
Using a sewing machine for the first time can be exciting, intimidating, and often frustrating.
With this lesson I hope to provide you with tips and instructions that will help you feel comfortable and confident as you begin to use your sewing machine.
Lesson Category:
- Sewing Machine Basics
Lesson Topics:
- Basic Machine Functions
- A Brother Computerized Sewing Machine is used as the example
- How to control the speed
- Basic Stitches and Parts
- Sewing Lines
- Sewing Corners
- Sewing Curves
- Sewing with a Seam Allowance
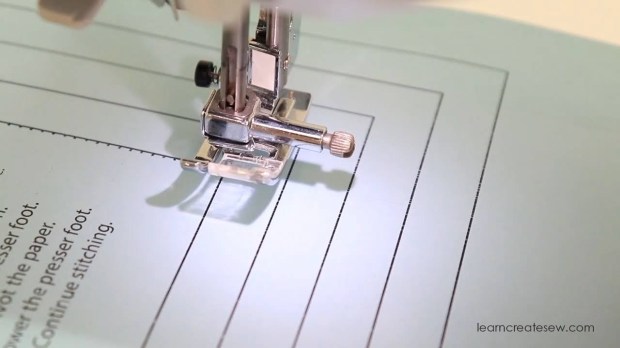
It may seem strange, but the best way to start using the machine is to practice sewing on paper.
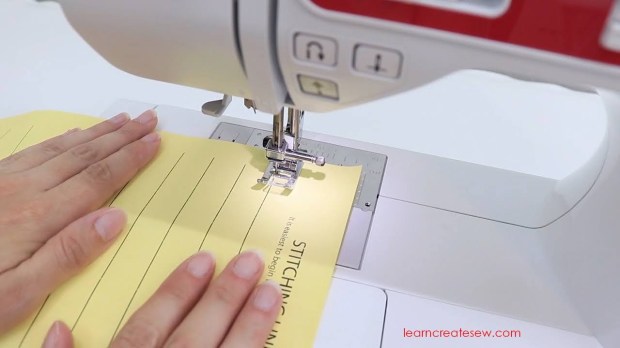
This allows you to learn how to control your machine without having to deal with the complications that arise when using fabric and thread.
We’ll learn how to sew corners and curves. We’ll also learn how to use a seam allowance.

This lesson uses a Brother Computerized Sewing Machine for the example, but the principles can be applied to any machine. If you are using a different type of machine you may want to do some research or consult your manual to find your machine’s default needle position as well as how to use the seam allowance measurement guides so you can accurately read your needle plate.

Stitching Practice Sheets:
Stitching Lines Practice by learncreatesew
Stitching Corners Practice by learncreatesew
Stitching Curves Practice by learncreatesew
Seam Allowance Practice by learncreatesew
Here is a Seam Allowance Measurement Guide for Brother Computerized Machines:
Brother Computerized Seam Allowance Guide by learncreatesew

LESSON:
