Rag Doll Bloomers

It is so nice to have the time to post projects once again! This project is here for you today thanks to a viewer request. Thanks Joanne for your idea!

This is a quick little project that is a great addition to your rag doll.

These beauties are available in 3 lengths, Short – Undies (Above) , Medium – Bloomers (Below), and Long – Extra Long Bloomers (Not Pictured).

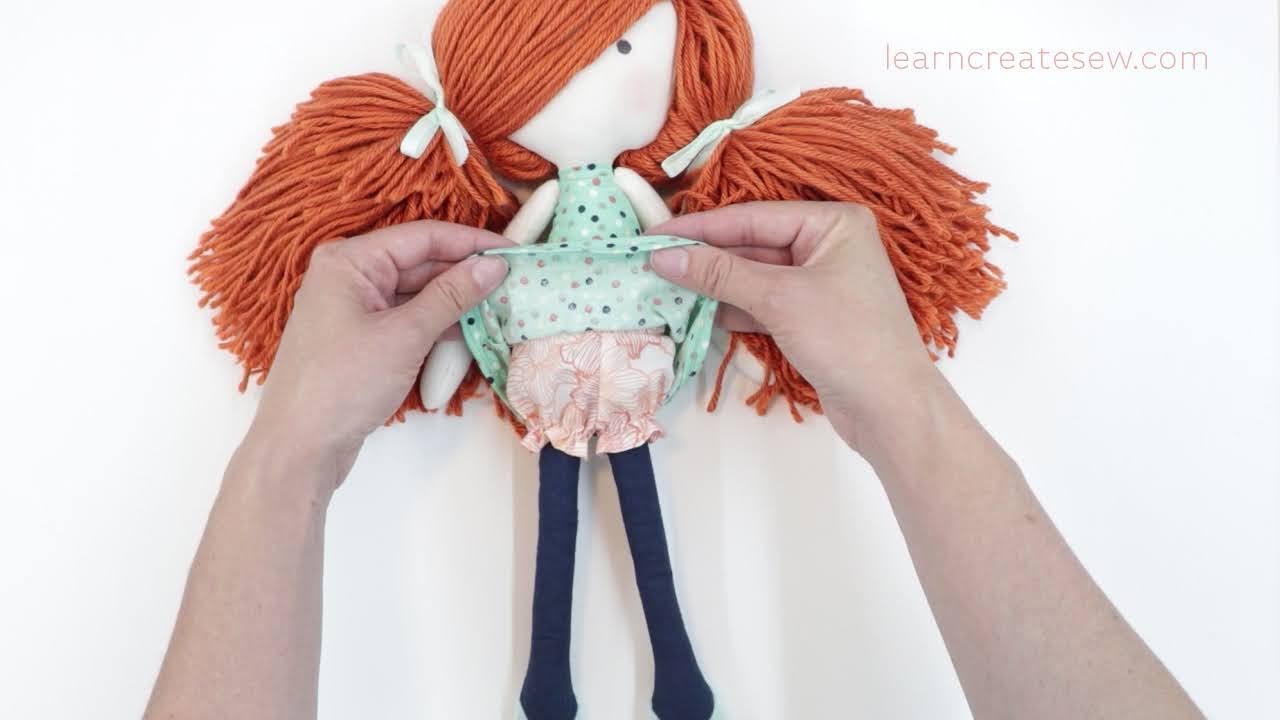
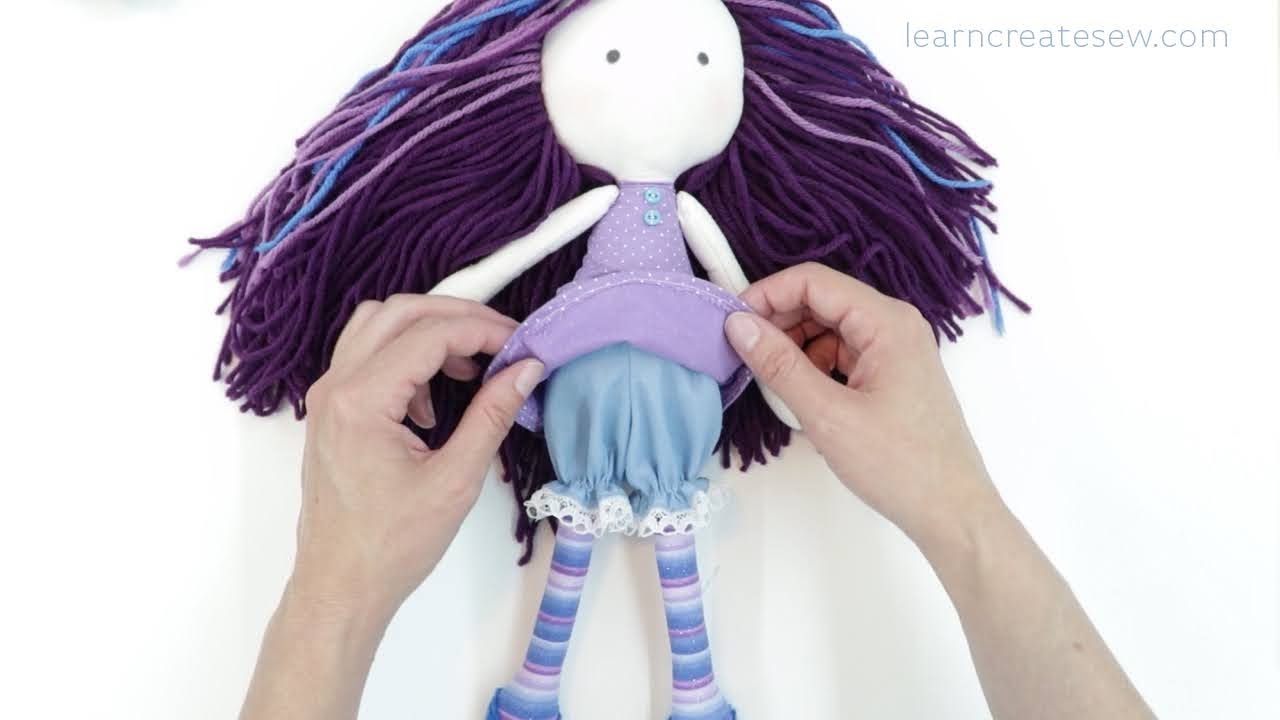
This project is pretty quick, but their tiny size does make them a challenge. As a result, I tried to make as many of the steps as possible flat.

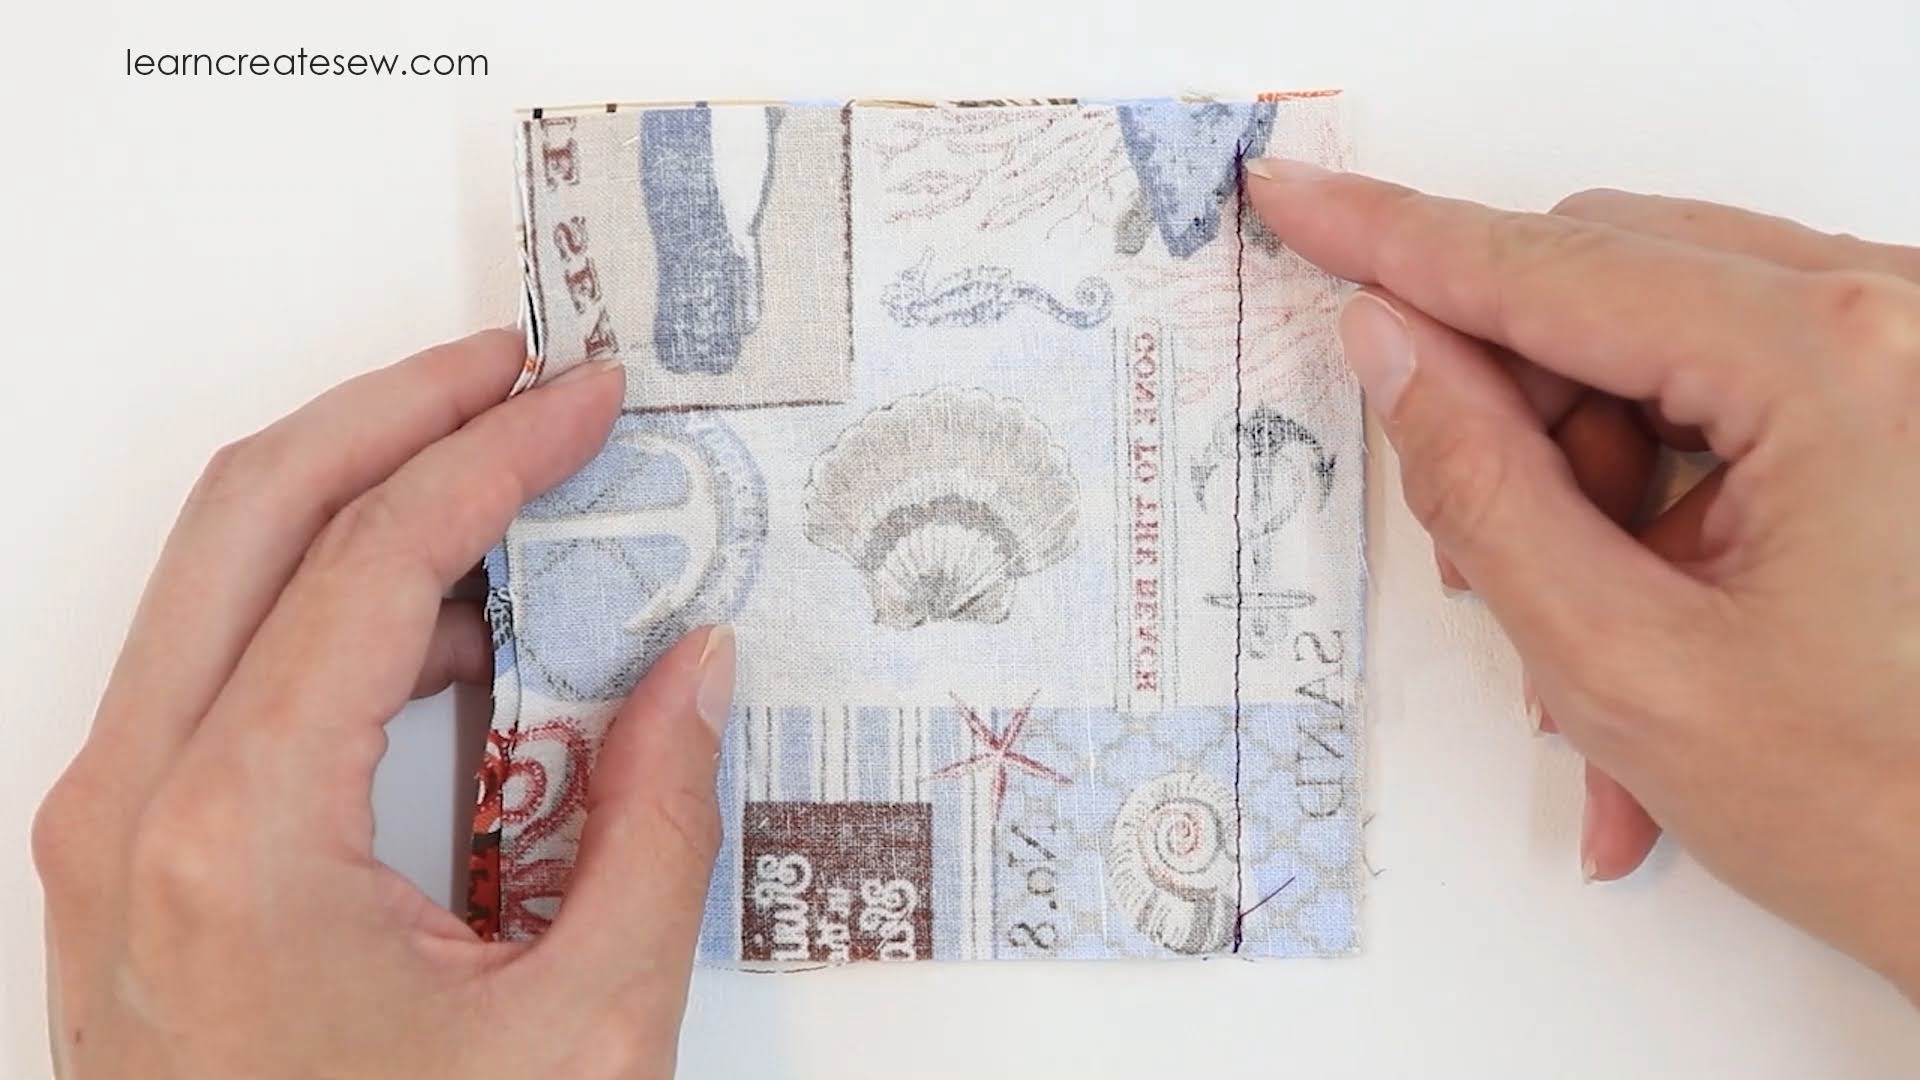
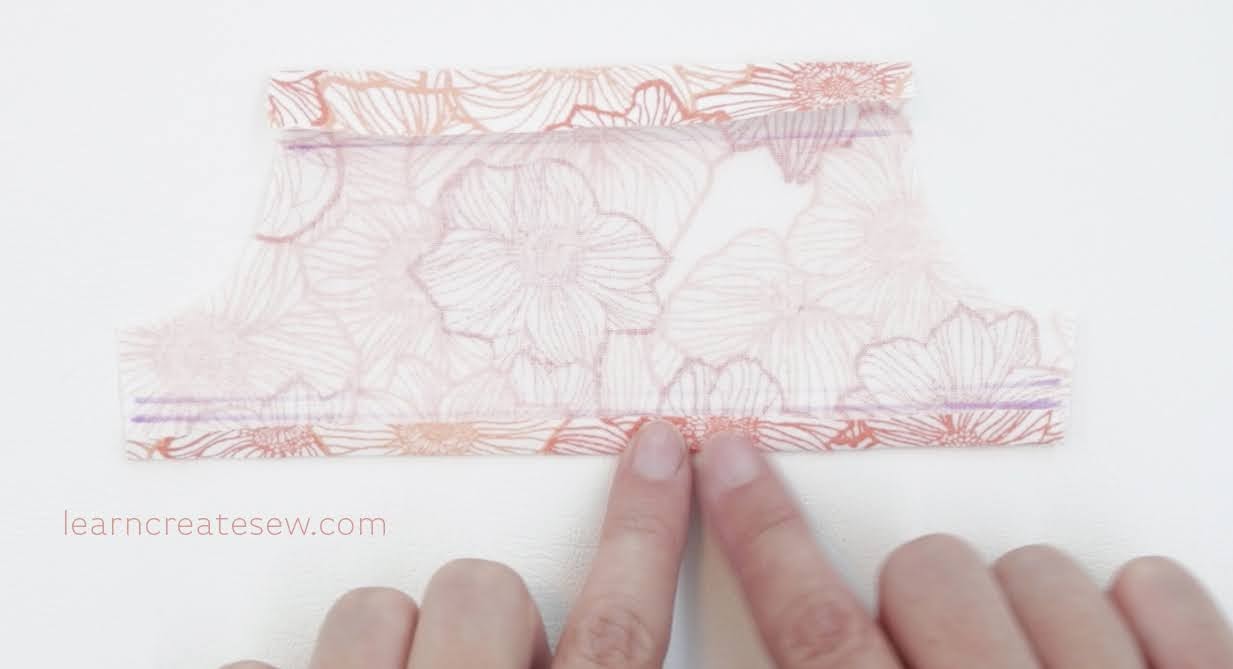
The hems in this project are finished with a single fold. If you want to avoid fraying, you can finish the top and bottom edges with a serger. You could also use double fold hems by add 1/4 inch to the top and bottom edge of the pattern and folding over 1/4 inch before following the other directions shown in the video. This may be recommended if you plan to remove the bloomers from the doll frequently.

There are two waistband styles demonstrated in the video. One is constructed flat and the ends of the elastic are visible in the seam allowance. The other is constructed in the round and the elastic is completely hidden.

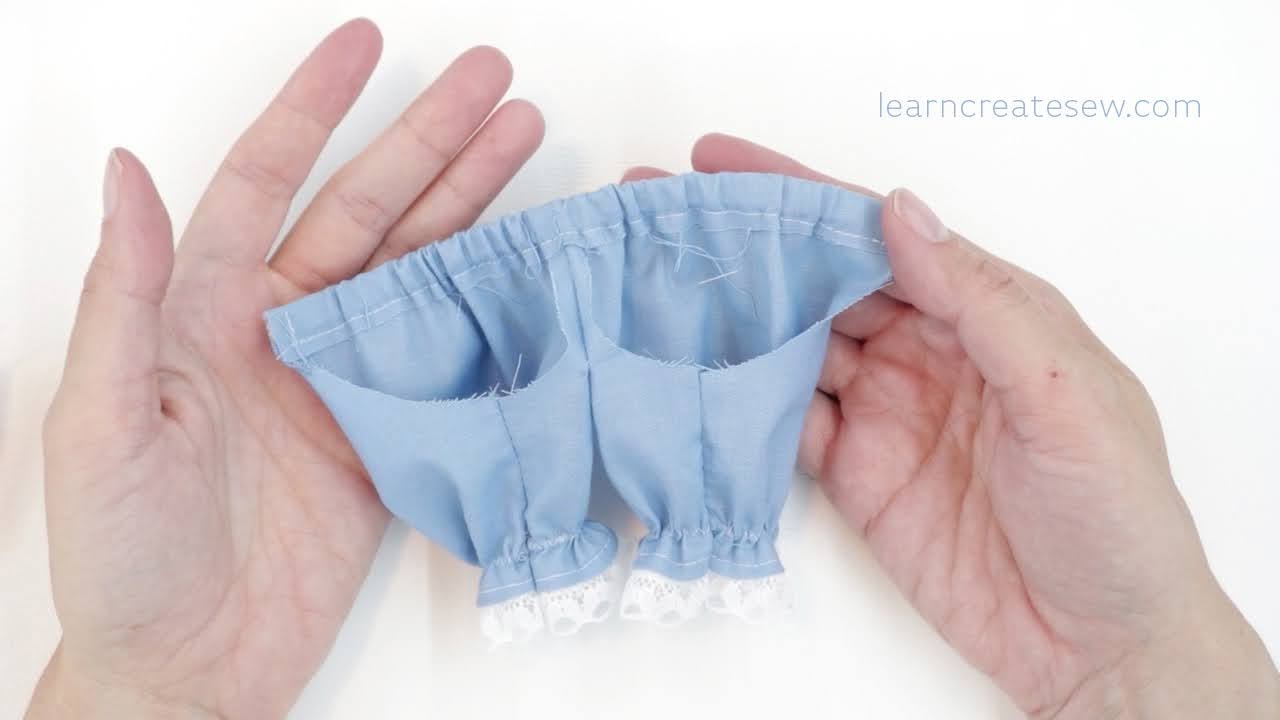
You can also add lace to the bottom edge to add a bit of extra cuteness 🙂

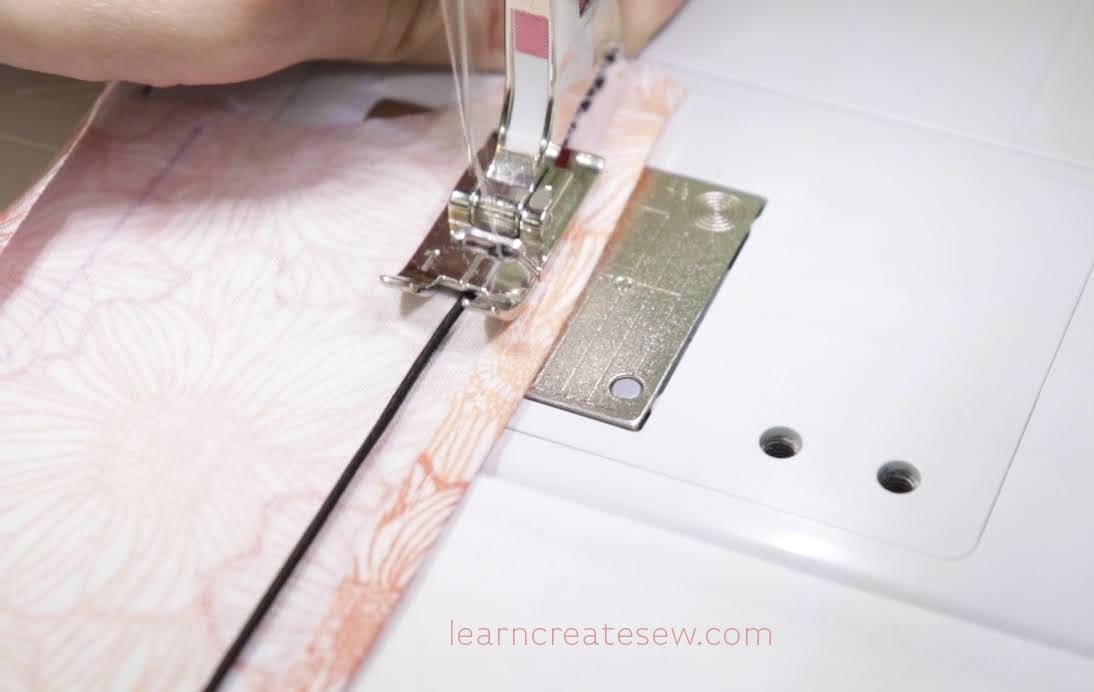
To help reduce bulk, instead of adding an elastic casing using fabric or binding, I used a zig zag stitch over narrow elastic cord. This worked very well around the teeny tiny legs of the rag doll.

Free Pattern:

Supplies:

  • Scrap Cotton Fabric ( or 6 x 16 inches)
  • 1/2 yard Narrow Cord Elastic (1.5mm) (I used beading cord elastic)
  • 6 inches of 1/4 inch wide elastic
  • 1/2 yard Narrow lightweight lace (optional)
  • Coordinating Thread

Tools:

Detailed Instructions Video:

Quick Overview:

Fun Sized Backpack Pattern Updated

Hey Everyone! I just wanted to let you know that the Fun Sized Backpack Pattern has been updated!

There was an error on the Bottom Pocket Gusset piece. It should measure 12.75 inches in length. If you have downloaded the original pattern please make sure to take note of this change!

The pattern has now been updated and is linked below. I’m so sorry for the inconvenience! A special thanks to Shirley for pointing out the discrepancy in the pattern so it could be fixed! Thanks, Shirley!

Looking for a Valentine’s Day project! Check out my new llama plush posted earlier this week!

Skill Builder – How to Sew a Seam

Once you’ve mastered threading and using seam allowances, as we studied in Lessons 3 and 4 of the Learn to Sew videos, you are ready to sew a seam.

This is where all machine sewing begins!

It’s important to be able to distinguish between the Right Side of the fabric, the bright side, the side you want to see on your final project, and the Wrong Side of the fabric, the dull side, the side you want hidden inside.

222

Almost always, when you sew a seam you sew with right sides together. This means the pretty sides of the two pieces of fabric will be touching.

You then align one of the sides with your seam allowance guide mark on your machine, and sew along the edge.

333

You use the needle plate on your machine as a guide to measure your seam allowance. As a result it is important to know your machine so you can ensure that your needle position aligns with the markings on your needle plate.

666

Once your needle is on the correct position and your machine is set to the correct stitch you can follow your guides as you sew to create a nice even seam allowance. It’s helpful to practice using different seam allowances so you feel comfortable using the different guides. That way when those seam allowance sizes appear in a project you are prepared.

999

It’s important to always back stitch when you start and stop your seam, unless told to do otherwise. This acts as a knot and prevents the seam from coming undone. Back stitching on a machine is different from the hand sewing back stitch. On a machine it’s when you make a few stitches in the opposite direction to secure your thread in place.

1313

It’s also a good idea to trim your threads after each seam. This helps prevents tangles and having a lot trim at the end of your project. It also improves the overall appearance of your project.

1111

In the videos below I have demonstrated sewing a seam on two different machines, on both a Brother Mechanical and a Brother Computerized Machine. The principles are the same for both, but there are slight differences in how you select your stitches and prepare your machine.

SEW A SEAM – BROTHER COMPUTERIZED MACHINE

SEW A SEAM – BROTHER MECHANICAL MACHINE

Learn to Sew: Lesson 4: How to Thread a Machine

In this lesson we will be threading Brother sewing machines. This will be demonstrated on two different machines.

The first is a Brother Computerized Machine with a Horizontal Spool Pin. The second is a Brother Mechanical Machine with a Vertical Spool Pin. Brother machines are very similar, so chances are if you have a Brother machine it will be similar to one or both of these.

If you don’t have a Brother machine I encourage you to consult your manual or find videos specific to your machine. Knowing how to thread your machine properly and being comfortable doing so, will solve 90% of your problems when sewing.

Lesson Category:

  • Sewing Machine Basics

Lesson Topics:

  • Quality Thread
  • Threading a Bobbin
  • Threading the Machine
  • Threading the Needle
  • Using an Automatic Needle Threader
  • Inserting the Bobbin into the Machine

First thing to know when threading your machine is that the quality of thread matters! If poor thread is used in a sewing machine it breaks frequently. Not only is this annoying, but if you are just learning to sew it can make you want to give up altogether.

21-1

I mainly use Gutermann and Coats and Clark All Purpose threads.

You also want to make sure you have the correct bobbins for your specific machine. Unfortunately, bobbins were not all created equal and while some look similar, just a slight difference in size can be significant. Most of the Brother machines I have used take SA156 Bobbins.

17

Since your sewing machine requires a bobbin in order to sew, we first learn how to thread the bobbin and then how to thread the machine.

3331

It’s helpful to identify if your machine has a vertical or horizontal spool pin. Thread spools that are wound with a crisscross pattern, such as the Gutermann threads shown in the picture shown at the beginning, work best on horizontal spool pins.

19-1

Threads that are would so that the thread is stacked, such as the Coats and Clark threads, work best on vertical spool pins.

555video

While I have used both styles of spools on both types of machines successfully, it is something to consider if your thread is giving you trouble.

I also occasionally have to use an adapter on my vertical spool pins in order to use the larger Gutermann spools (1093 yds). My adapter is very fancy…just kidding…it’s the body of a basic Paper Mate pen. I just take off the tip and the ink and use the hollow pen. I simply slide it over the spool pin and then slide the spool of thread over it. It’s definitely not the recommended method, but it has always worked great for me 🙂 It adds a bit of stability for taller spools. It’s also a whole lot cheaper than official spool pin adapters.

A note on a popular machine. The Brother CS6000i (and CS7000i) is wonderful model. It’s a computerized machine, but has a vertical spool pin. If you have this machine, threading the top of the machine and the bobbin will be most like my video on vertical spool pins, while inserting the bobbin casing will look like the one shown in my video with horizontal spool pins. You can just skip to the appropriate chapters in each video.

HOW TO THREAD BROTHER COMPUTERIZED MACHINES WITH A HORIZONTAL SPOOL PIN:

HOW TO THREAD BROTHER MECHANICAL MACHINES WITH A VERTICAL SPOOL PIN:

How to Change a Sewing Machine Needle

When I was younger and had been sewing for just a few years, my sewing machine started acting funny and I thought for sure it was broken. Turns out, that wasn’t the case at all. The problem was I had been using the same needle the whole time I had been using the machine. My goodness, I was lucky it lasted as long as it did!

31

Now that I have quite a bit more experience I realize how important your needle is, both the type of needle and its quality and condition.

When to change your needle?

There are many times and situations when changing your needle is a good idea. Here are a few examples.

  • Every 8 – 10 hours of sewing
  • Whenever your needle is bent or damaged
  • Whenever you need a specialty needle or specific size
    • Ball point / Stretch Needles (knits)
    • Denim Needles
    • Quilting Needles
    • Microtex Needles (vinyl)
    • Small Universal Sizes (8 -10) Lightweight fabrics
    • Medium Universal Sizes (11 – 14) Mid-weight fabrics
      • I usually use a size 12 when sewing cottons
    • Large Universal Sizes (16 – 18) Heavyweight fabrics
  • For every new project (or every few projects if they are small and/or lightweight)
  • After sewing heavy duty projects
  • When your machine is sewing with irregular stitches
  • When your machine has tension issues

Once you become familiar with how to change a needle it’s really quick and easy! And since you can usually find needles at very affordable prices it’s best to change your needle rather than use an old one, if you are in doubt.

I like to purchase needles frequently, so I always have them on hand. Here is my favorite place to buy needles for both regular point universal needles and ball point needles.

Video Instruction:


Learn to Sew: Lesson 3: Machine Stitching Practice

Using a sewing machine for the first time can be exciting, intimidating, and often frustrating.

With this lesson I hope to provide you with tips and instructions that will help you feel comfortable and confident as you begin to use your sewing machine.

Lesson Category:

  • Sewing Machine Basics

Lesson Topics:

  • Basic Machine Functions
    • A Brother Computerized Sewing Machine is used as the example
    • How to control the speed
    • Basic Stitches and Parts
  • Sewing Lines
  • Sewing Corners
  • Sewing Curves
  • Sewing with a Seam Allowance

It may seem strange, but the best way to start using the machine is to practice sewing on paper.

21-3

This allows you to learn how to control your machine without having to deal with the complications that arise when using fabric and thread.

41

We’ll learn how to sew corners and curves. We’ll also learn how to use a seam allowance.

51

This lesson uses a Brother Computerized Sewing Machine for the example, but the principles can be applied to any machine. If you are using a different type of machine you may want to do some research or consult your manual to find your machine’s default needle position as well as how to use the seam allowance measurement guides so you can accurately read your needle plate.

6

Stitching Practice Sheets:

Stitching Lines Practice by learncreatesew

Stitching Corners Practice by learncreatesew

Stitching Curves Practice by learncreatesew

Seam Allowance Practice by learncreatesew

Here is a Seam Allowance Measurement Guide for Brother Computerized Machines:

Brother Computerized Seam Allowance Guide by learncreatesew

Brother Computerized Seam Allowance Guide by learncreatesew.pdf

LESSON:

2 Layer Face Mask with Filter Pocket

I am constantly trying the think of new ways to improve face masks. I am going to be wearing these every day to work like many of you and I hope to create masks that are both comfortable and functional.

After making the 3 layer mask with a filter pocket I thought I would give this one a try. I was very pleased with the results.

3img_1925

This mask uses my regular contoured face mask pattern, but cut at the pocket line, so it is a bit more narrow. This actually is nice because it’s not as hot since it doesn’t extend as far toward the ears.

1img_1931

The channel for the nose bridge wire is optional, but is simply a row of stitches attaching the lining to the exterior fabric.

1img_1952

I didn’t use any interfacing on mine, and I really like how lightweight it is, even with the filter.

1img_1947

I also tried strap adjusters with this mask. They are handy and are quite easy to use. I like that they are small and not bulky.

Supplies:

8 x 10 inches Main Cotton Fabric (Dimensions work for all sizes. You may need less fabric for smaller sizes)

8 x 10 inches Lining Cotton Fabric

Straps (I used 1/8 inch elastic)

Filter (Optional)

Nose Bridge Wire (Optional)

Strap Adjusters (Optional)

Free Pattern:

Contour Face Mask Pattern with Filter Pocket by learncreatesew

DETAILED INSTRUCTIONS:

FACE MASK KEY CHAIN CASE:

The face mask key chain case is always a fun project 🙂 It’s a little tight fitting the nose bridge wire, and you have to fold the filter, but I like to store my mask in the case when it’s not in use, without the filter and wire. I find it keeps my masks nice and organized.

Water Bottle Holder

The supplies for making a water bottle holder have been sitting in my closet for quite a while, and I was excited to finally use them!

1img_1717

I was walking through the Dollar Tree and found this super cute water bottle and thought it was just perfect for the water bottle holder that I wanted to make.

1img_1731

This water bottle has an optional drawstring at the top. The pattern is adjustable and can work for water bottles of various sizes. The pattern has templates and measurements calculated for water bottles with diameters from 2.5 – 3.125 inches. You can also adjust the height and the handle length as you like.

So, whether you are using a disposable water bottle or one that is more durable, this pattern can work for you.

31

I have been using this water bottle holder for a week now and I have to say that I LOVE IT! I have started carrying it around with me and have found it super handy 🙂

Supplies:

Exterior Cotton Fabric (1/3 yard should be enough for holders up to 9 inches tall)

Lining Cotton Fabric (1/3 yard should be enough for holders up to 9 inches tall)

Rattail Cord (Optional – Approximately 1/2 yard)

Spring Cord Stopper (Optional)

Here is the free pattern:

Water Bottle Holder Pattern by learncreatesew

DETAILED INSTRUCTIONS:

Learn to Sew Lesson 2: Rice Bags

The second Learn to Sew lesson continues to focus on hand-sewing. Most of the time when we are hand sewing we are not working with felt or yarn. As a result, it is very helpful to practice your stitch size and placement, as well as working with regular all-purpose thread.

3img_1443

Recommended prep before this lesson:

Lesson Category:

  • Hand Stitching

Lesson Topics:

  • Careful Cutting
  • Identifying the Right Side of the Fabric
  • Using a Seam Allowance
  • Double Threading a Needle
  • Tying a knot
  • Sewing a Back Stitch
  • Blanket Stitch Applique
  • Stitch Size & Placement
  • Slip Stitch

Whether you have been sewing for a while or are picking up a needle and thread for the first time, rice bags are always a fun project 🙂

1img_1469

For this project, you get to add decoration of your choice to really personalize your project! Decorative stitching can add dimension to any project and is a great skill to have even when sewing complex projects. These also make great gifts when you are finished.

4img_1462

Supplies:

5.5 x 11 inches of Cotton Fabric

Scrap Felt

1 Cup of Rice

Coordinating All-Purpose Thread

Here is the free pattern:

Owl and Sloth Rice Bag Patterns by learncreatesew

LESSON:

Blanket Stitch vs Buttonhole Stitch

Yesterday I was working on a project that I had hoped to have ready for you today. The project involved a lot of blanket stitching, and as I was in the middle of sewing it I realized that without noticing I would randomly switch how I made the stitch.

It got me thinking…what stitch am I actually sewing? This led me to do some research. Come to find out, the blanket stitch is often confused with the buttonhole stitch. I practiced both for quite a while and as I did so I found a stitching method that worked great for me for both stitches, and allowed me to distinguish between the two.

1img_1647comp

I realized after doing this that I had actually been using the blanket stitch the whole time, I would just every once in a while switch to making the stitch backwards. This wouldn’t have been a big deal if I always did it that way, but going back and forth isn’t the best method. So, I made a consistent routine that helped me keep my stitches uniform. Since this helped me with my sewing project, I thought it may also be helpful to others, and decided to share it with you today.

The Blanket Stitch

The Blanket Stitch is often used for decorative edging, embroidery, and in felt crafts. You can sew the blanket stitch on the edge of fabric for decoration or to join to layers together.

1img_1660

It’s a little tricky at the corners, but not too bad once you know the process.

1img_1661

I most frequently use the blanket stitch for applique. This is when you sew one piece of fabric on top of another, usually for decoration.

1img_1619

The video will explain how to change your thread if you happen to run out or want a different color.

5img_1658

To help me remember the correct way to stitch a Blanket Stitch I think of this…

FRONT to BACK…UP and OVER.

21

The Buttonhole Stitch

The buttonhole stitch is stronger than the blanket stitch. While the blanket stitch hooks over the next stitch, the buttonhole stitch actually wraps around it.

3img_1654

This stitch is not as commonly used, but you do see it in embroidery, as well as actually constructing buttonholes. When making the buttonholes, you don’t leave space between the stitches. You stitch them side by side. This creates a really strong edge with all of the “knots” right next to each other.

To remember how to sew the Buttonhole Stitch I think of this…

BACK to FRONT…AROUND and DOWN.

12

I hope you find this information as helpful as I did! Happy Sewing!

DETAILED INSTRUCTIONS:

QUICK OVERVIEW: Blanket Stitch vs. Buttonhole Stitch