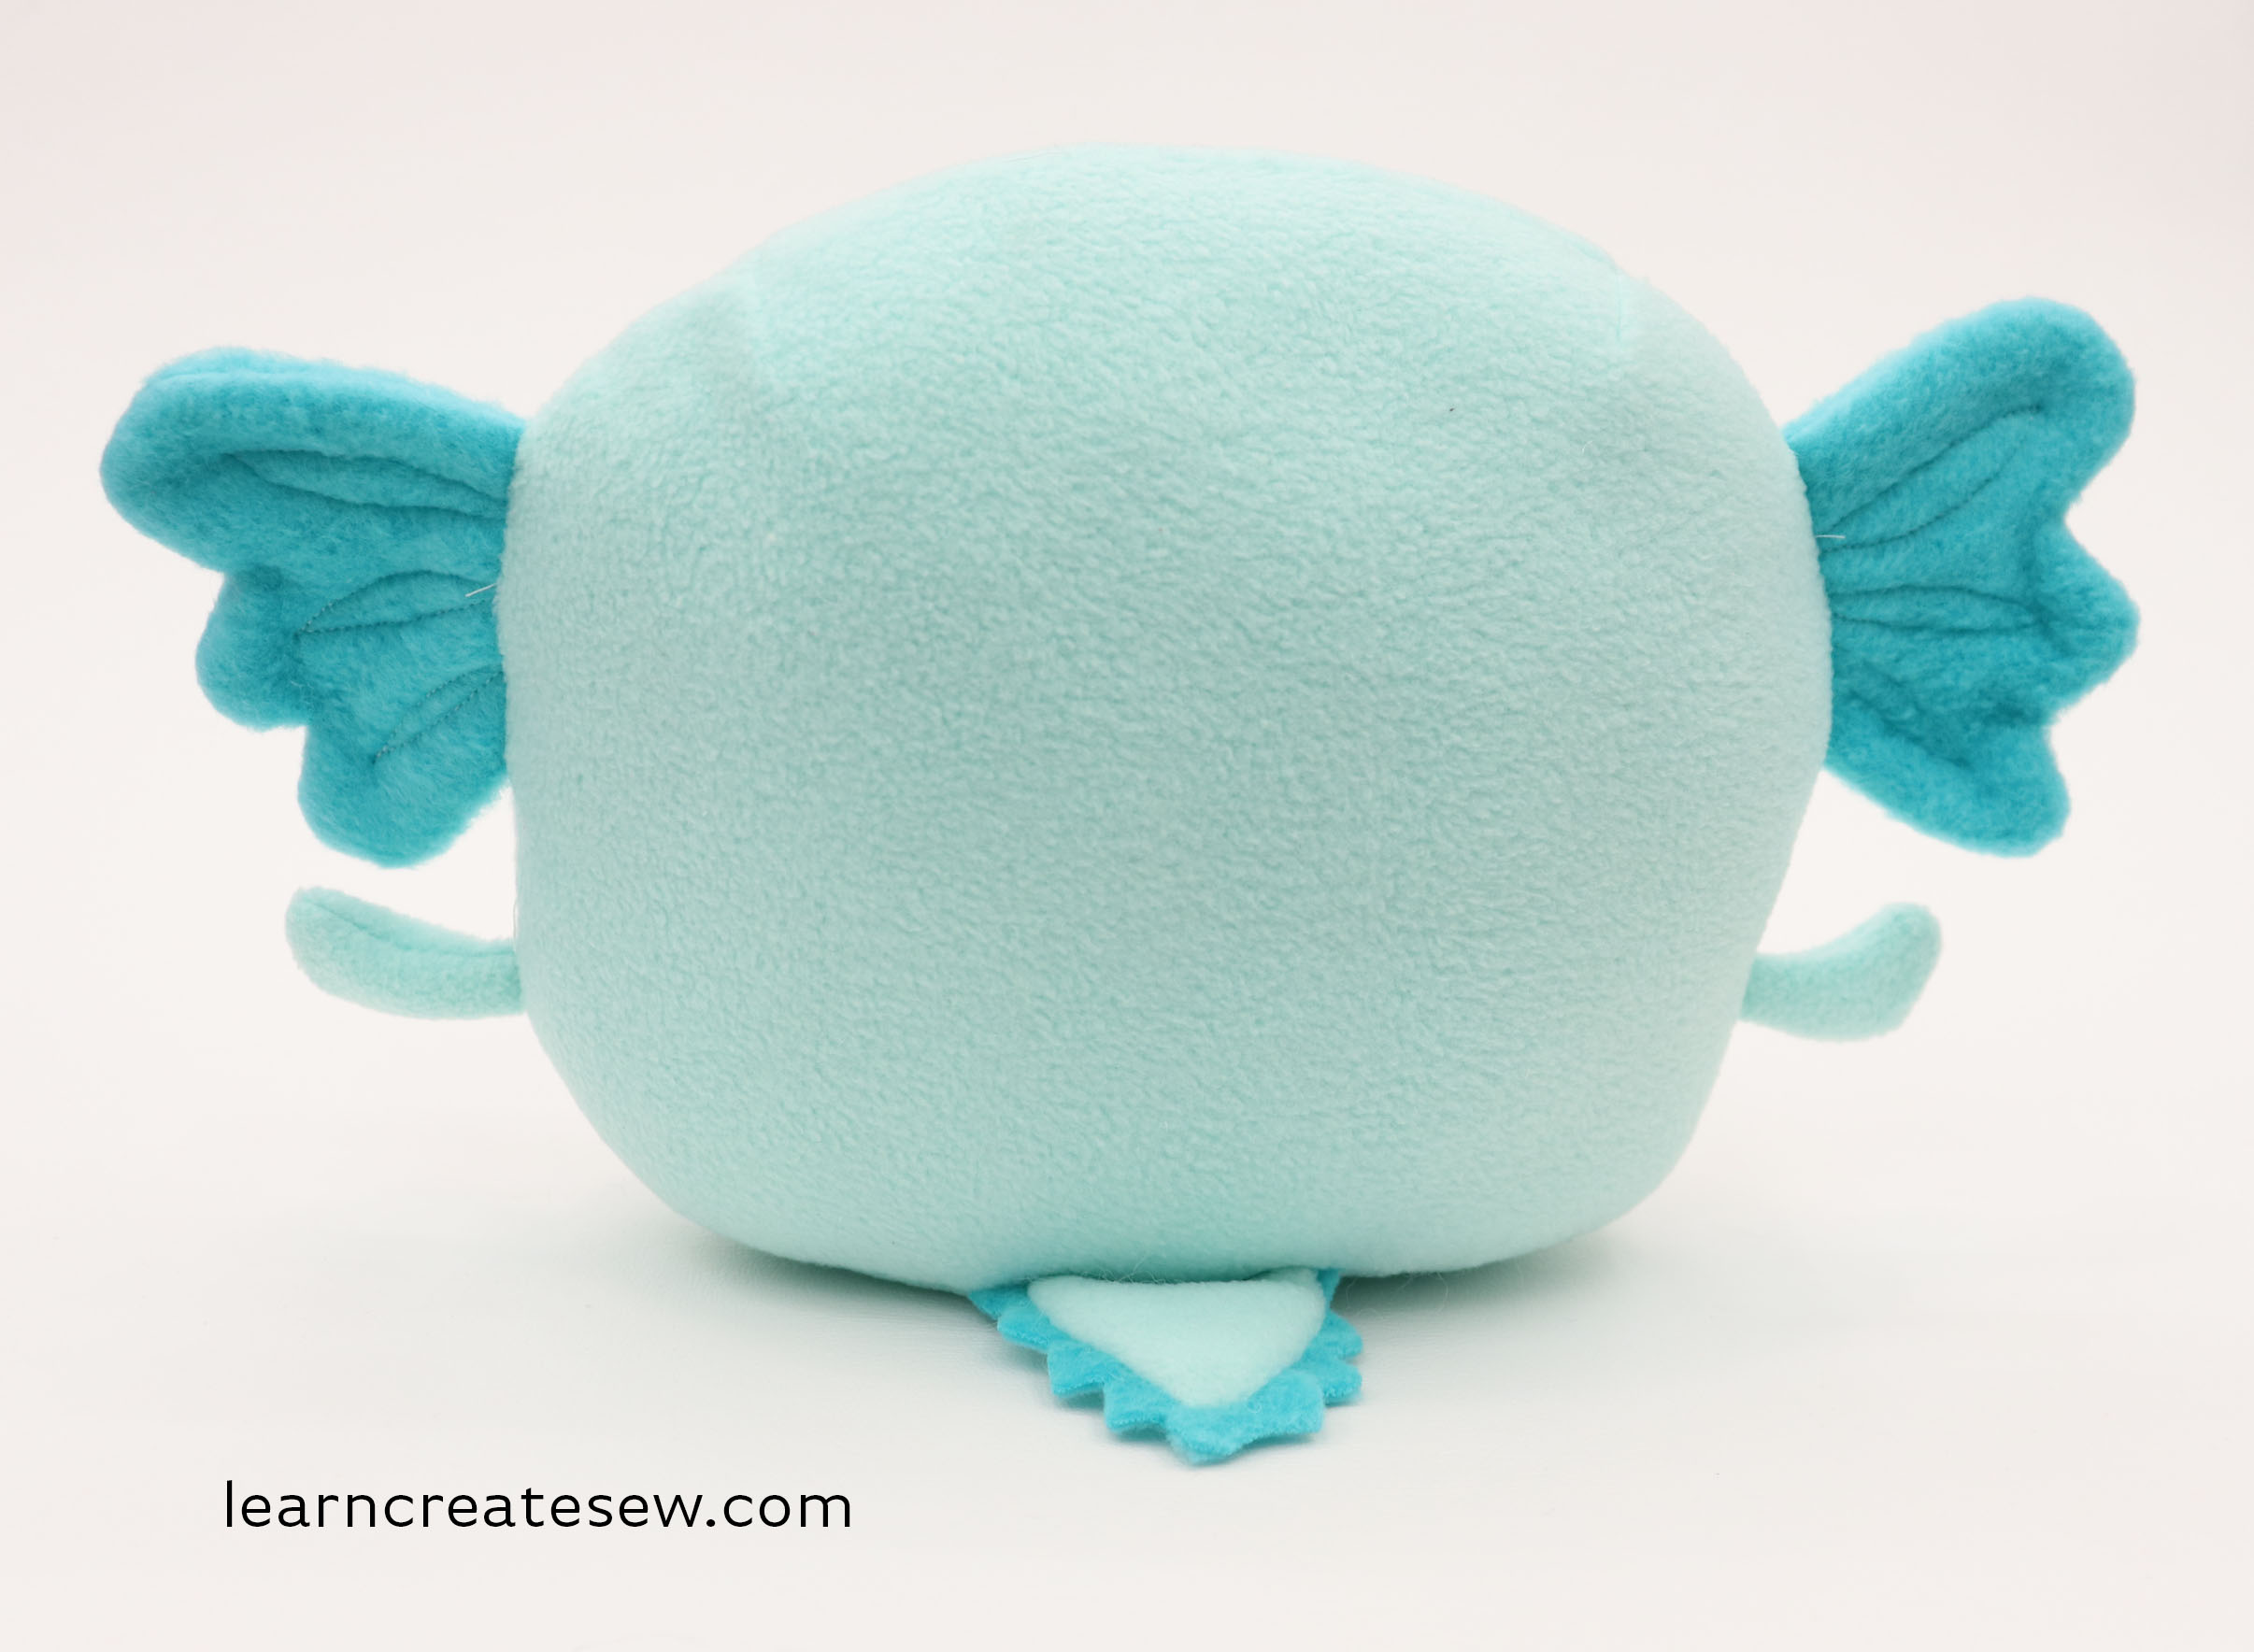
I am happy to finally have the chance to make another post. Today, I have a cute little plush for you. It’s a project my students have been requesting for a while, and is an adorable axolotl plush.
It’s a pretty simple plush and doesn’t require a lot of fabric. The trickiest part is cutting out the pieces, as some of the pattern pieces include seam allowance, while others don’t. However, those that don’t are much easier to sew before cutting, so I opted to use the differing pattern pieces.
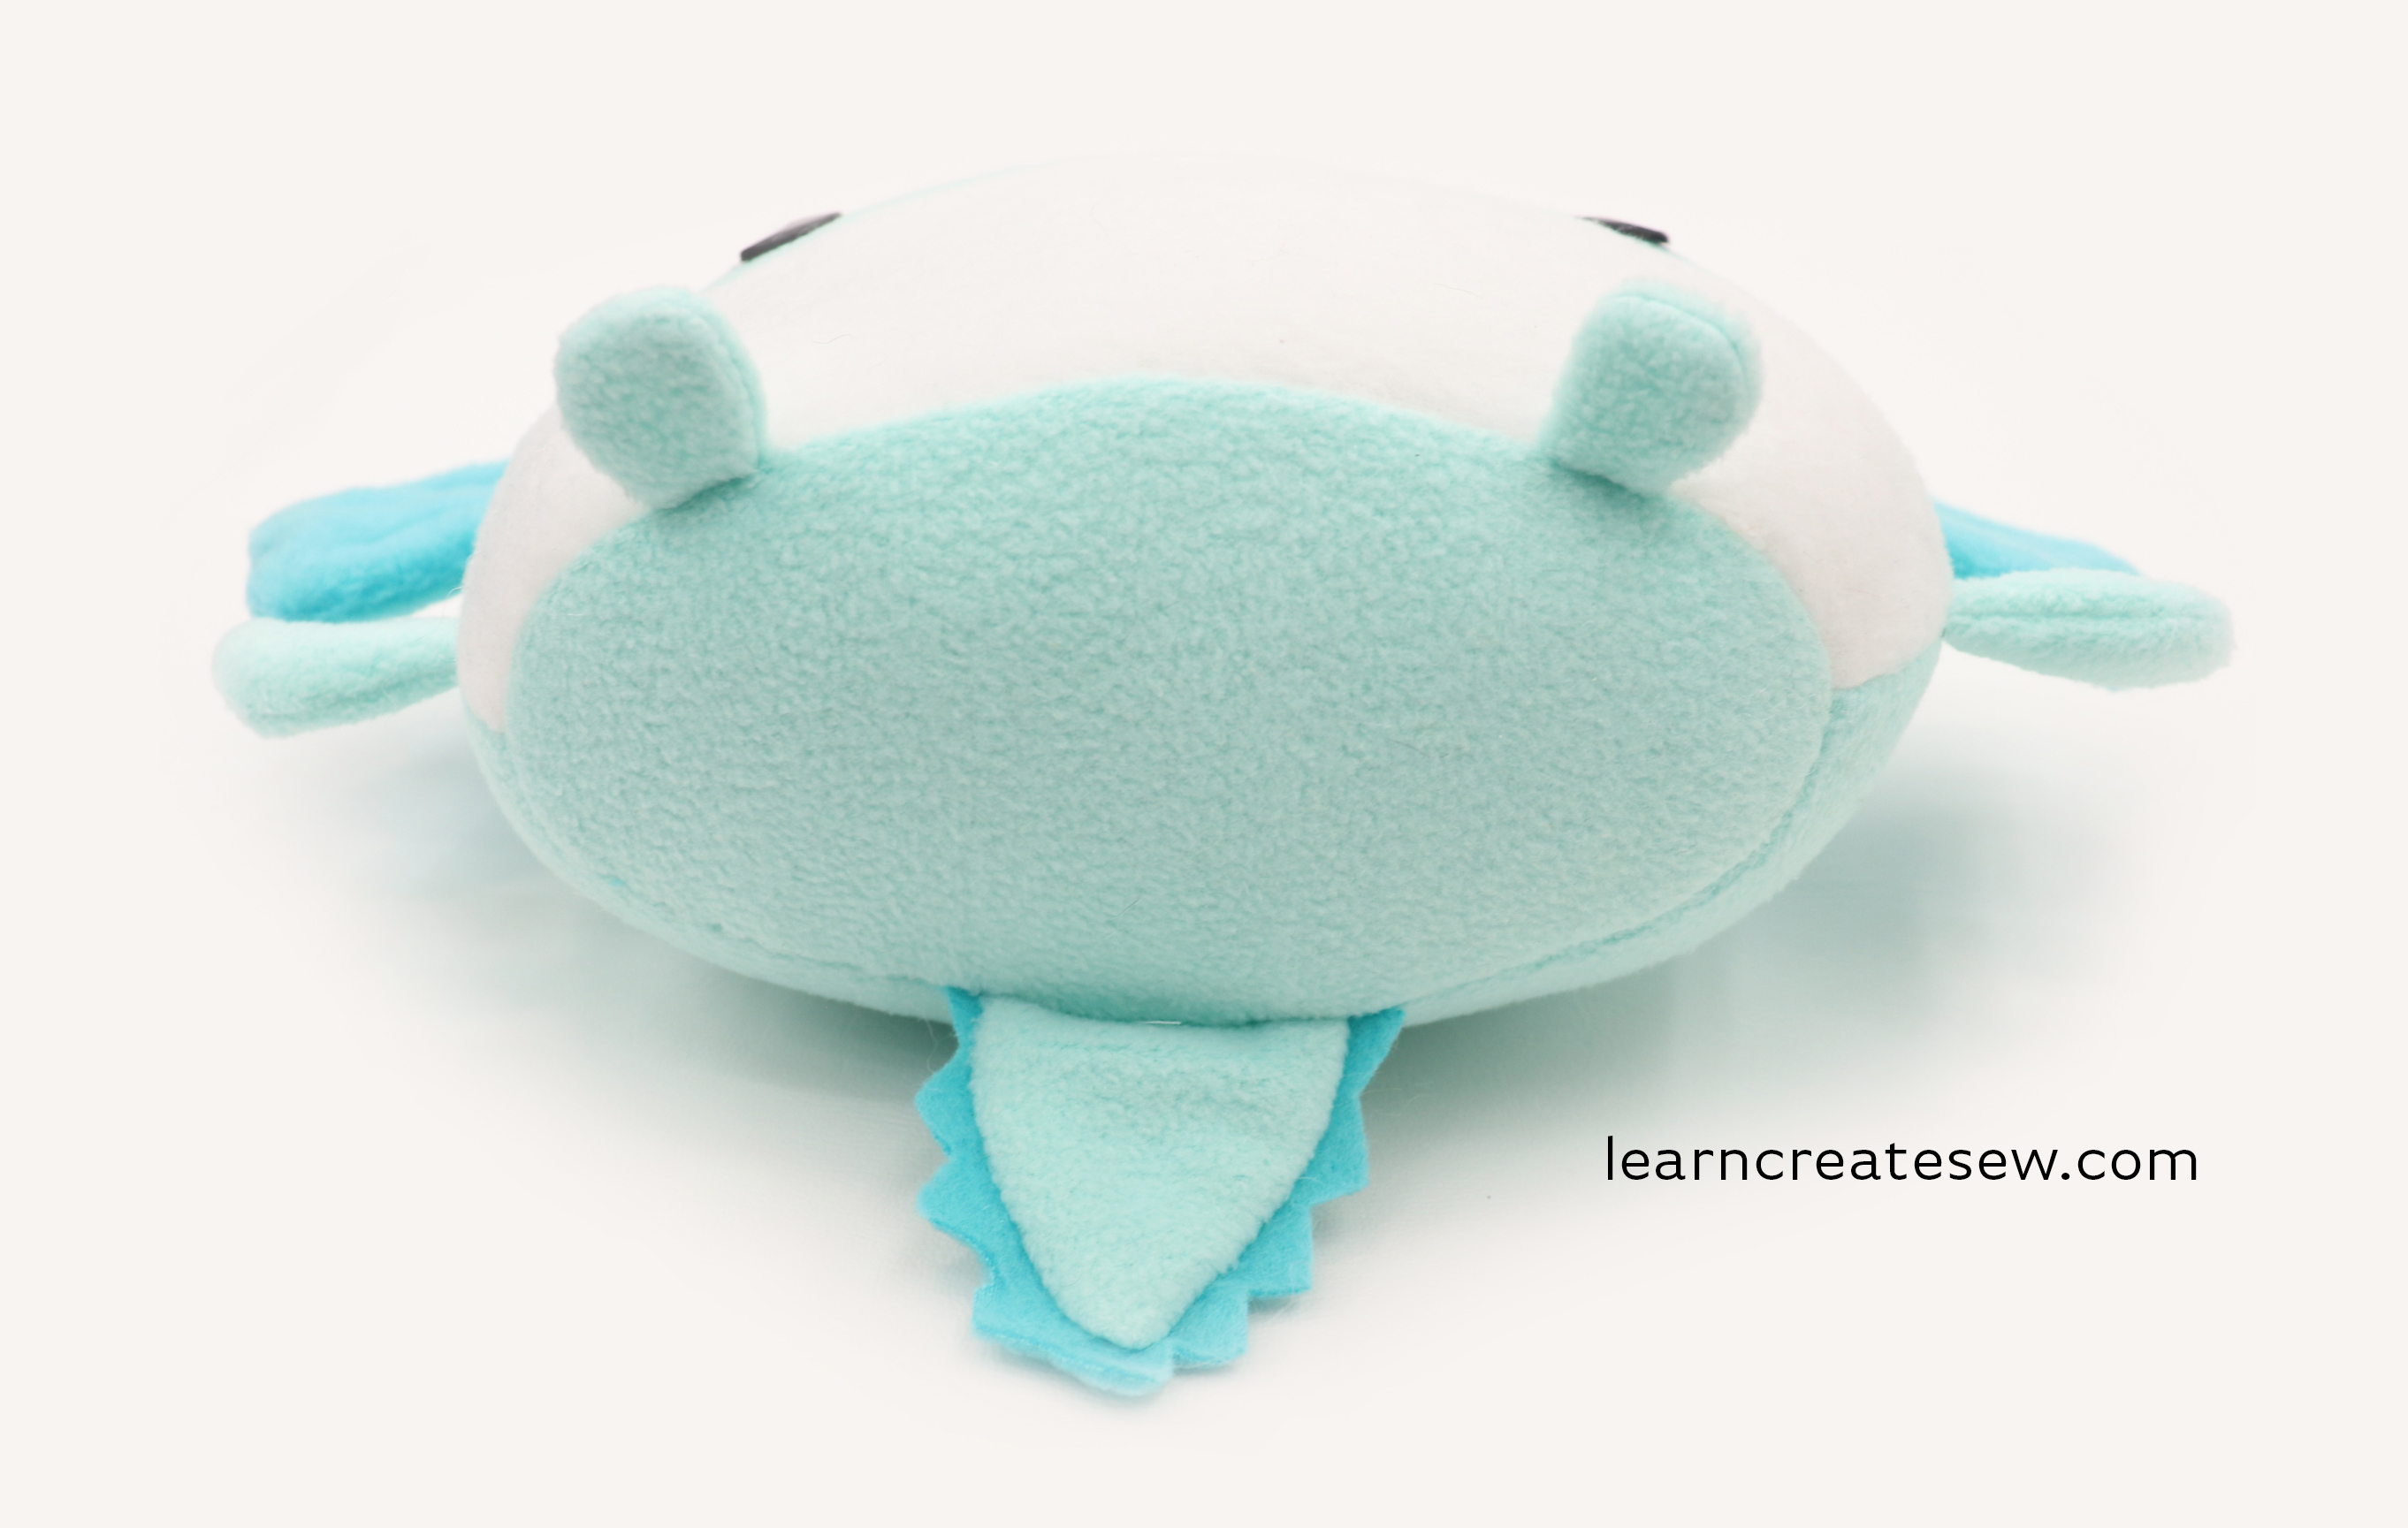
It’s fun to make multiple plushies in different colors. I love the contrasting front as well as the itty bitty arms and legs.
The tail is also nice. Not only is it cute, but it also helps the plush stand up.
I hope you have as much fun making this project as I did.
Happy Sewing!
Supplies:
Recommended Fabric: Fleece or Minky (Example project made from fleece). I used the Mainstays brand in hot pink, light pink, mint, turquoise, and white. 10 x 28.5 inches Main Color Fabric 4.5 x 10 inches White Fabric or 2nd Accent Color 5 x 17 inches Accent Color Fabric Coordinating Thread Two 16 mm Safety Eyes Embroidery Floss (eyebrows) Polyfil
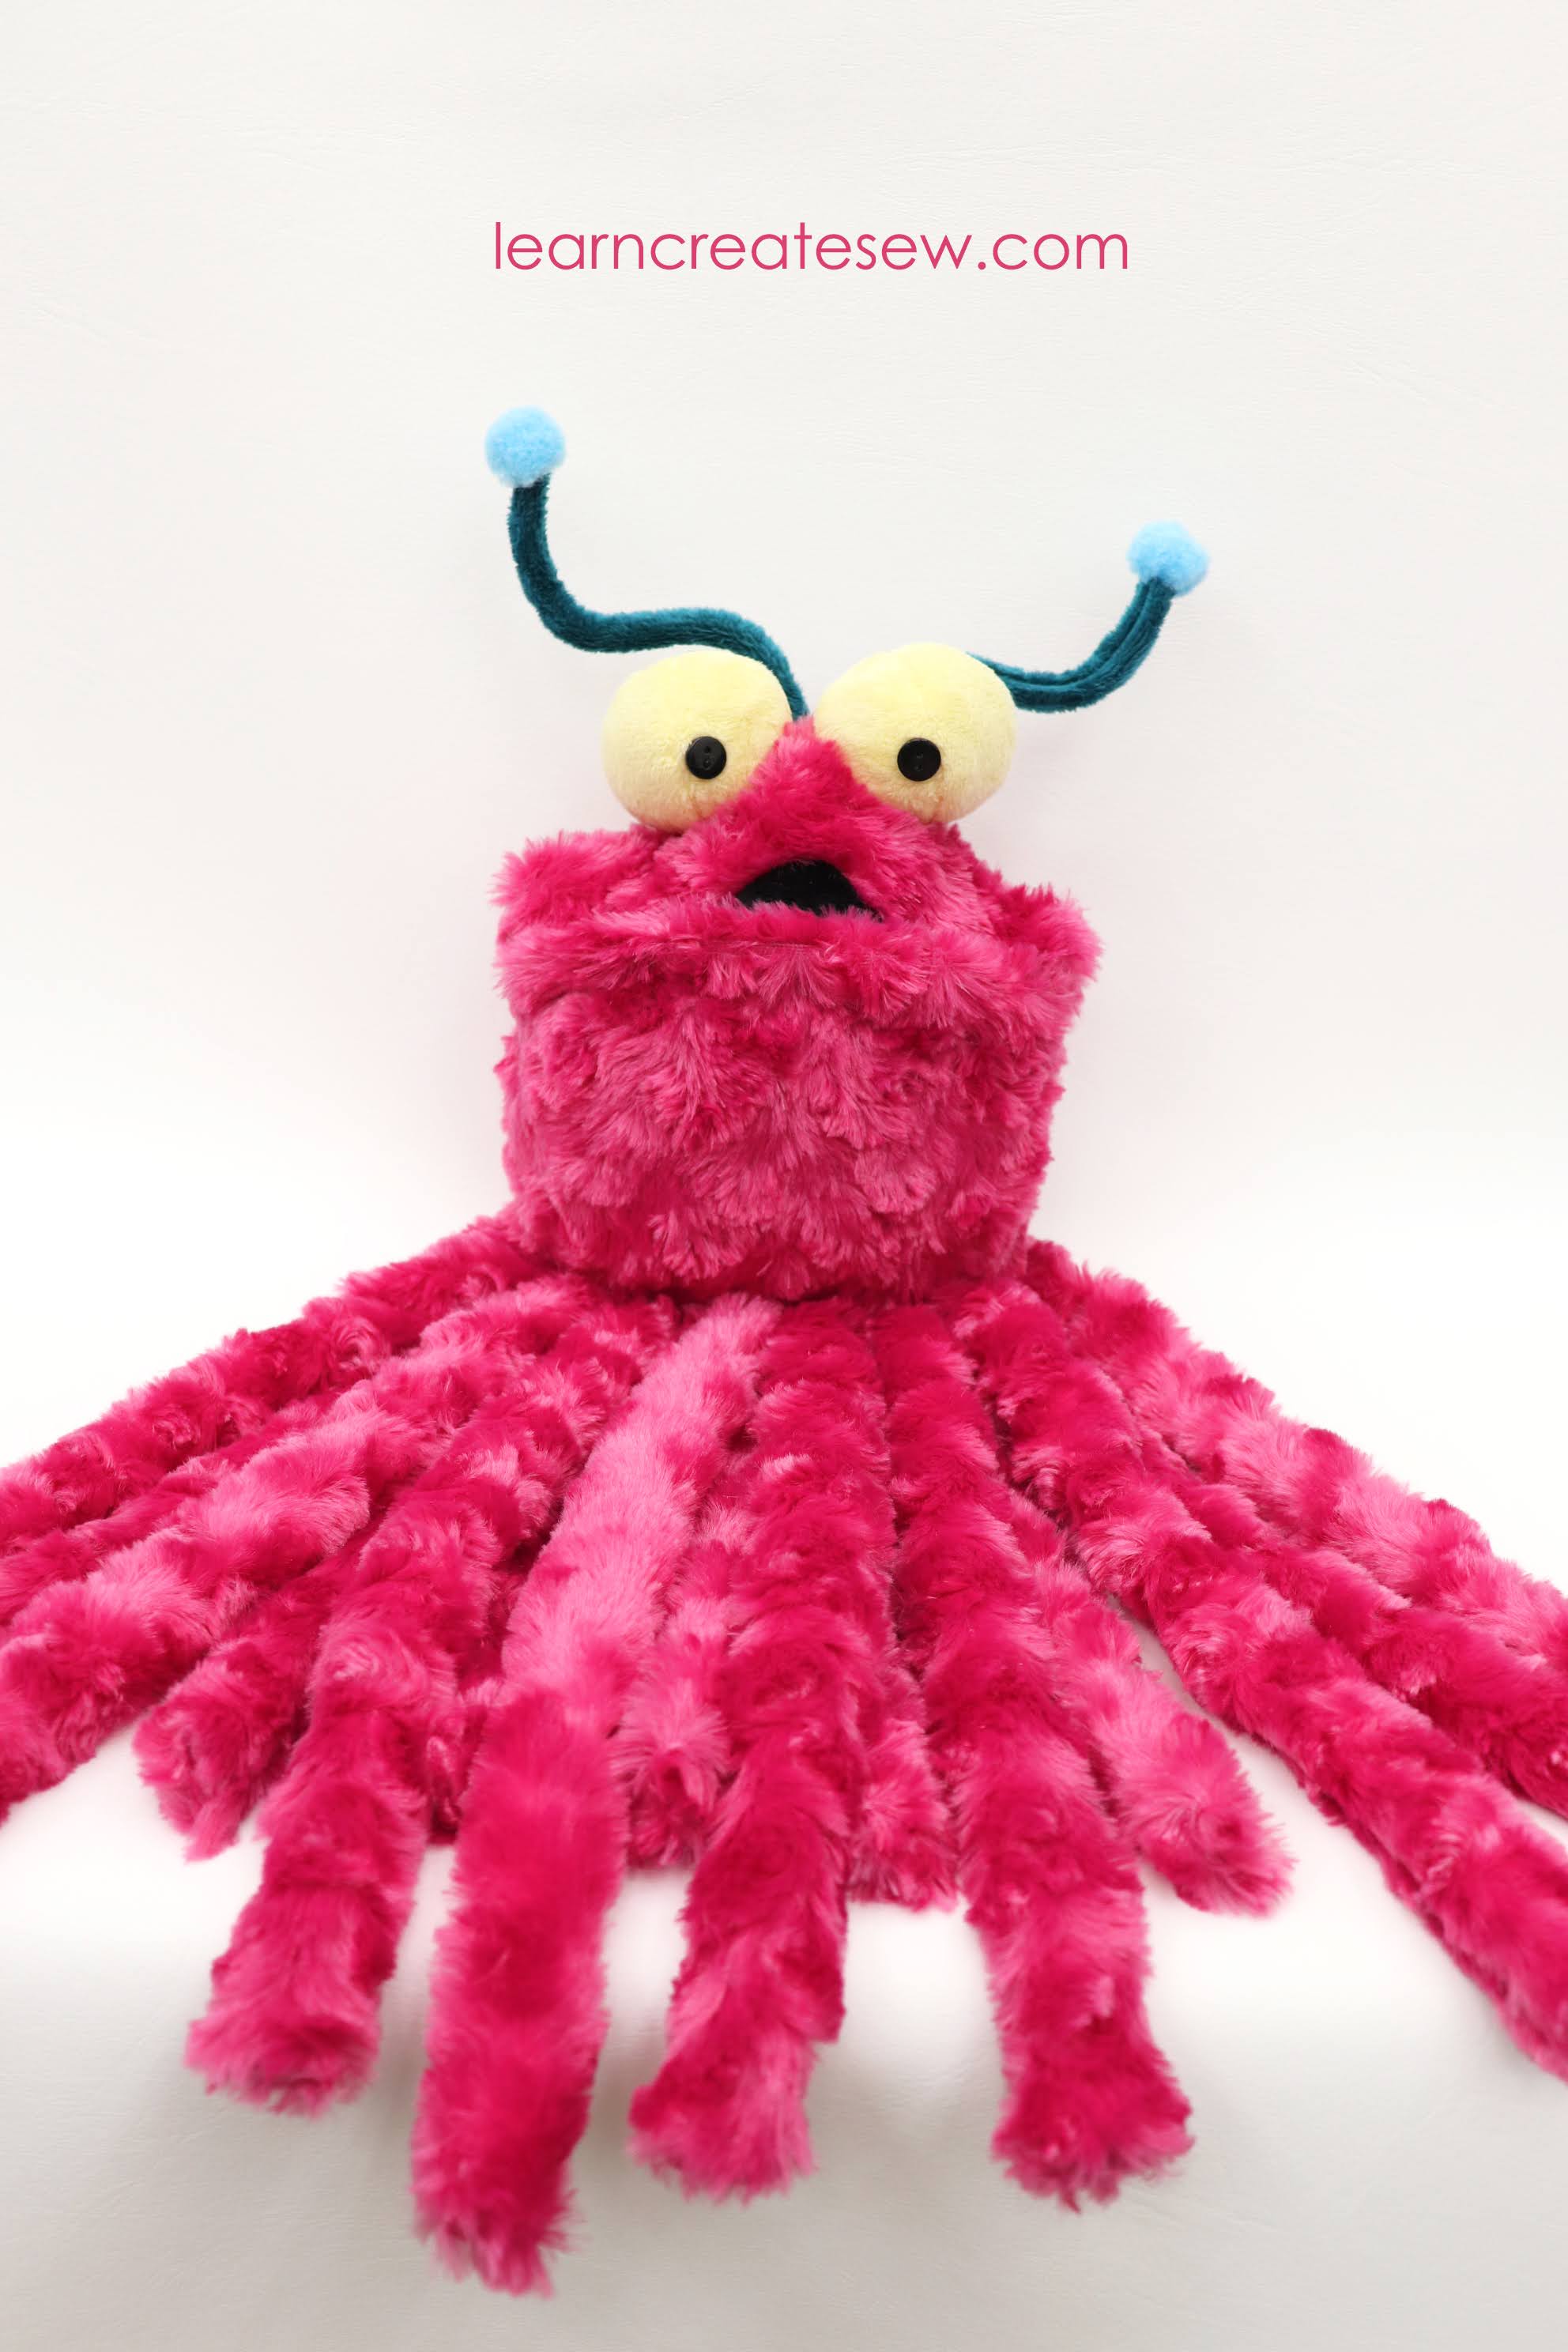
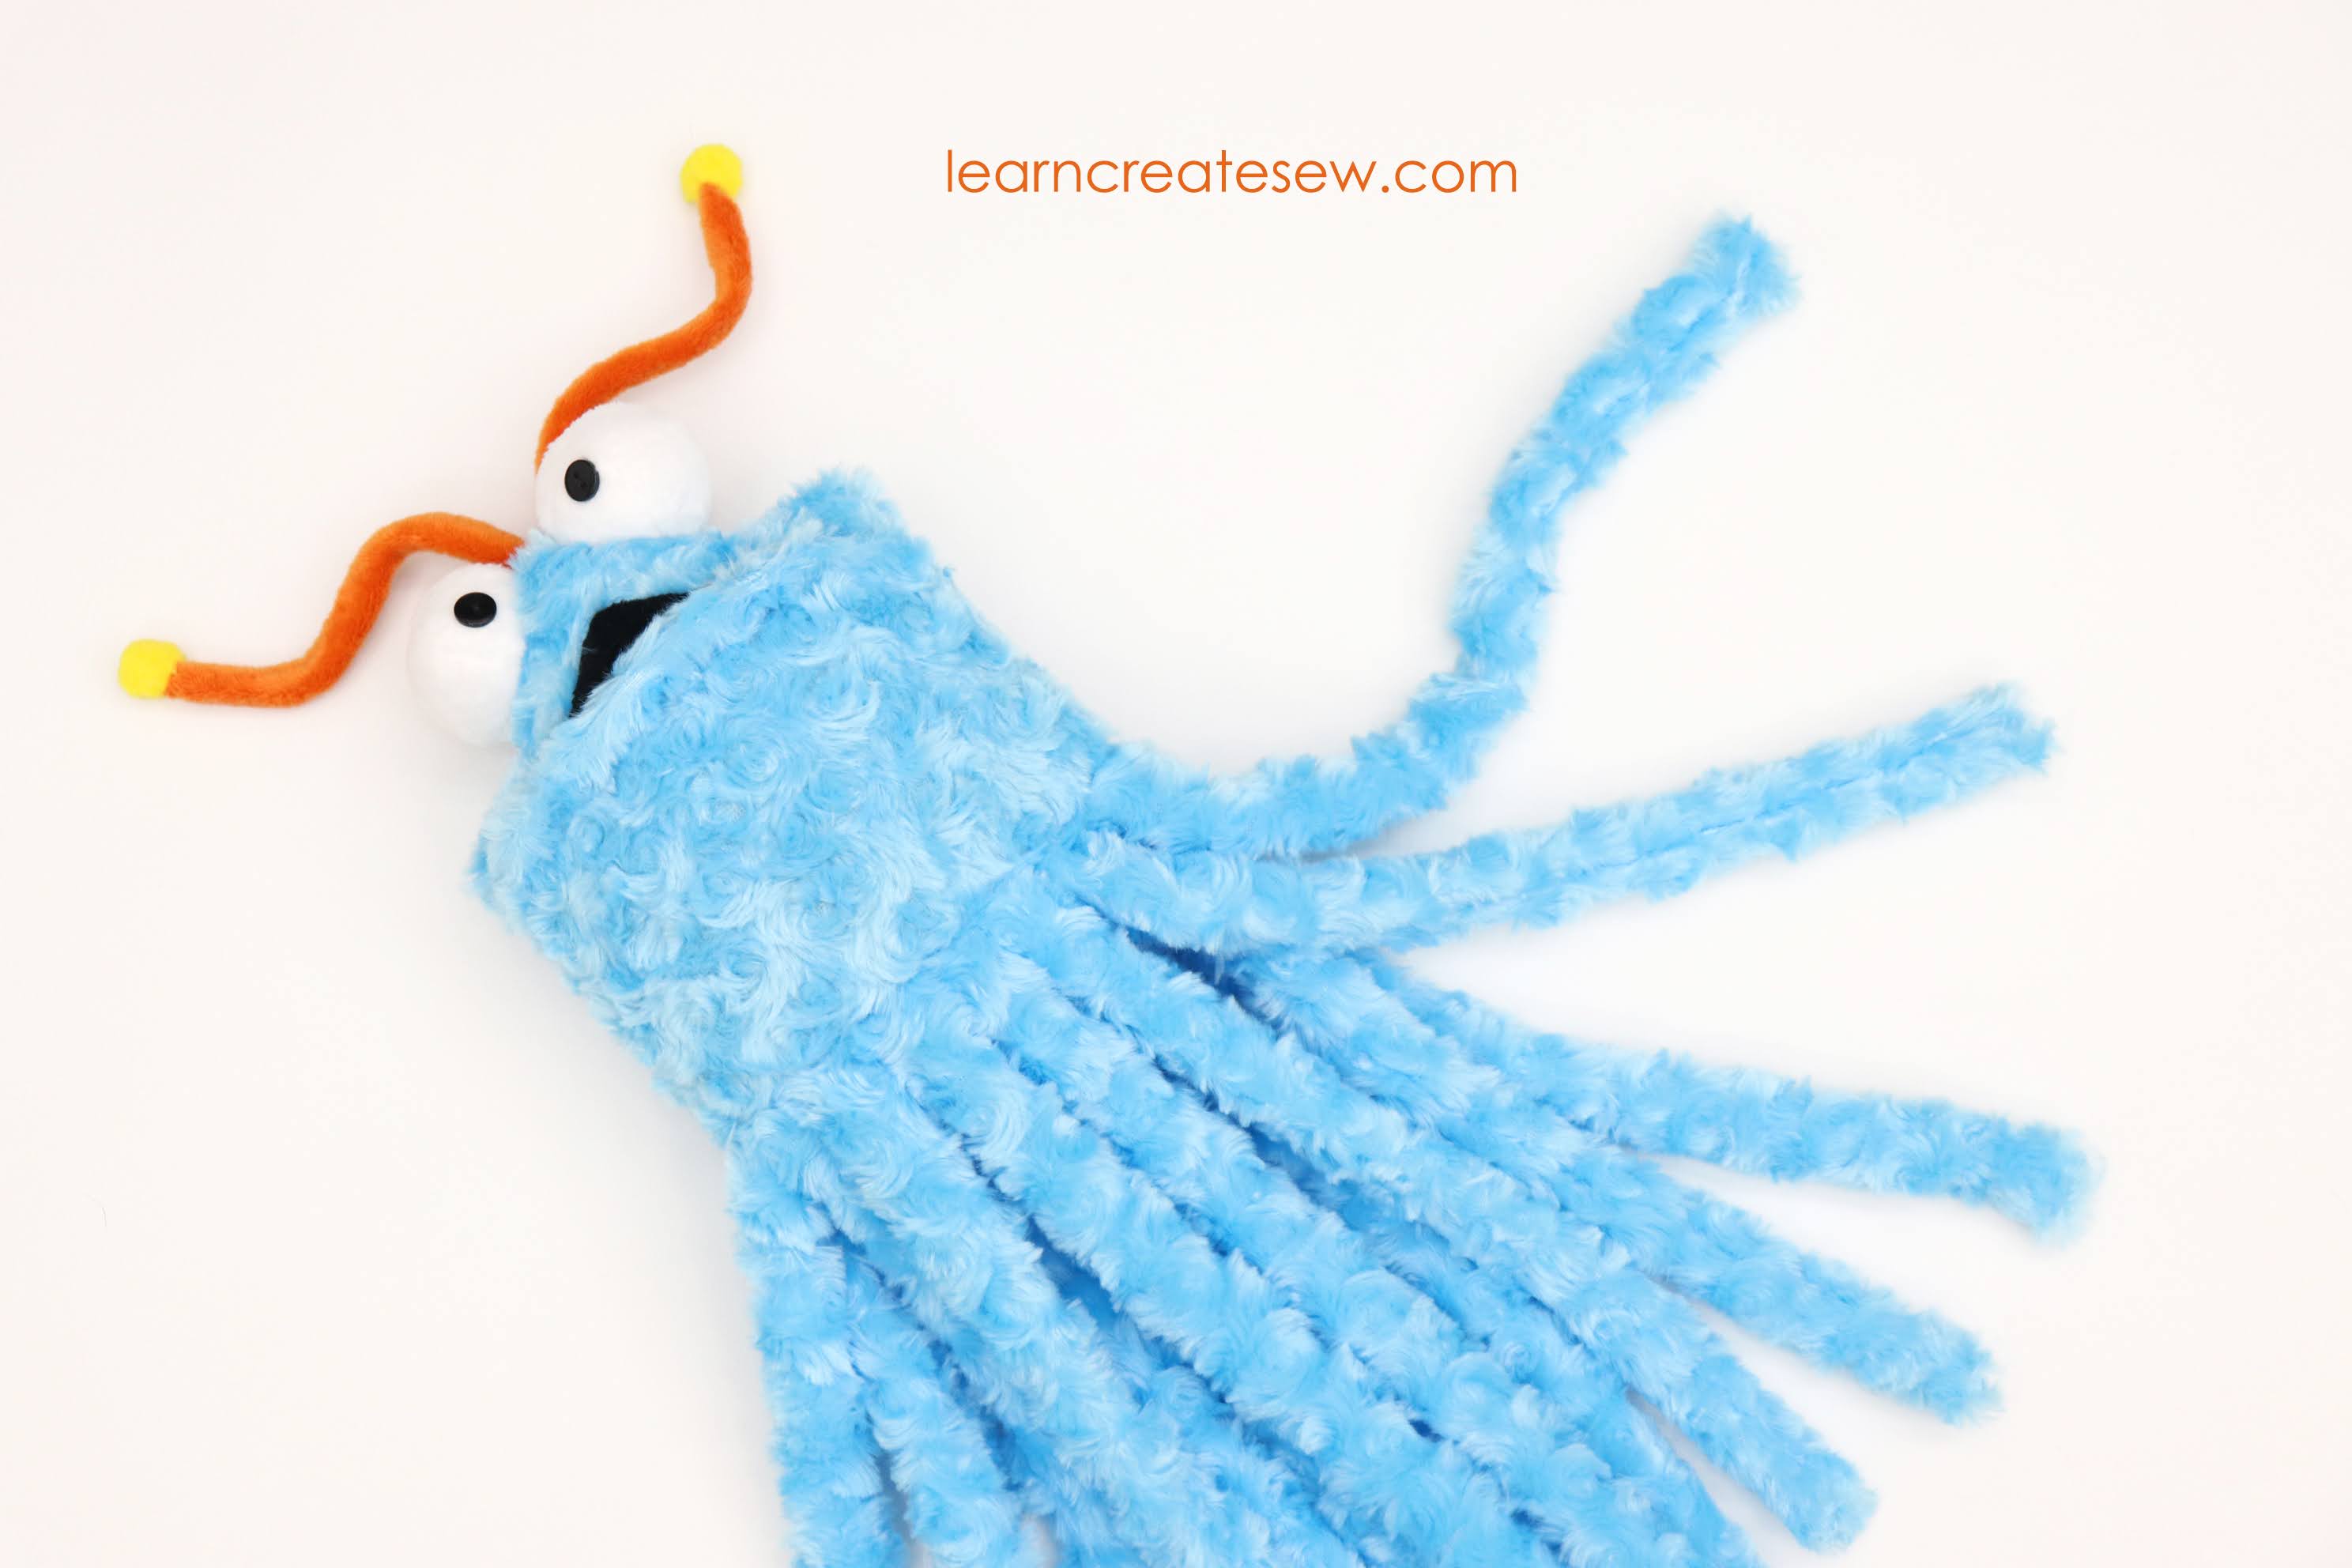
A friend asked me to make an alien plush for her daughter, and I had so much fun with it that I decided to share the project.
I started by making the larger fur aliens and then decided to add the smaller fleece option, which takes less fabric and is easier to construct.
The antenna and large eyes give these plushies a lot of personality.
Regular-Sized Plush
The large aliens are made with a swirl faux fur fabric (also called rose minky) for the body and regular minky for the accents. They measure approximately 20 inches tall and have finished (sewn) legs.
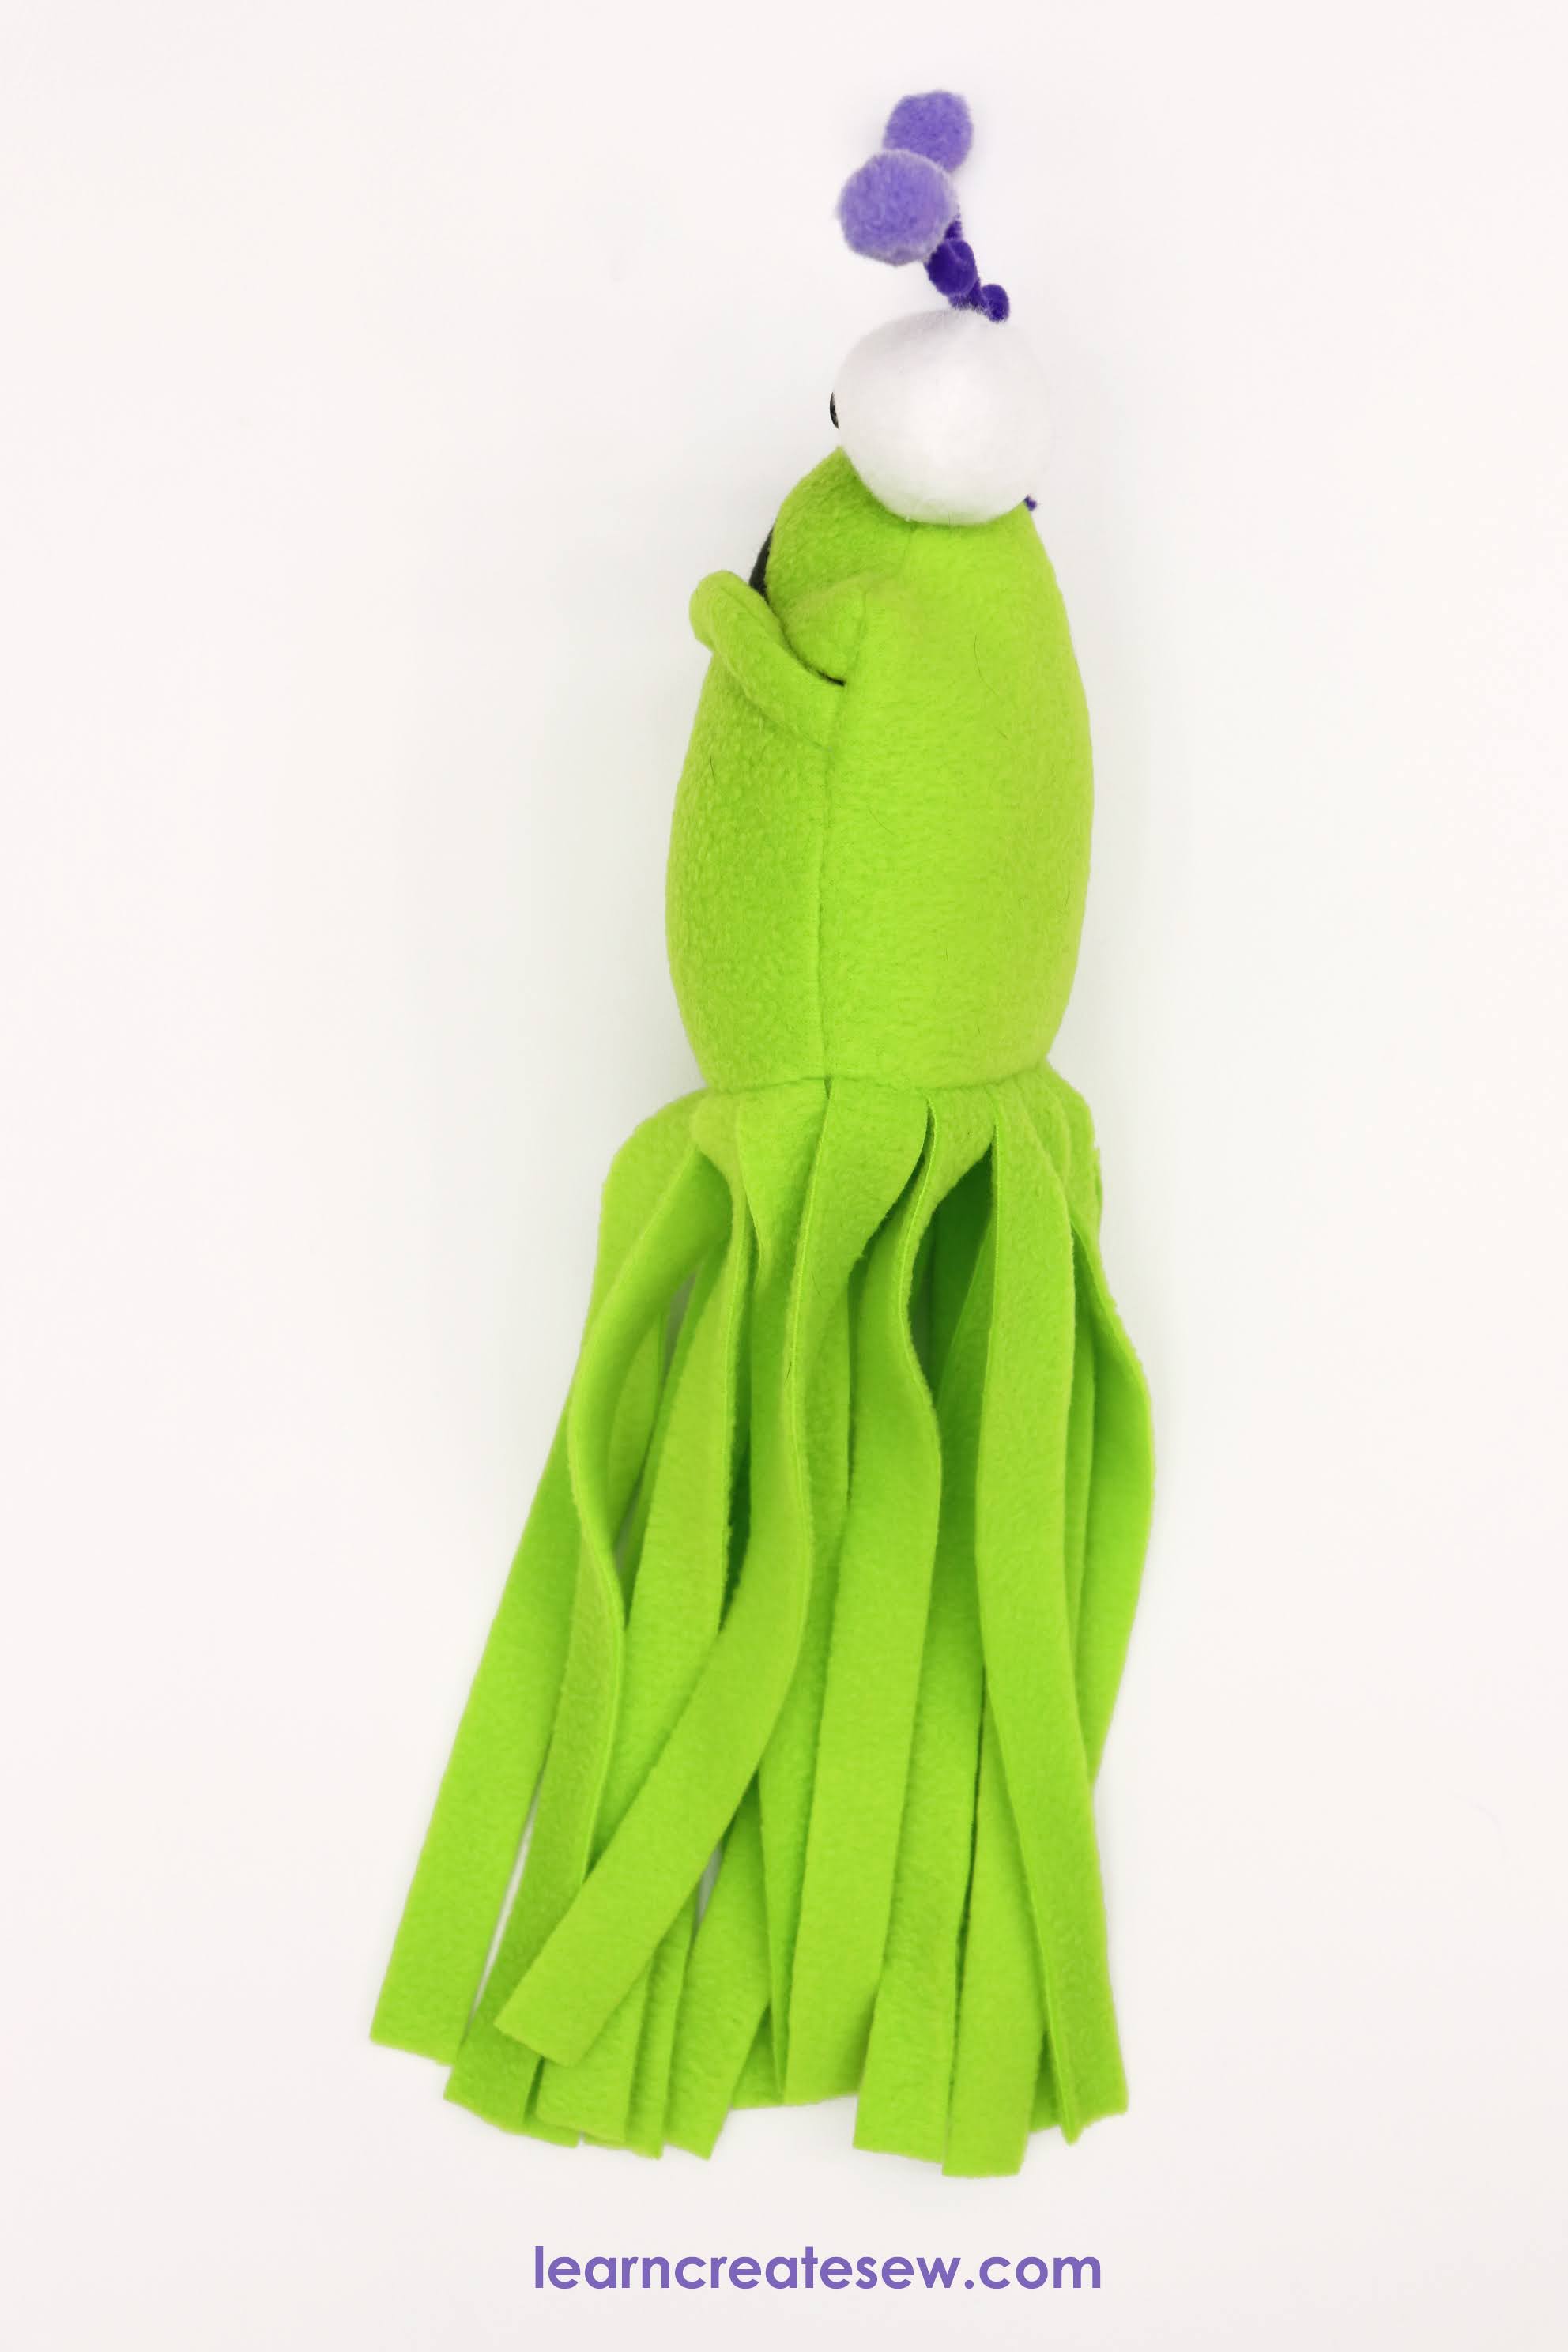
Small Sized Plush
The small aliens are made with fleece for both the body and the accents and have unfinished (unsewn) legs. The small size measures approximately 15 inches tall when finished. This is 75% scale of the regular-sized plush. This plush feels considerably lighter and smaller because of the reduced size and because the unfinished legs eliminate a lot of bulk.
Finished v Unfinished Legs
You have two legs finish choices when you make the alien, finished or unfinished. The small fleece aliens have unfinished legs. This means that they are not sewn. The fabric is simply cut into strips, the edges are left raw, and they are sewn directly to the plush. This shortens the construction time by quite a bit and reduces the difficulty of the project.
The regular-sized faux fur aliens have finished legs. The finished legs are sewn individually prior to attaching them to the plush. I chose to finish the legs on the faux fur to minimize shedding and to make them stronger. The finished legs take more time and more fabric.
UNFINISHED LEGSFINISHED LEGS
Accents
The eyes and antenna of the aliens bring out their fun personalities. The eyes are sewn into balls with minky or fleece fabric and then decorated with buttons. There are two options for making the antenna, the first which is shown on the small fleece plush, is simply to bend a pipe cleaner and hot glue pom poms to the ends. The other is to cover the antenna with fabric, which is shown on the larger fur aliens. You make a fabric tube, insert wire or pipe cleaners, and then sew pom poms to the end. The single pipe cleaner option is definitely faster and easier, and I prefer that look best, but the covered option is much stronger and helps the antenna stand out.
Supplies:
Refer to the Cut Layout included with the free pattern for fabric quantities
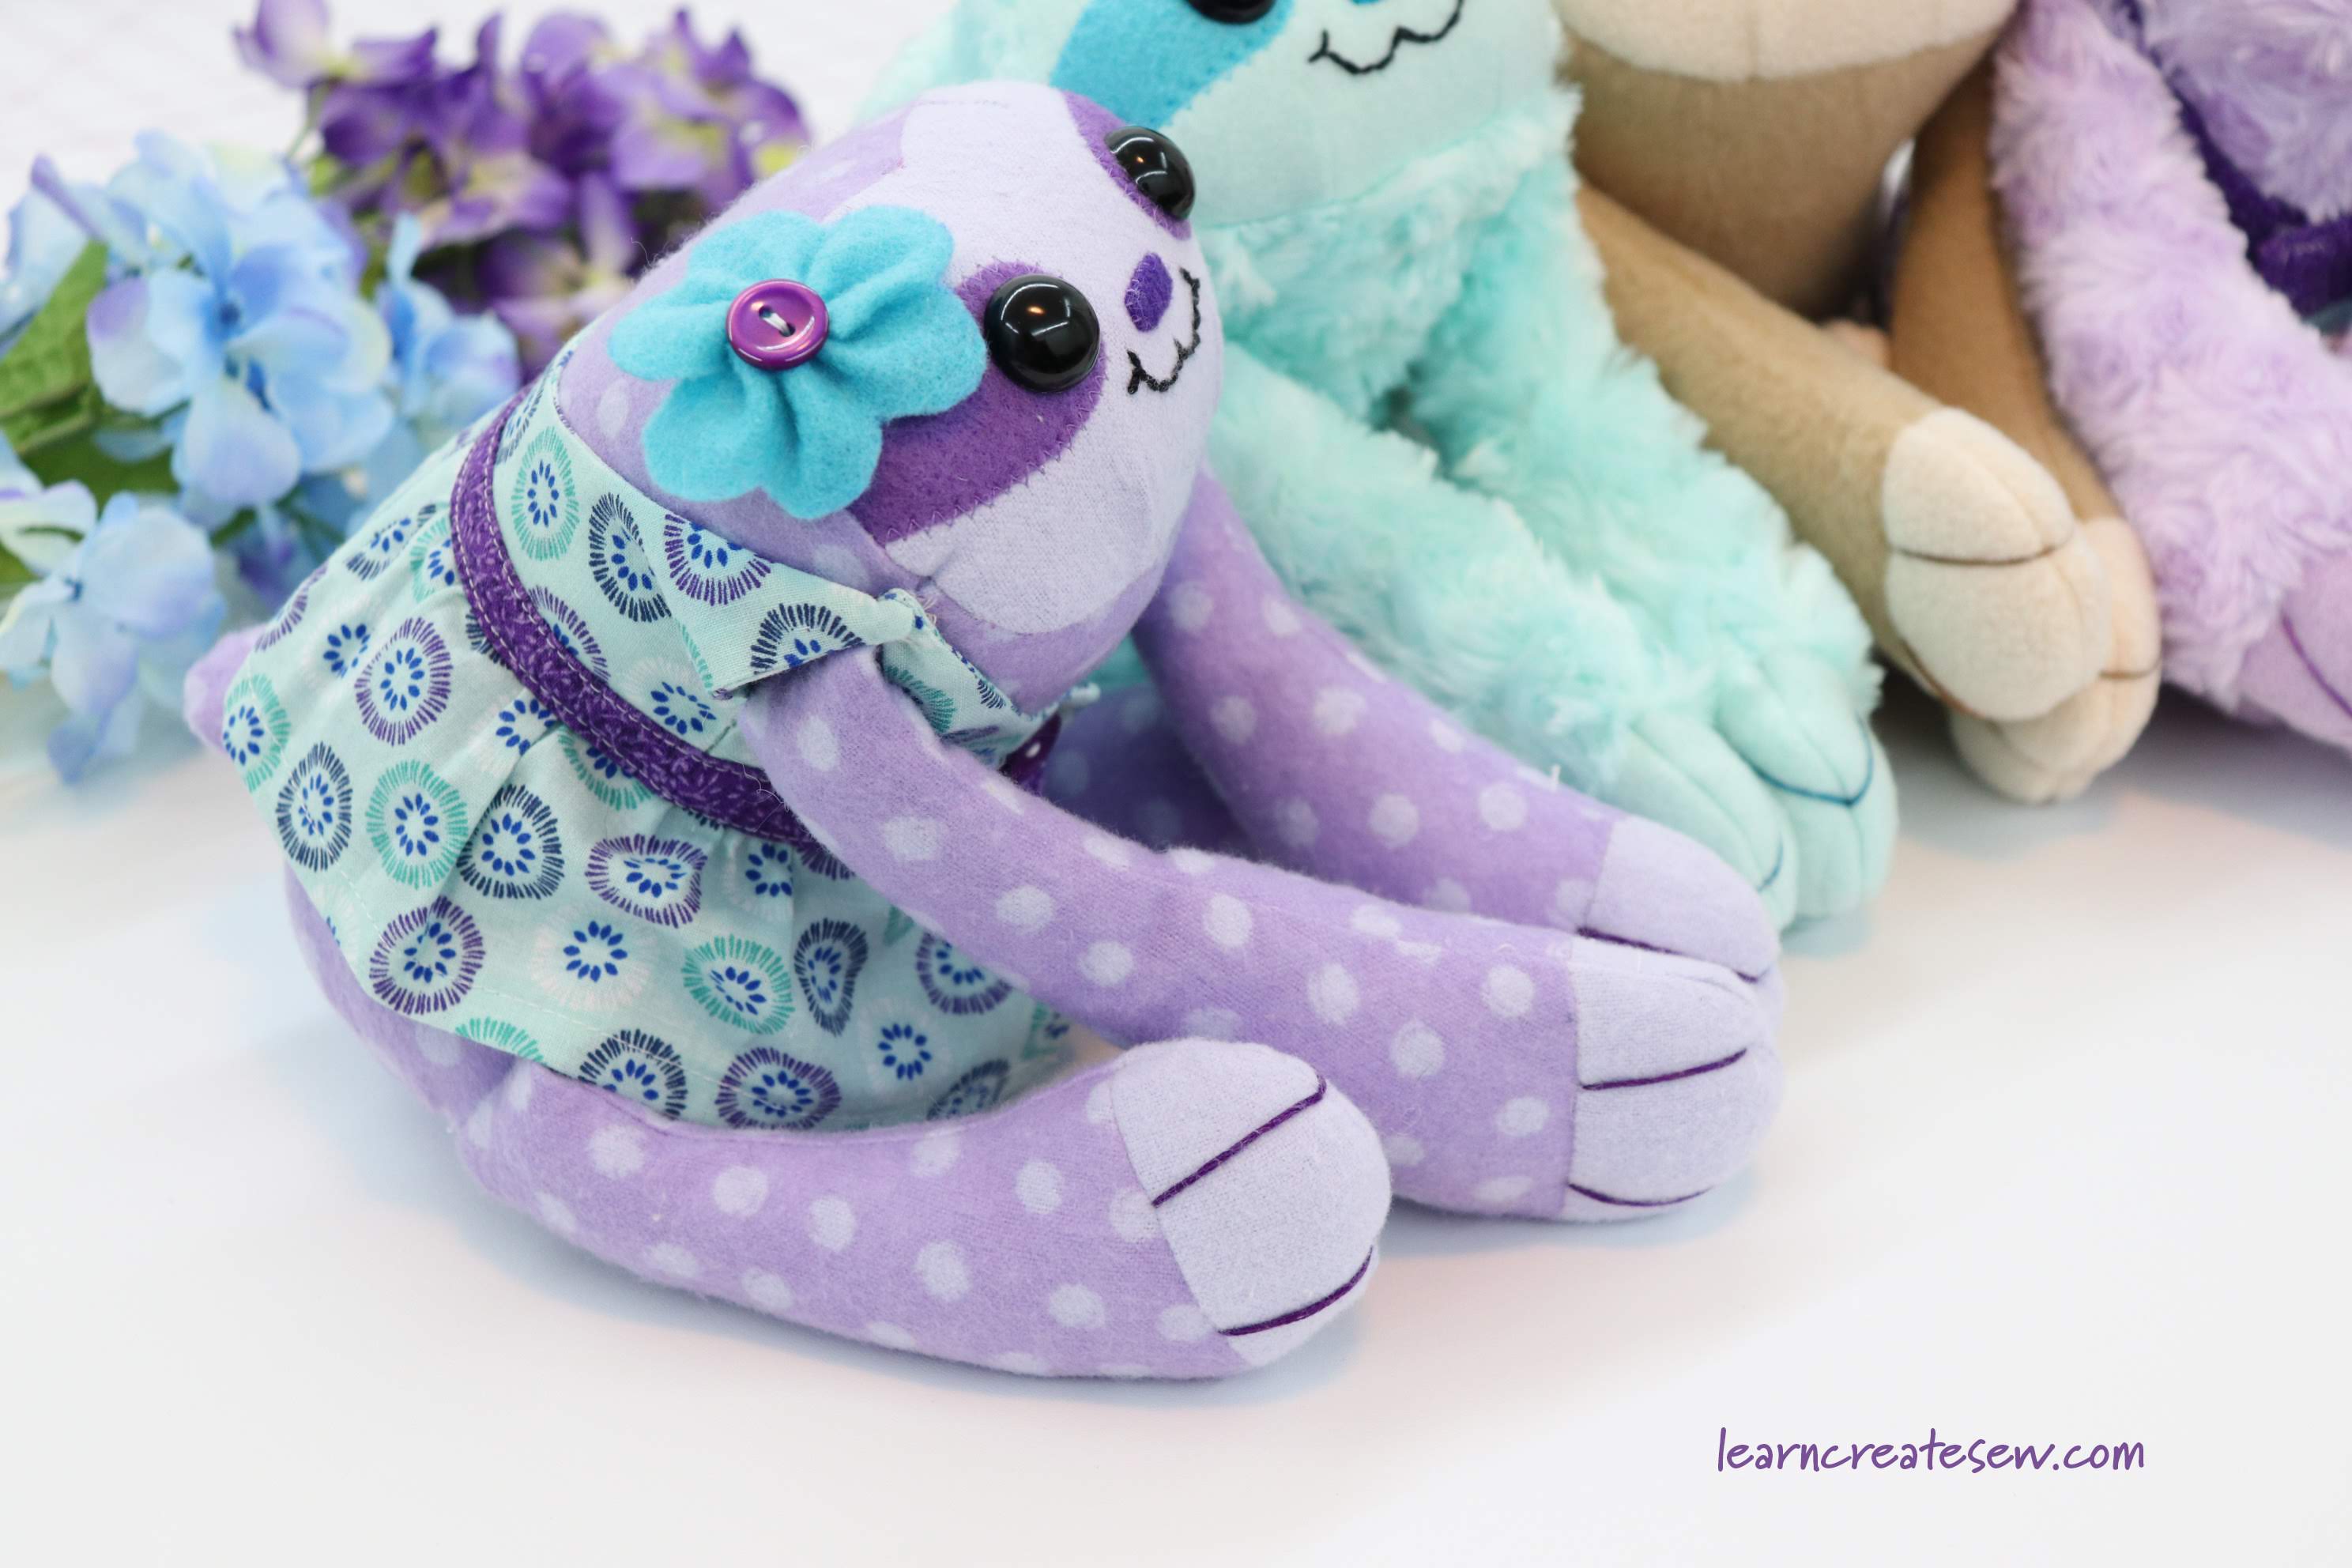
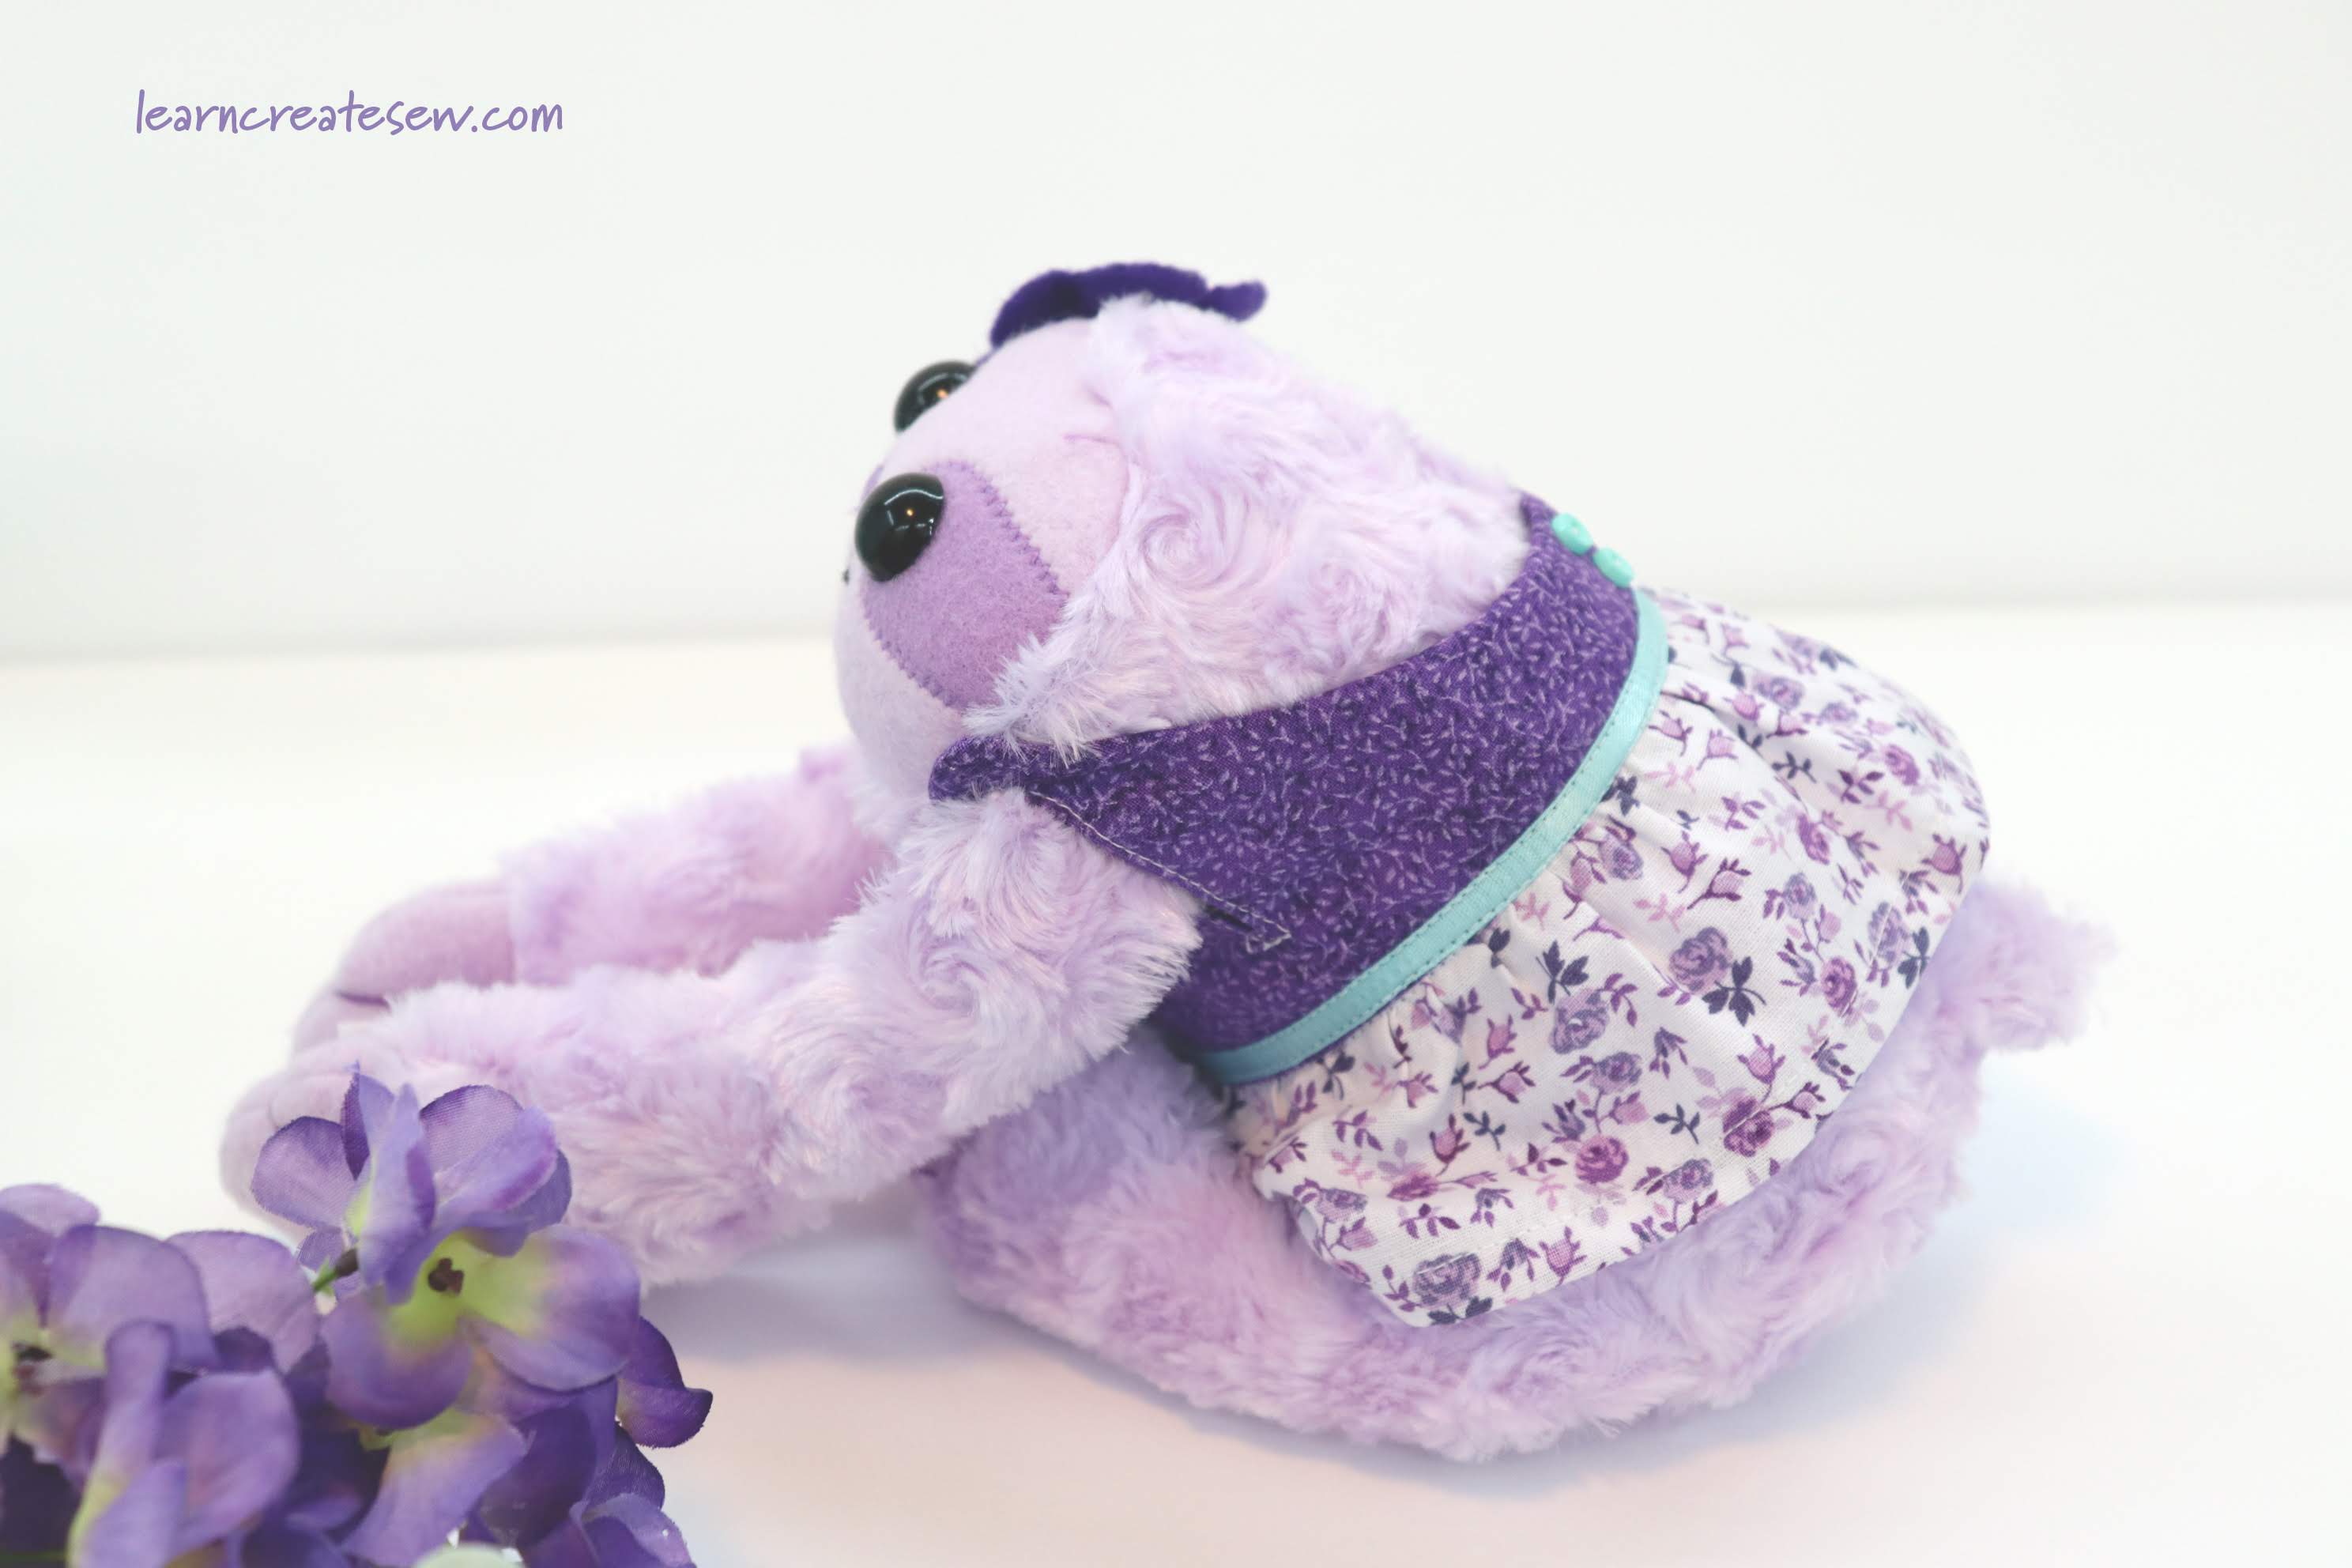
I have long been meaning to post a tutorial on how to make a dress for the Sloth plush, but it always seemed to slip my mind. A special thanks to Carol for reminding me about it! The dress is a cute little addition to the sloth plush and a lot of fun to make.
I don’t have a video for this one, but I do have several photos. I hope you find them helpful.
Here are some quick instructions on how to make the dress.
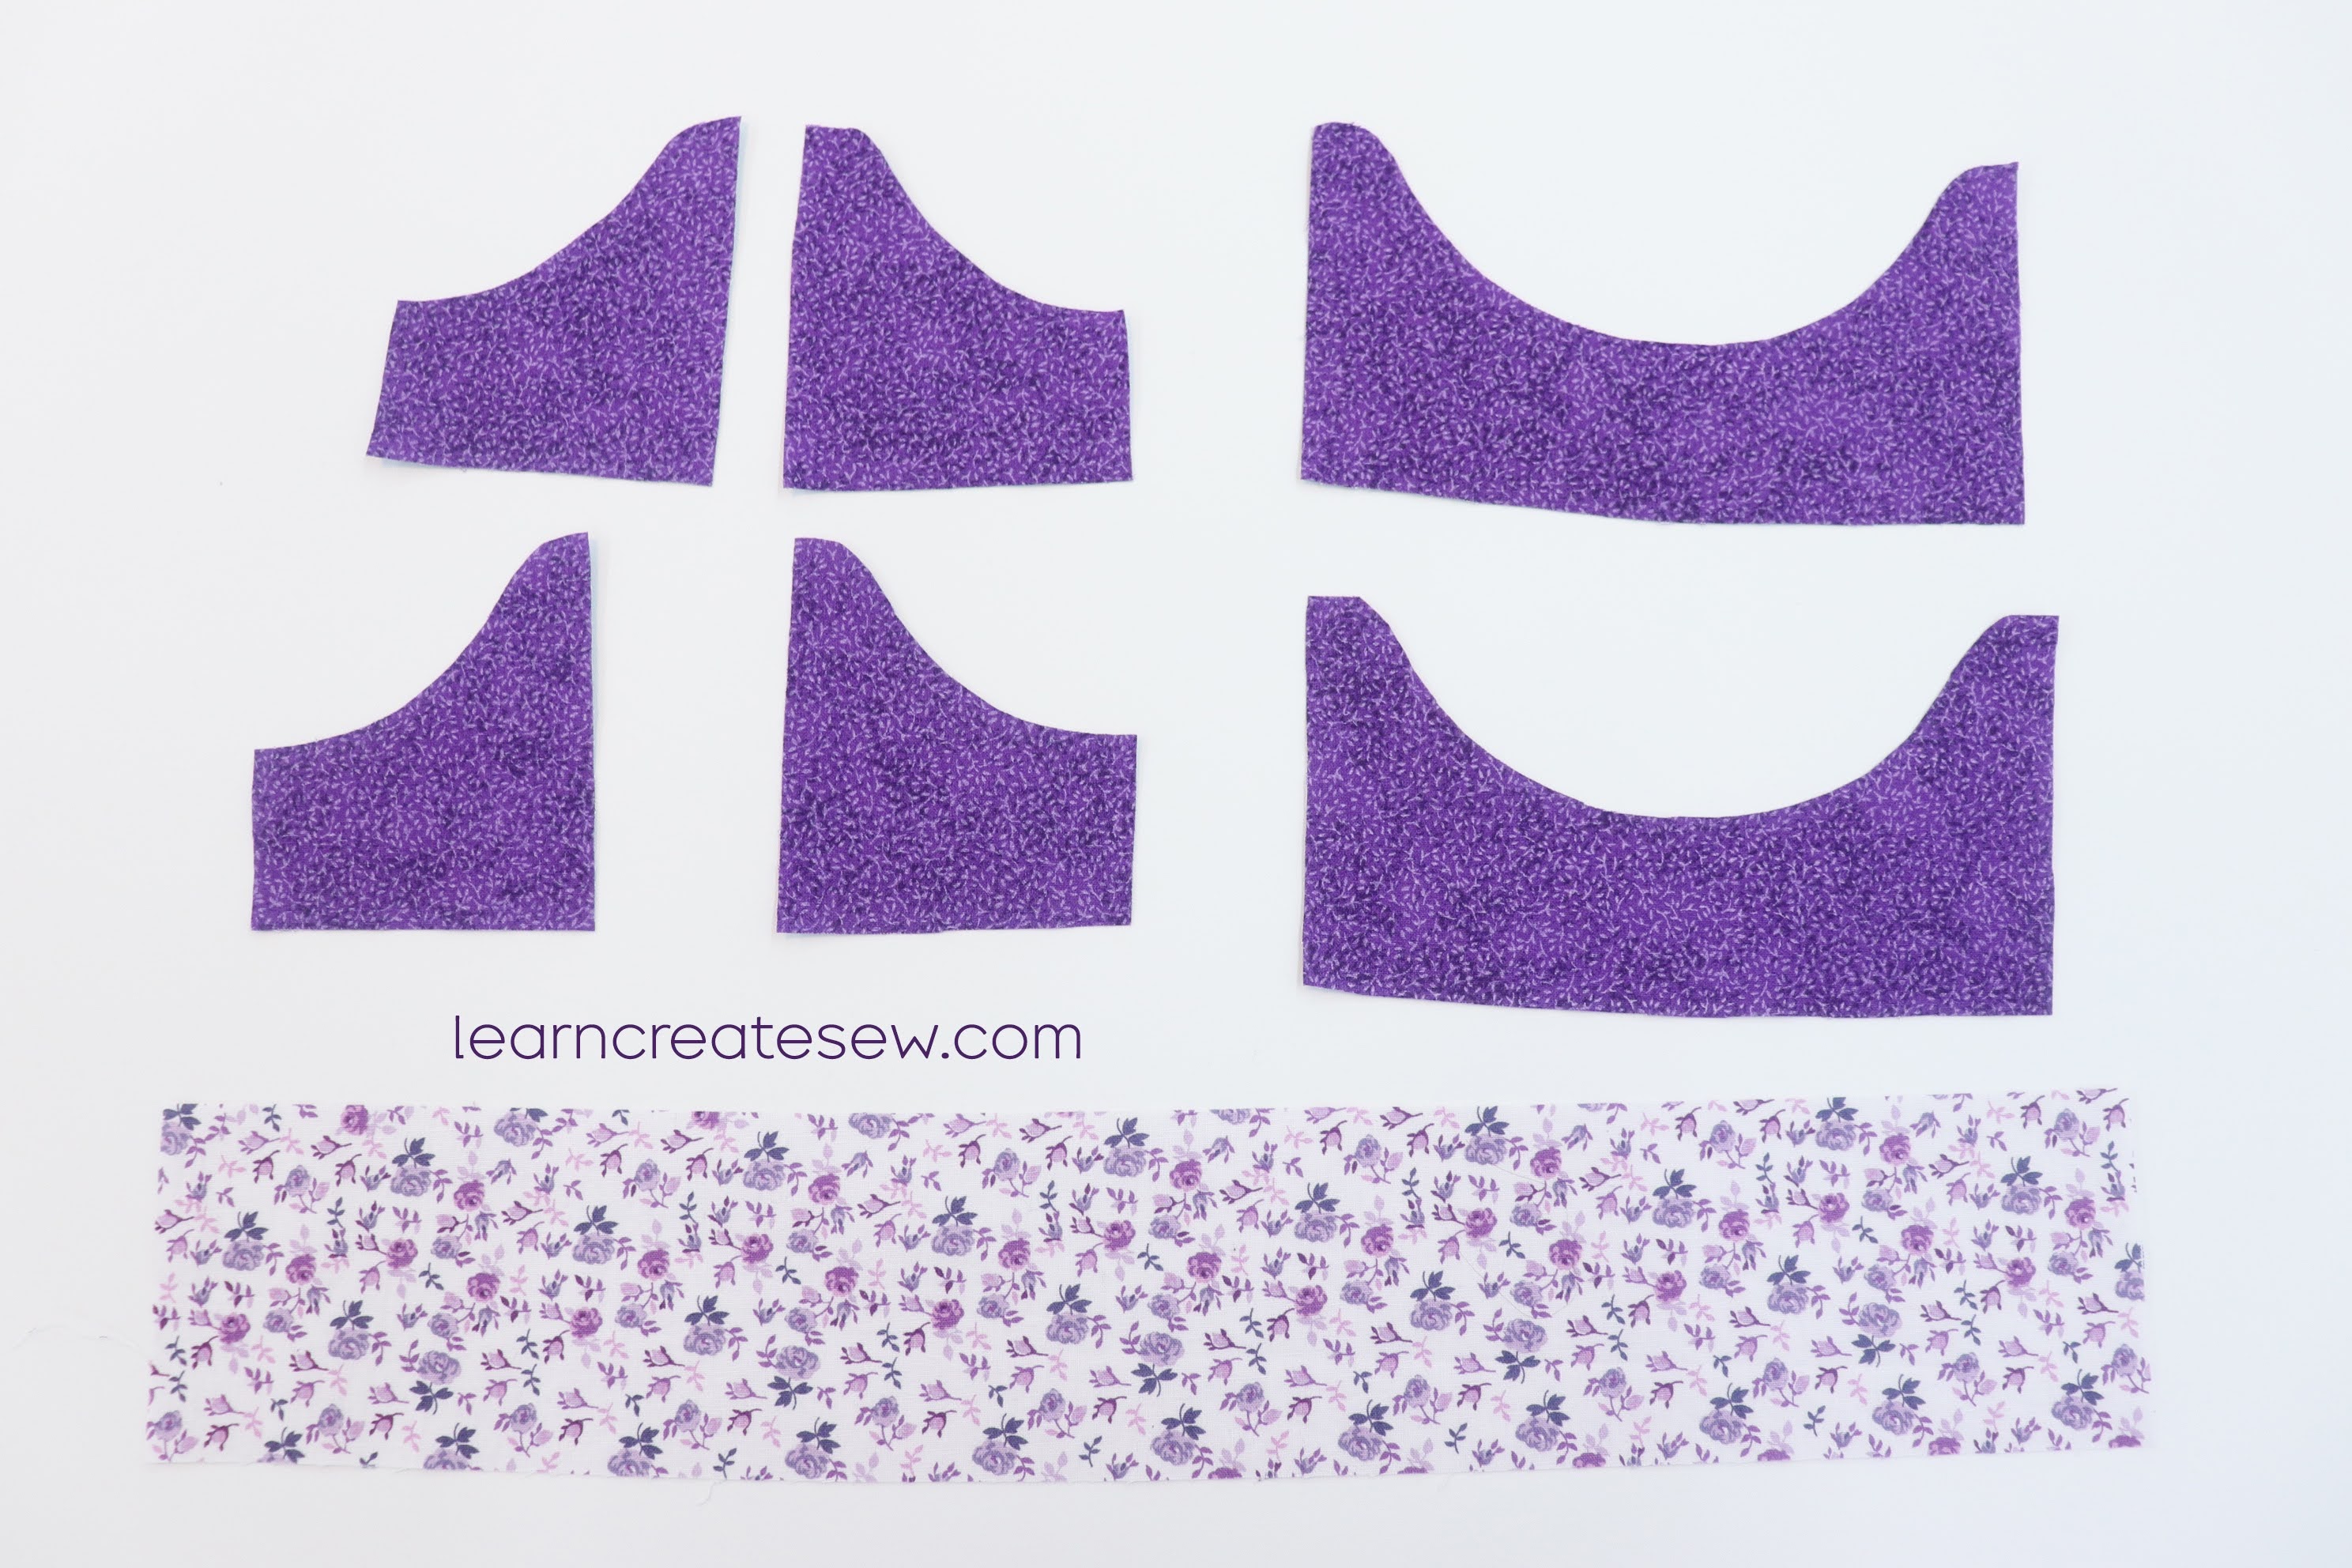
First, cut out the pieces. The skirt rectangle is approximately 3 x 18 inches, but you can adjust that as desired.
Hem the bottom and two sides of the skirt with a double-fold narrow hem. Approximately, 1/4 inch wide.
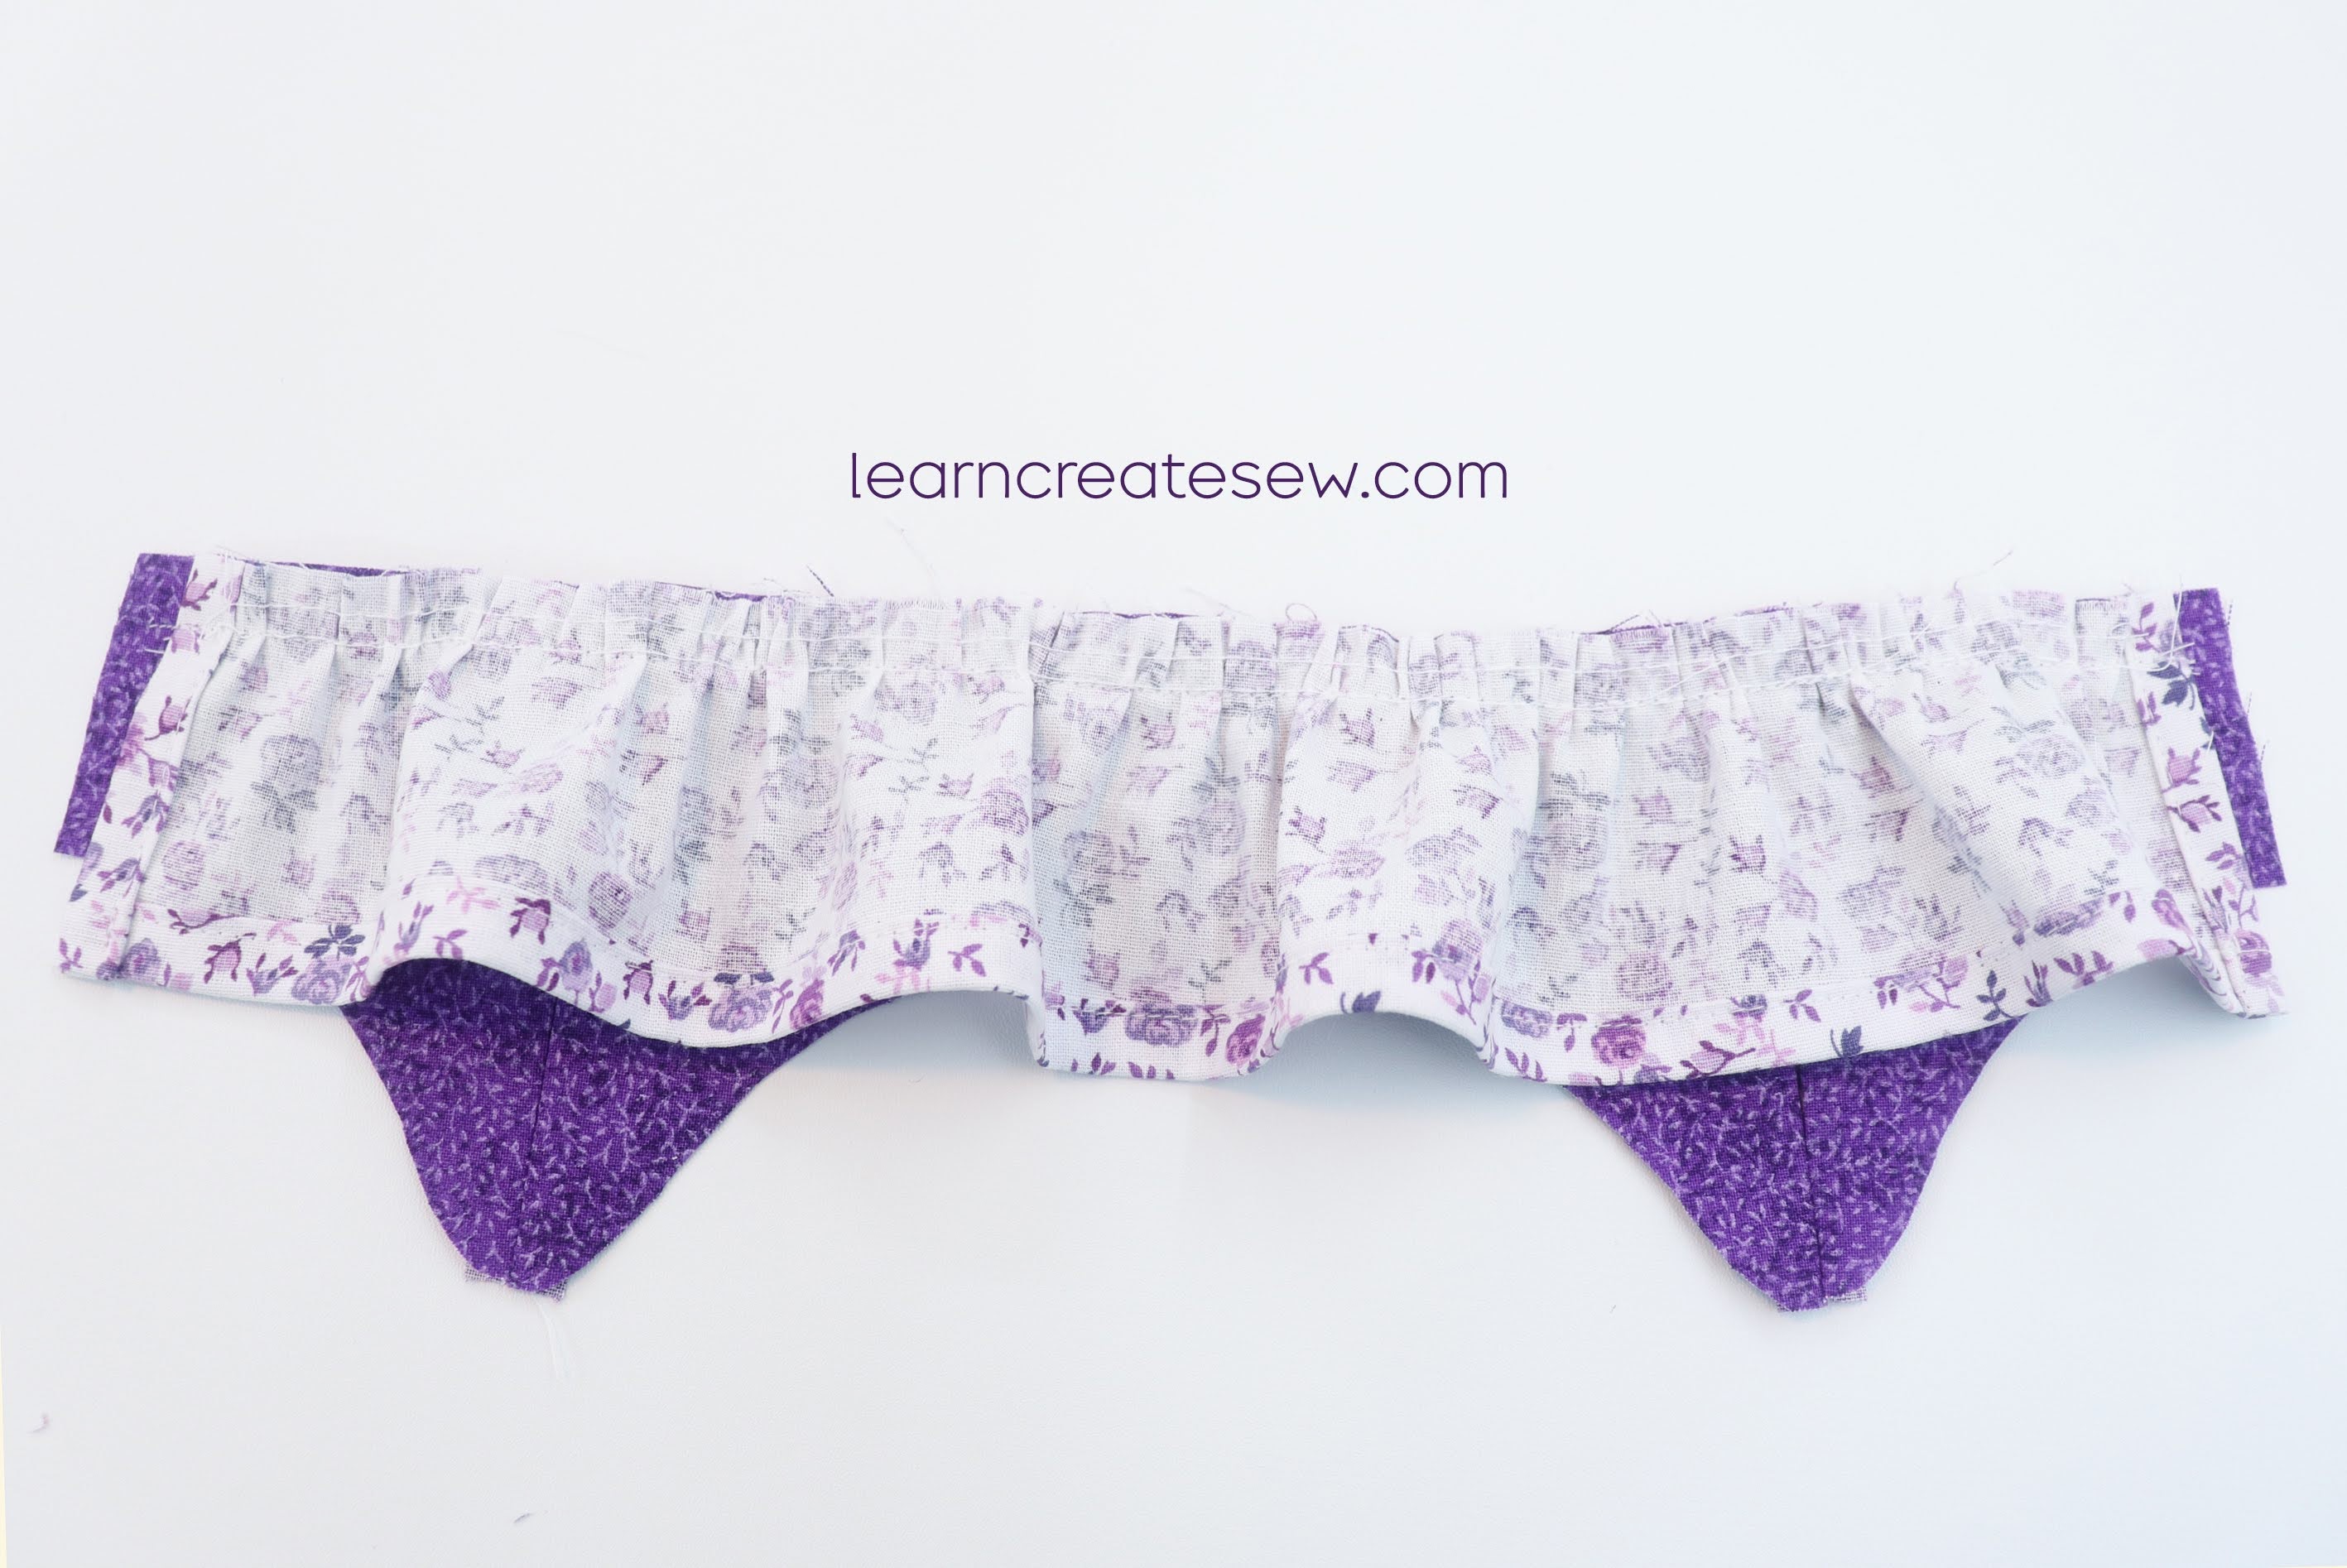
Gather the top edge.
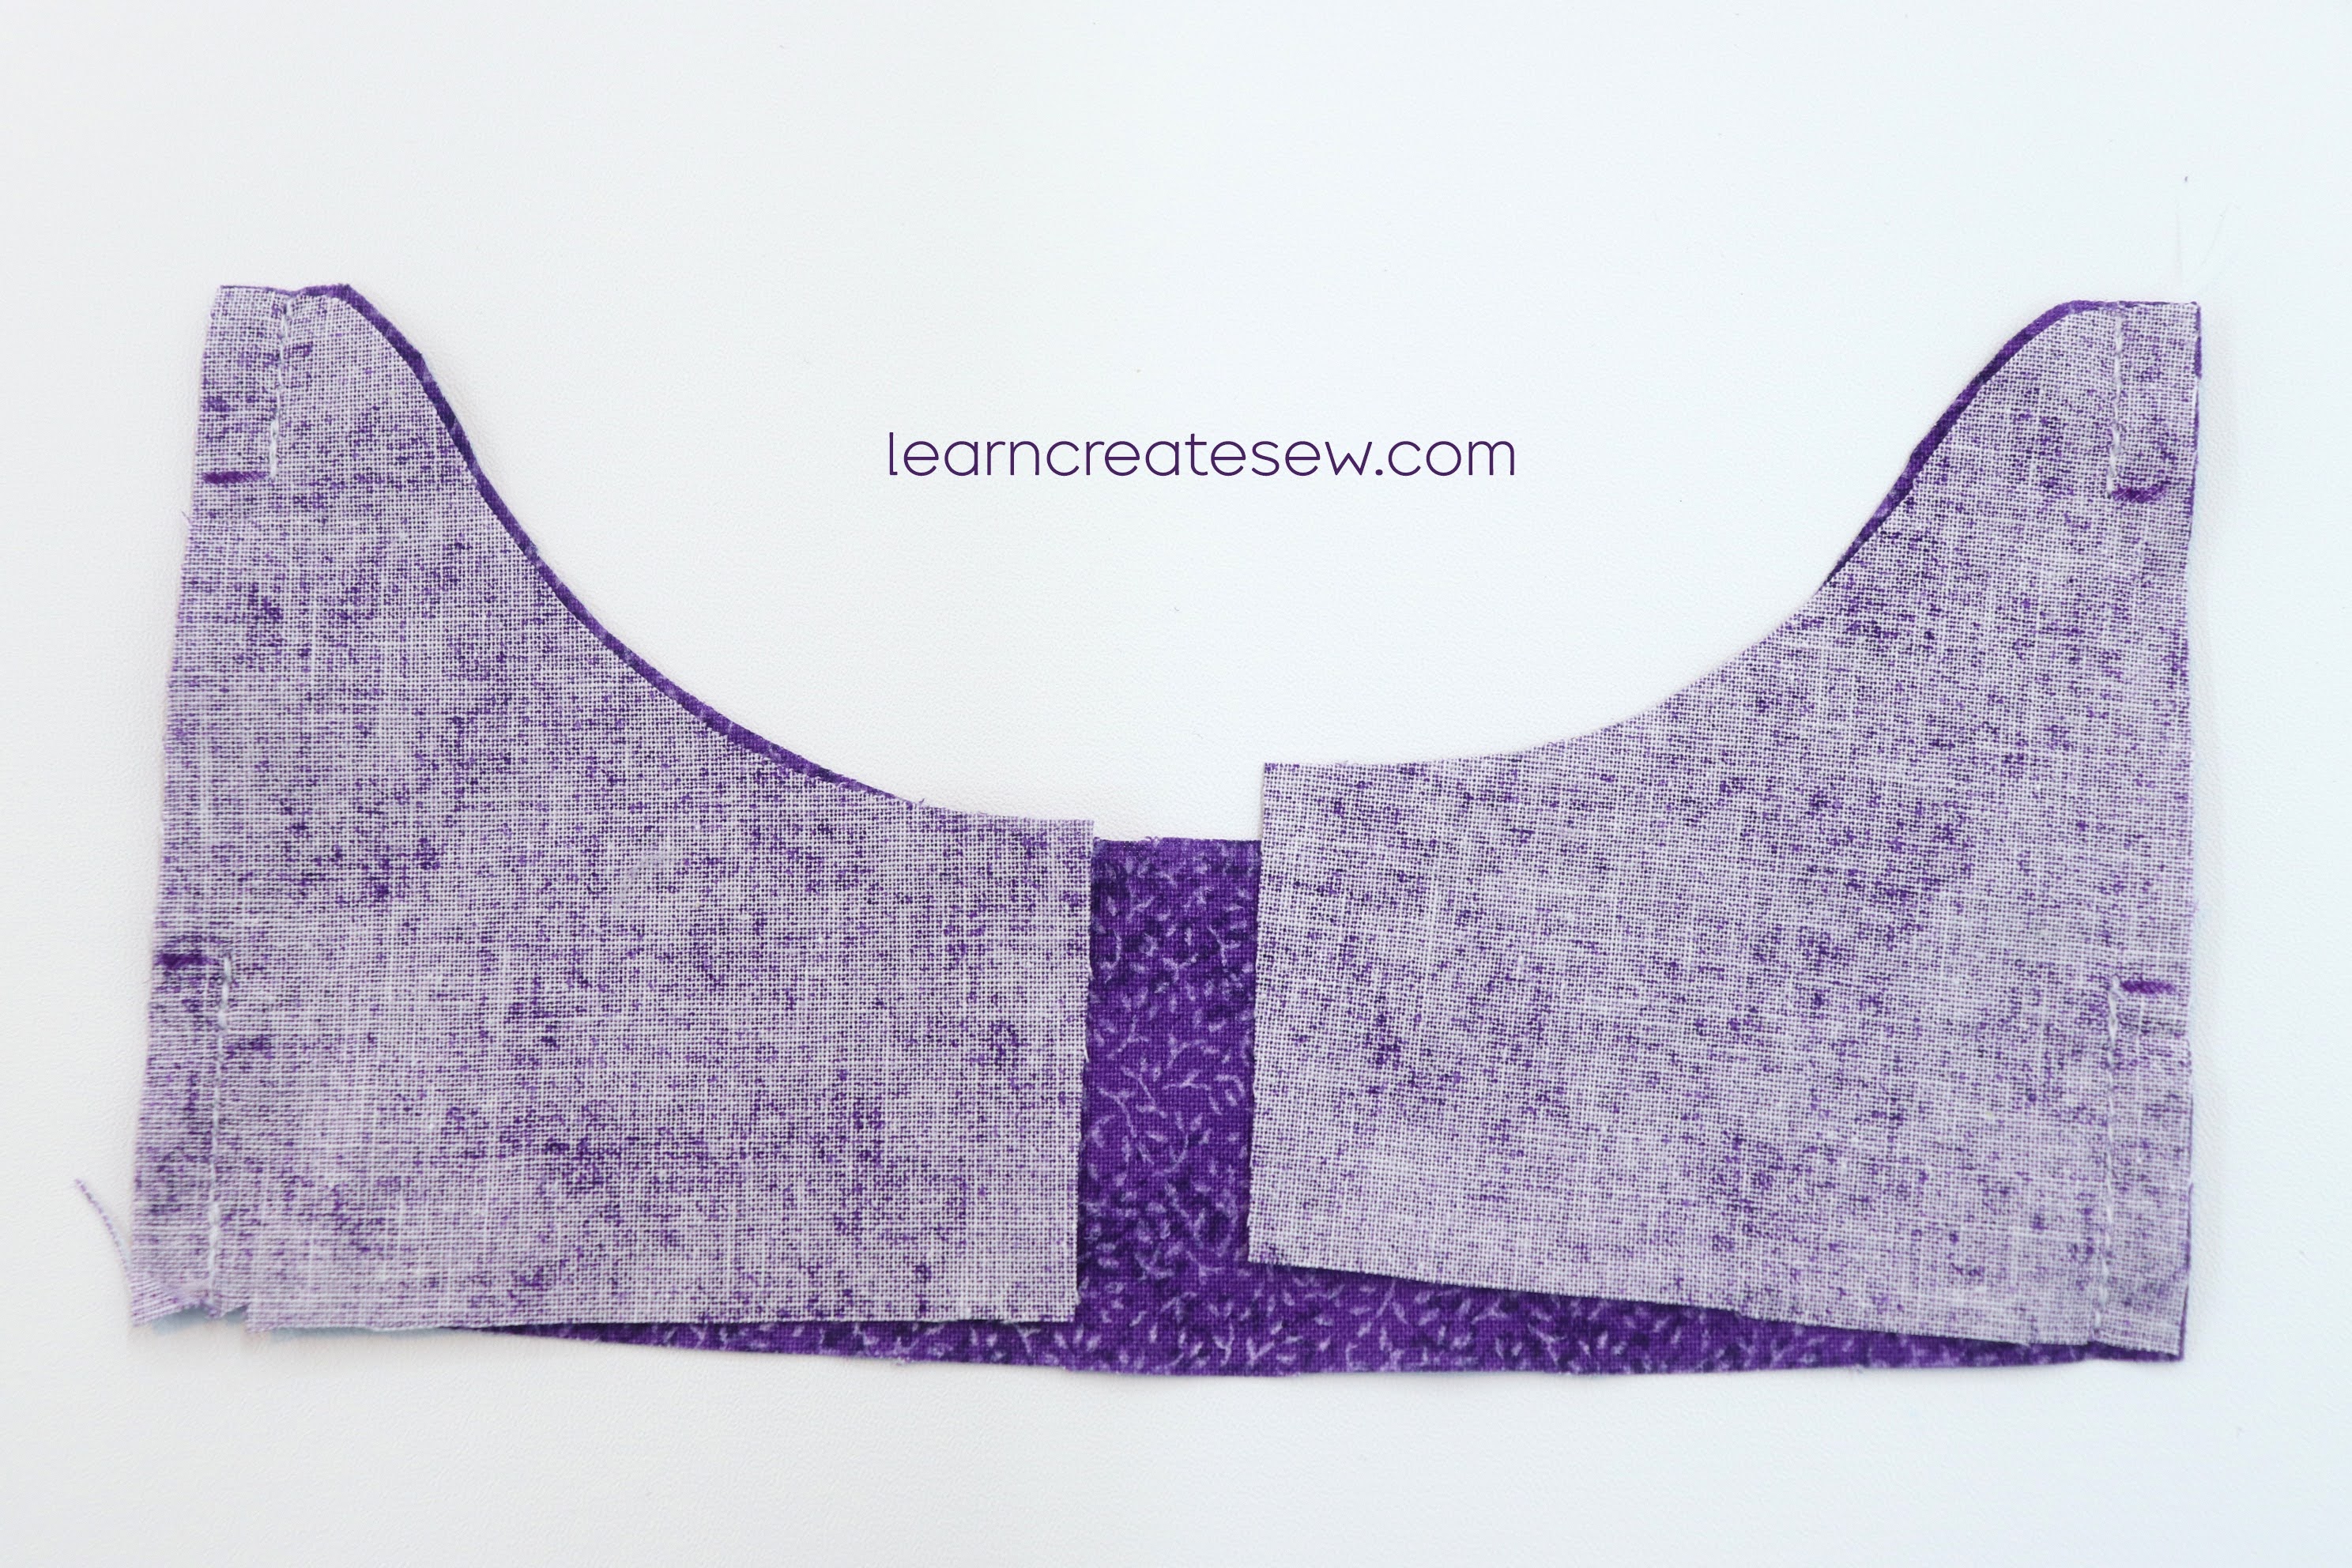
Pin two of the bodice front pieces to a bodice back piece, right sides together. Align the dashes marked on the pattern.
Stitch the side seams with a 1/4 inch seam allowance. Only sew above and below the dashes, leaving a gap in the middle. This is for the sloth’s arms to pass through.
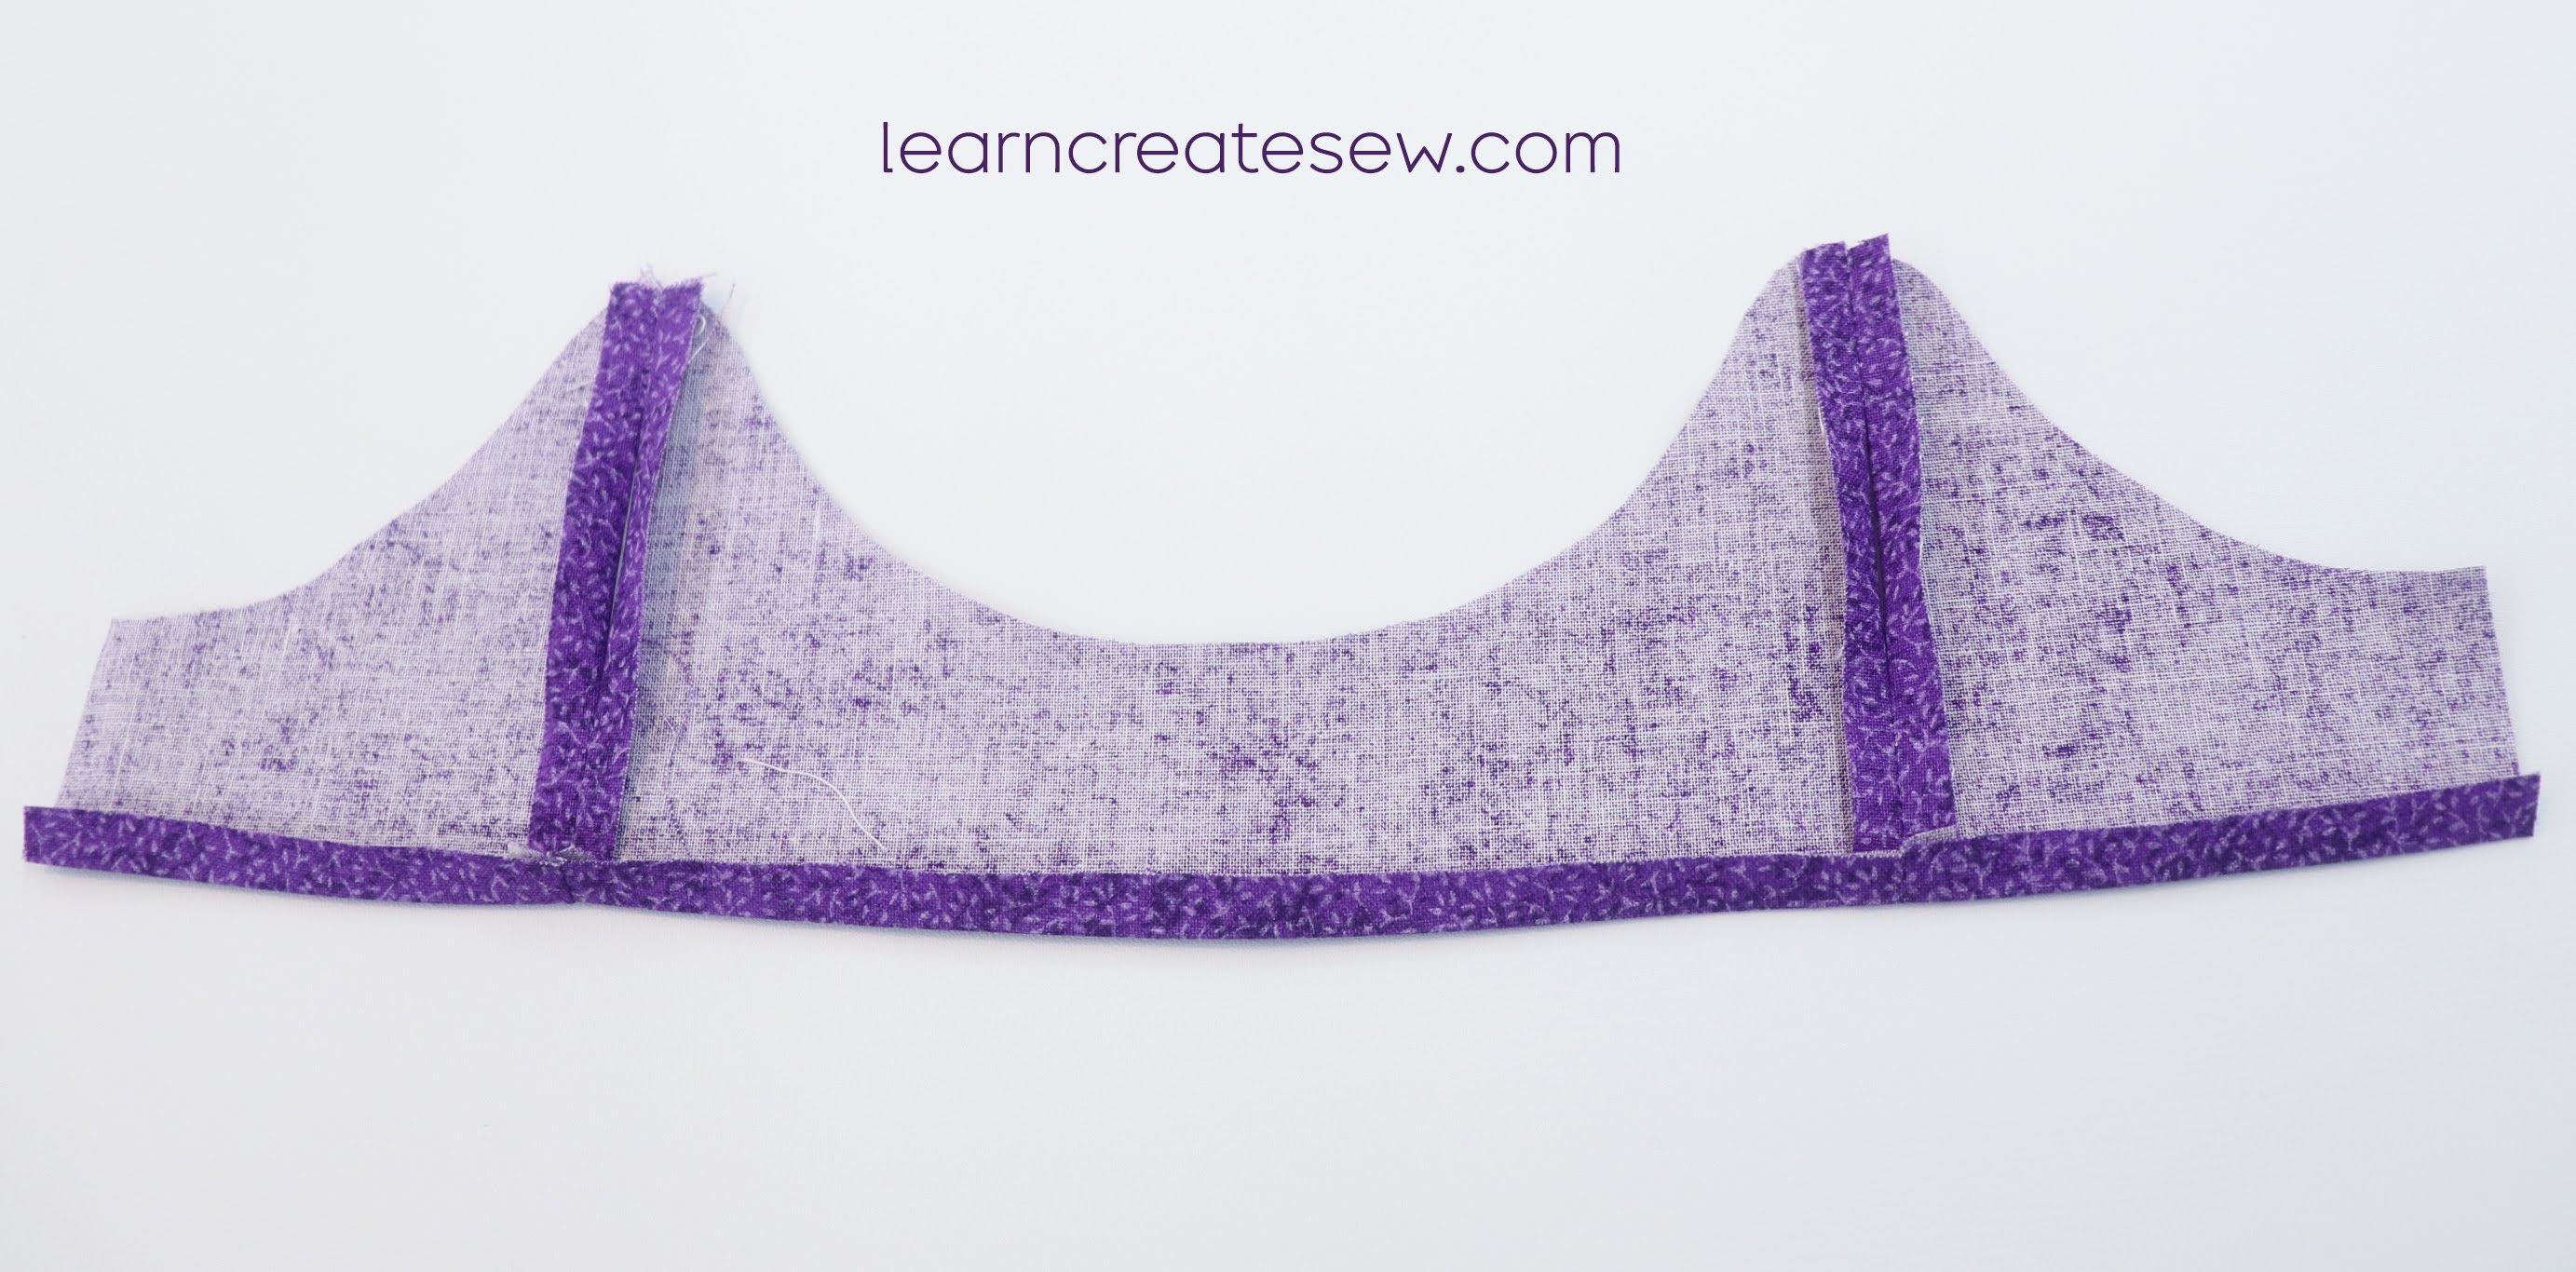
Repeat this process again for the other front and back pieces. You should end up with two identical dress bodices. Press the side seams open on both bodices.
Fold up the bottom edge of one of the bodices 3/8 inch. Press. Keep the bottom edge of the other flat.
Lay the bodice with the bottom edge flat (the one you did not press) right side up. Place the skirt right side down on top of it. Align the gathered edge of the skirt with the raw edge of the bodice. Let the bodice extend an extra 1/4 inch on each side beyond the skirt. Stitch the skirt in place along the gathered edge with a 1/2 inch seam allowance.
Flip the skirt down and press the seam allowance toward the bodice.
Place the dress right side up. (You can disregard the topstitching shown on the bodice in the photo. It’s not necessary in this step. We will get to that later.)
Lay the other bodice, the one with the folded bottom edge, right side down on top of the dress. Align seams and edges of the bodice pieces. Make sure the seams are open and flat. Sew all of the way around the edge of the bodice with a 1/4 inch seam allowance, everywhere except the bottom edge where the skirt is attached, that will stay open. (None of your stitches should be on the skirt section. Only the bodice fabric is being stitched.)
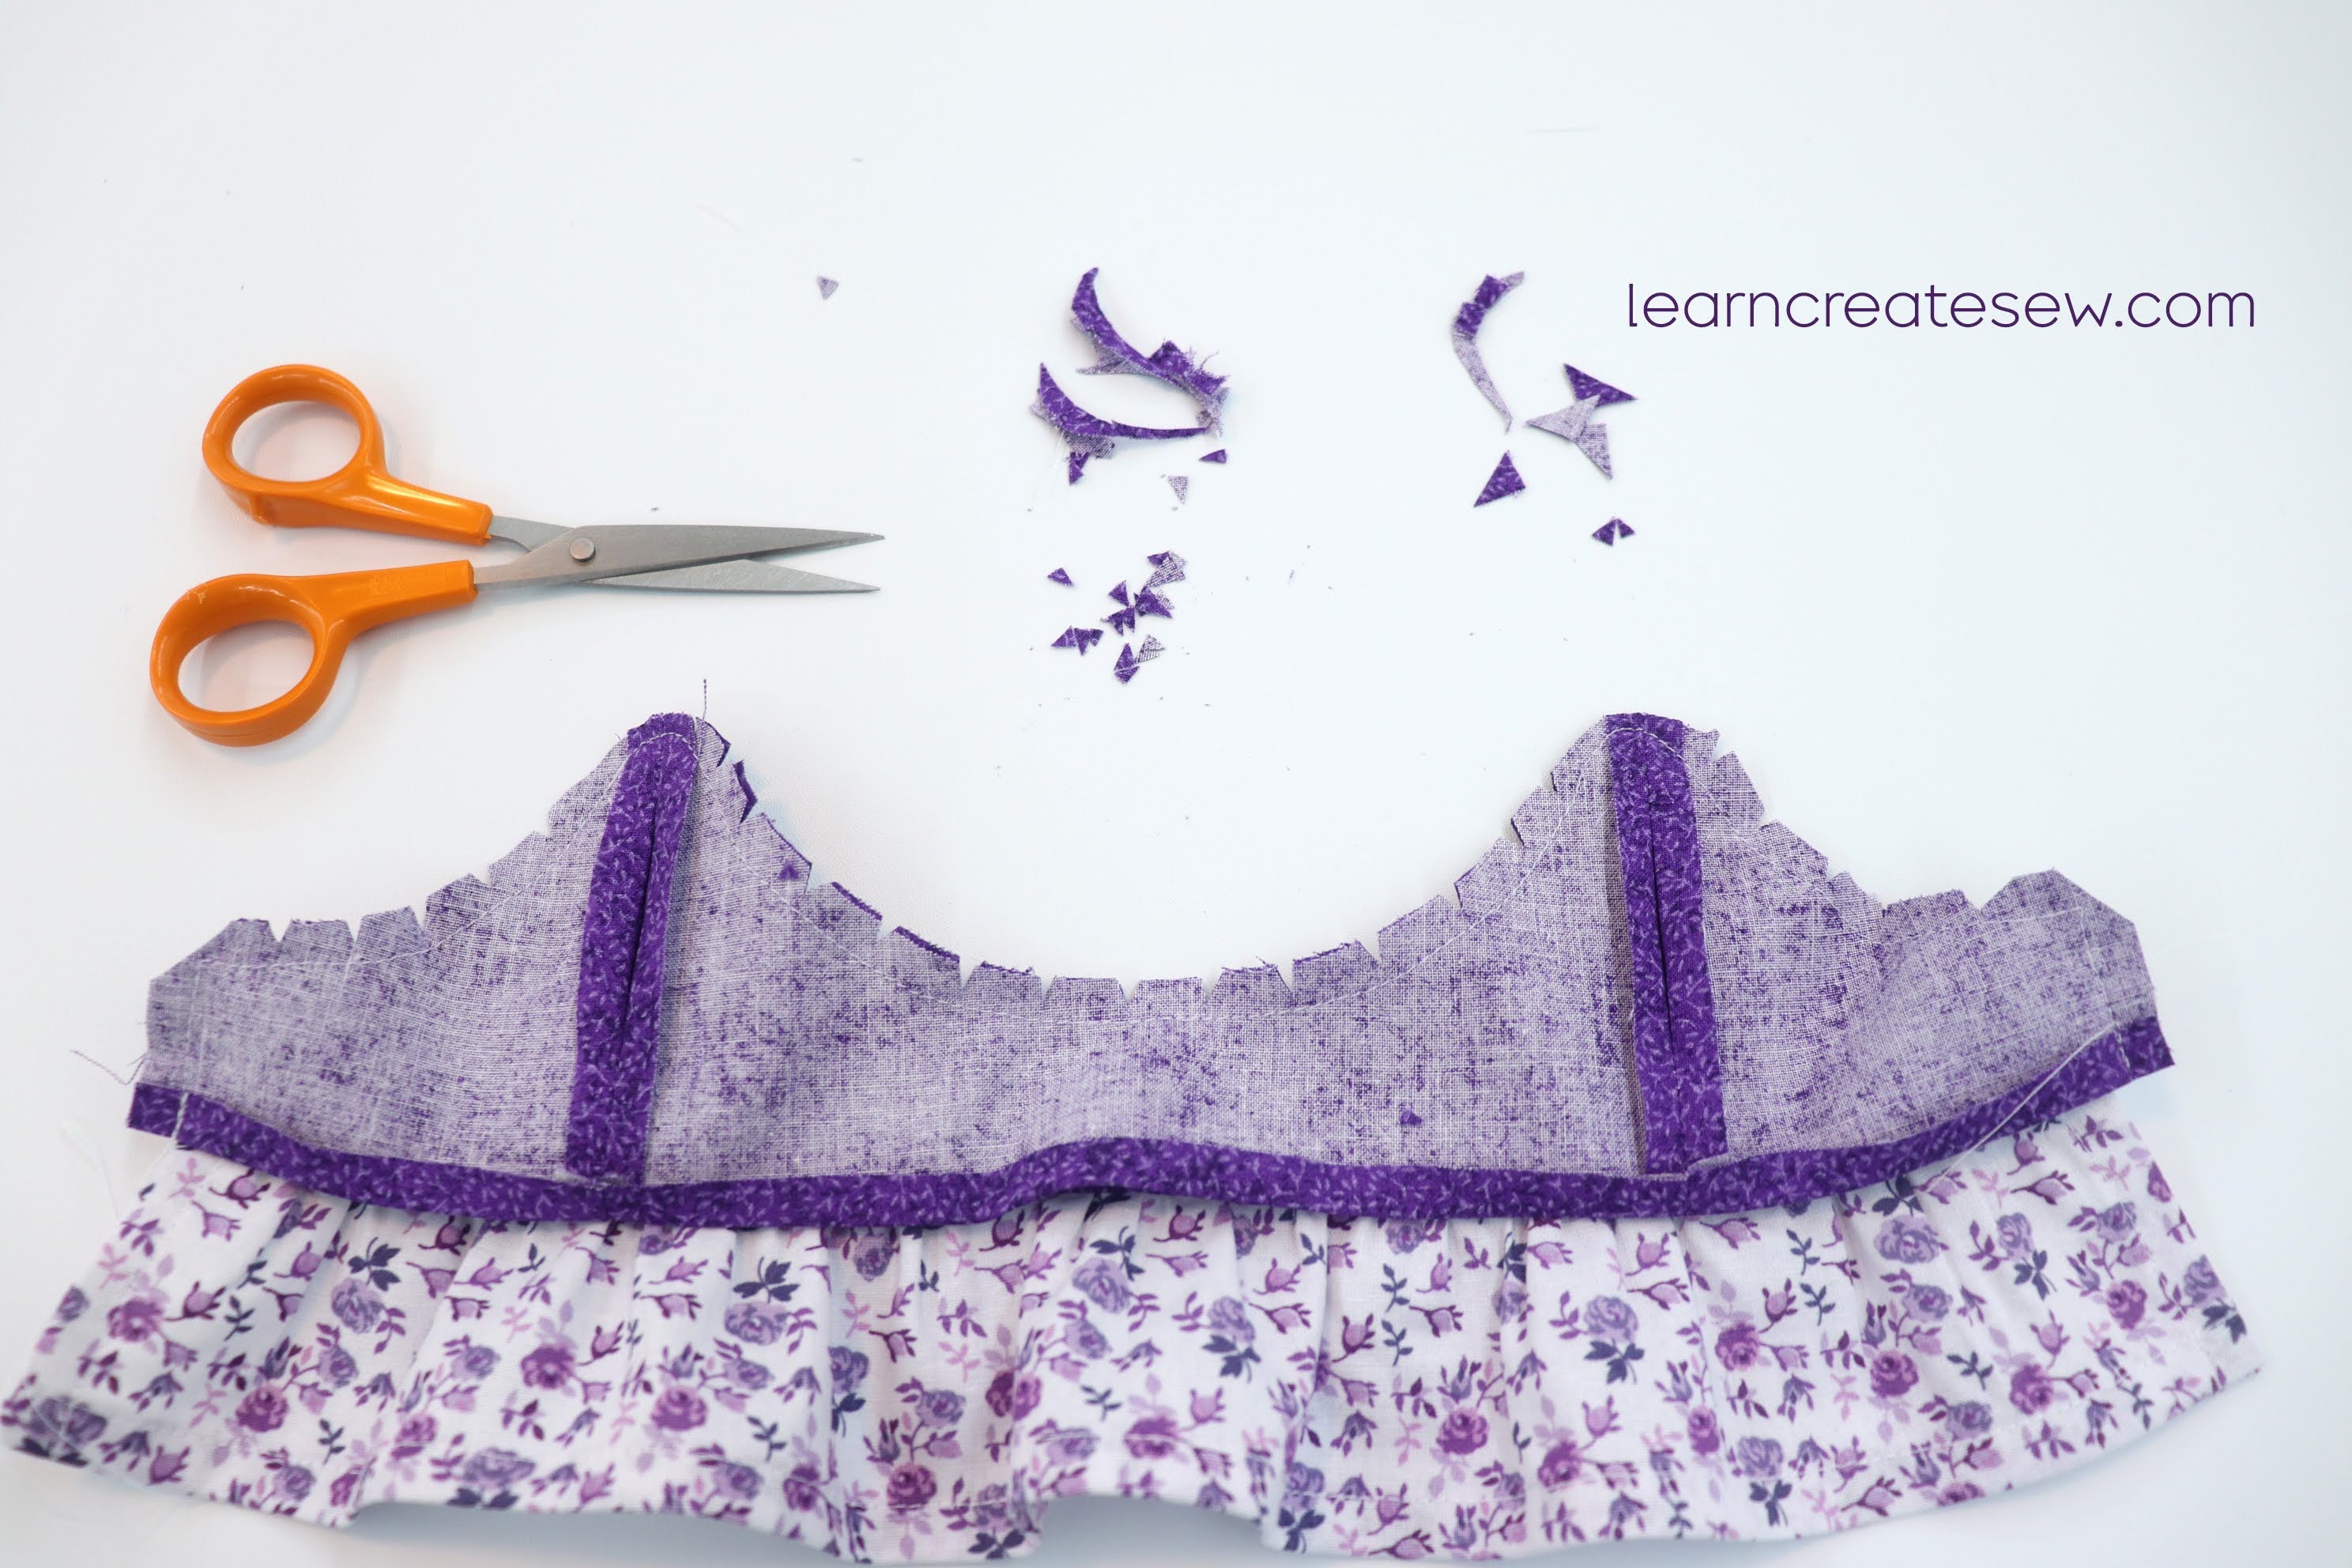
Clip the curves and corners.
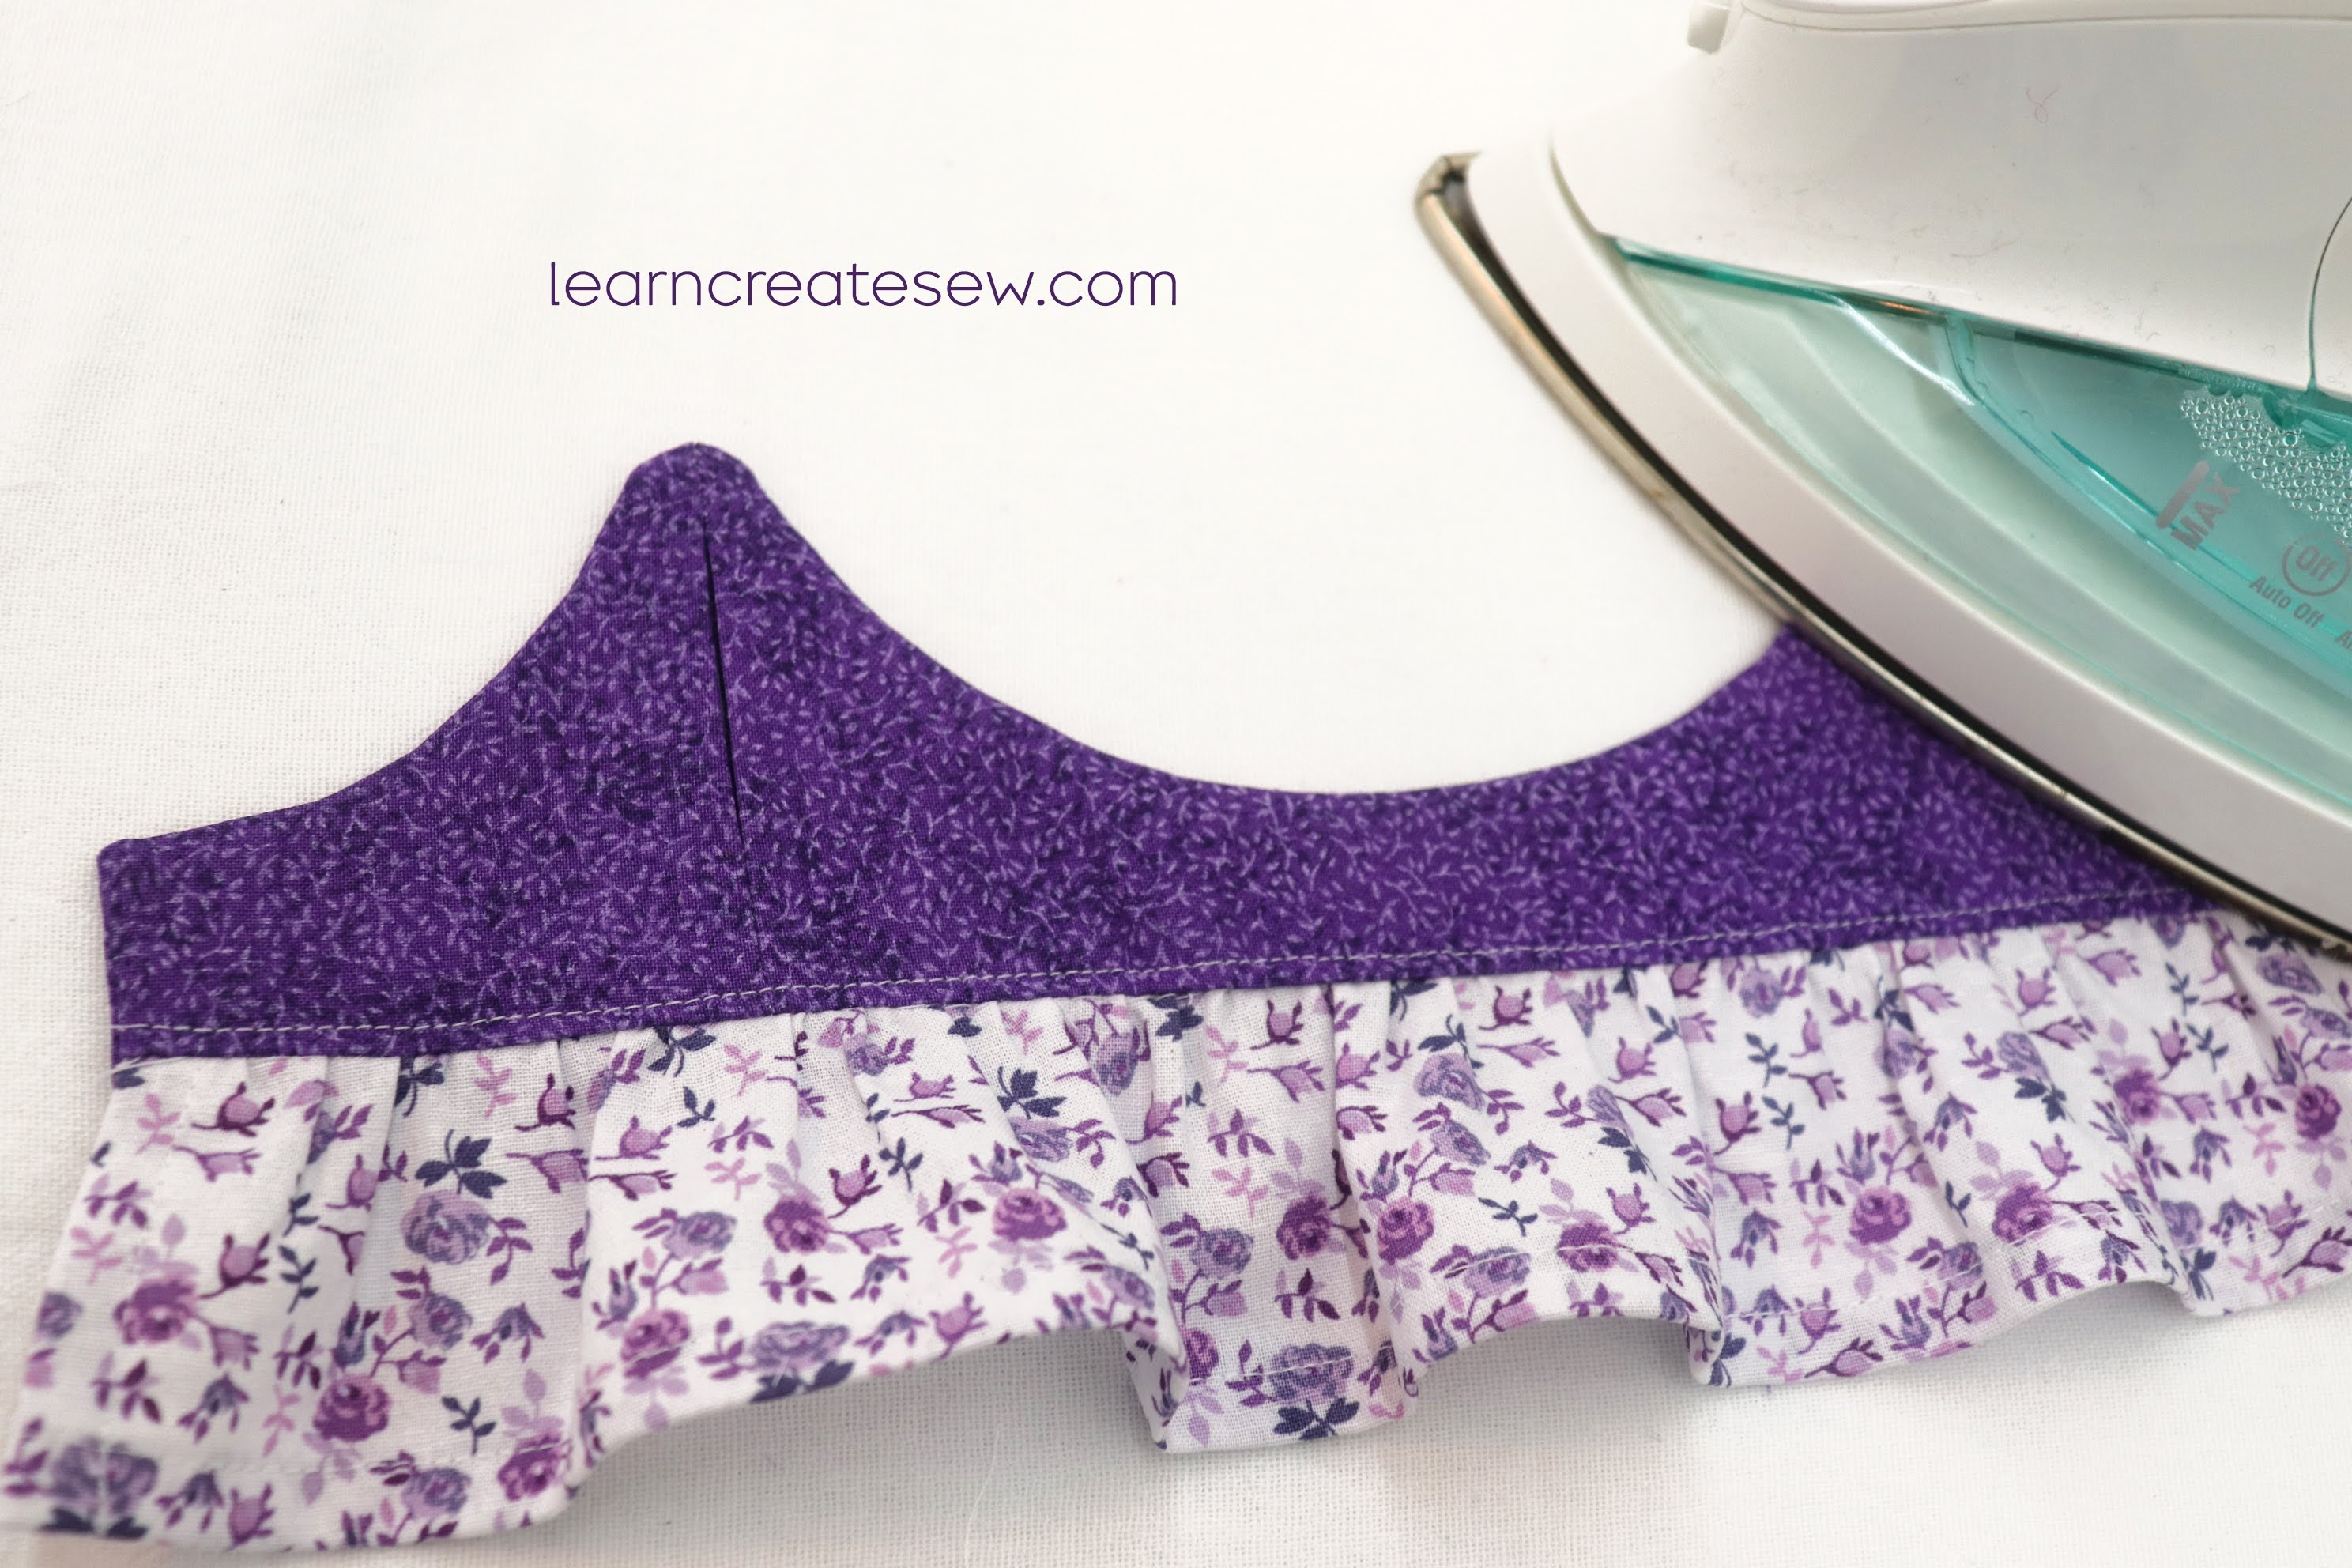
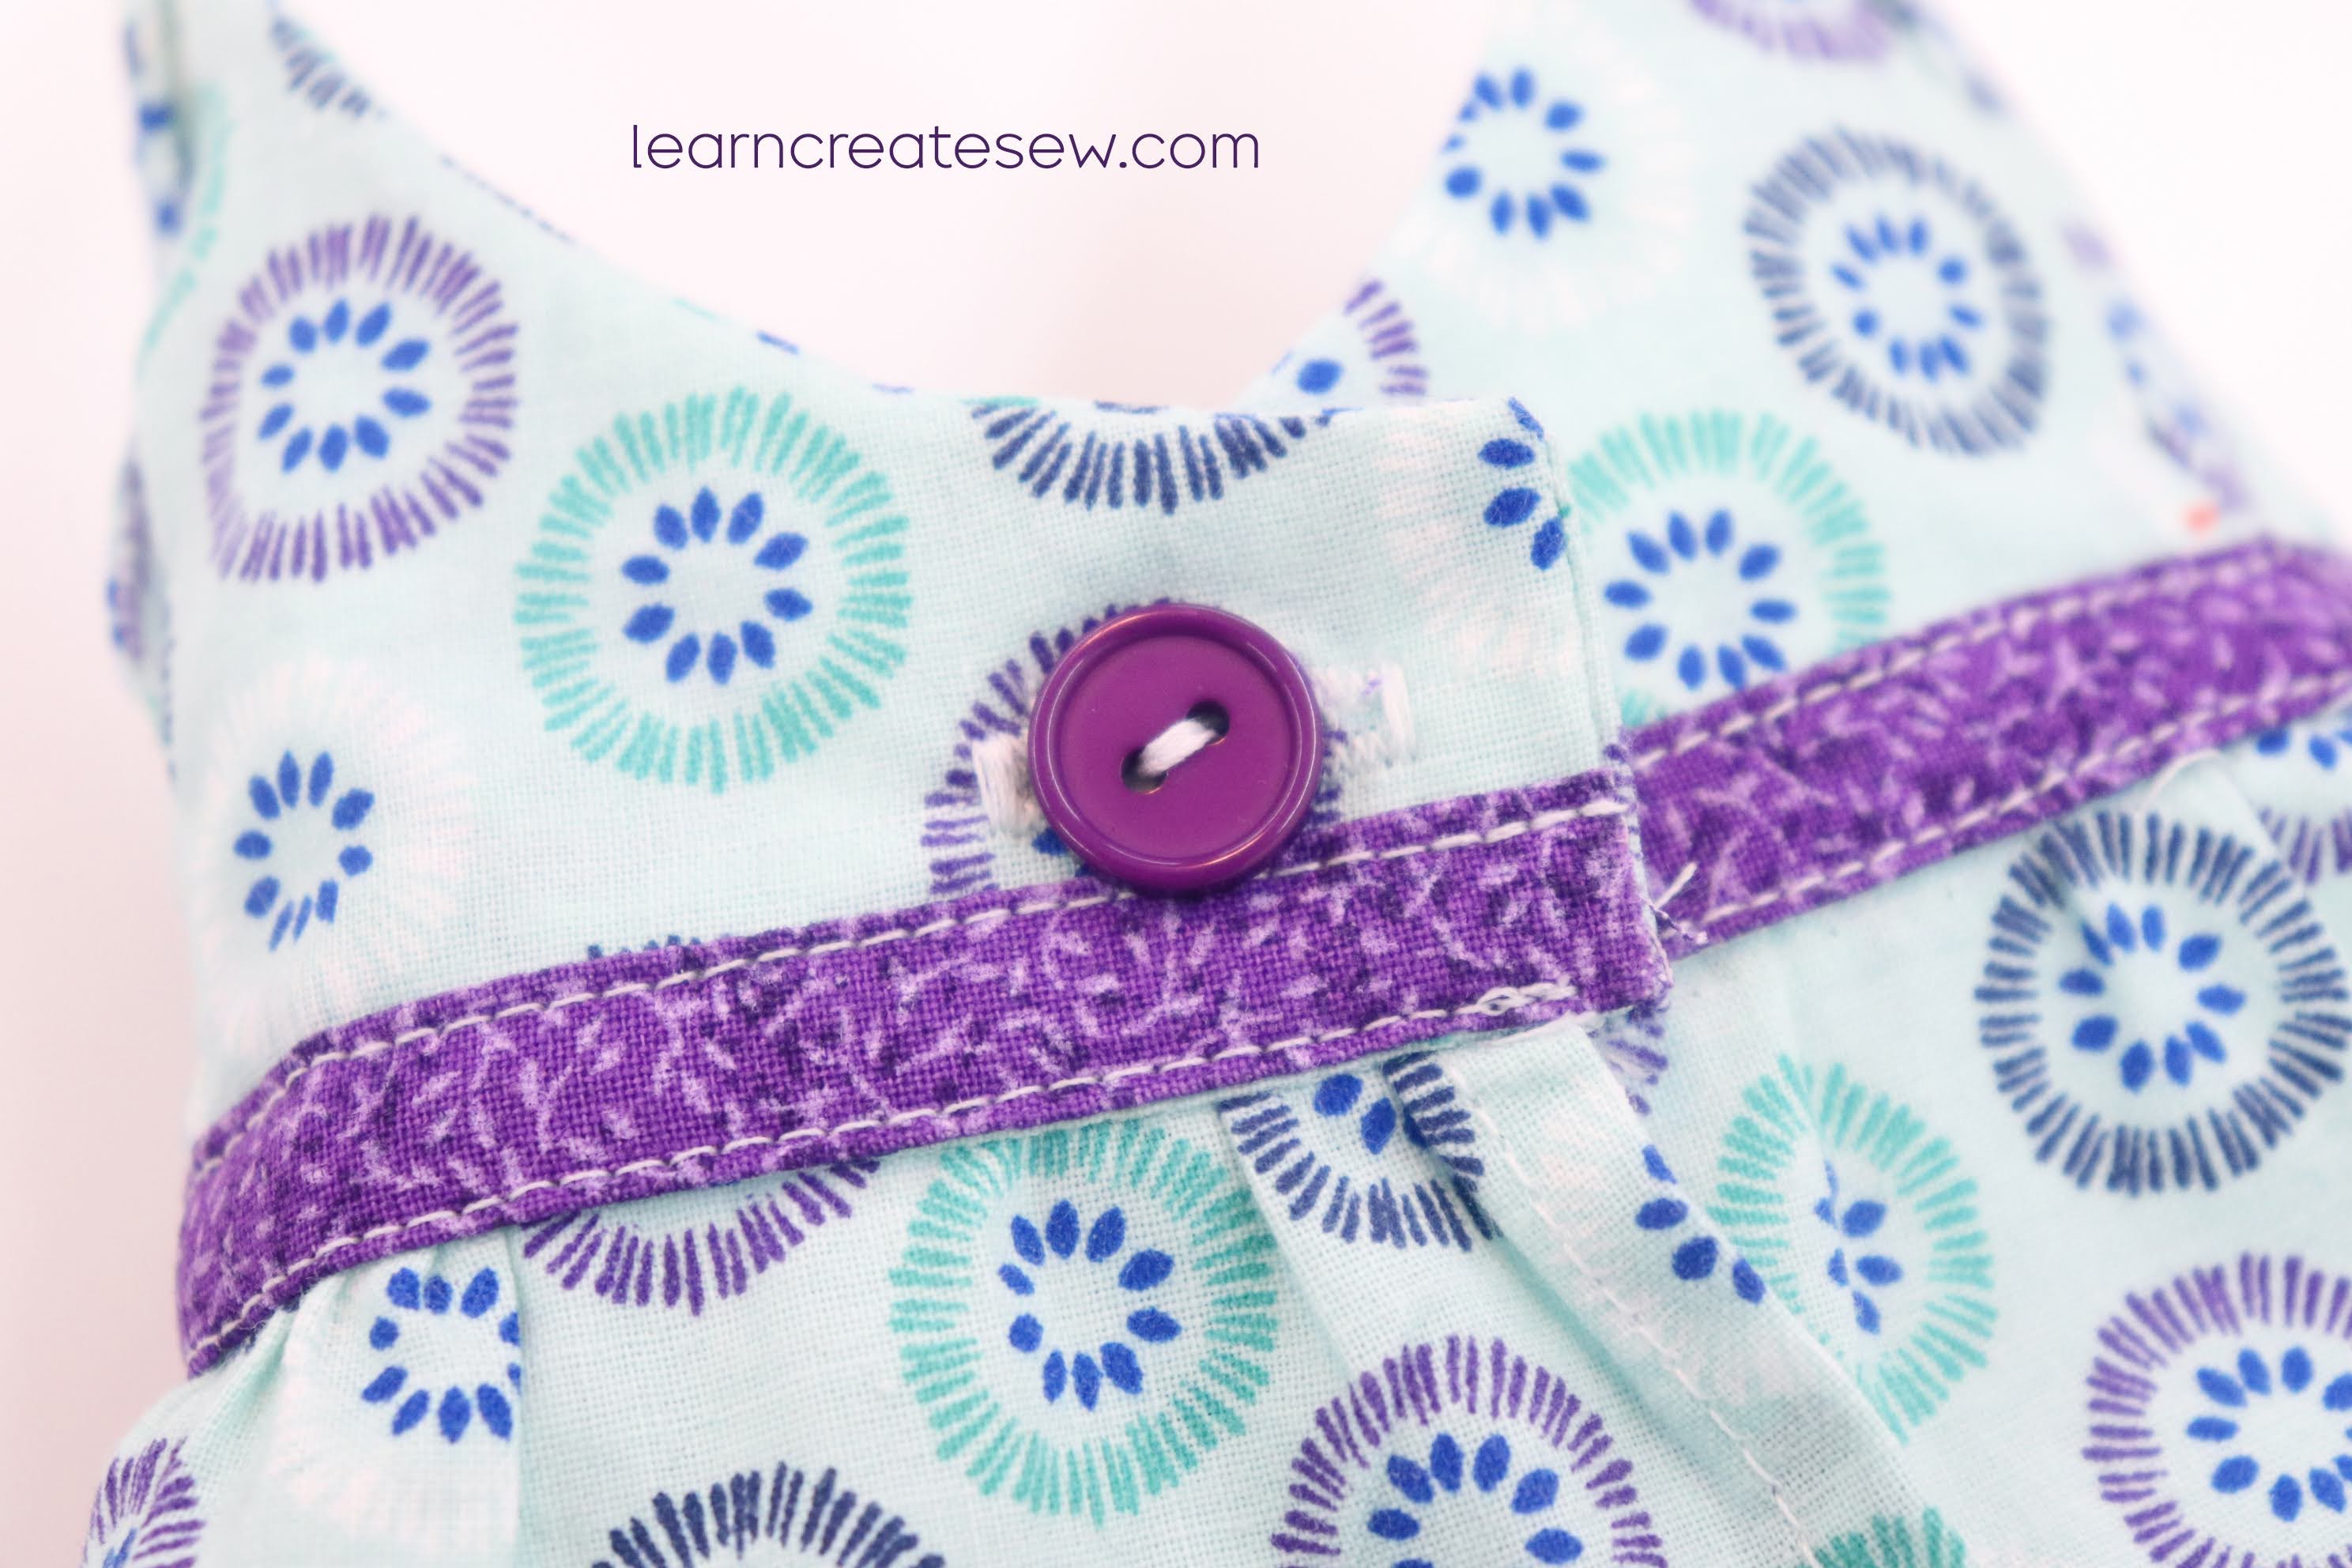
Flip the bodice right side out and press. Carefully align the bottom edge of the folded bodice so it covers the gathers and hides the seam allowance on the inside. The folded bodice edge should extend about 1/8 inch below the stitch line of the skirt. Flip it over. Pin in place as needed. From the front side, topstitch along the bottom of the bodice edge (more detailed photos below) and then press again. The skirt will now be sandwiched between the two bodice layers.
I usually topstitch with a 1/8 inch seam allowance.
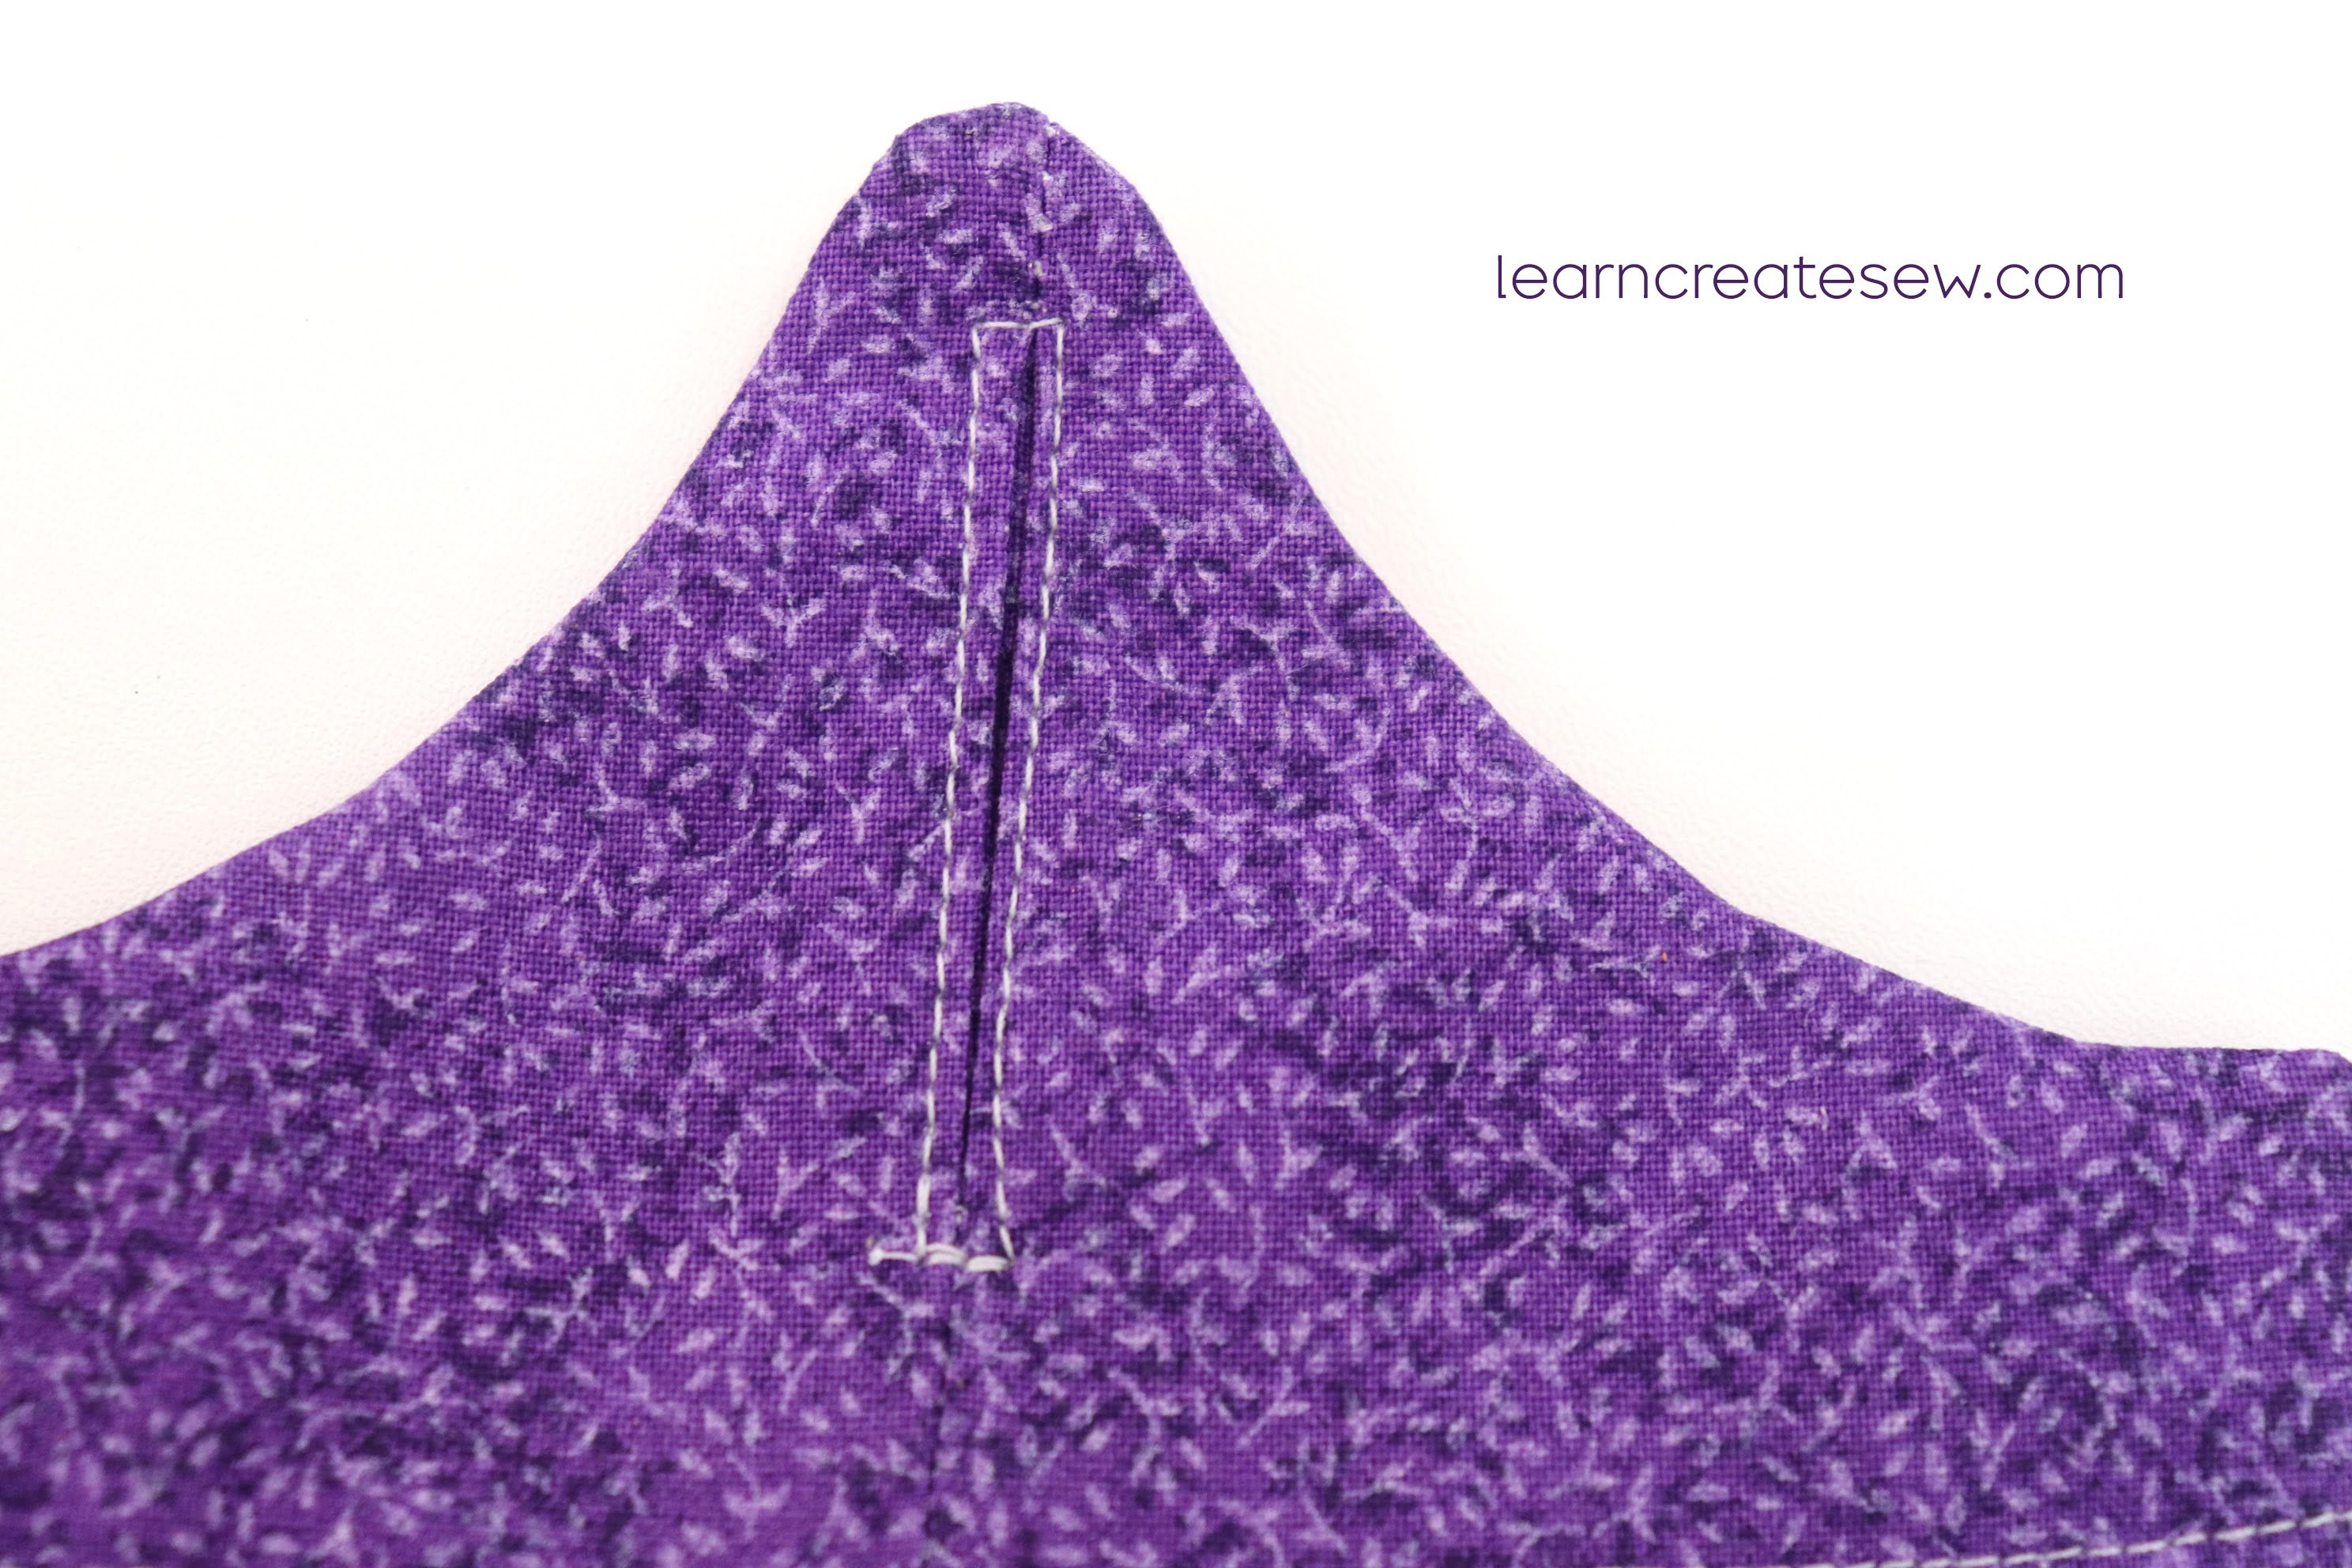
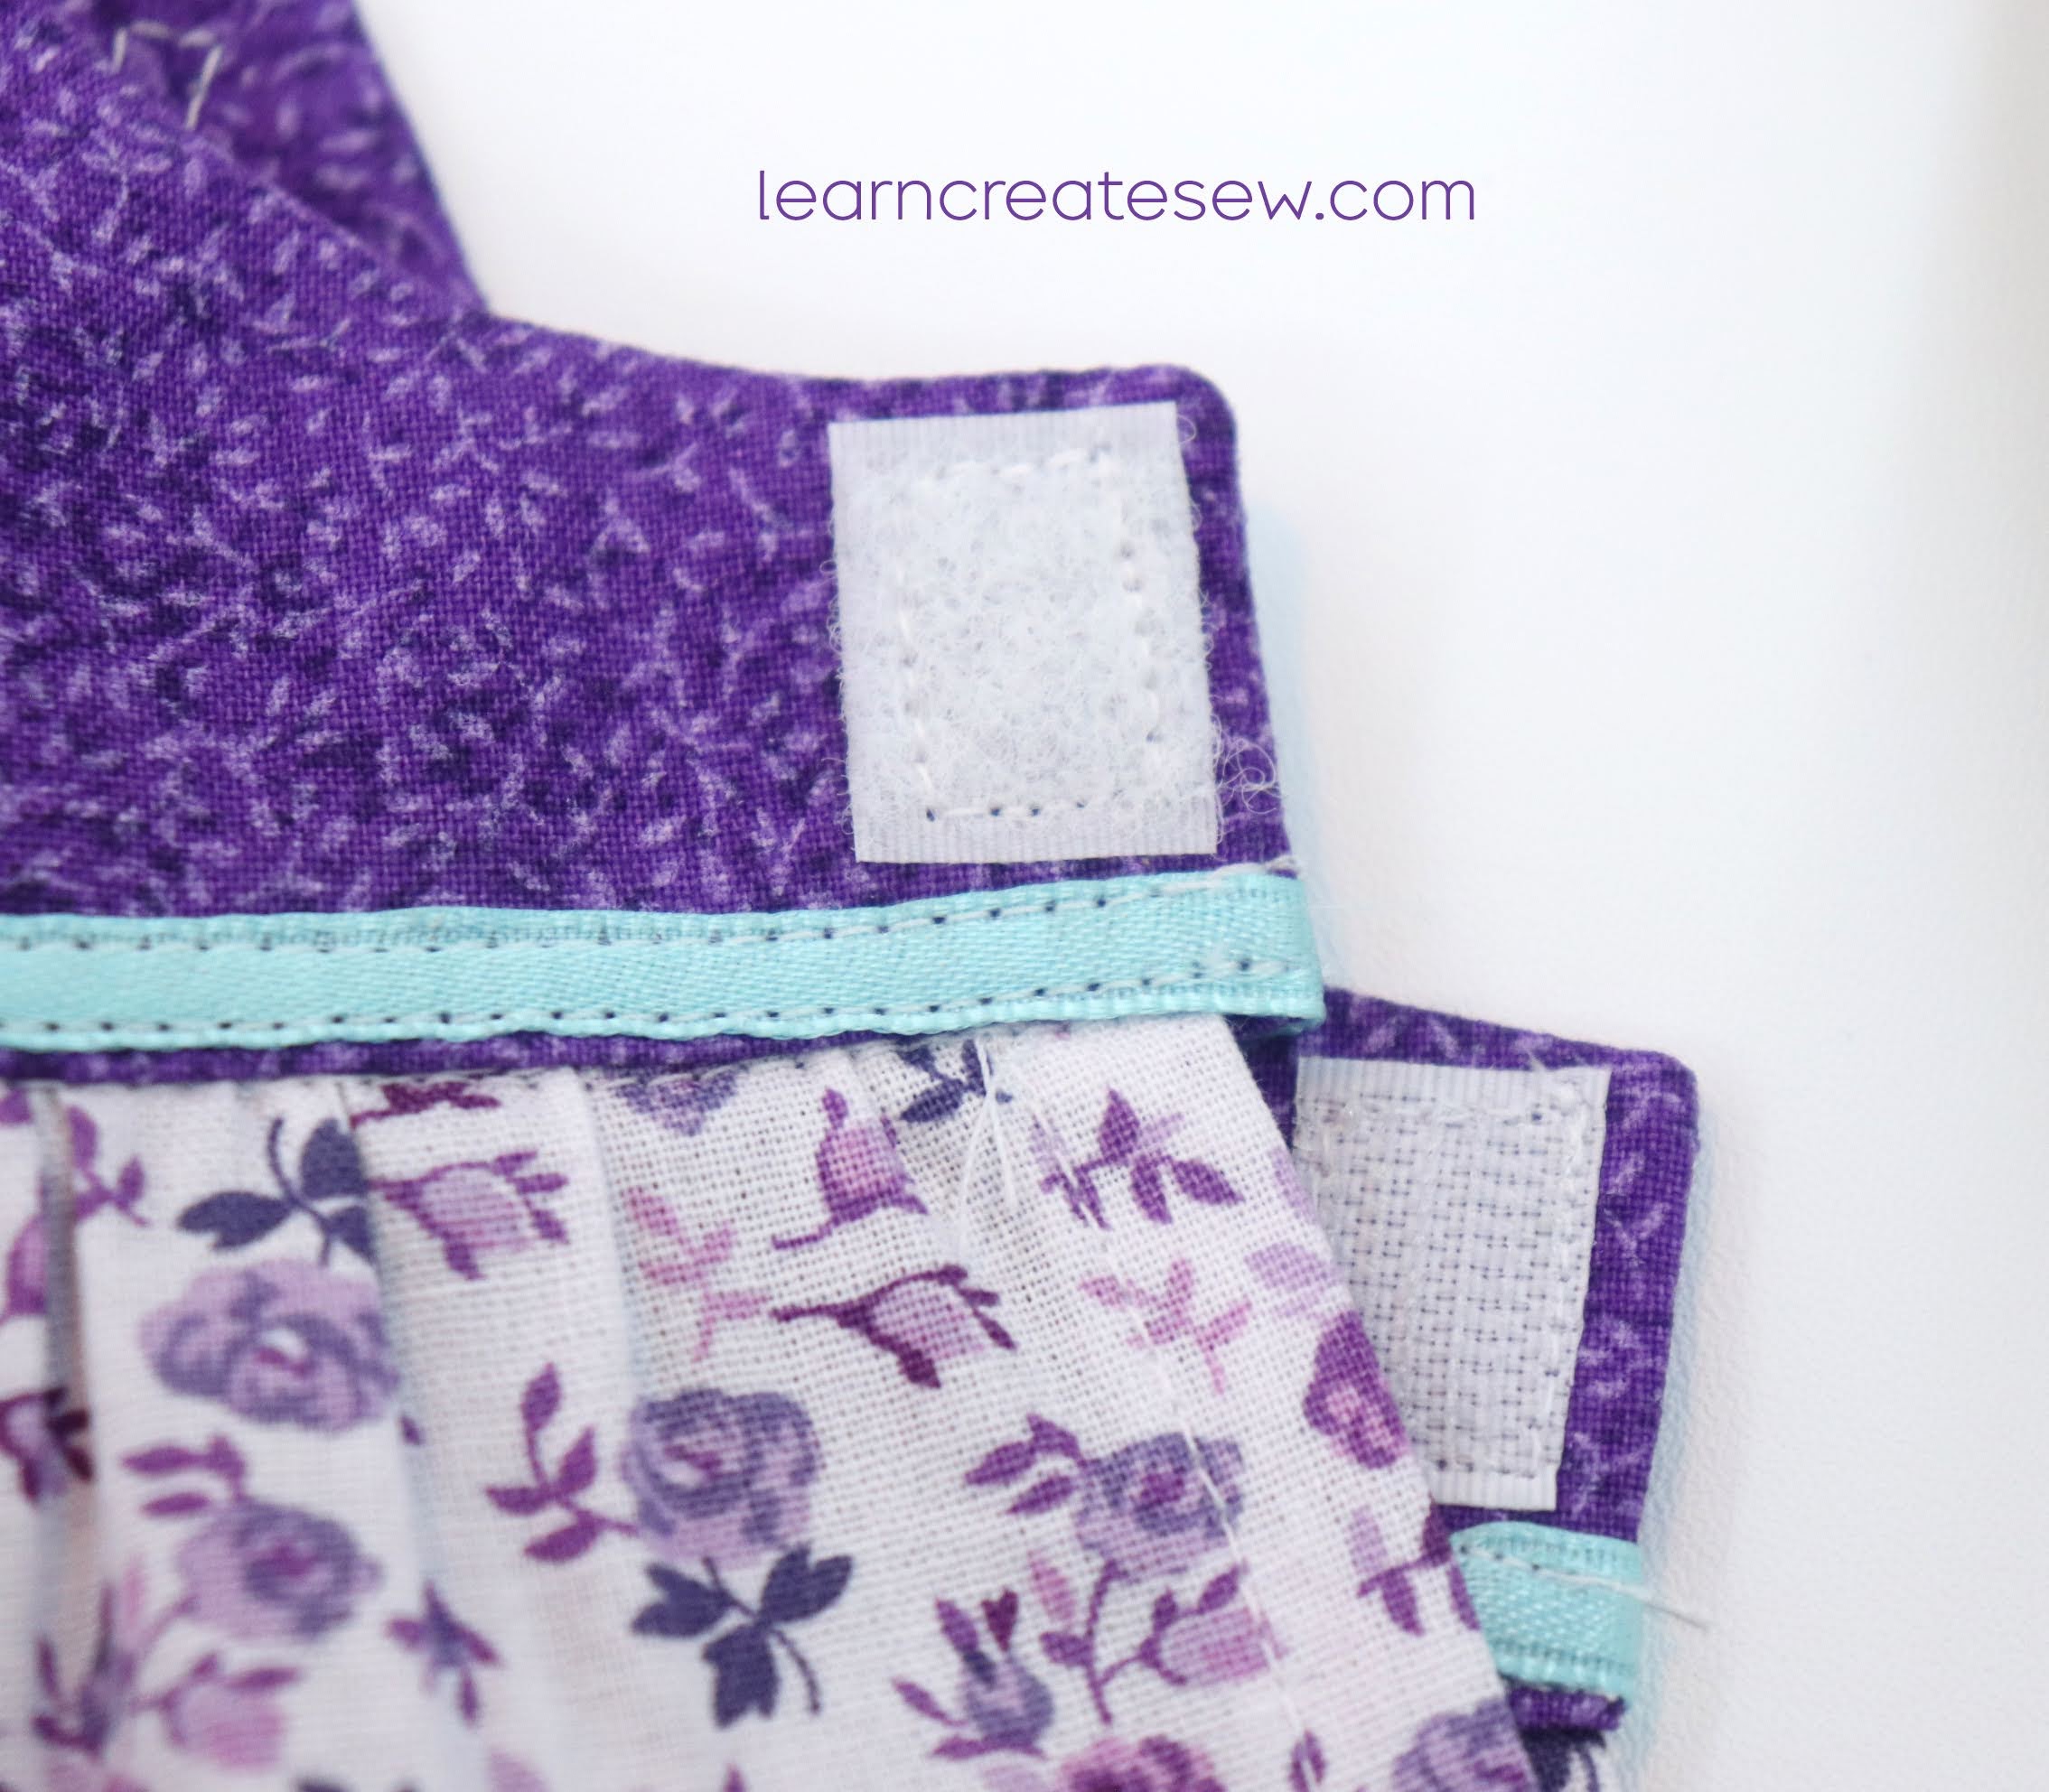
Notice there is an opening for the arm hole.
Topstitch around the slit with a 1/8 inch seam allowance.
Add decorative ribbon, buttons, or trim if you like.
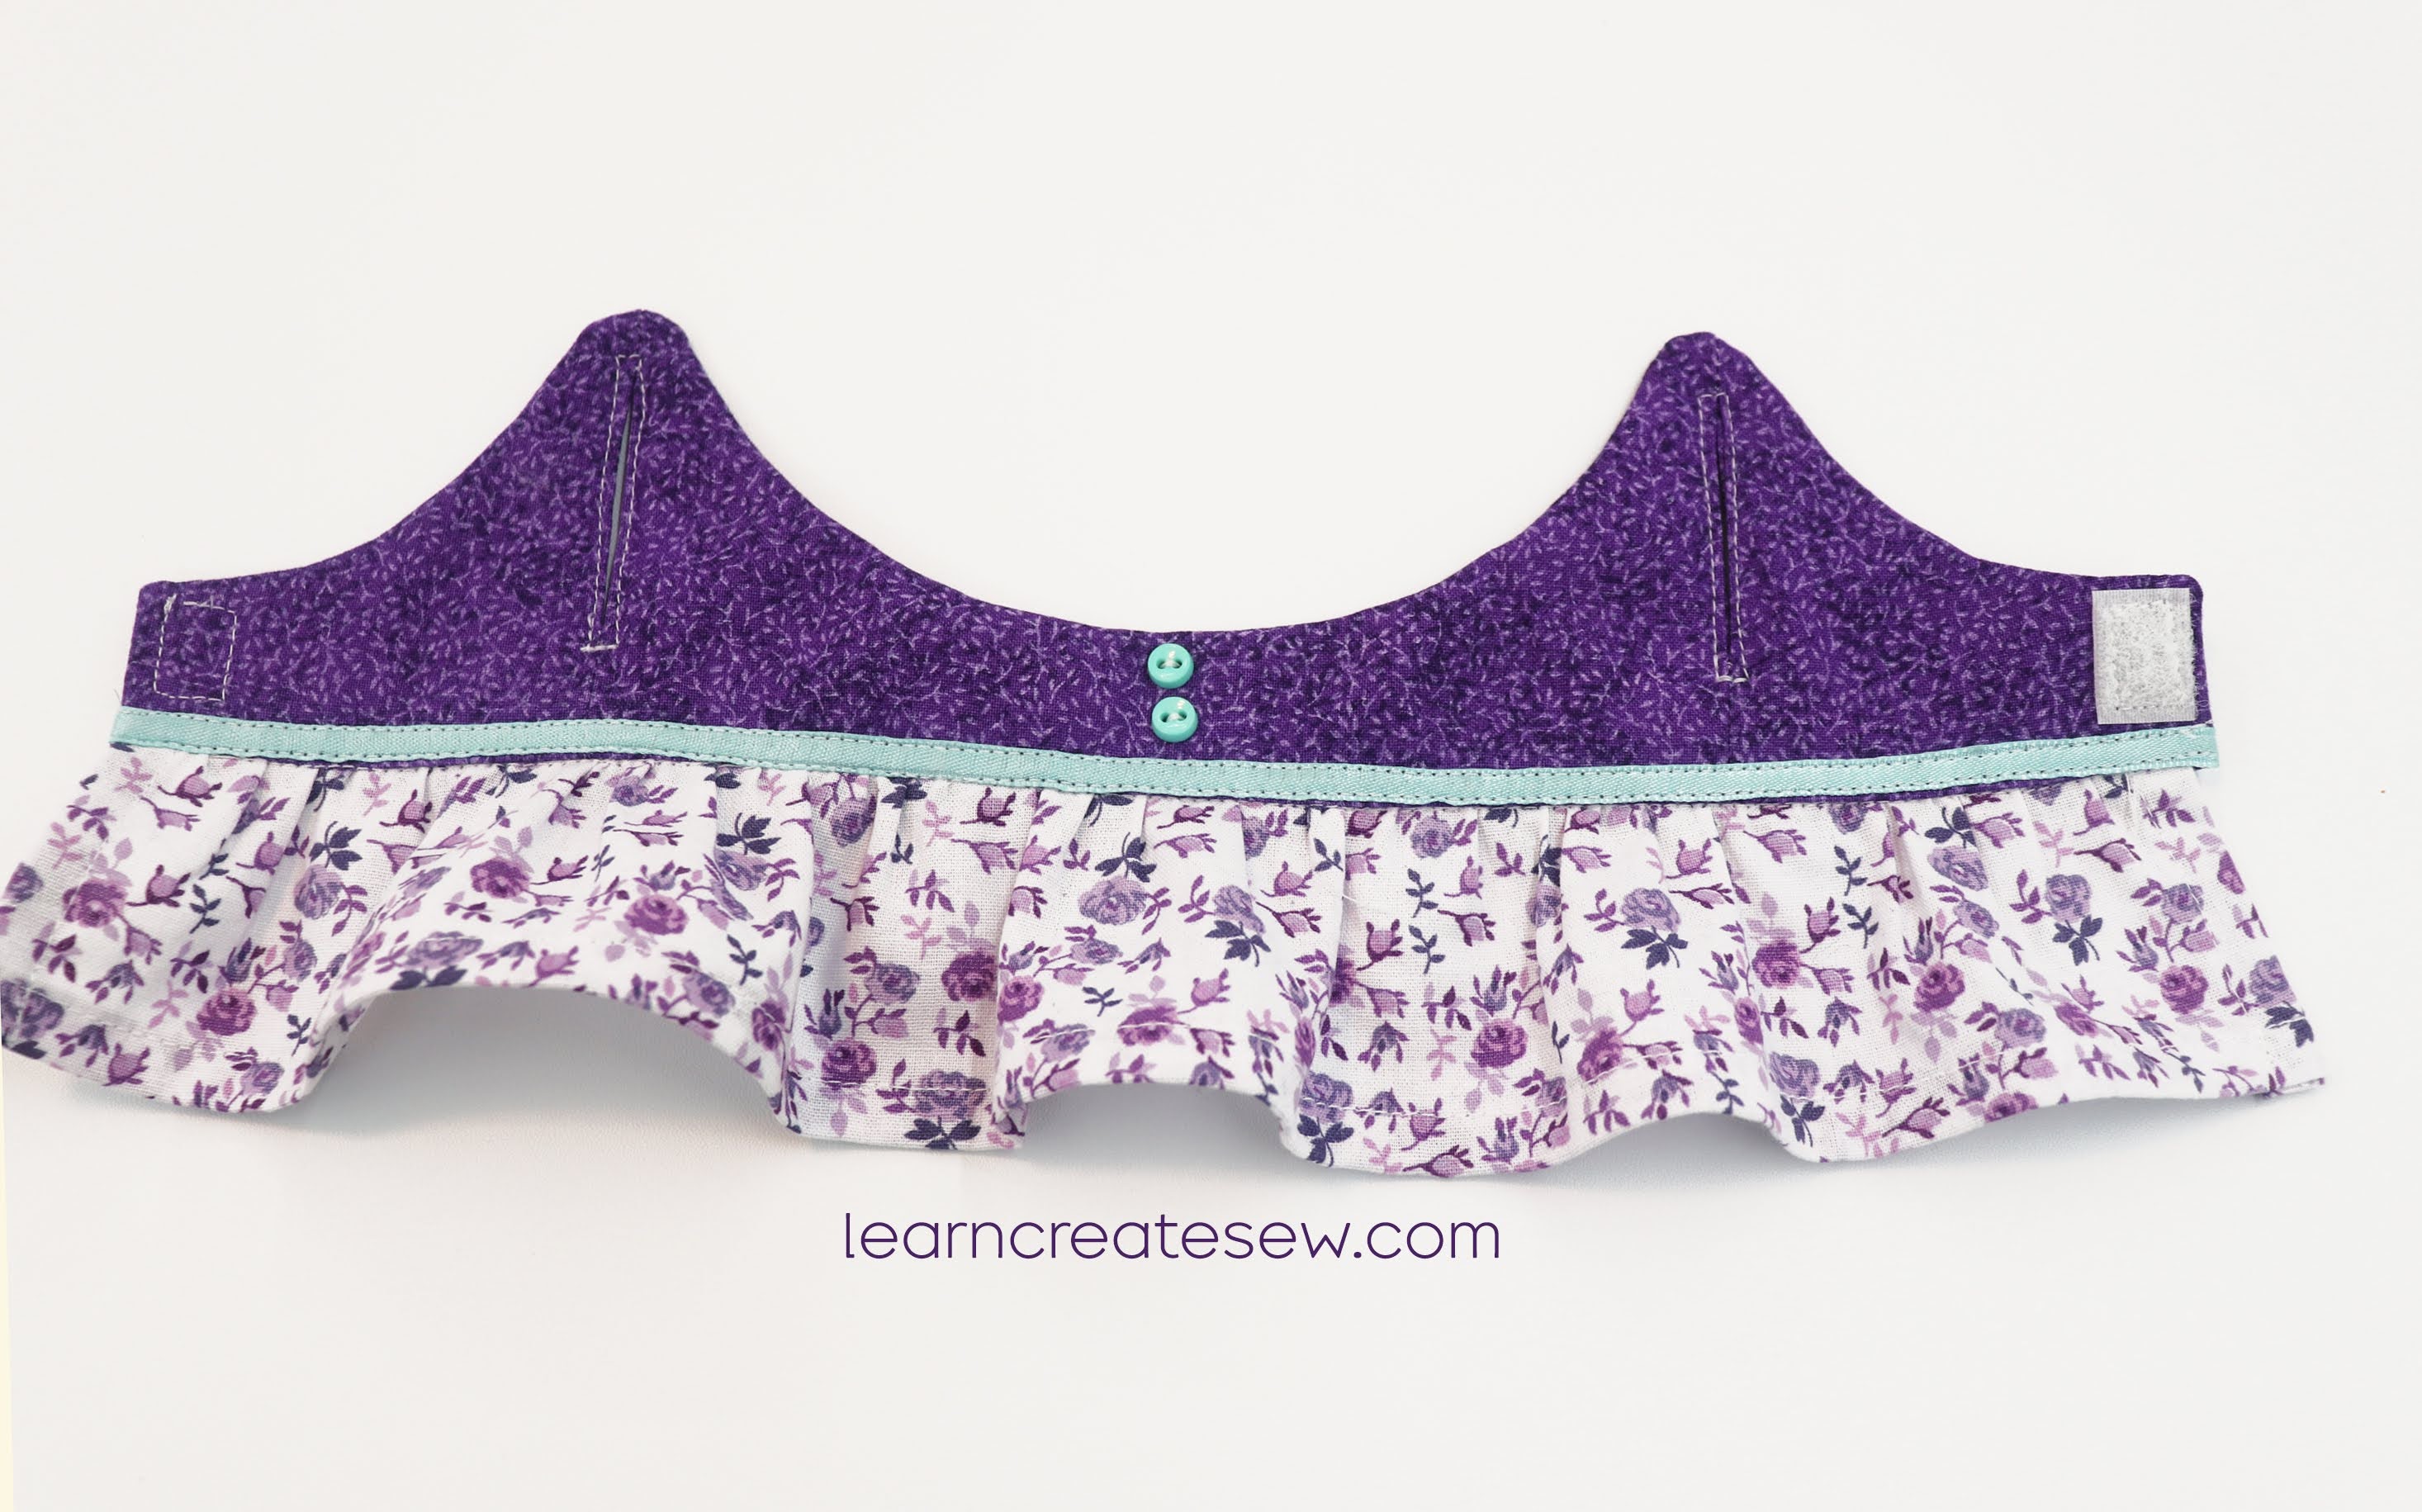
Try the dress on your sloth and then attach a closure. Velcro, buttons, and snaps all work great.
And your dress is done!
Happy Sewing!
(FYI, the shoulder seams were done differently in this picture. I still love the dress but prefer the technique described above.)
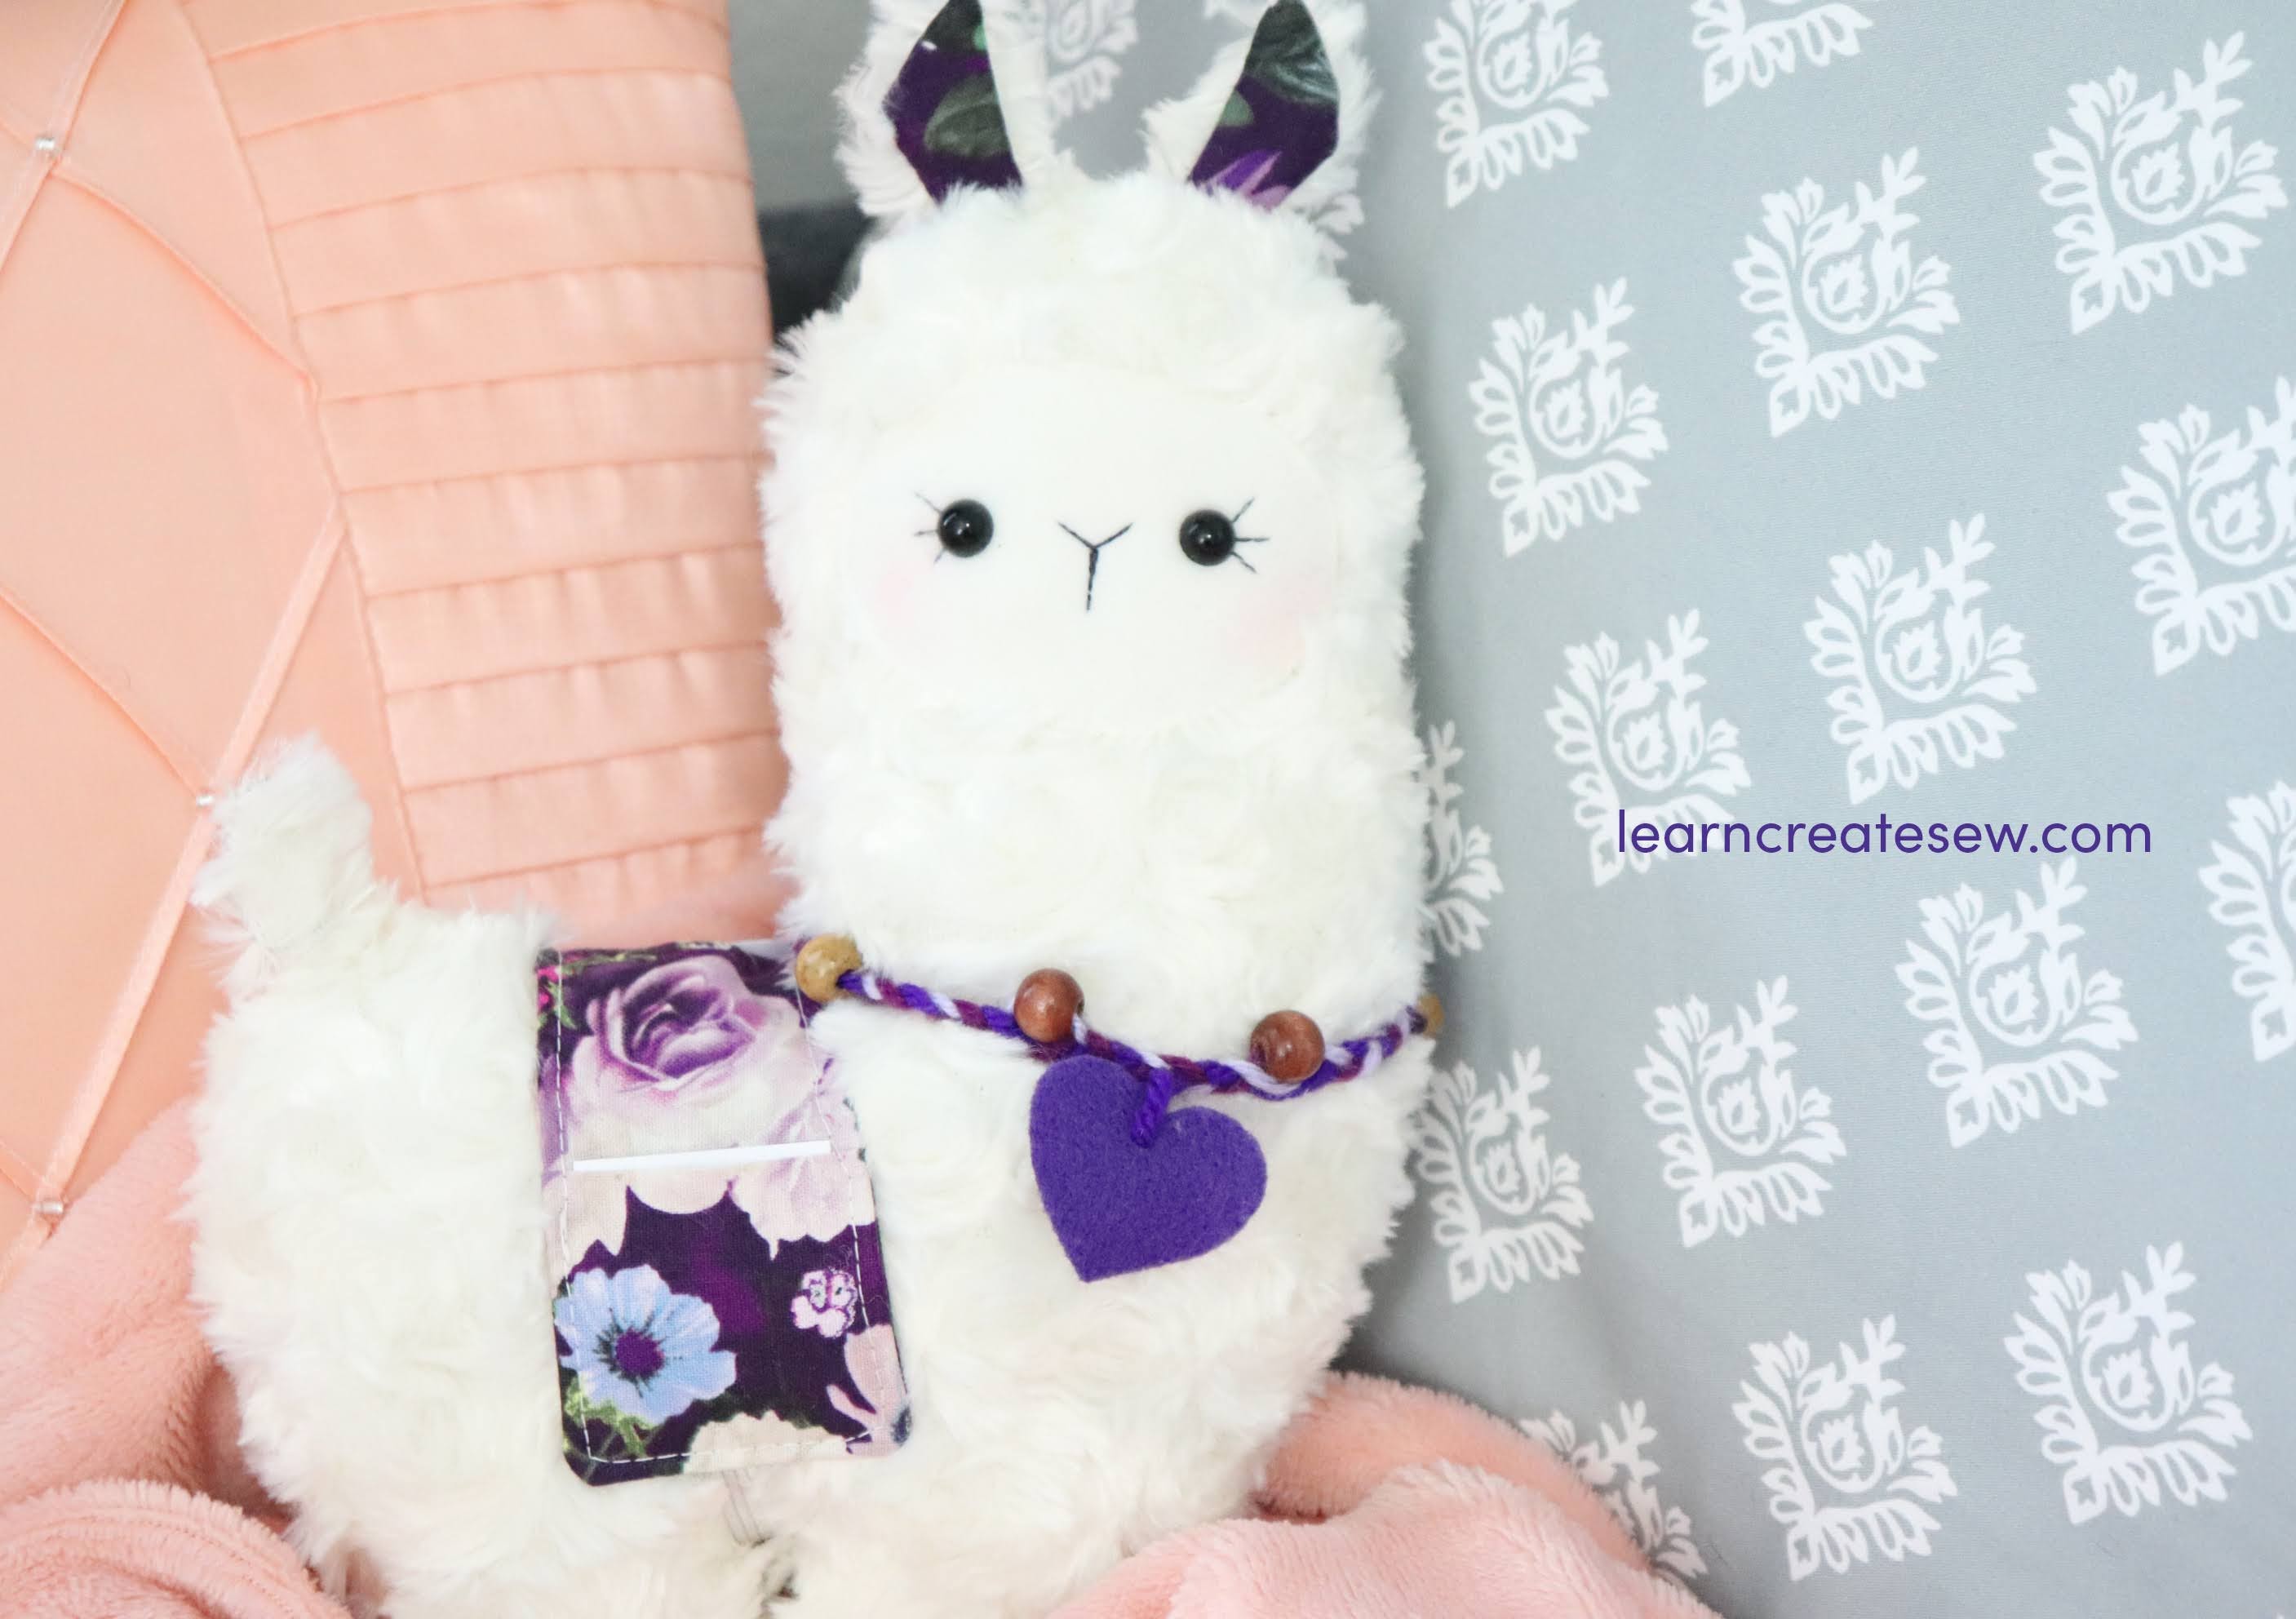
With Valentine’s Day coming up I was inspired by a cute new idea! A Lovely Little Llama Valentine!
This little llama has a blanket with two pockets that can deliver valentines for the big day 🙂
Not only would this llama be adorable for Valentine’s Day, but any holiday! Change the colors to green and red and you have Christmas. Dress it up for birthdays, Easter, or even Halloween. Changing the colors, accessories, and fabrics will completely change the feel of the project.
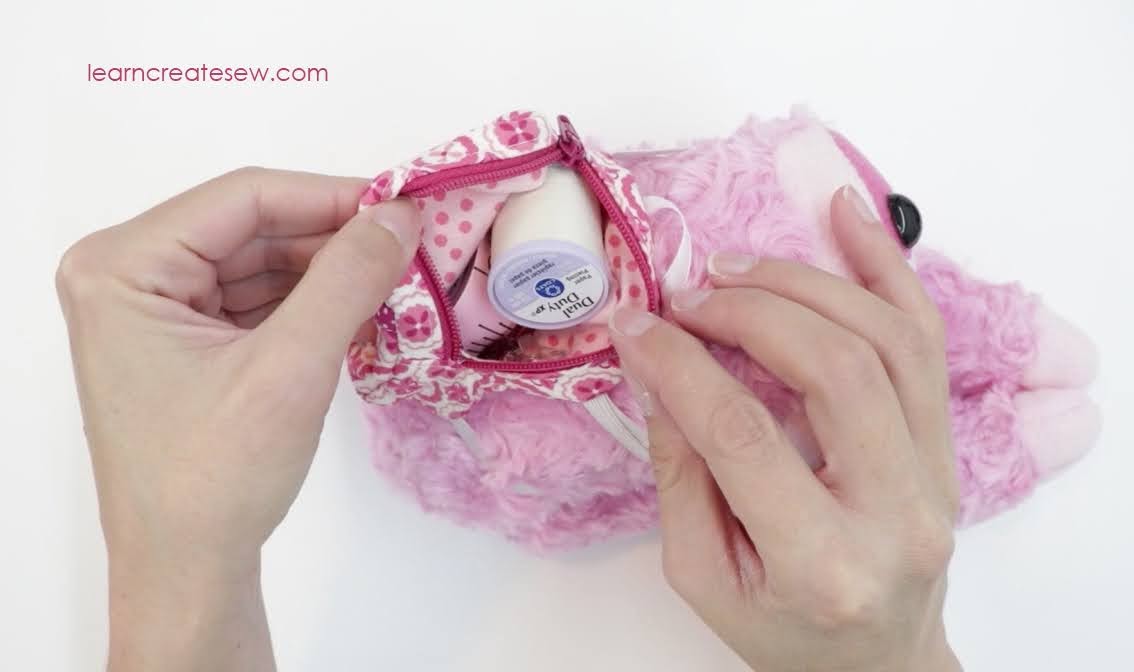
The pocket pouch is definitely my favorite part of the project, aside from the overall cuteness, of course! You can place notes, treats, and gifts in the little pockets.
The pattern is available in two sizes. The small size measures approximately 9 inches tall without the ears, and the large measures approximately 11.5 inches tall.
It is constructed with swirl fur which is great to work with and is super fluffy! It just calls out for cuddles 🙂
This project is fairly simple, but the fur does add a bit of difficulty. I would say it is about a 4/10 in terms of difficulty. You need to be comfortable using small seam allowances and sewing curves. Experience with fur or plush fabrics is also helpful.
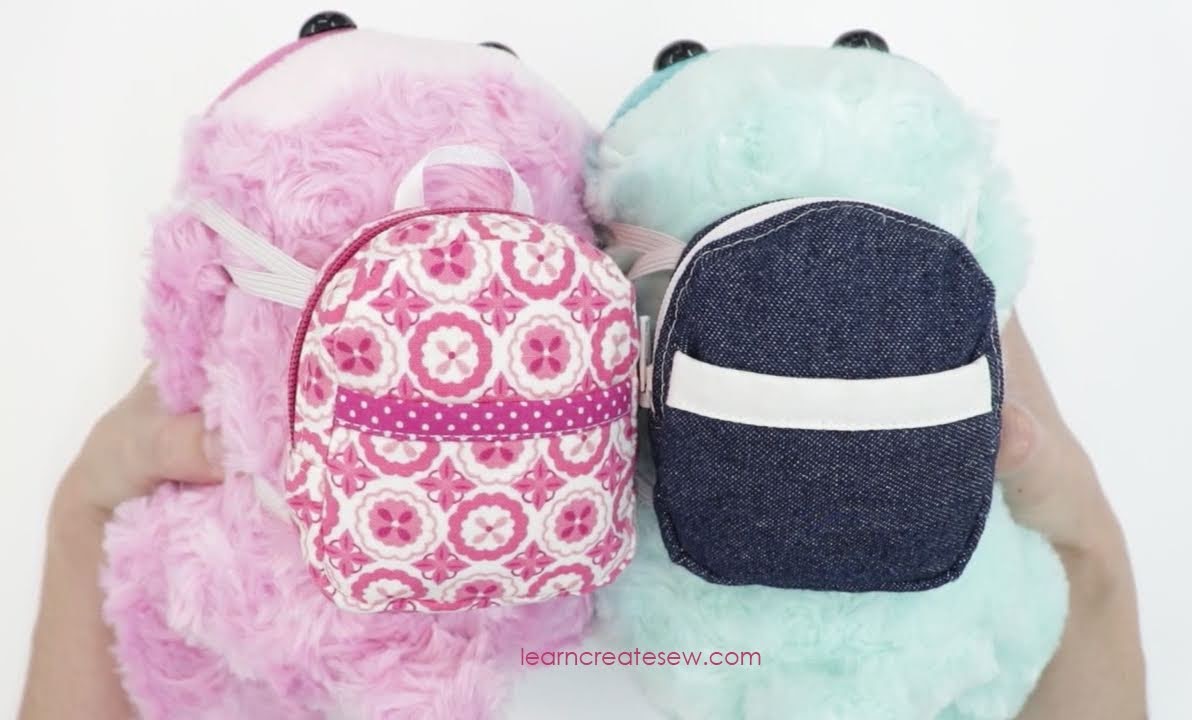
When I made the sloth plush project I always intended for there to be accessories to go with it. So, here is the first!
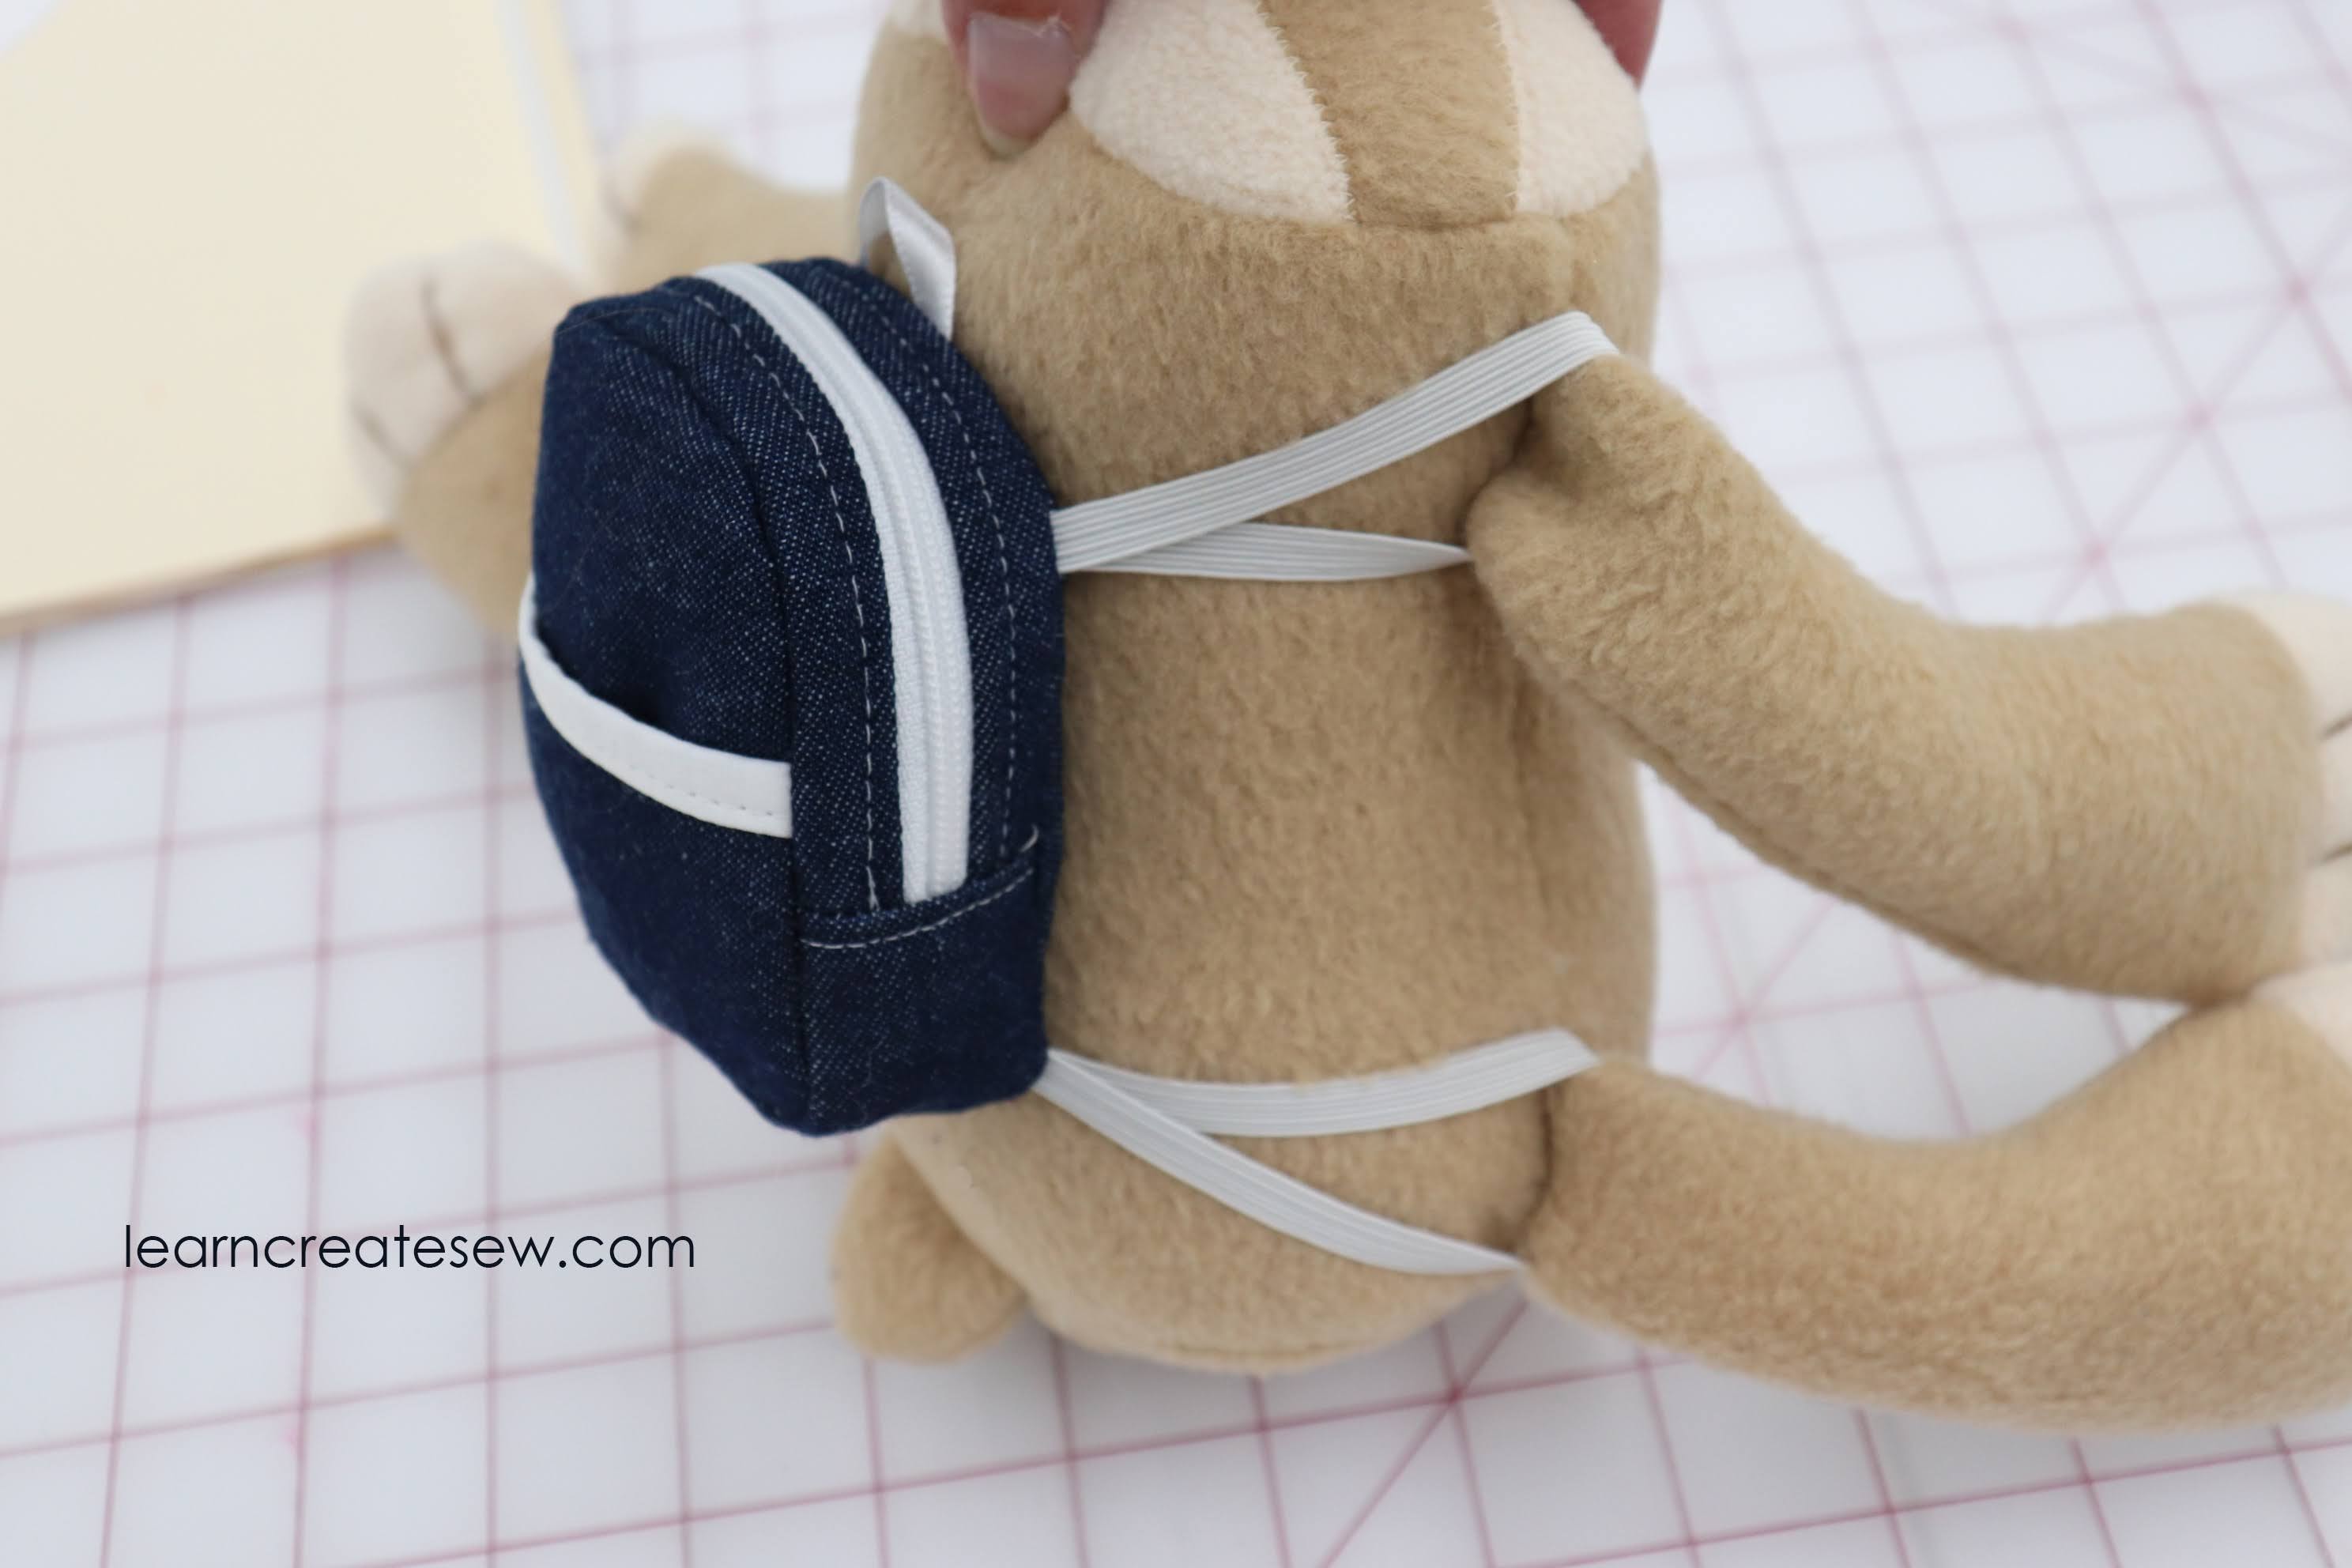
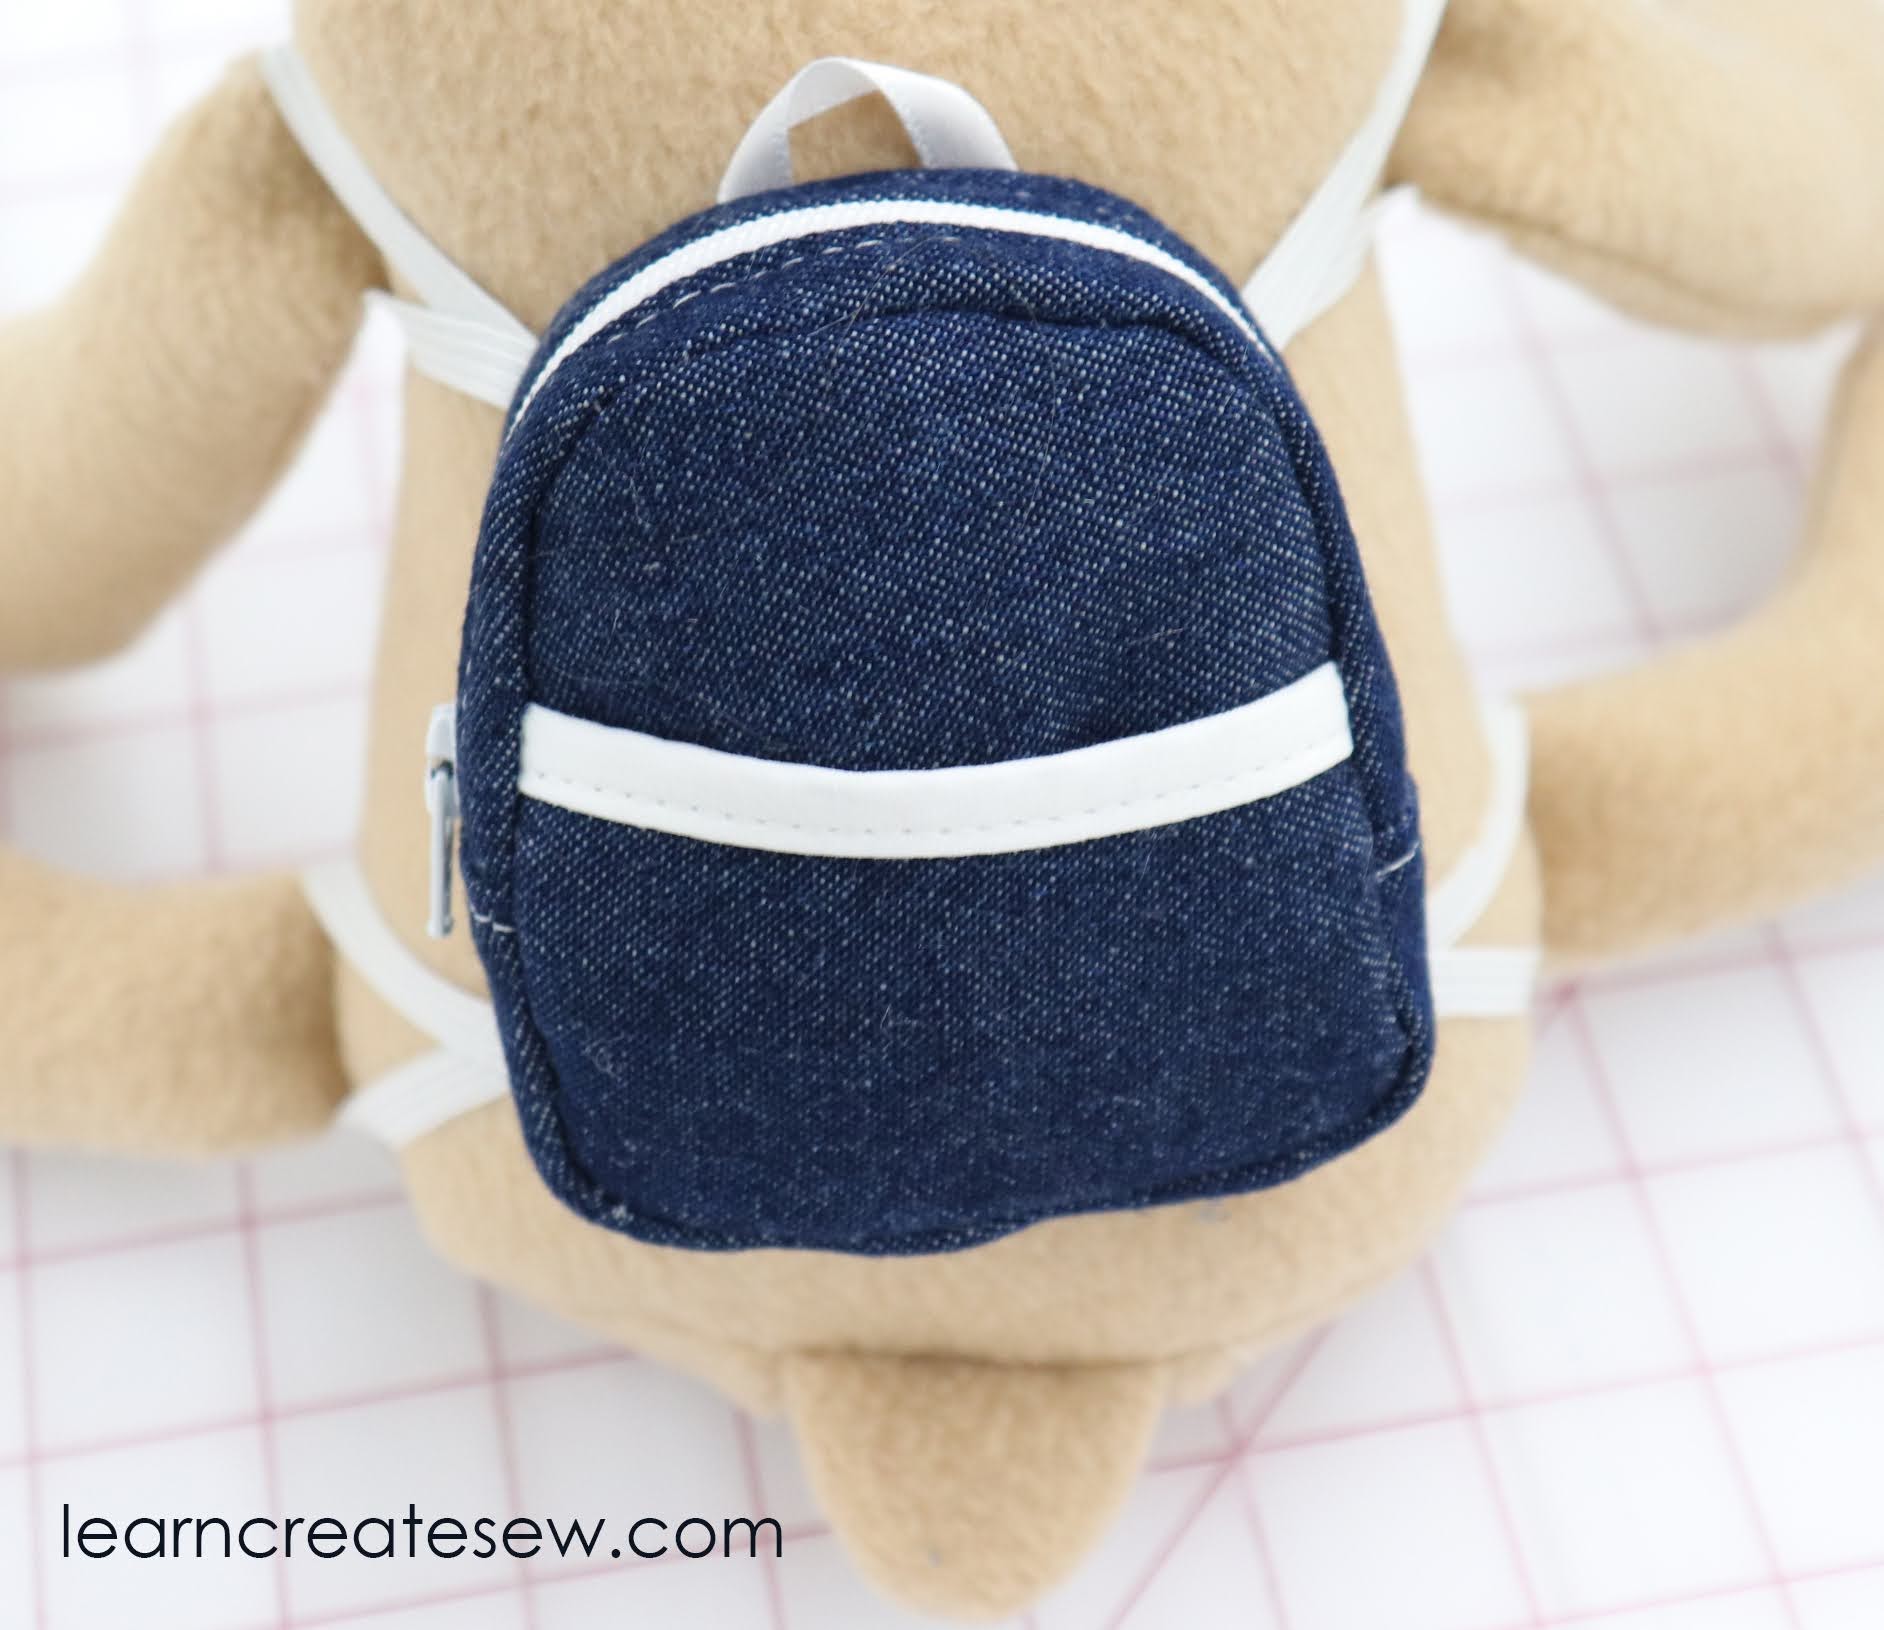
This is a tiny little backpack that is just adorable on the sloth project!
It could easily be adapted for other dolls and stuffed animals by adjusting the elastic straps.
You can choose to make the backpack out of a single layer of fabric (like my denim example), or you can make it with lining (pink example). There are also two different options for the lower straps. Loops that go around each leg, or a single strap that goes around the belly.
Overall, I was really happy with how this one turned out. I hope you enjoy it as well!
Supplies:
4.5 x 18 inches of Main Fabric
4.5 x 18 inches of Interfacing (optional – I used Pellon SF101)
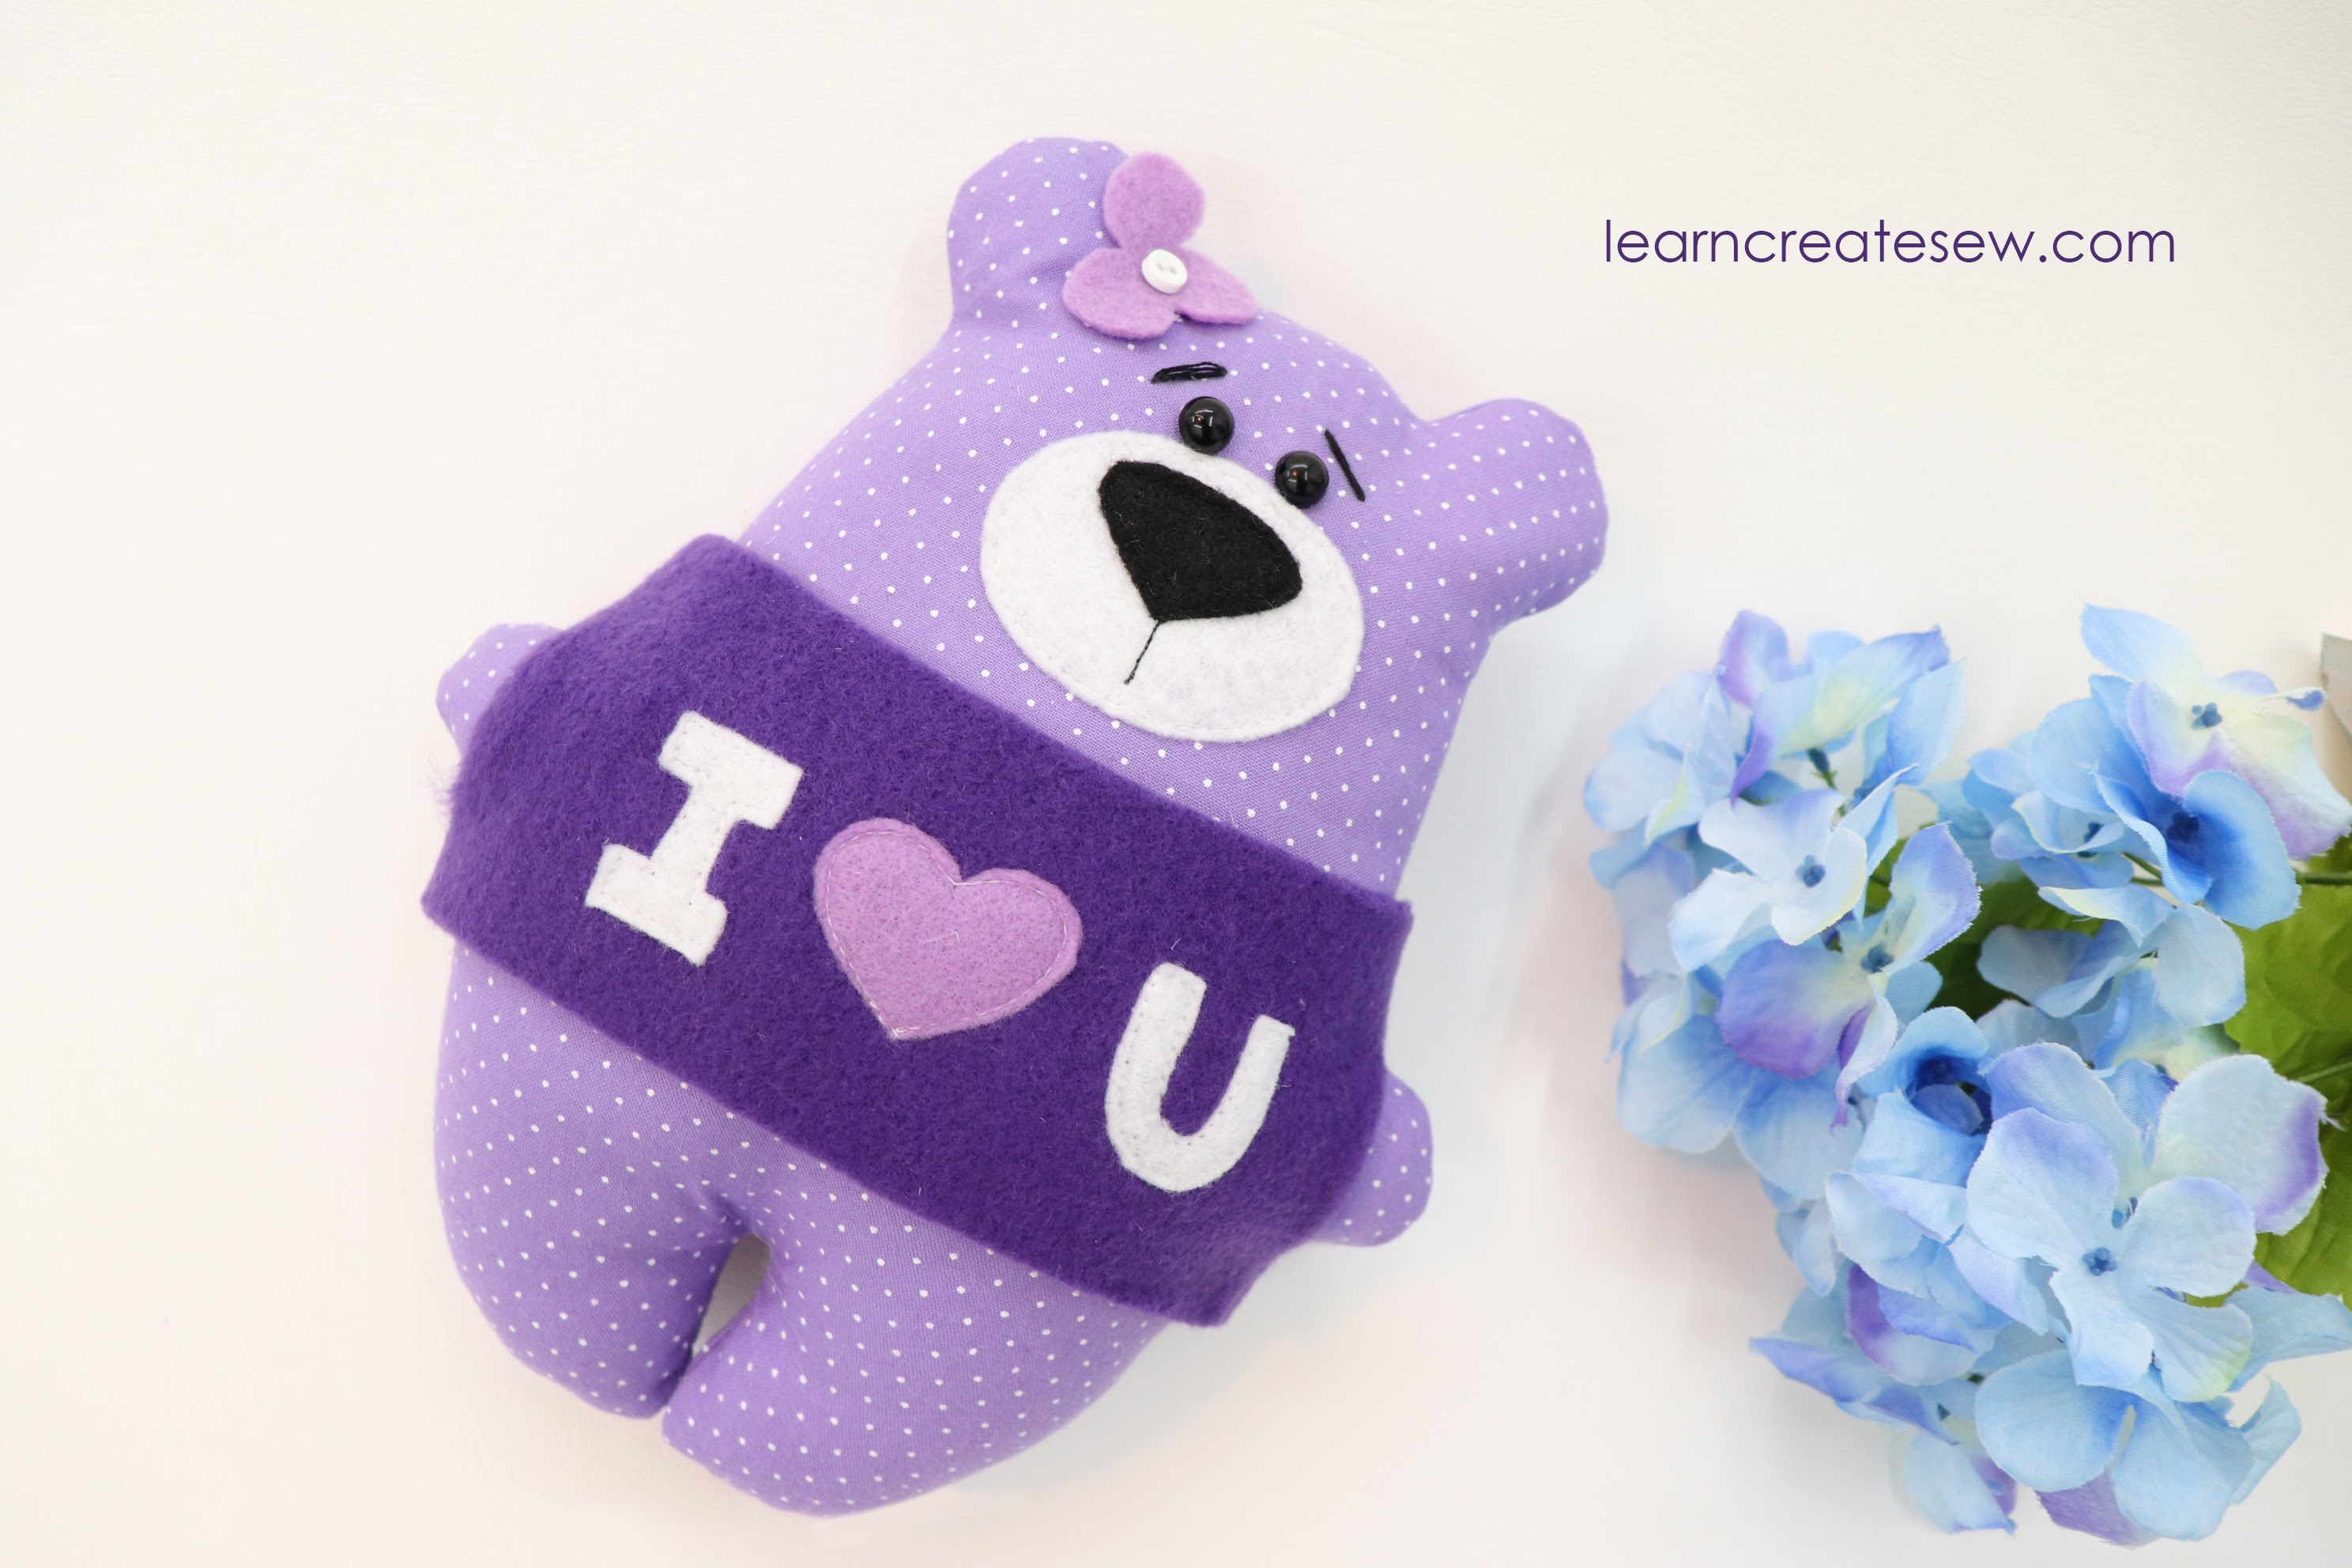
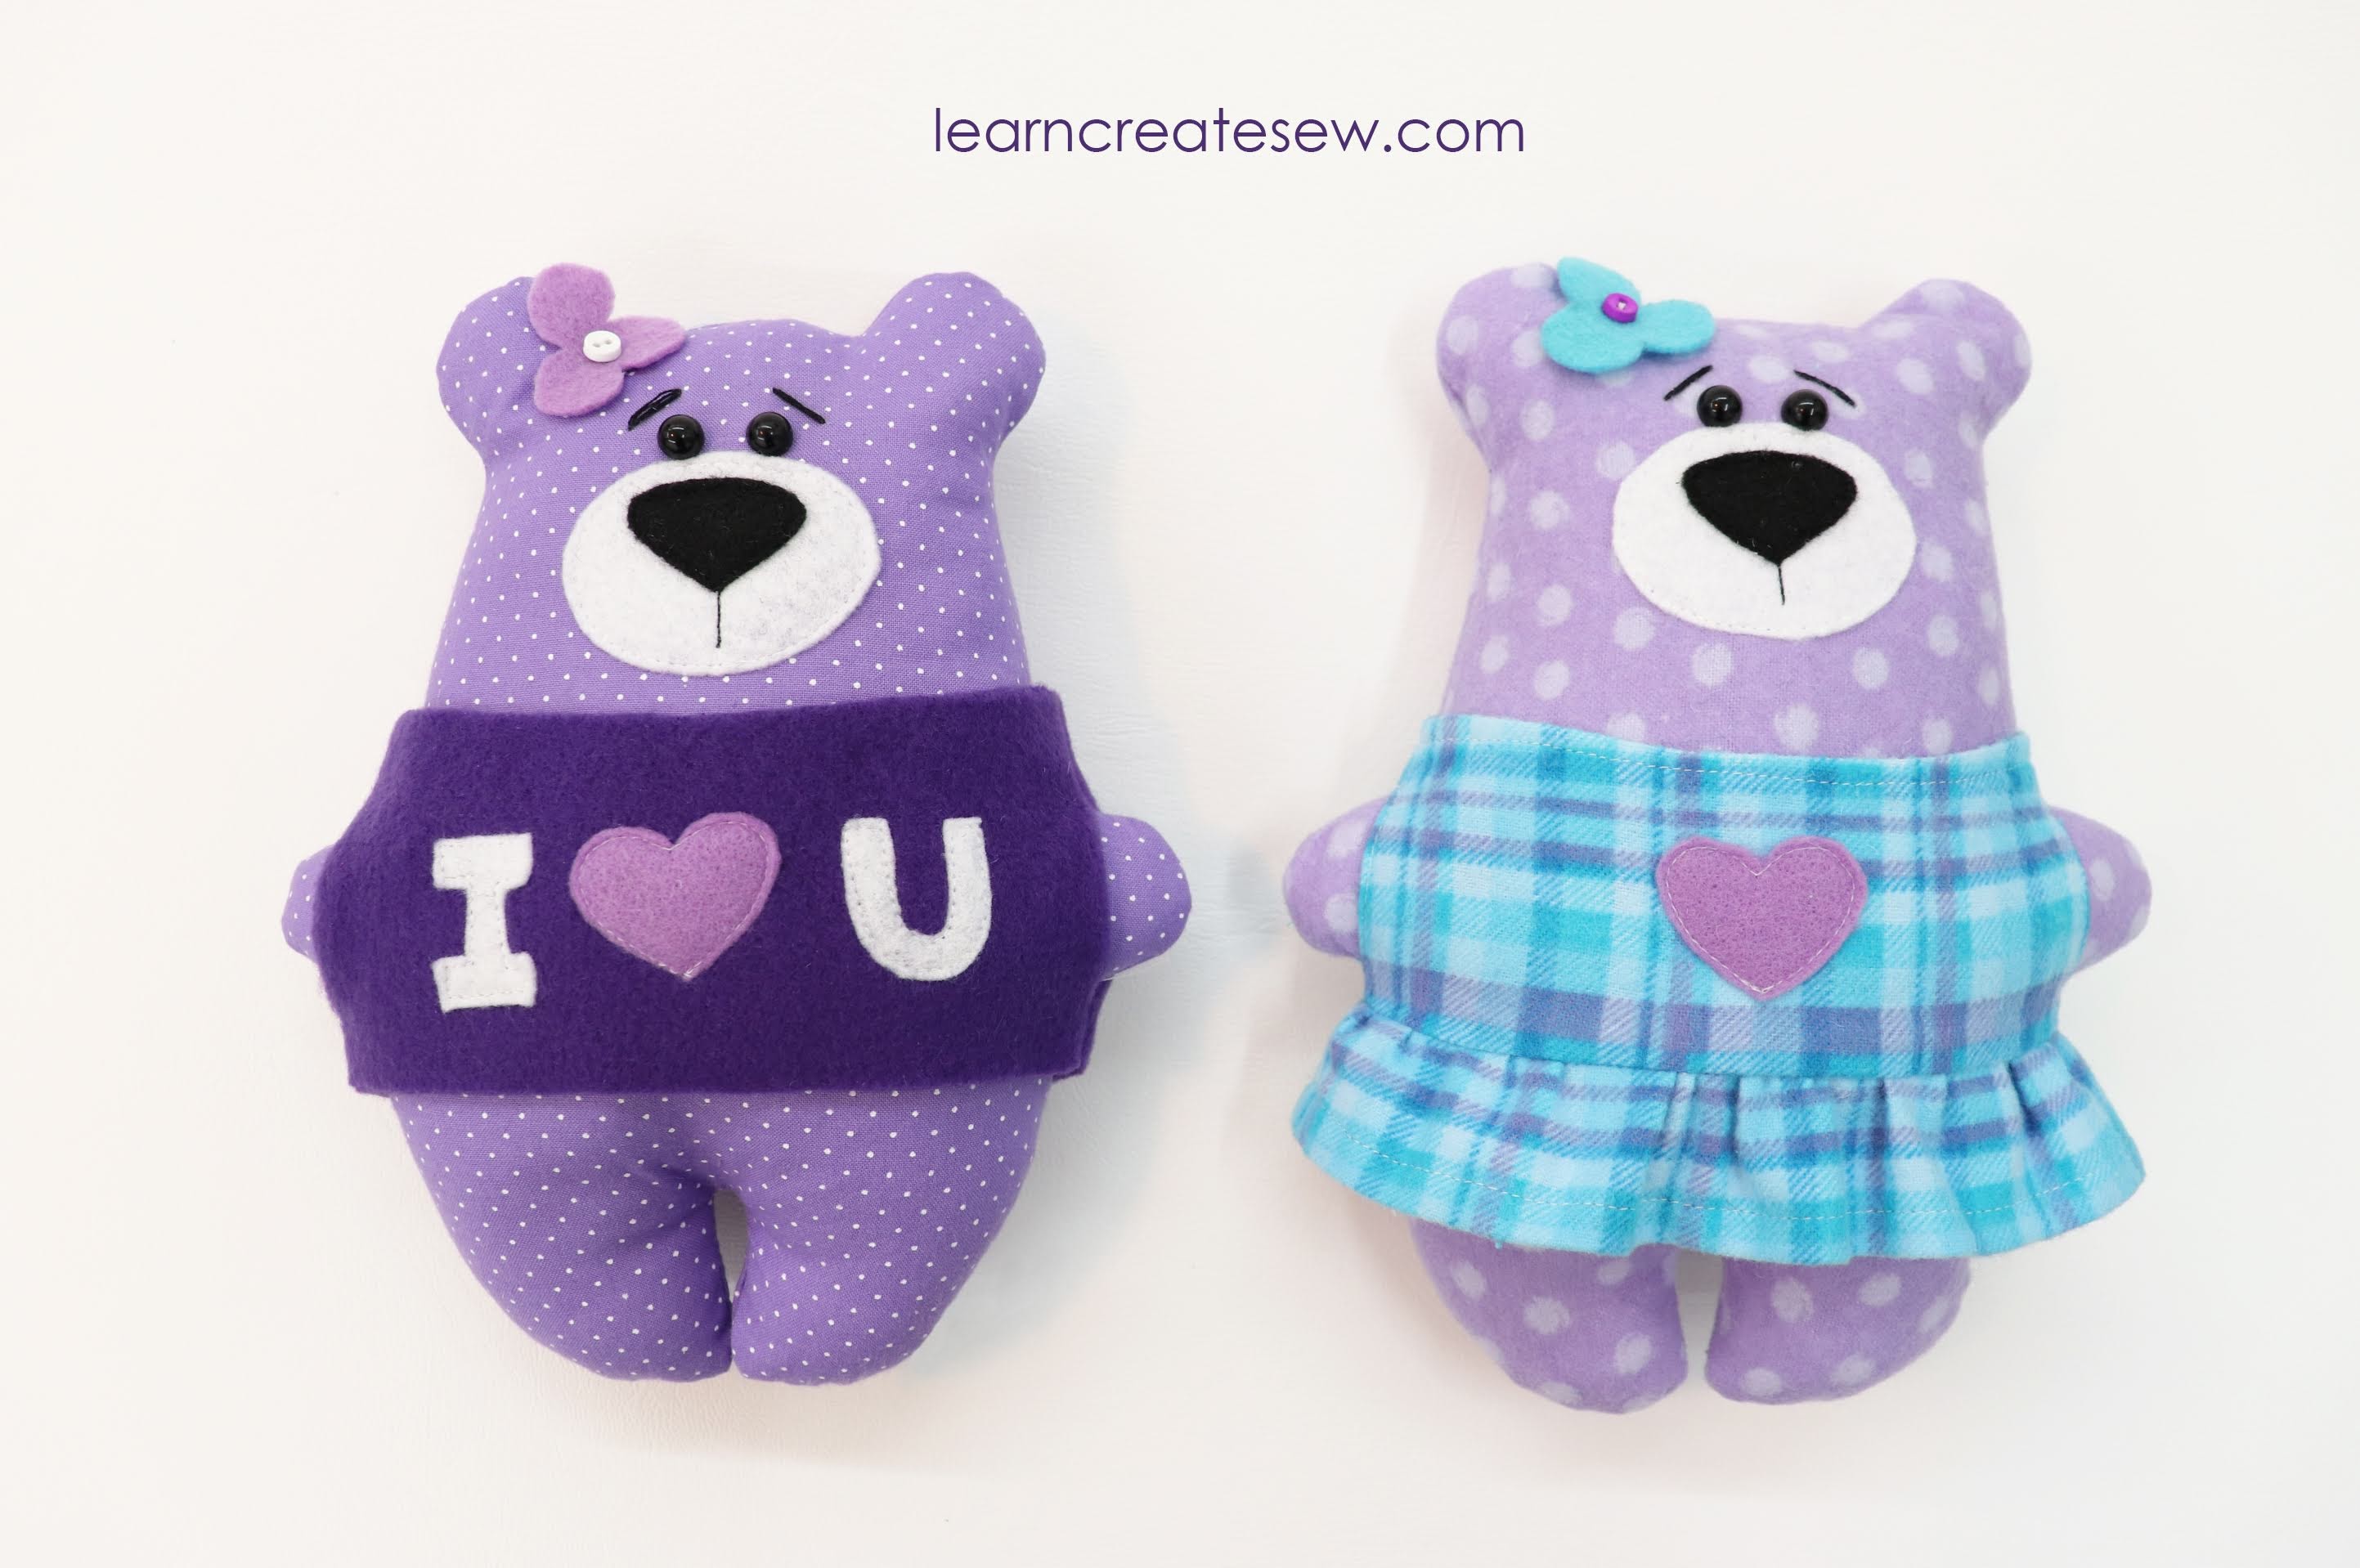
This simple bear plush is great for beginning sewers and service projects! My first year sewing students made these bears for a children’s hospital. They were a big hit for both those making the bears and those receiving them. They are quick to make and even my new sewers were successful! They are also a lot of fun 🙂
This bear can be made with or without accessories, and it is adorable either way! The dress may be a bit of a challenge for beginning sewers as it involves gathering.
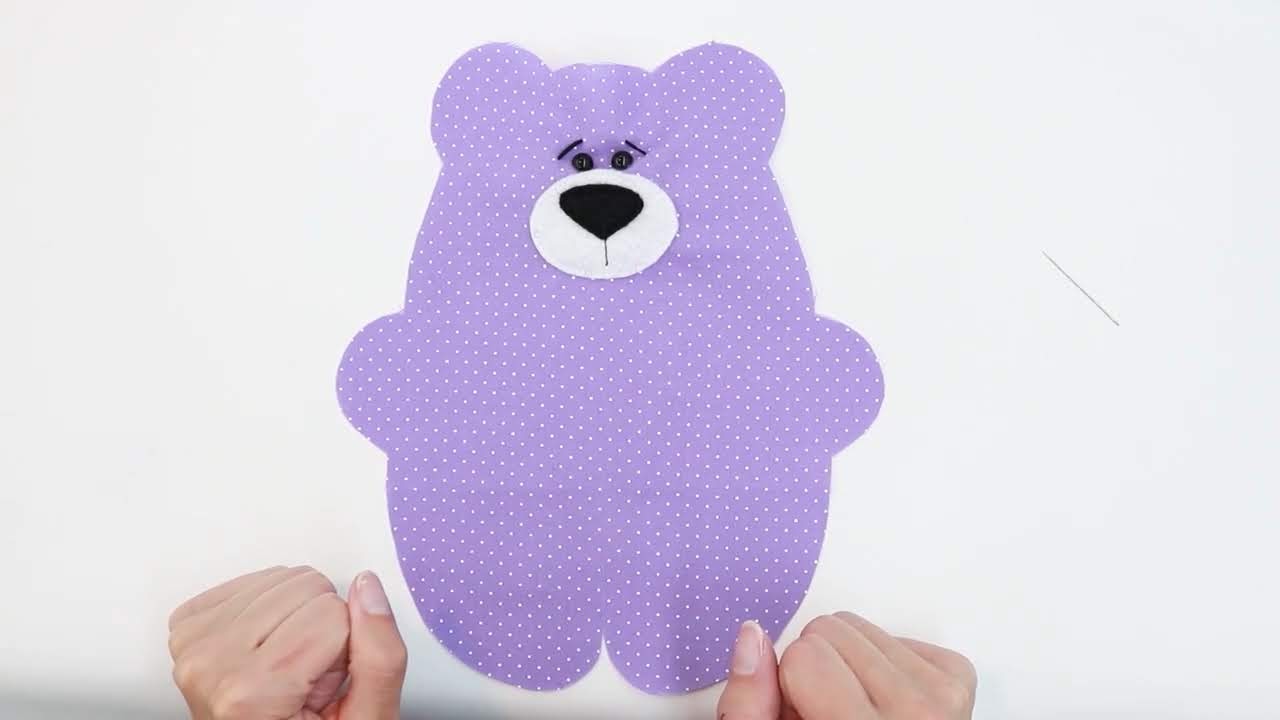
The body of the bear can be made with cotton, flannel, or fleece. Felt is great for the details. I used fleece for the I love You sweatshirt and flannel for the little dress. I also used 8mm safety eyes, buttons are also a great option. Embroidery floss was used for the eyebrows.
It is really fun to personalize your bear. Decorate as you prefer! Be creative and make it all your own. Since much of the decoration is simply felt shapes, this is really easy to do.
I hope you enjoy making this project as much as I did.
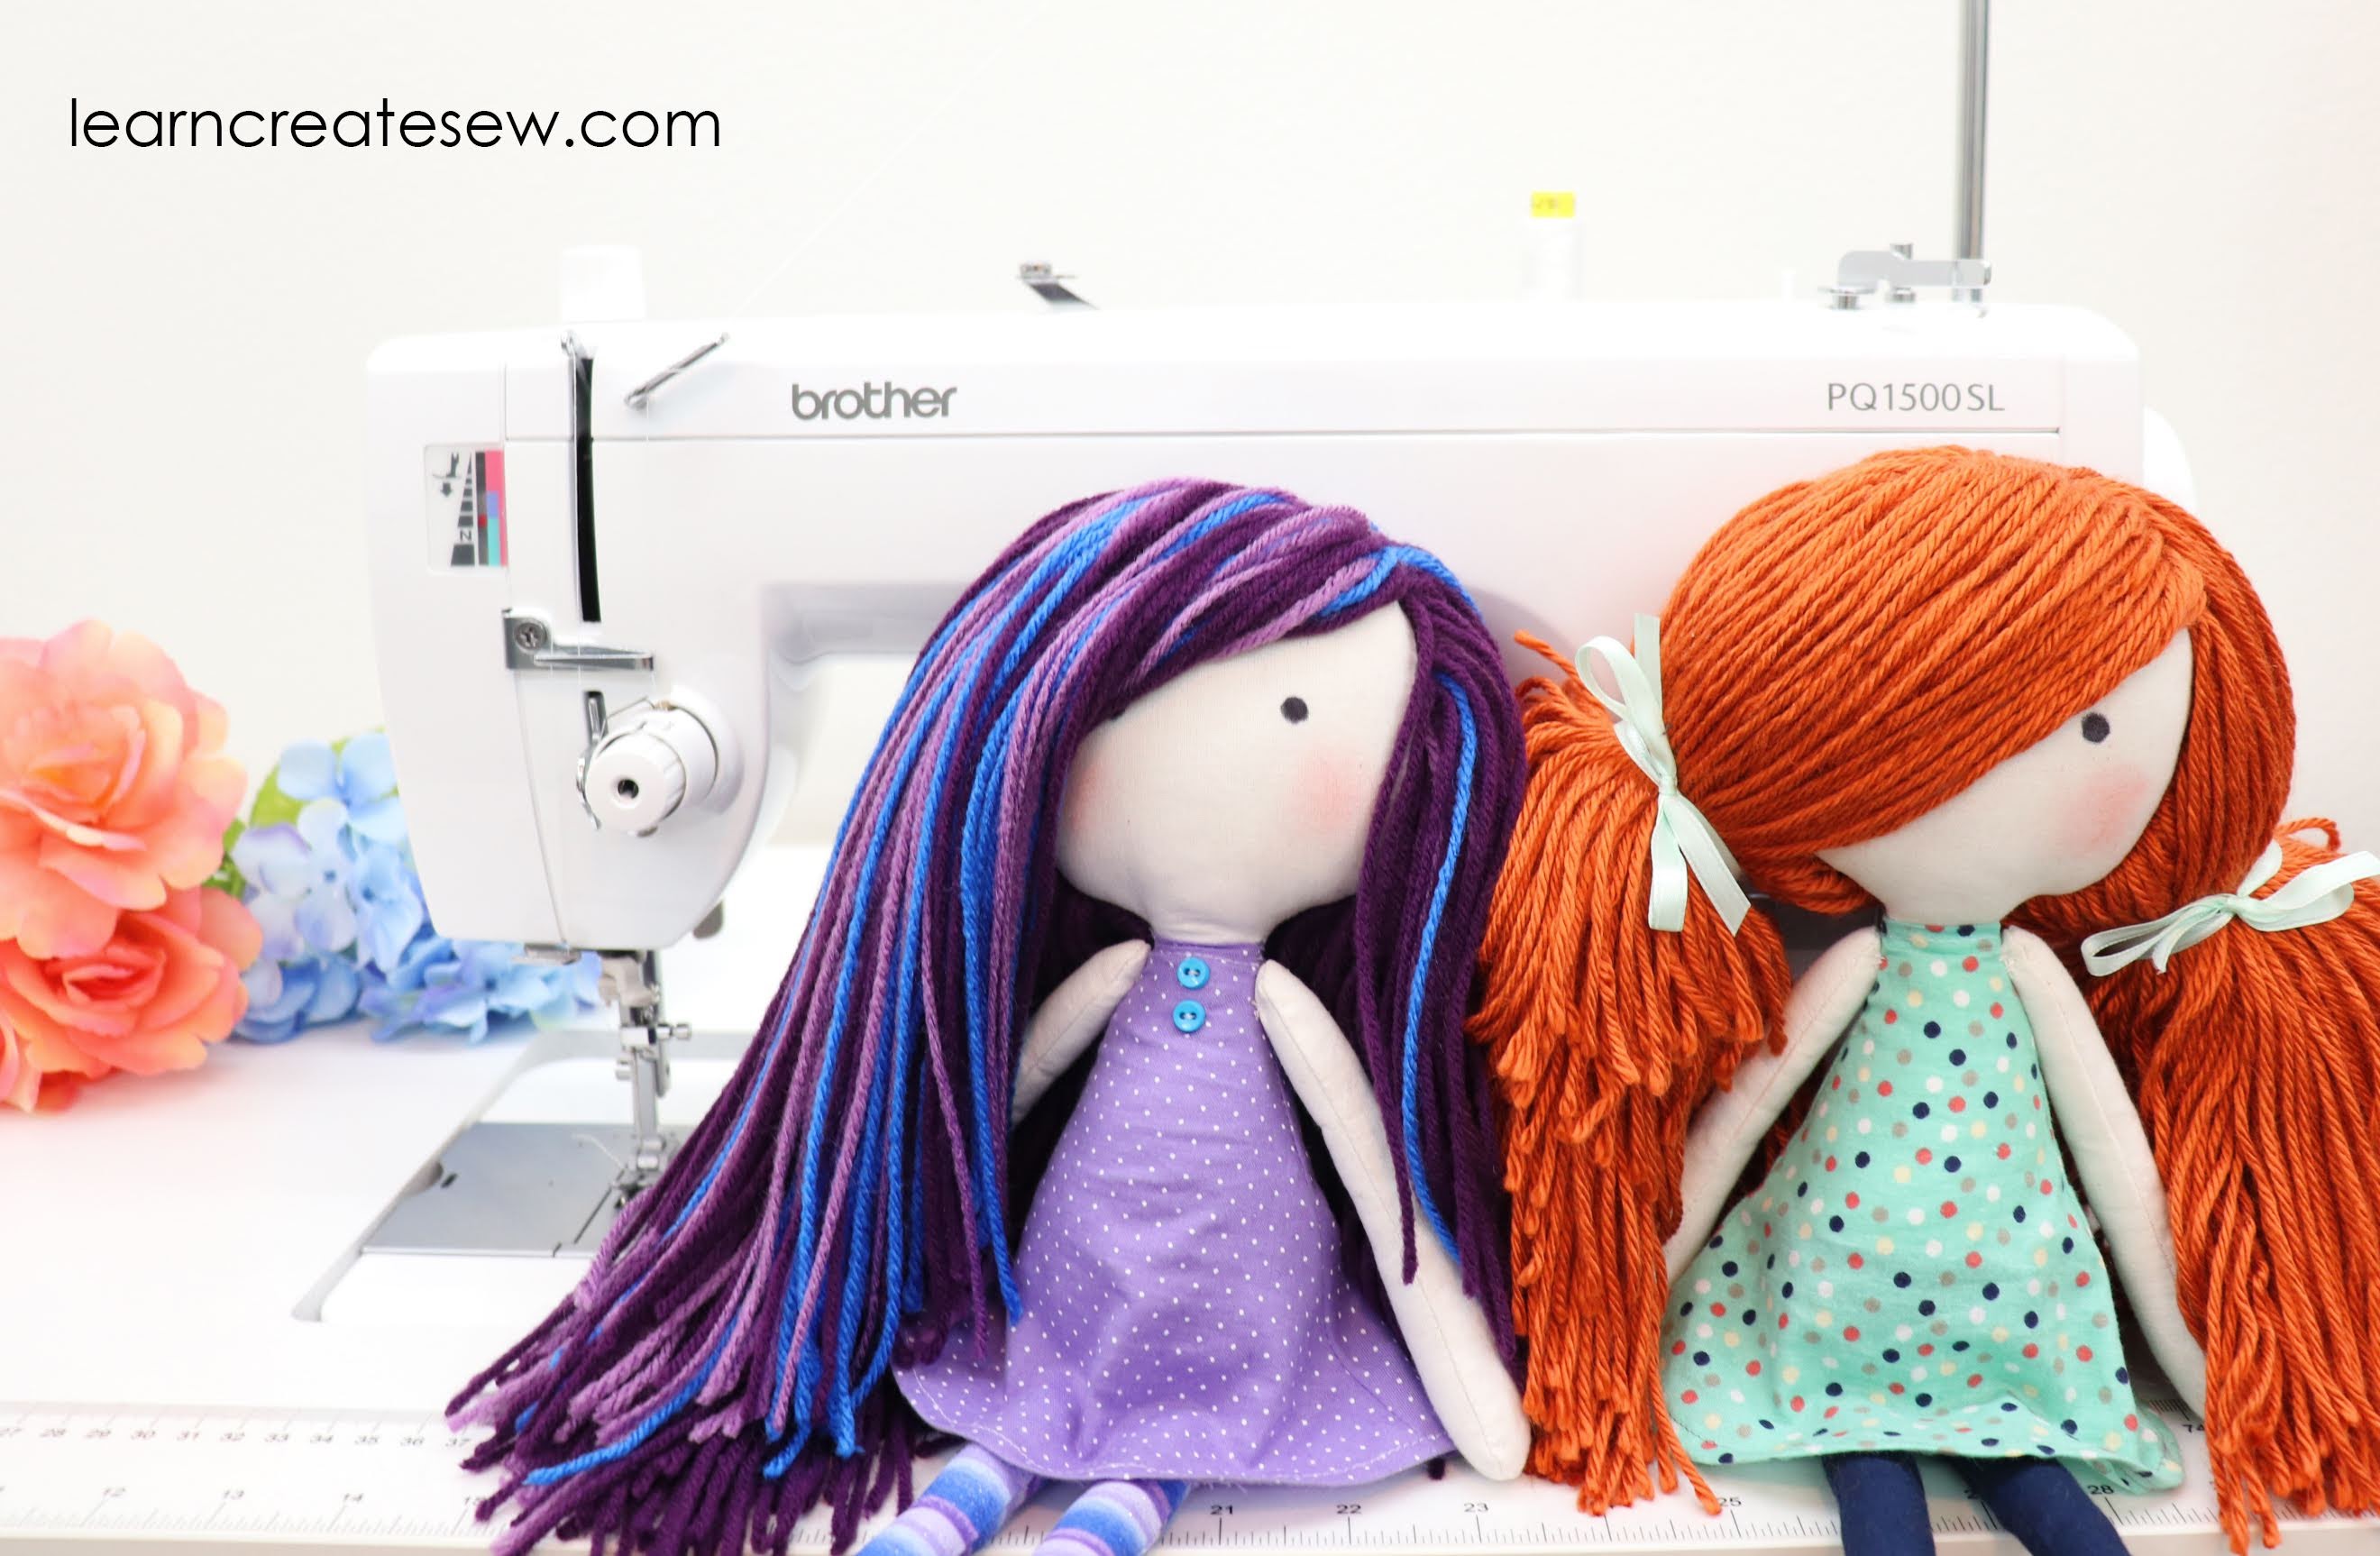
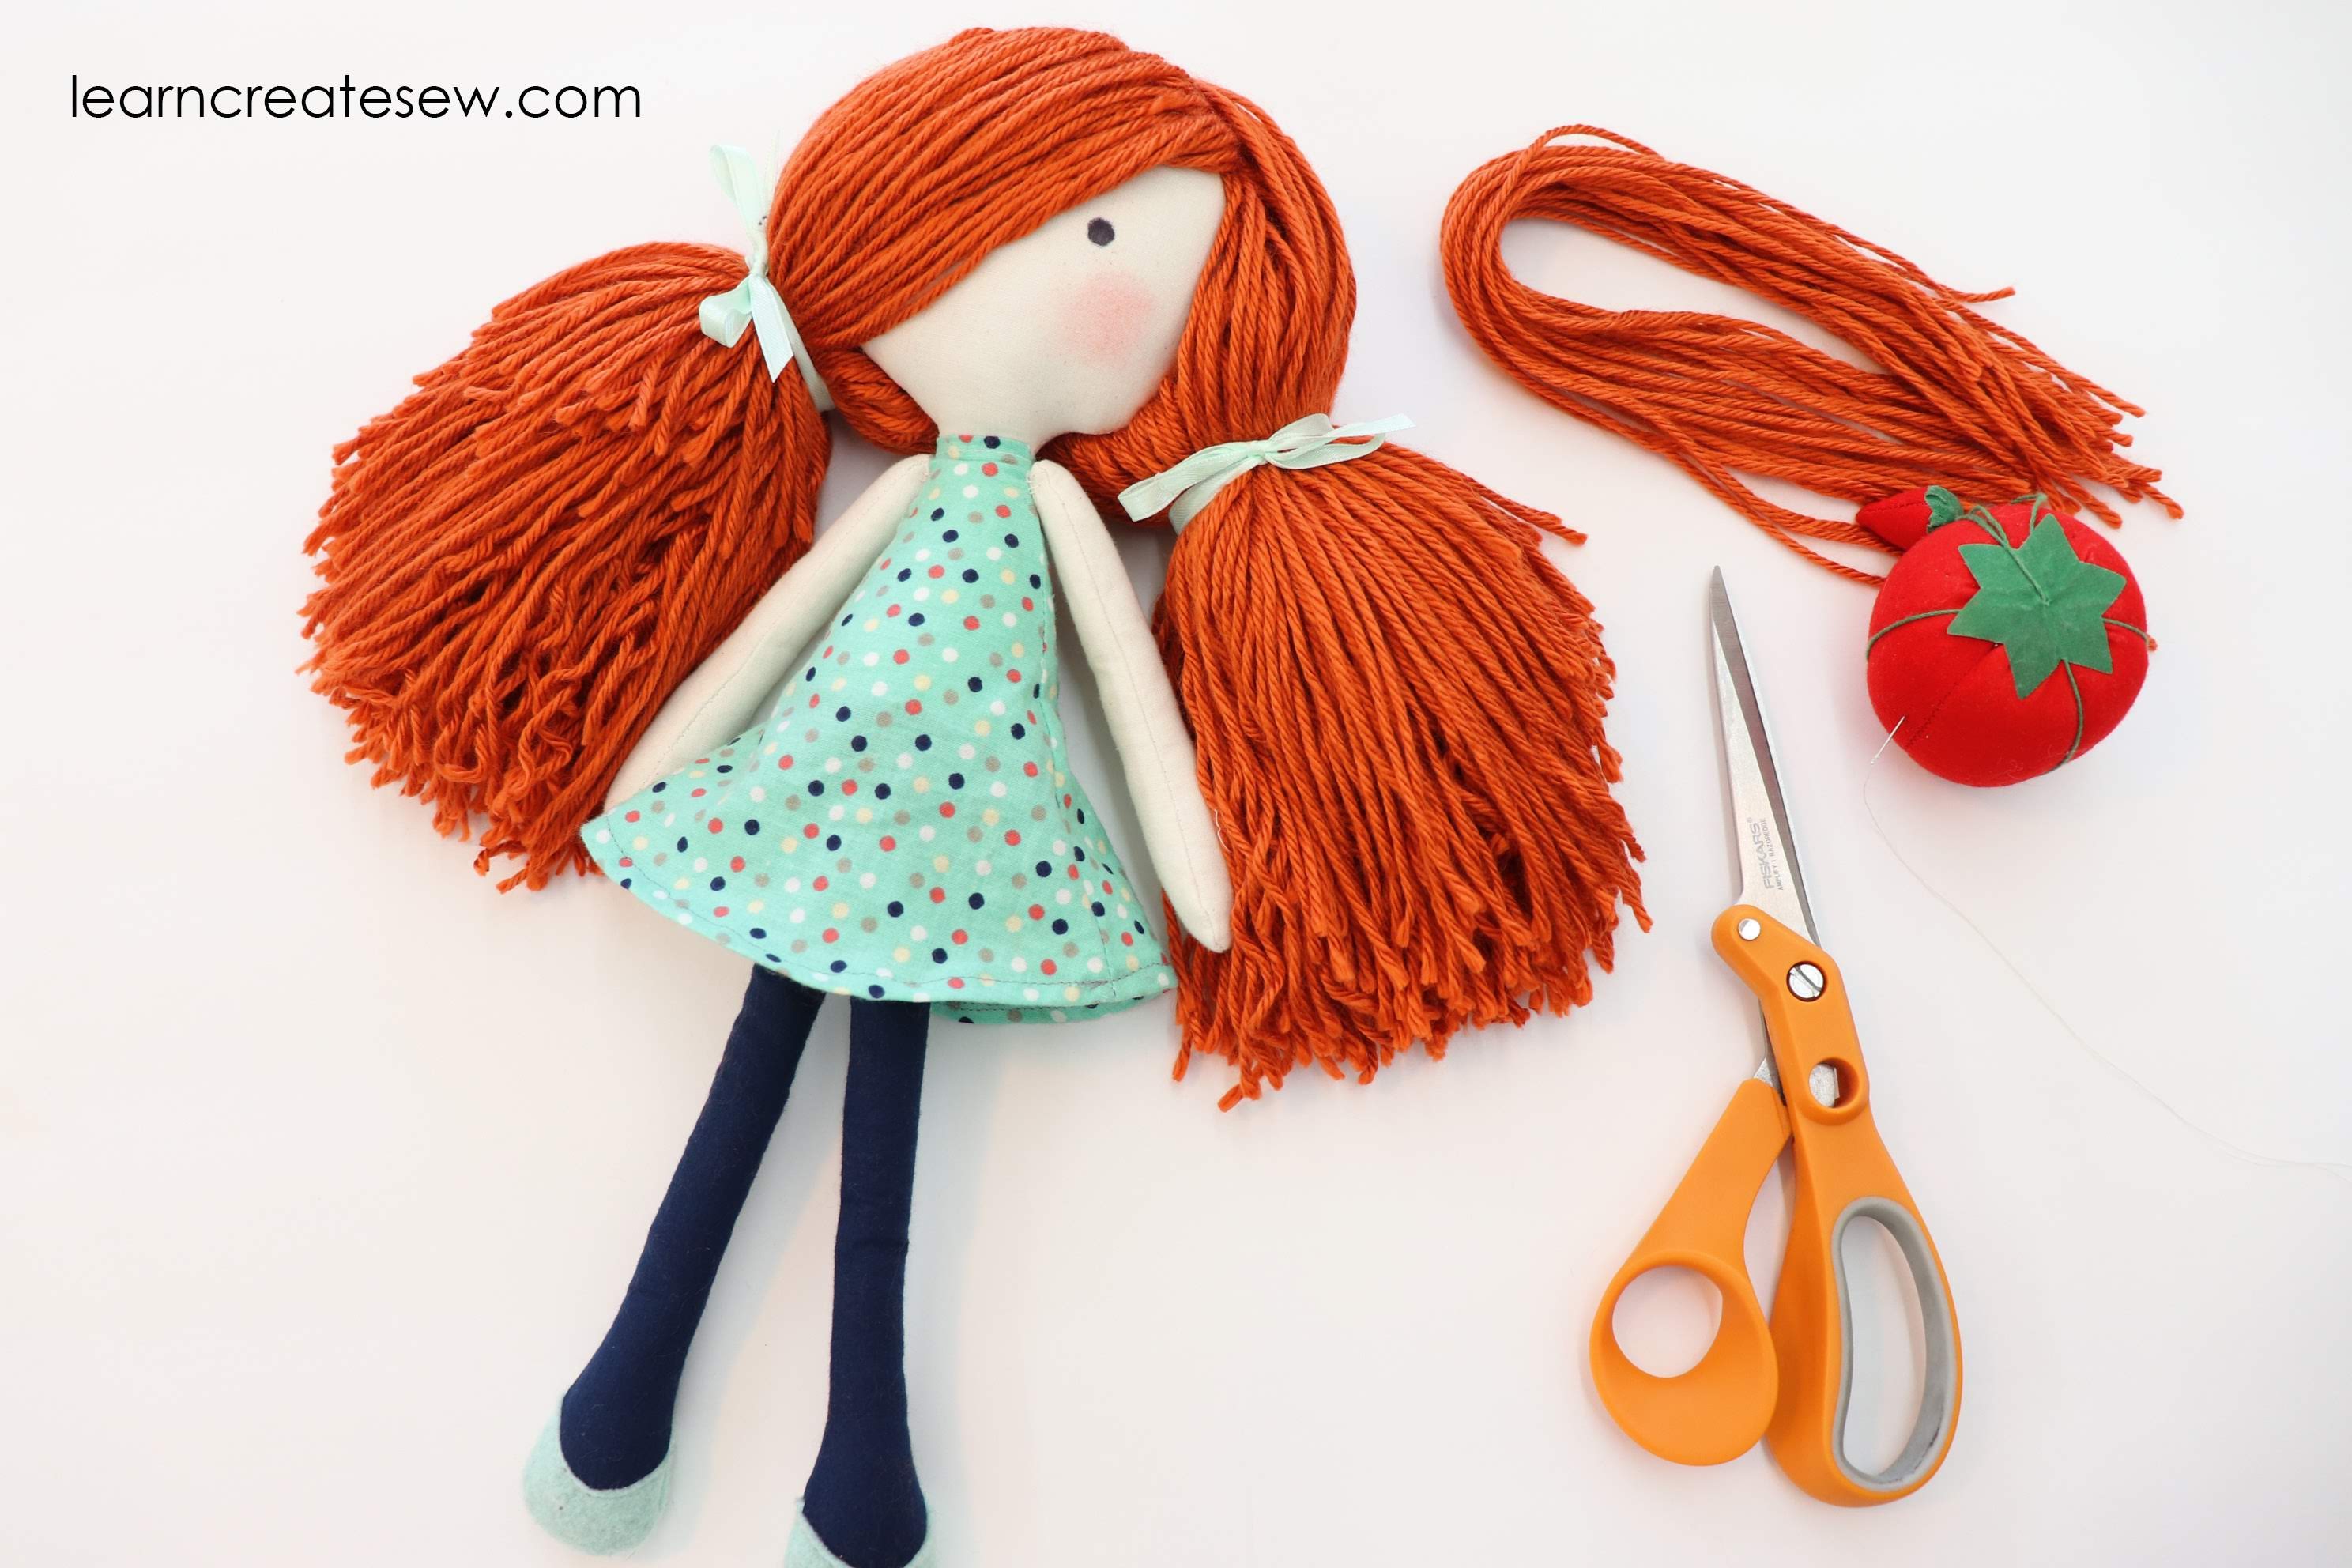
Here is the second installment of my rag doll tutorial. This was by far one of the most difficult videos I have made. Not because the process is hard, but because there are so many different styles of hair that can be selected and so many methods with which it can be applied.
I spent a lot of time deciding what I would share because I didn’t want anyone to feel limited in the approach they had to use. Not to mention, there was a whole lot of yarn that did not want to cooperate and stay in place while filming! Apparently it does not take direction well.
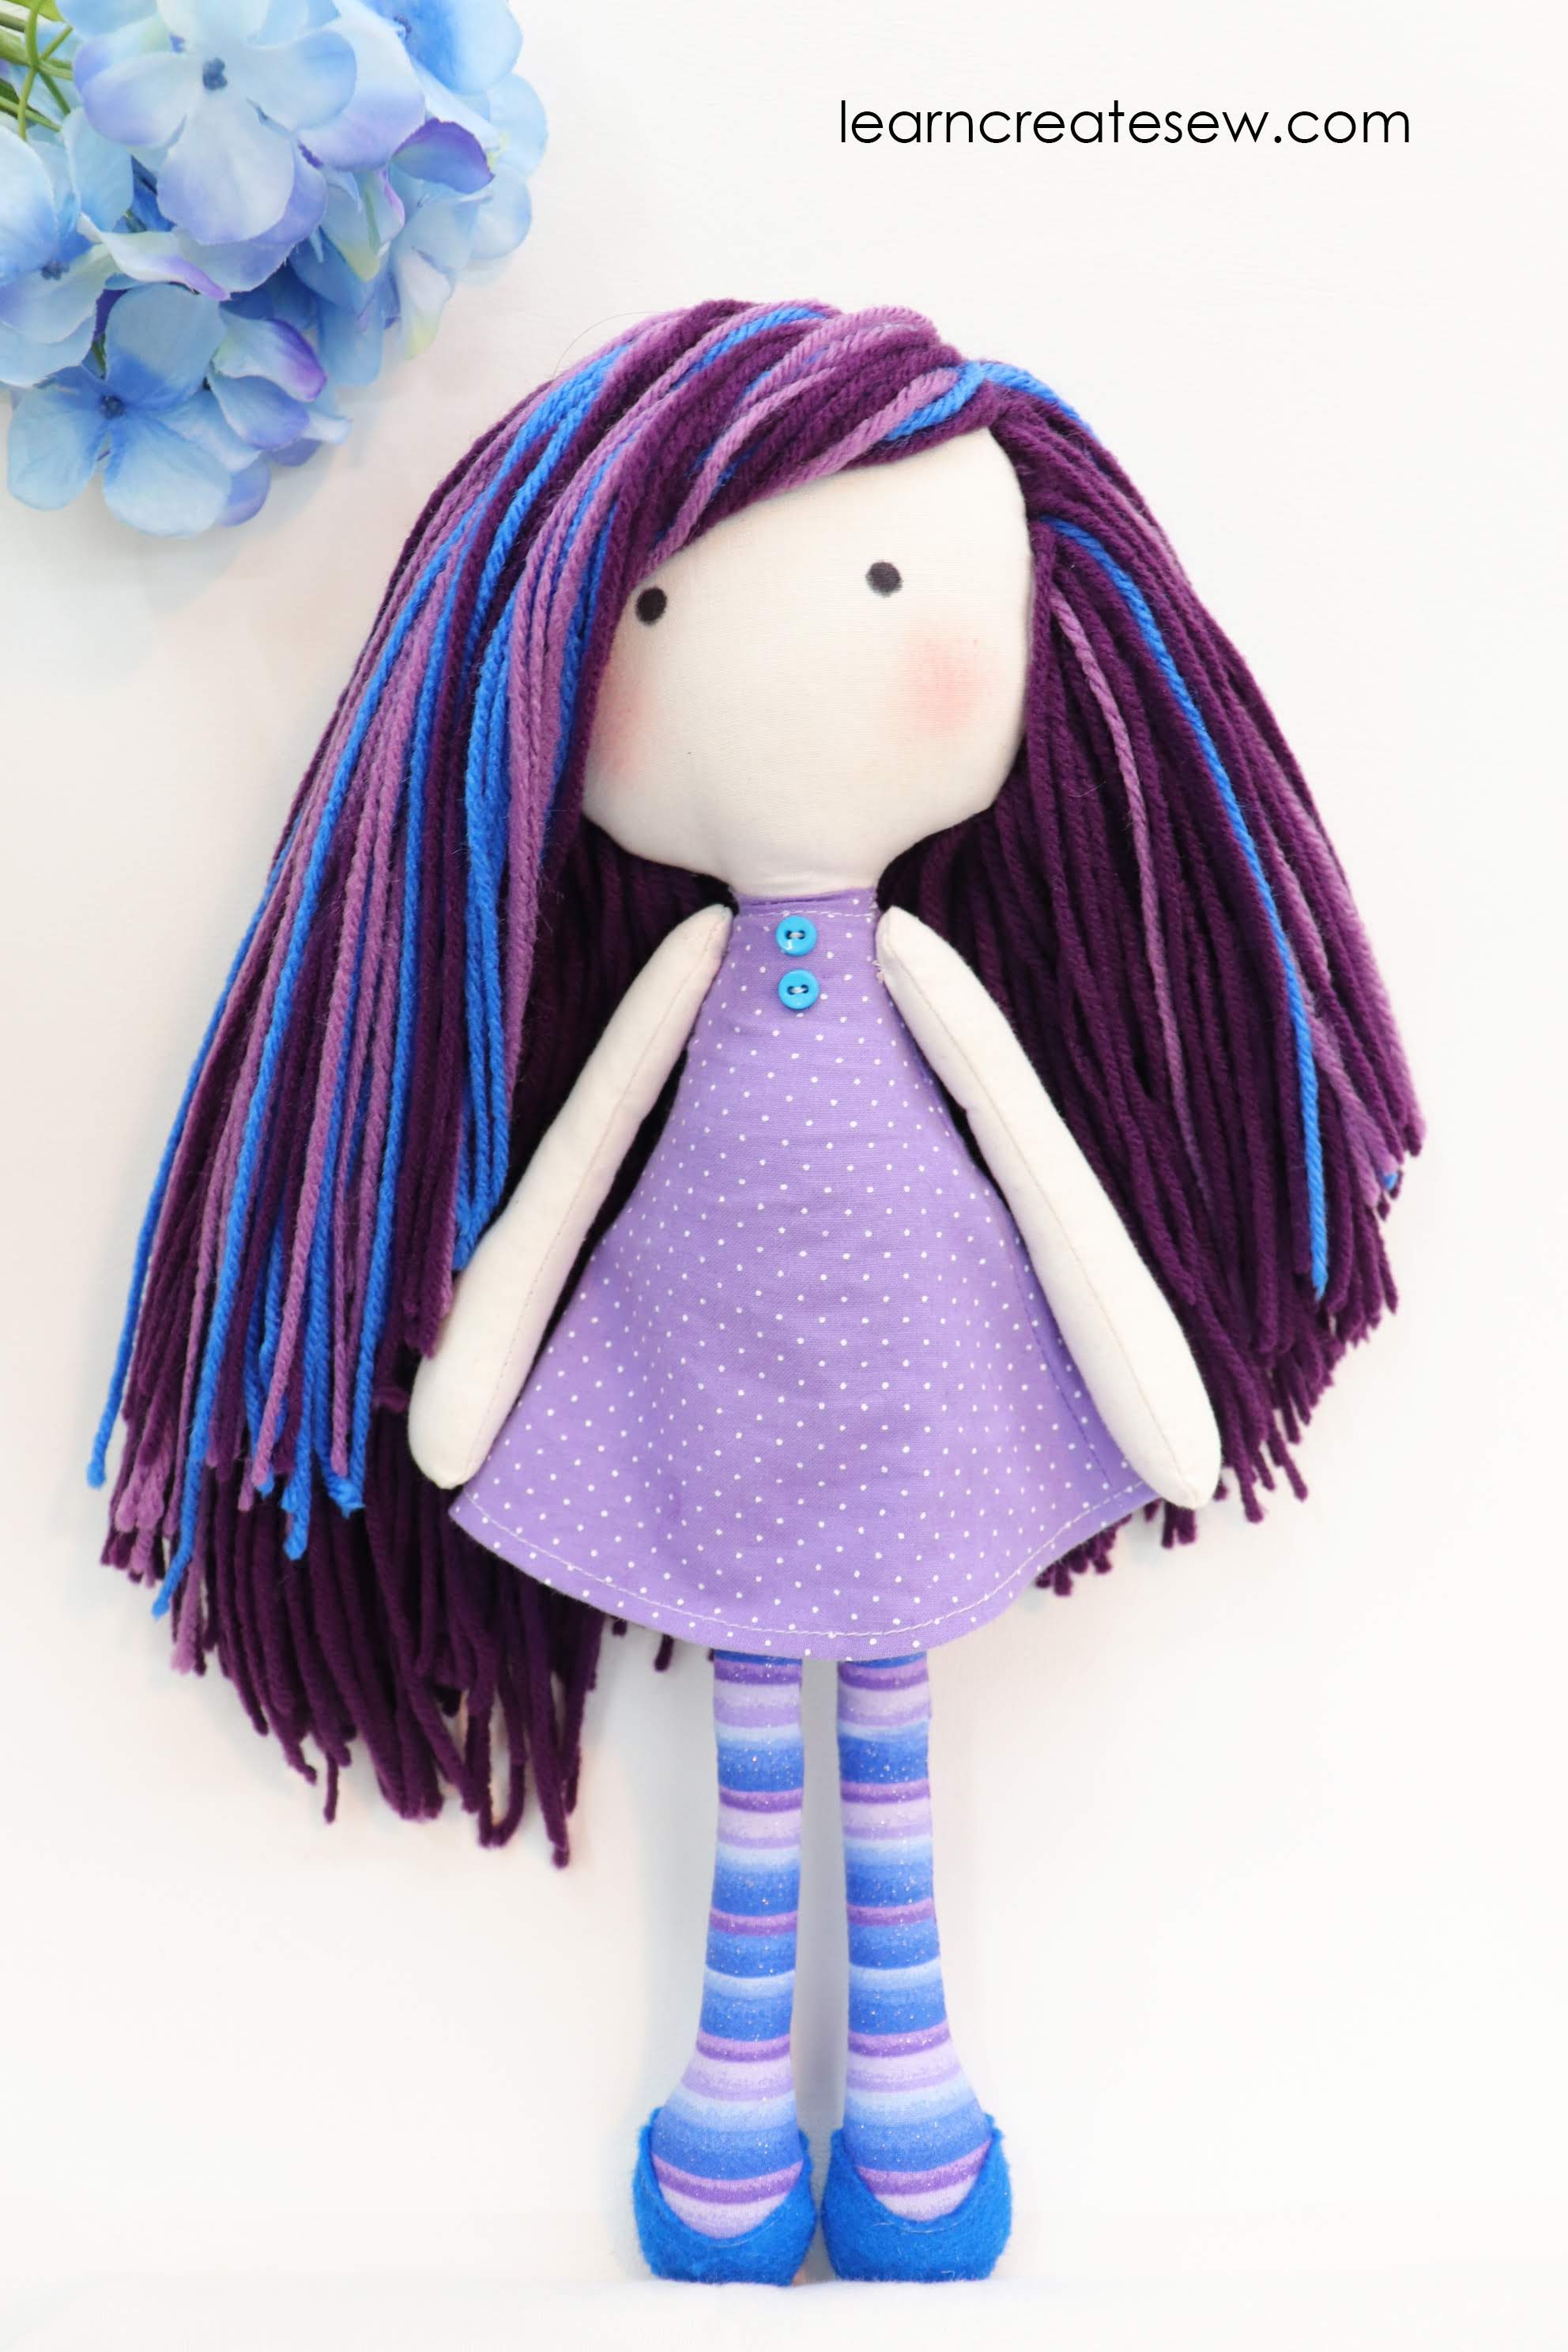
I really enjoyed using multi-colored hair on this doll. Mixing and matching colors strand by strand was a lot of fun, and I really like the look it created.
On the above doll the majority if her hair is the dark purple color. The wefts added at the bottom were all the same color, however at the top, I added just a bit of contrast.
I hope that you can take the methods used in this video and expand upon them to make something all your own 🙂
I love the drastically different looks you can create by altering hair styles and color.
Here is my rag doll pattern in case you missed it in the last post. The doll is just over 14 inches tall when completed.
I have finished my rag doll pattern! I’ve been working hard to create the instructional videos and I am happy to say that I have the body instructions ready to share with you today.
I really enjoyed working on this project and mixing and matching fabrics to create the body of the doll.
I love all of the different styles you can design to make the doll uniquely your own!
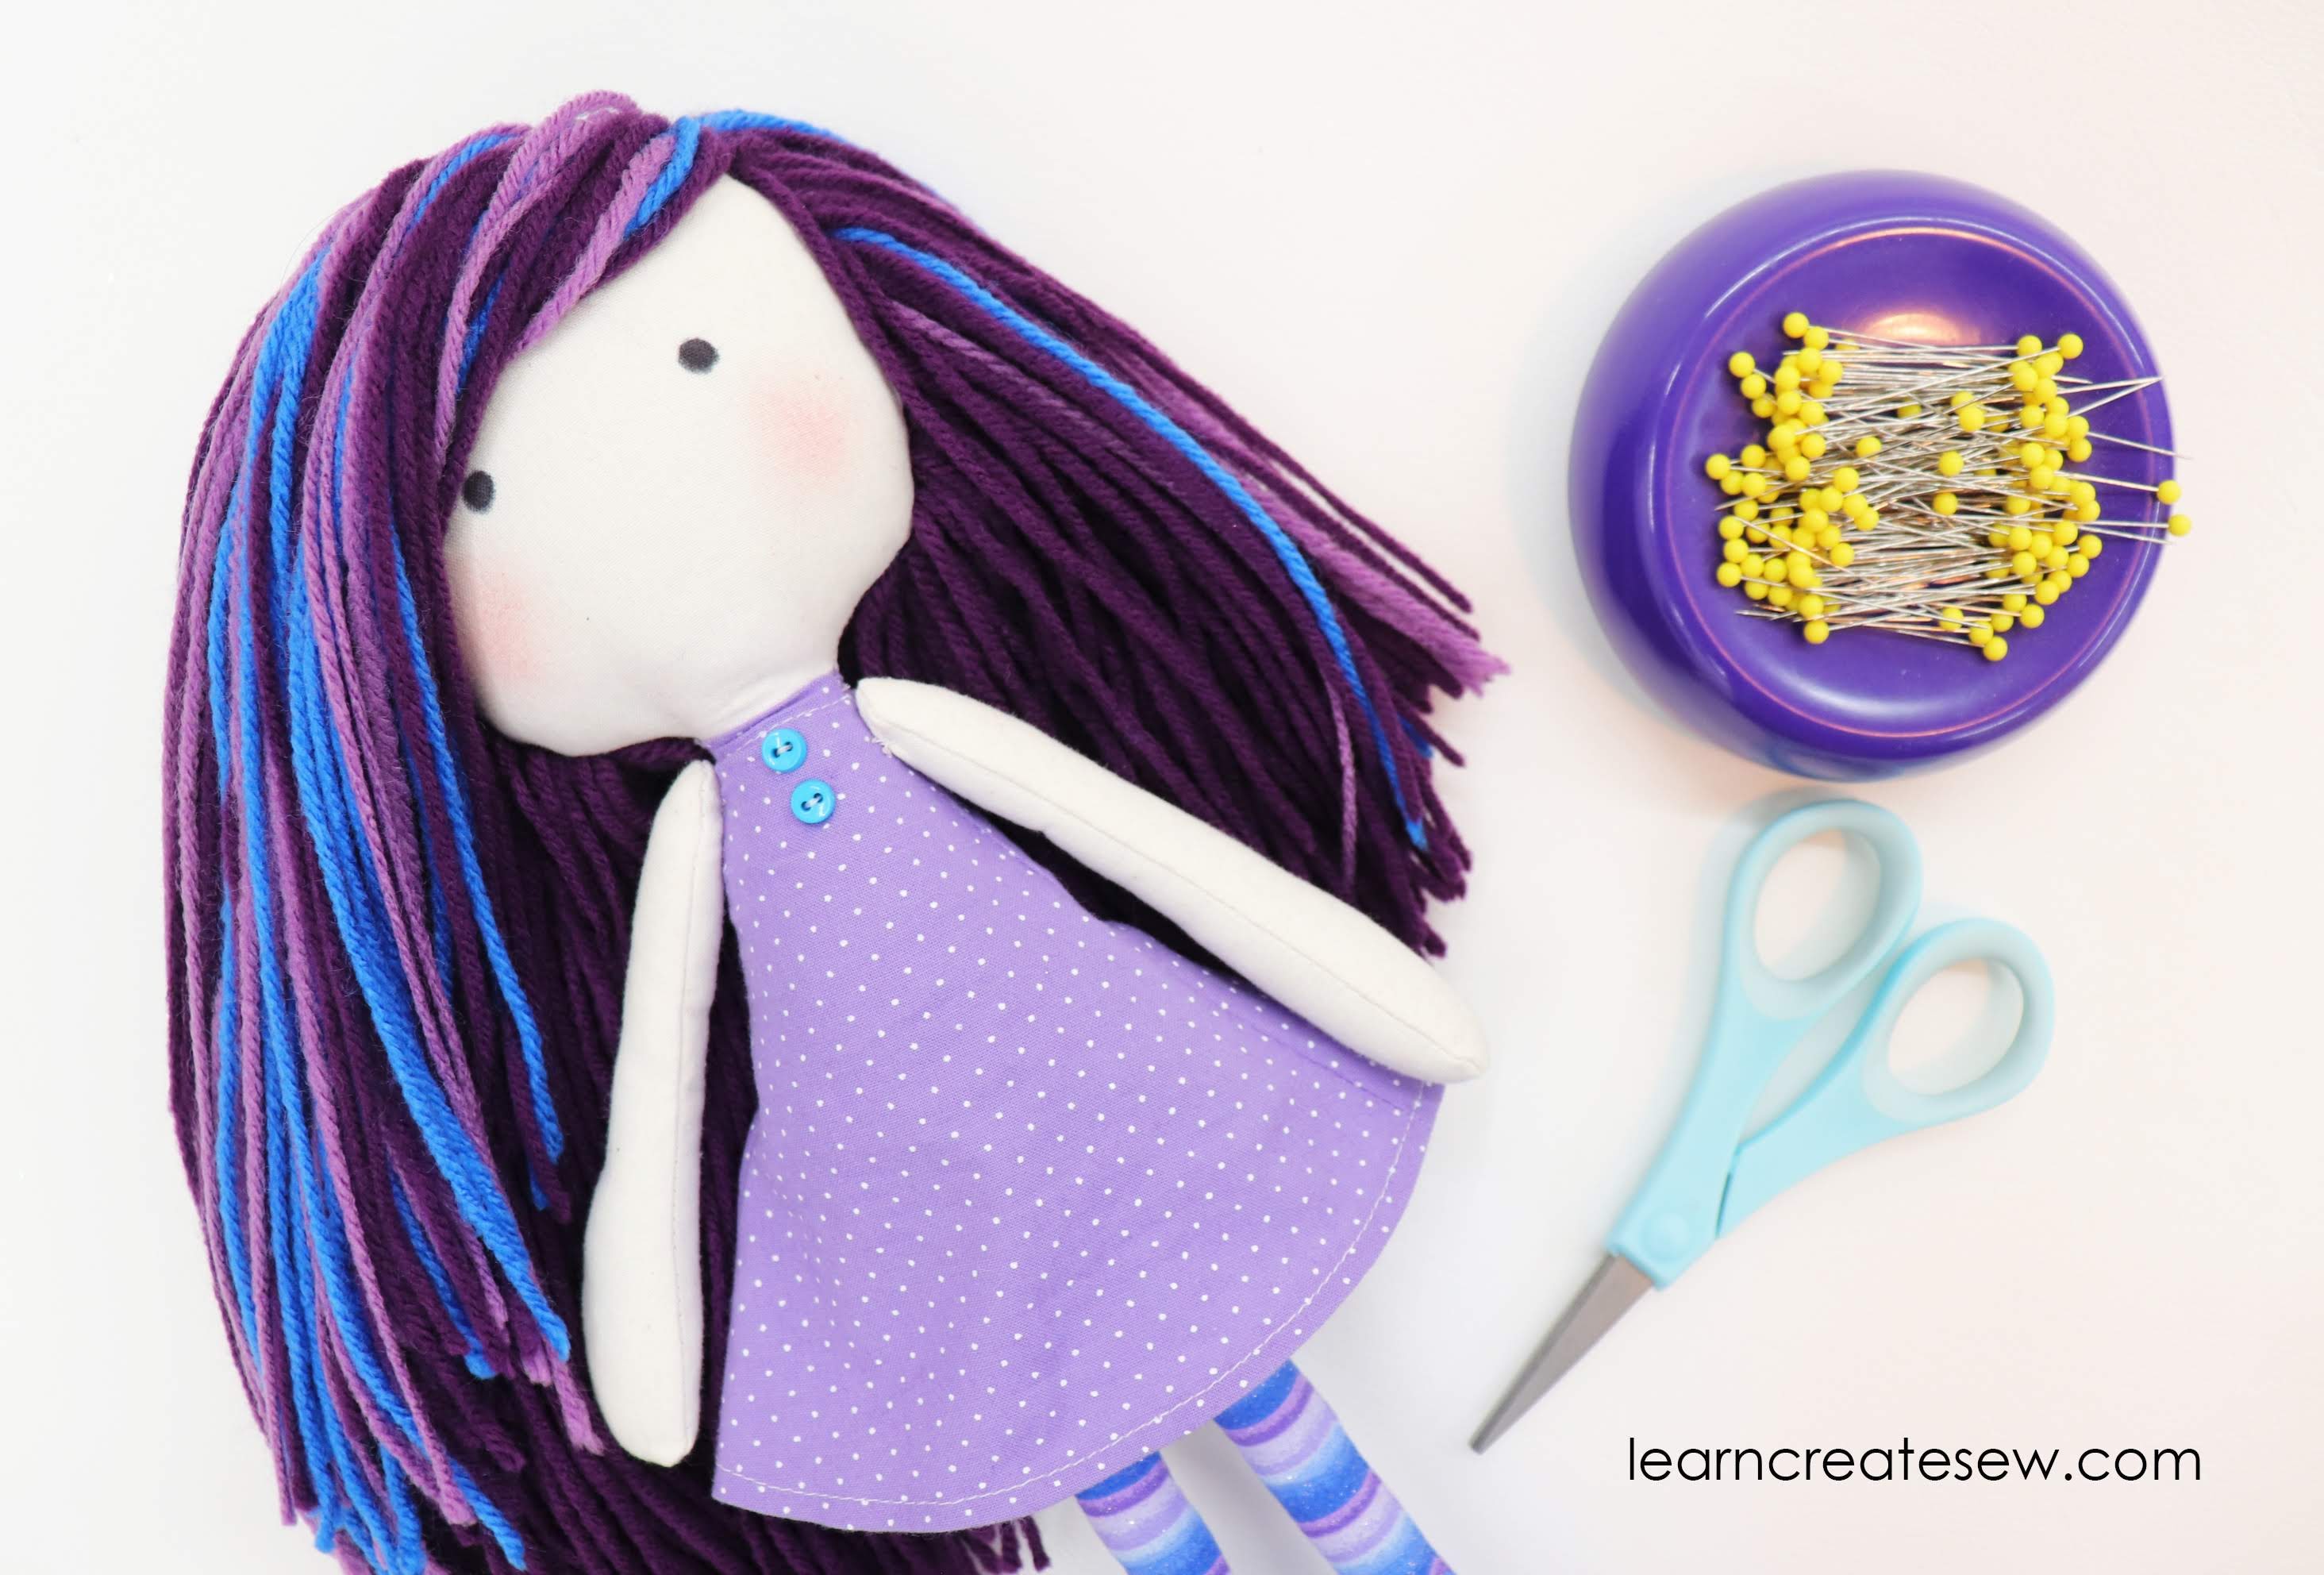
This project is a bit more time consuming than others and does require a bit of patience. It is probably a 5/10 in difficulty just for the amount of time needed to hand stitch the hair and for the exactness of seam allowance that is needed. When sewing plush projects, a small error in your seam allowance can make a big difference in the appearance of your doll. You also need to be comfortable slip stitching and working with small curves.
The doll measures between 14 and 14.5 inches tall when finished.
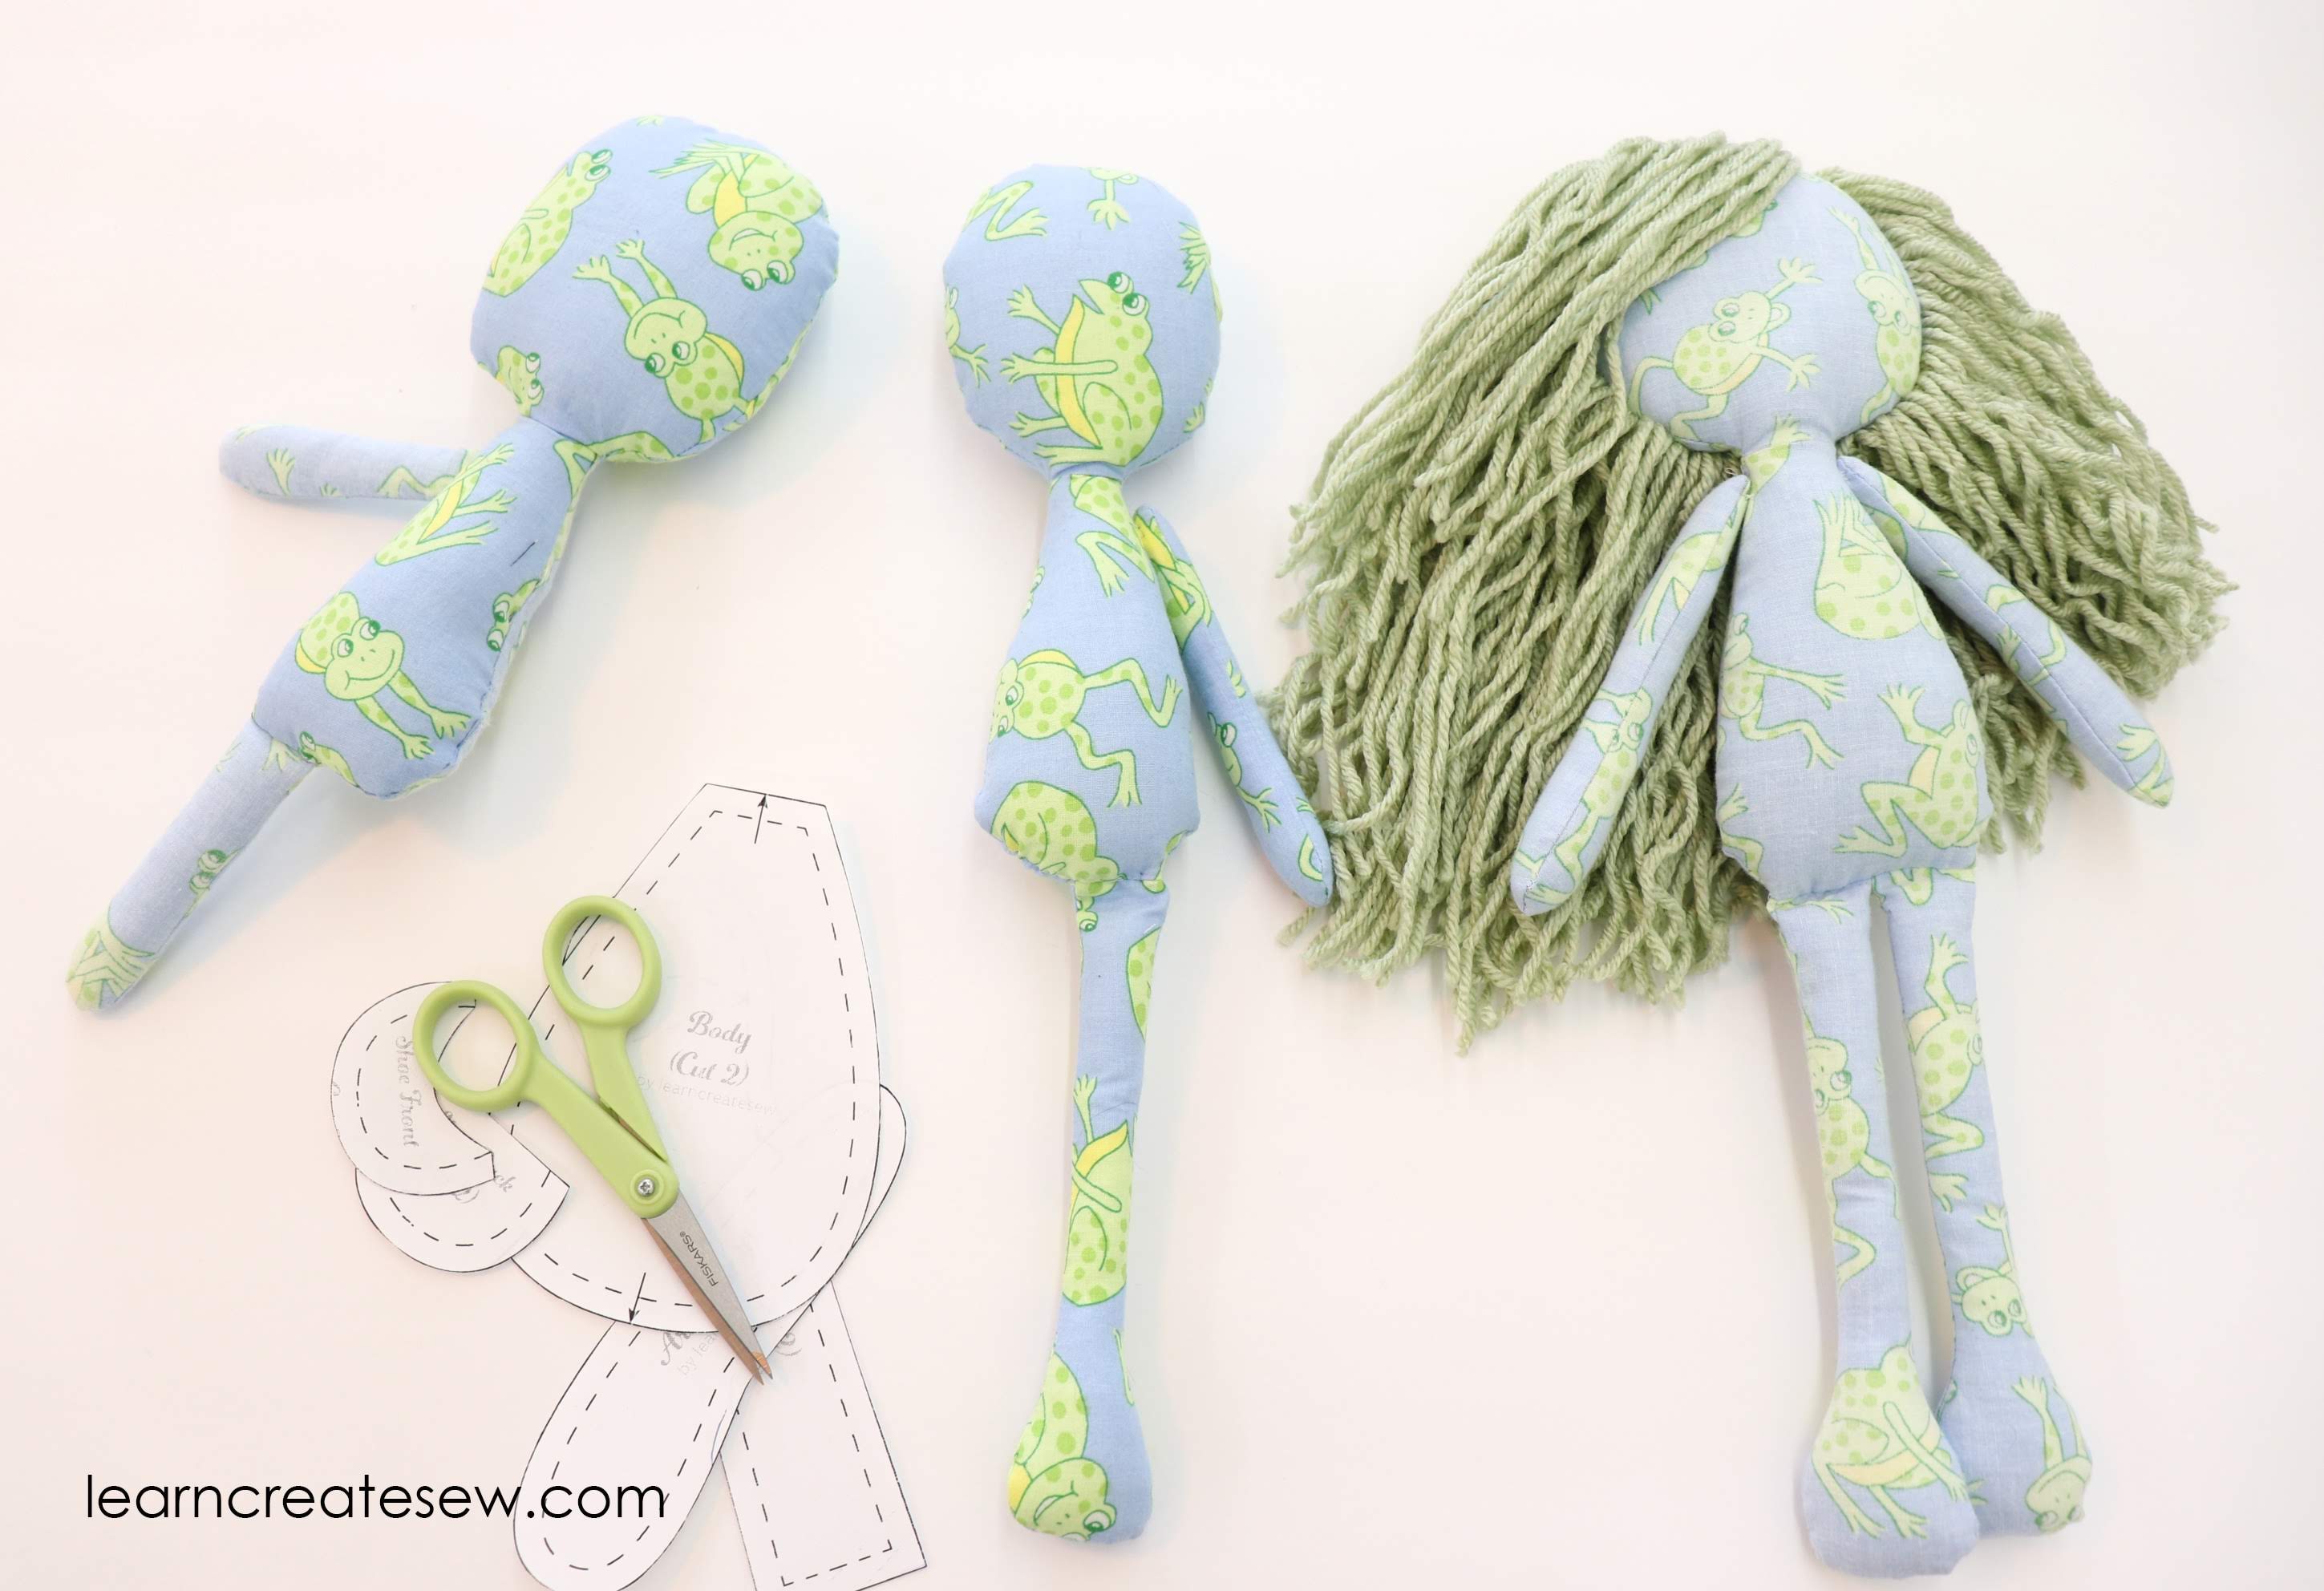
A rag doll was one of the project brainstorm ideas that I posted in my sketchbook recently. The project is a bit time consuming, so I opted to do other projects first.
However, this weekend I was quite excited to have the time to work on the project.
First, I drafted two pattern options. After testing them both I made some adjustments to my favorite version and found a shape I was pretty happy with!
Next came the daunting task of tackling the hair! I do have to say that it took longer than expected to hand stitch all that yarn! Thank goodness for comfy couches and Netflix. It definitely helps the process.
Once I was happy with my rough drafts, I went on to test the project!
I have to say, I was quite happy with the results! I love all of the hair! It took about a half skein of yarn, but I love how puffy it is!
I hope to have instructions and patterns ready to share soon!
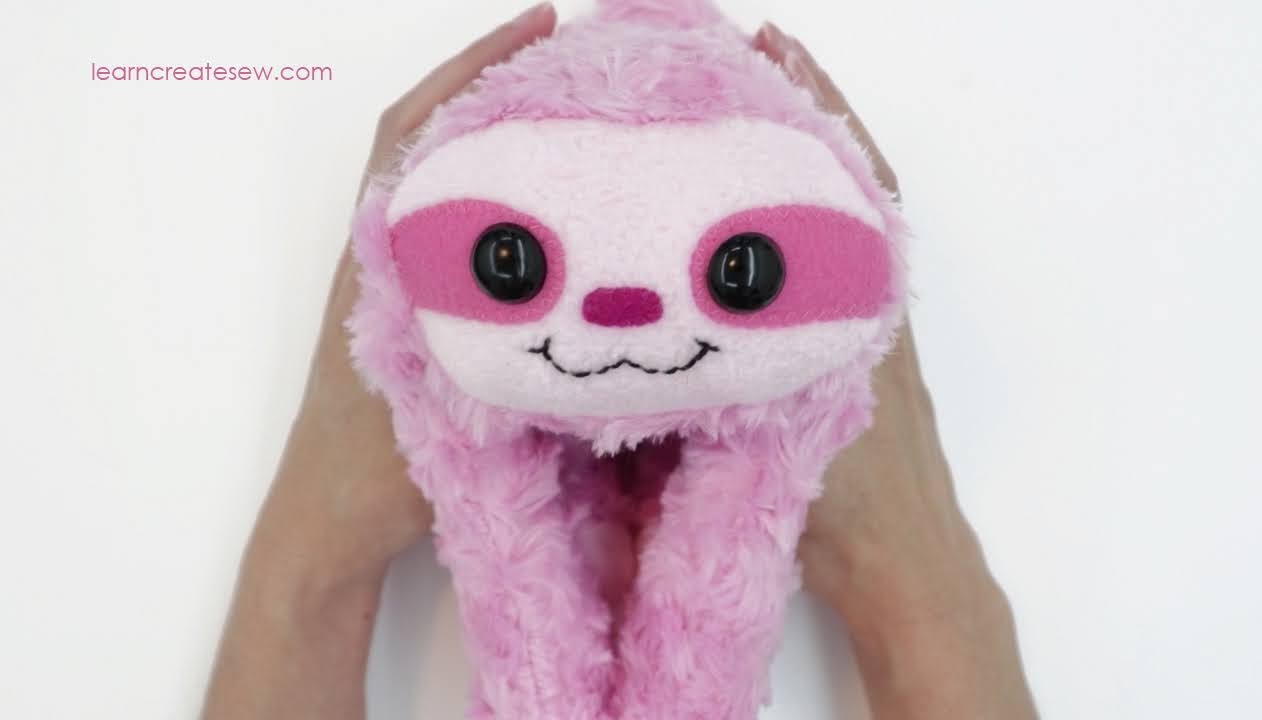
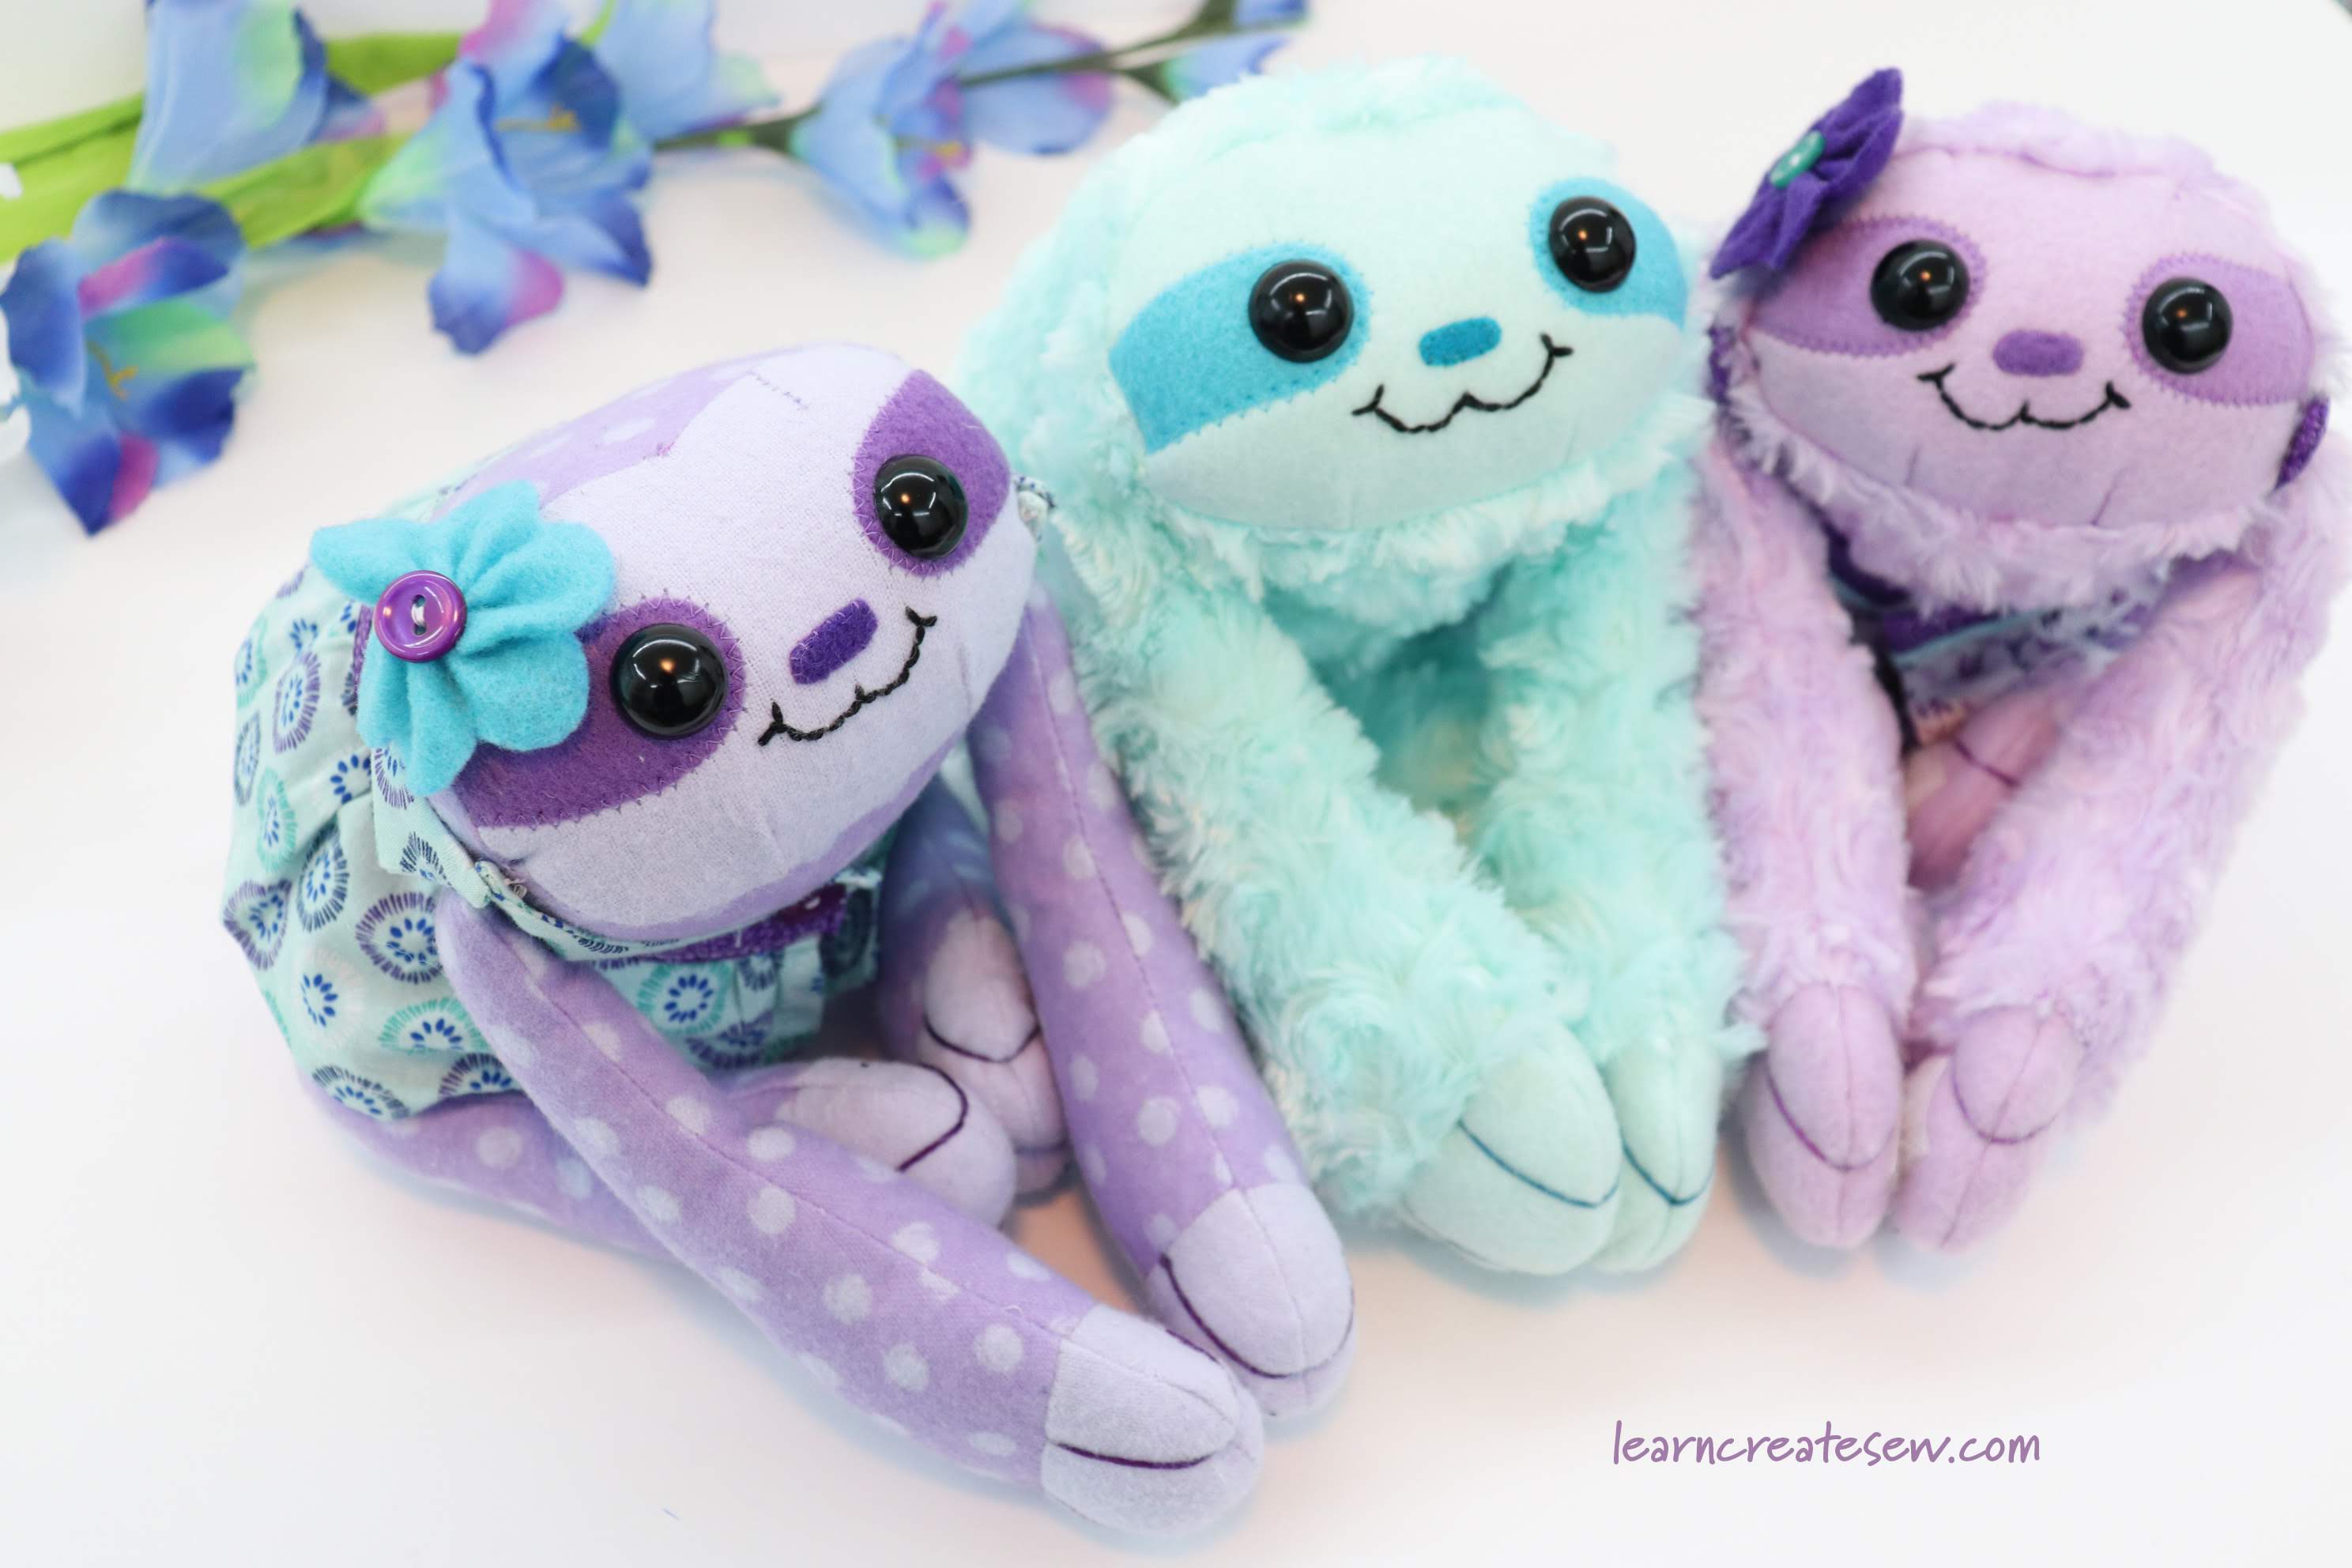
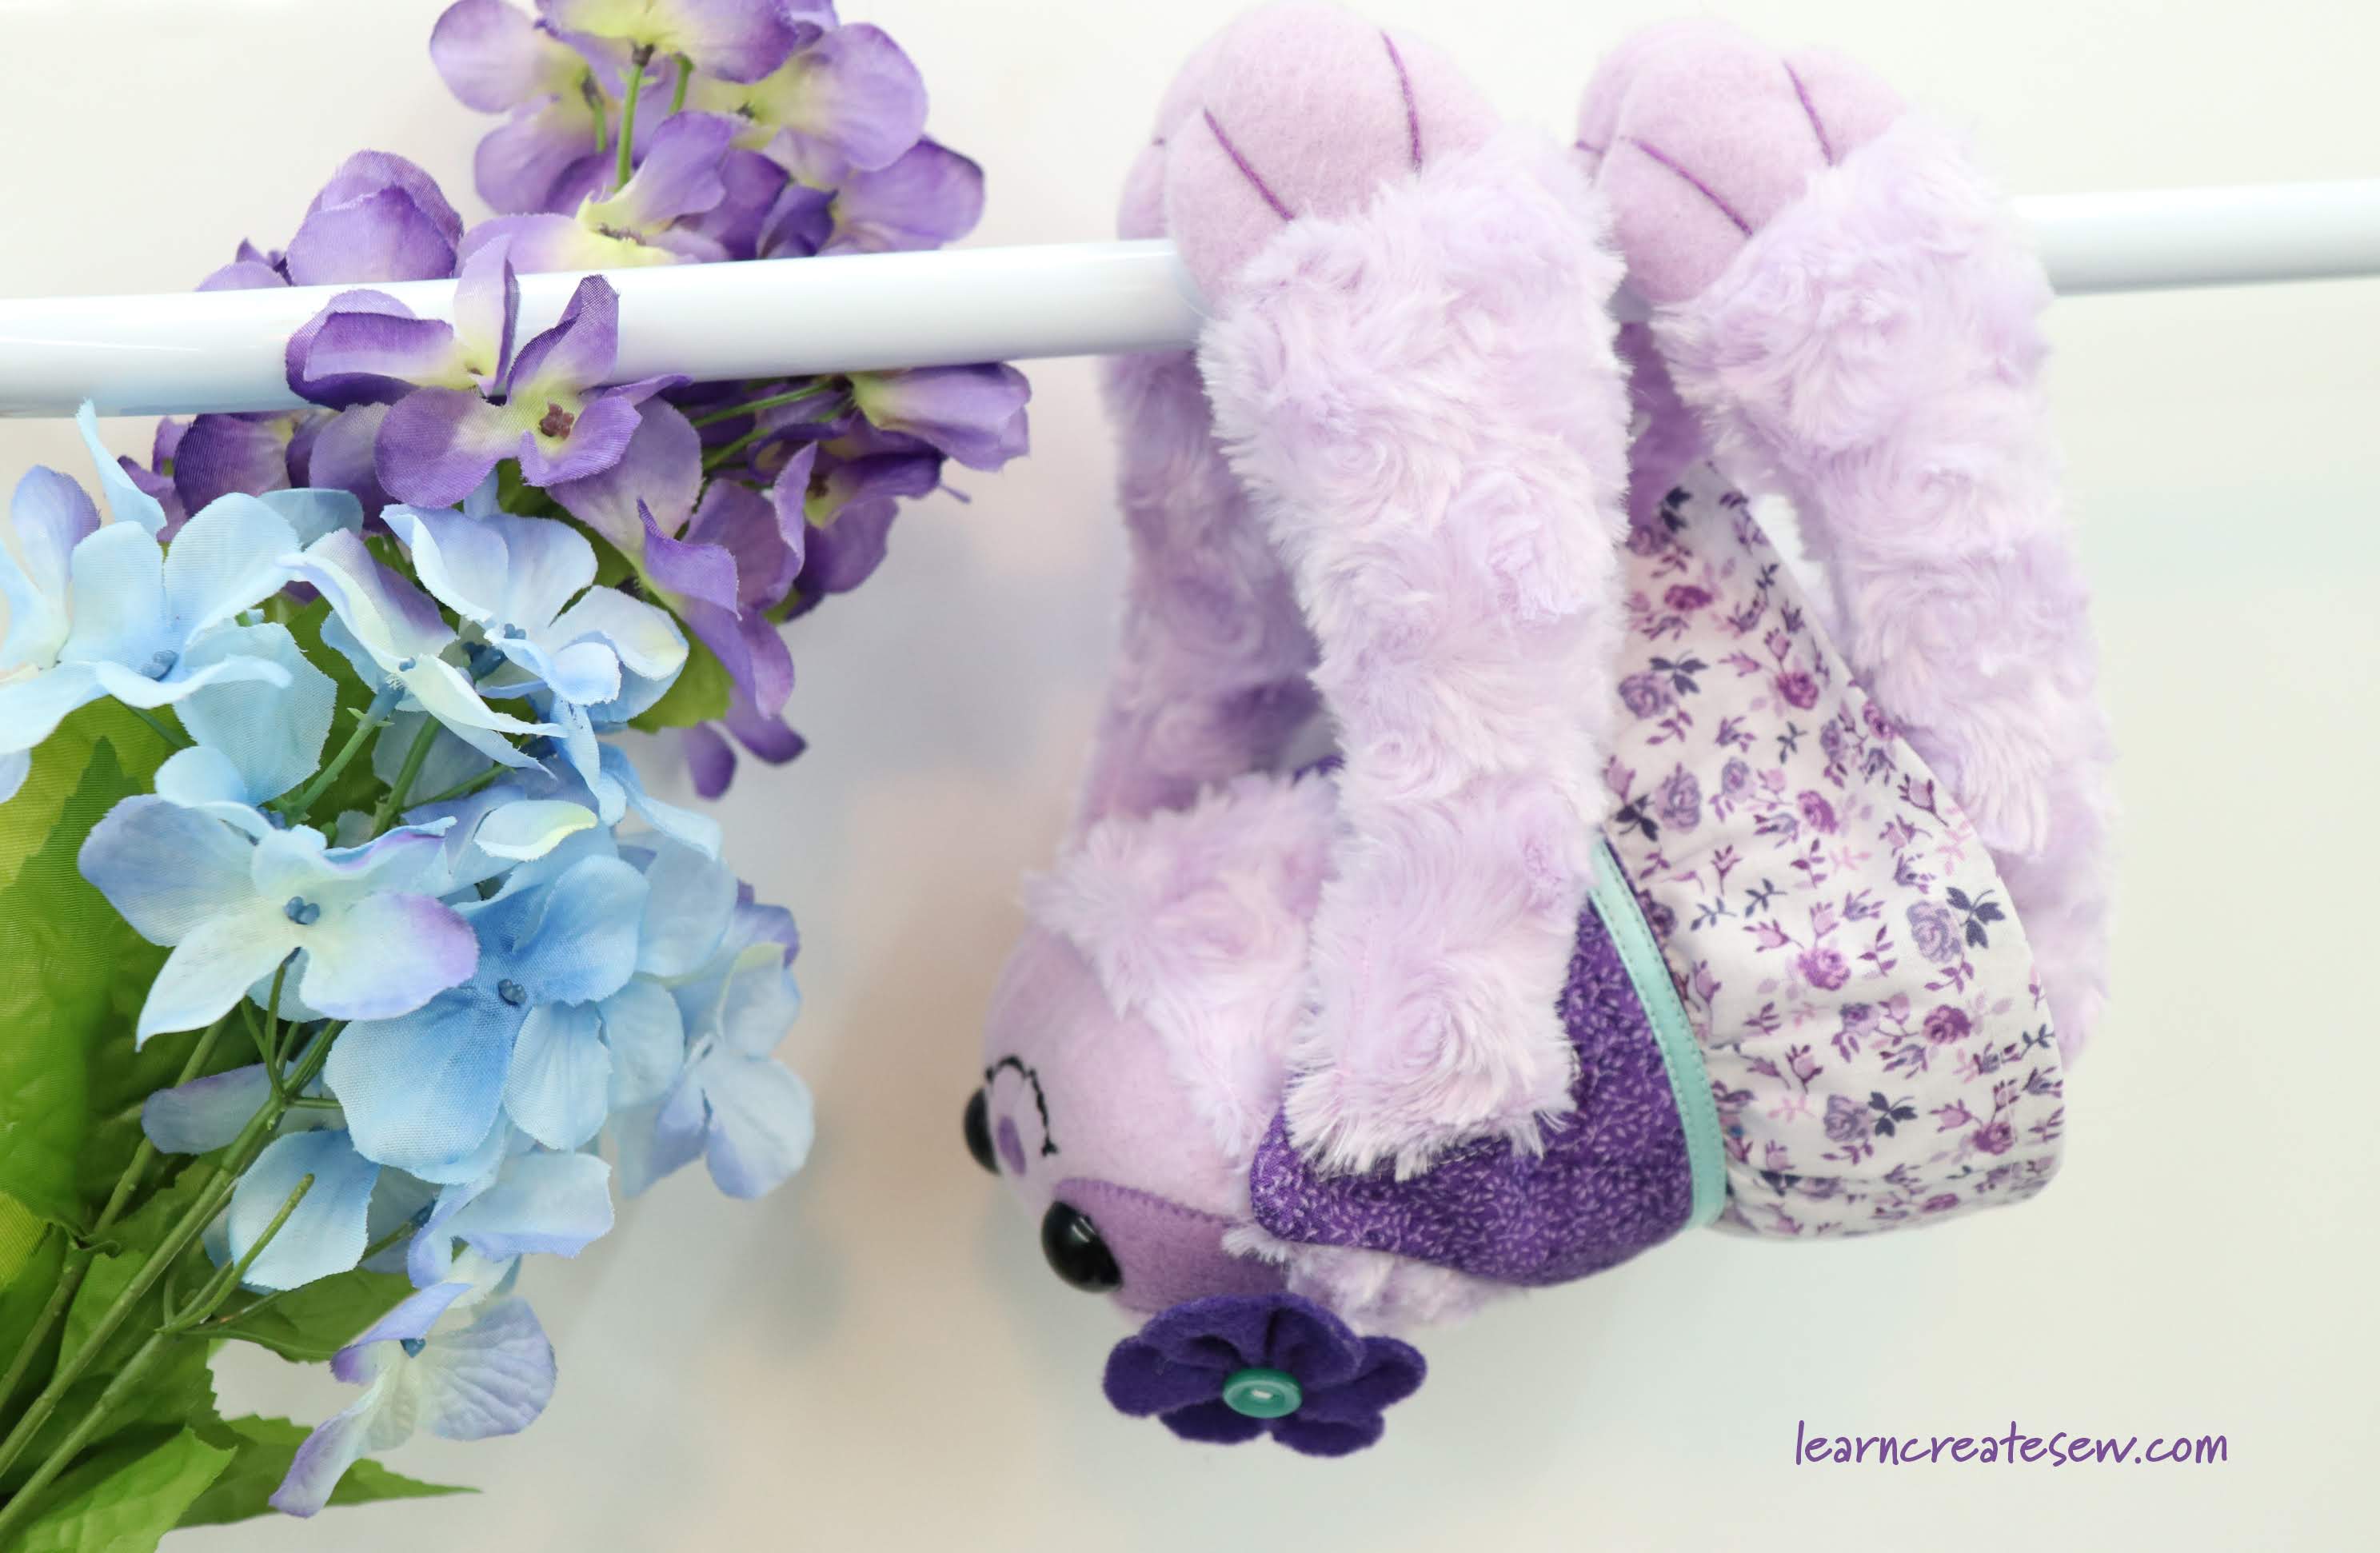
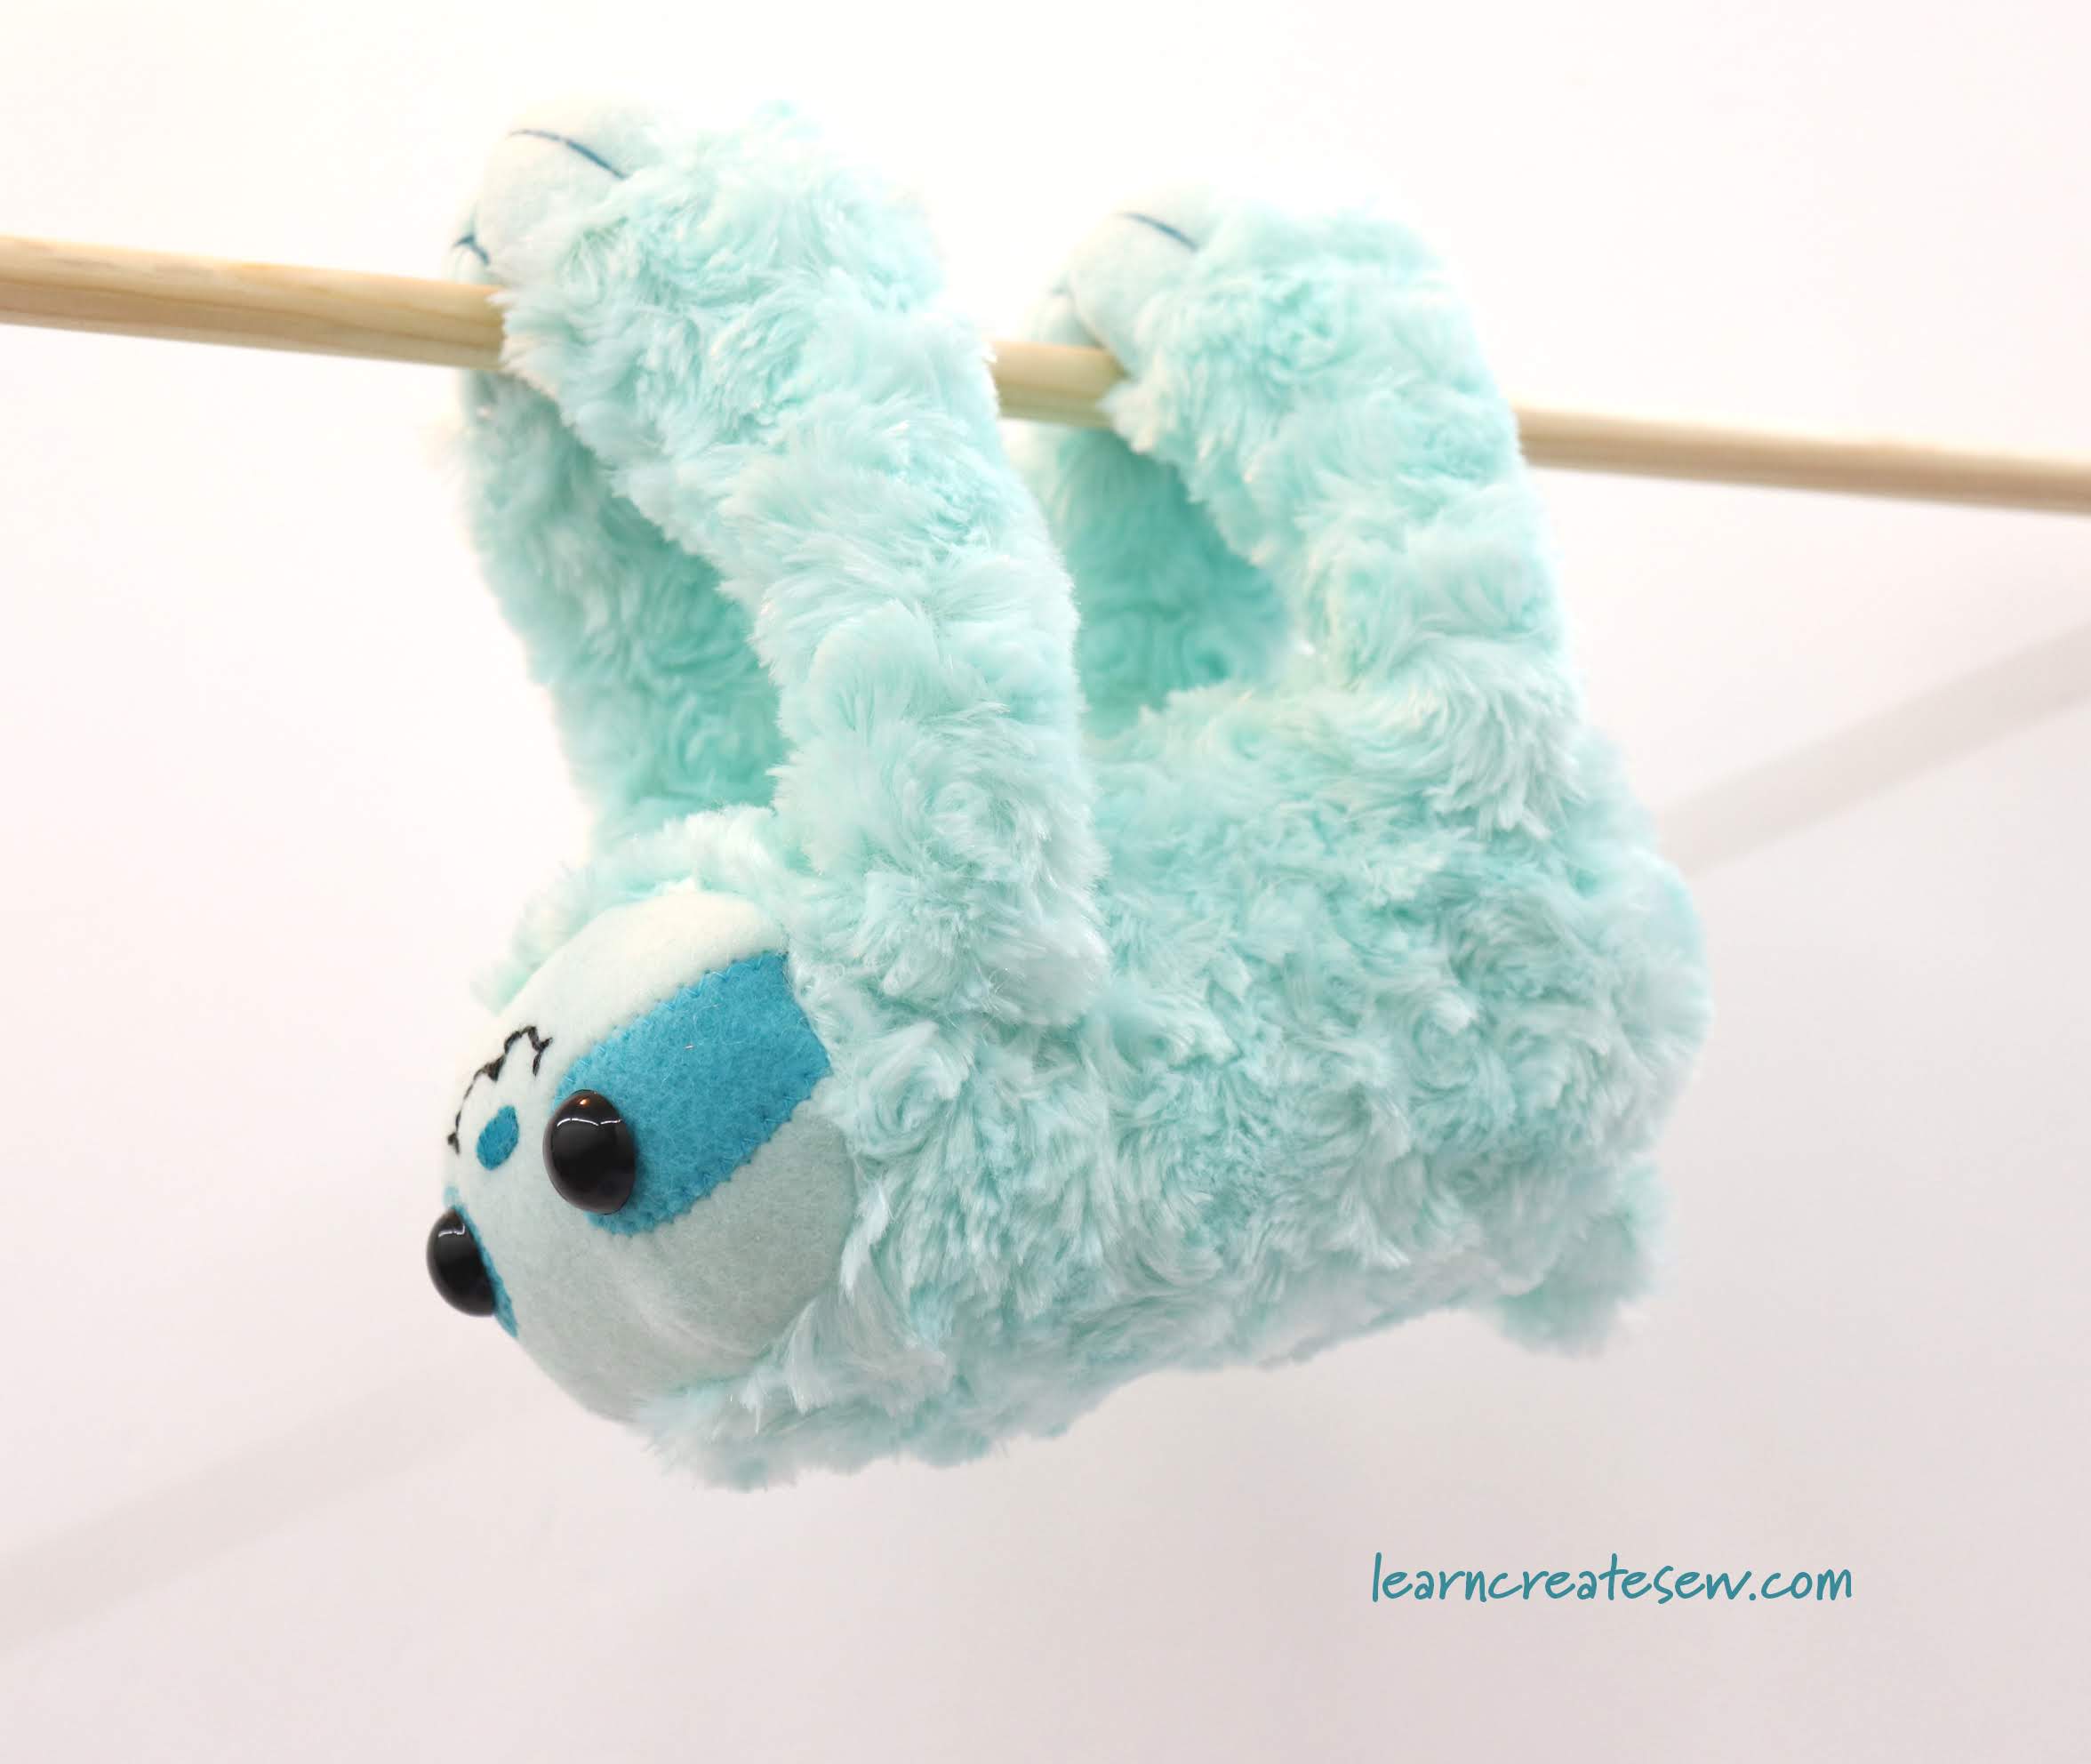
One of my favorite projects that I made this year was a sloth plush! My students absolutely love making plushies, and as I am sure you have noticed sloths are HUGE right now.
I tried several different designs for the plush before coming up with this one.
I really like that you can hang the plush if you want to.
You can also leave it simple or add accessories.
Sewing with fur is a bit of a challenge, but they are so cuddly!
This project difficulty is about a 4/10 if working with fleece, and a 5/10 if working with fur. The project is time consuming since there are a lot of piece, and you have to add a seam allowance to some of the pieces. But the whole project could be completed by hand if you didn’t want to use a machine.