In this lesson we will learn several topics that are applicable in a wide variety of sewing projects. The drawstring bag introduces how to make a casing or channel that can be used to hold, a drawstring, elastic, ribbon, and more. This skill is used everywhere from bag making to garment construction and makes the drawstring bag a great project for beginning sewers.
Lesson Category:
Machine Sewing – Straight Seams
Lesson Topics:
Making a Drawstring
Making a Casing
Sewing Straight seams
Finishing Seams
Pressing
This bag measured approximately 13.5 x 15 inches when finished, but could easily be adapted for other sizes.
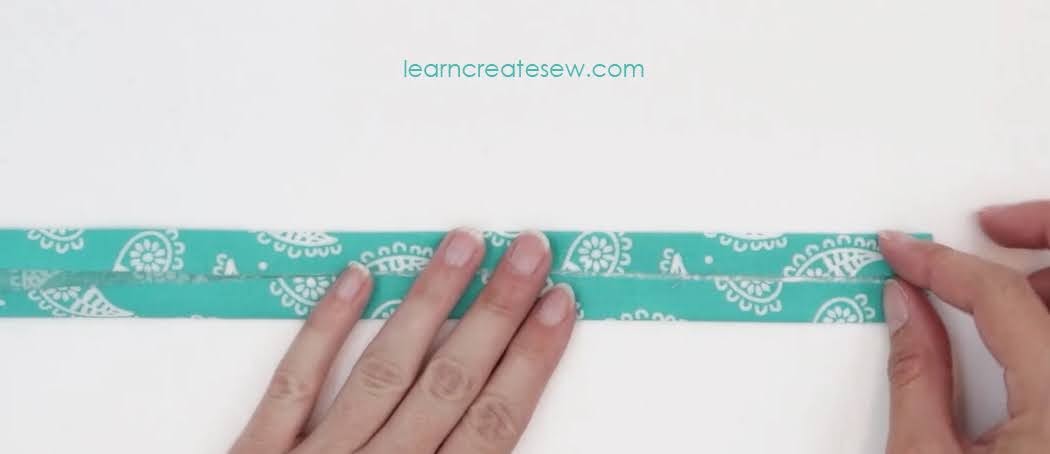
The bag features a 1/2 inch wide drawstring made by piecing and folding 2 inch strips of fabric.
This project was designed to only use 1/2 yard of fabric, and as a result the drawstring is pieced, but you could use more fabric if you prefer to make the drawstring out of a continuous piece of fabric rather than multiple pieces.
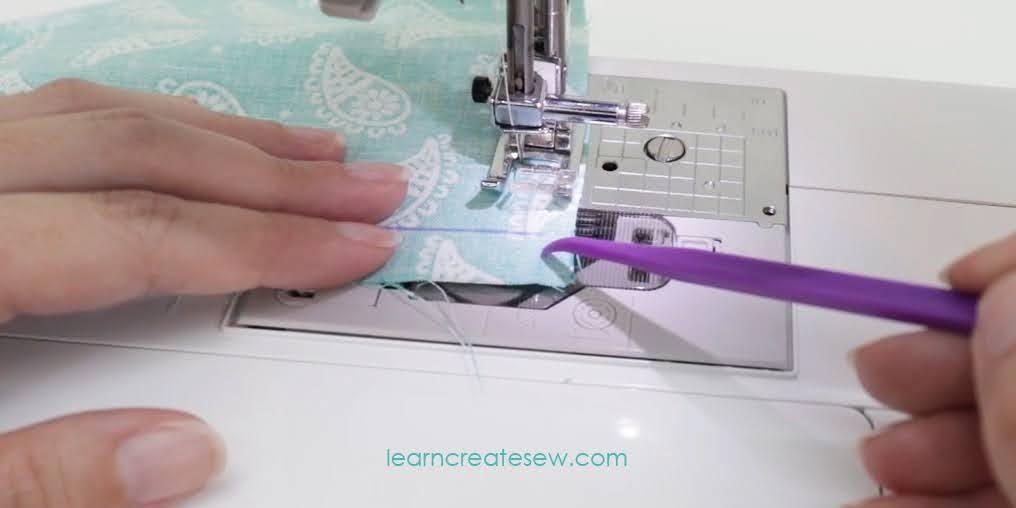
It has a wide casing for easy threading of the drawstring. I’ll show you a quick way to make sure the sizing of your channel is consistent.
It also introduces finishing seams, which is a great skill in general. If you are interested in learning more about finishing seams check out my Skill Building Video on the topic!
In the video also introduces tips for how to turn a corner exactly, how to finish the edges of the drawstring channel and more.
No matter how long you’ve been sewing, or how much experience you have unpicking seams is inevitable.
Sooner or later, you will have to unpick a seam. It’s actually good to do so. In most cases, when something goes wrong, it is best to redo it right away. Ignoring it can often make the issue worse, as you may find that what went wrong impacts what you will need to do four or five steps down the road. So, if we can become comfortable and skilled at unpicking seams, we will be able to improve the overall results of our sewing projects!
In this video I will show you four different ways to unpick seams. Since many fabrics are different, often the way we unpick the seams differs as well. All of the methods have their uses and are helpful in a variety of situations.
Method 1: Unpicking from the Wrong Side
This is usually done with the fabric laying flat and right sides together. It is the most common method of unpicking, and is my go to method in most cases.
This method is actually quite simple, but it’s easy to do more work than you need to. Just remember…you don’t have to unpick EVERY stitch! That’s usually not necessary unless you are using a very small stitch length or are working in an area that was backstitched.
Simply slide the seam ripper under every 4th or 5th stitch, tearing the thread, and then pull thread from the back and ta da! It’s all undone!
Method 2: Unpicking from the Right Side
I use this method a lot on fleece or plush fabrics. I find on these fabrics my stitches sink right into the fabric, and sliding the seam ripper under the stiches can be difficult. I also like using this method in situations where the stitches are difficult to see, especially if you are using coordinating thread.
Lay your fabric flat with the seam allowance open. Unpick the first few stitches one by one, and then gently pull the fabric on each side away from each other. You will then be able to see the thread between them. This makes sliding the seam ripper under the threads much easier! And since you are gently pulling as you go, it often is quite quick.
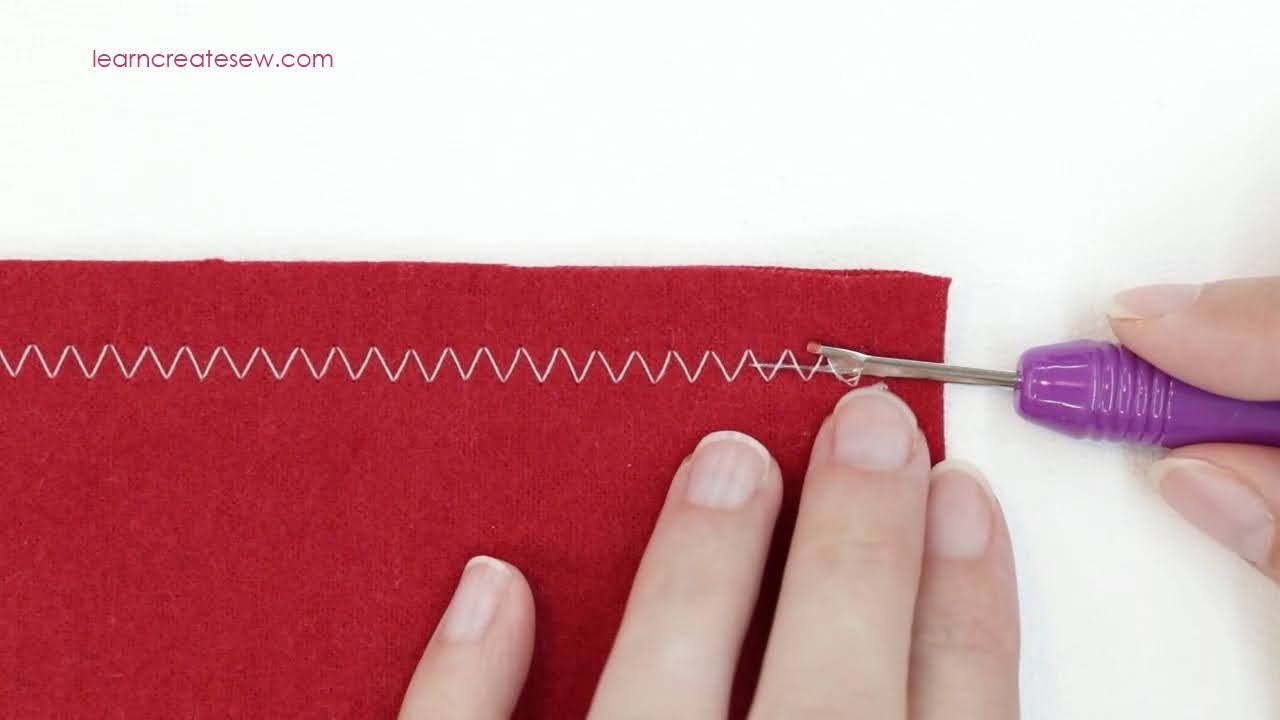
Method 3: Unpicking Zig Zag Stitches
Zigzag stitches are probably the easiest stitches to unpick. You simply slide and go. Guide the point of the seam ripper under the stitches and slide right through. The seam ripper is usually able to glide under several stitches at once, ripping the stitches of the seam in seconds.
Method 4: Using the Little Red Ball
This is a really popular method for unpicking and is super convenient. Simply unpick a few stitches in the seam to get it started, then slide the little red ball between the layers of fabric, and gently push it through the seam. The little ball helps separate the fabric so only the threads are cut.
As the seam ripper slides down the seam it will cut the stitches. This method is SO fast. If you are careful it works great. This can be done with the fabric wrong sides together such as on the edge of a closed project, or with the fabric laying flat and the seam allowance open (which protects the fabric a bit more). It is actually pretty fun to watch the seam ripper slide smoothly along the edge and take out those unwanted stitches 🙂
I want to love this method, I really do. It is so easy and it’s nice to just slide that seam ripper along and let it do its’ work. Unfortunately, this method does have its drawbacks. Every once in a while a bit of fabric gets caught in the groove and the blade can tear a hole in your fabric. This could happen for a lot of reasons. It could be the weight or position of your fabric, a dull seam ripper, unexpectedly tight stitches, or any number of other reasons. I have on multiple occasions cut a hole in my fabric using this technique. As a result, I don’t use it very frequently. I also avoid attempting it on expensive fabrics or project that don’t have any leeway in sizing. I’ve found it’s just a bit too risky for me. That said, a lot of people love it and this is the method they use all of the time. So, give it a try! Find the method that works best for you and don’t hesitate to unpick a seam when needed!
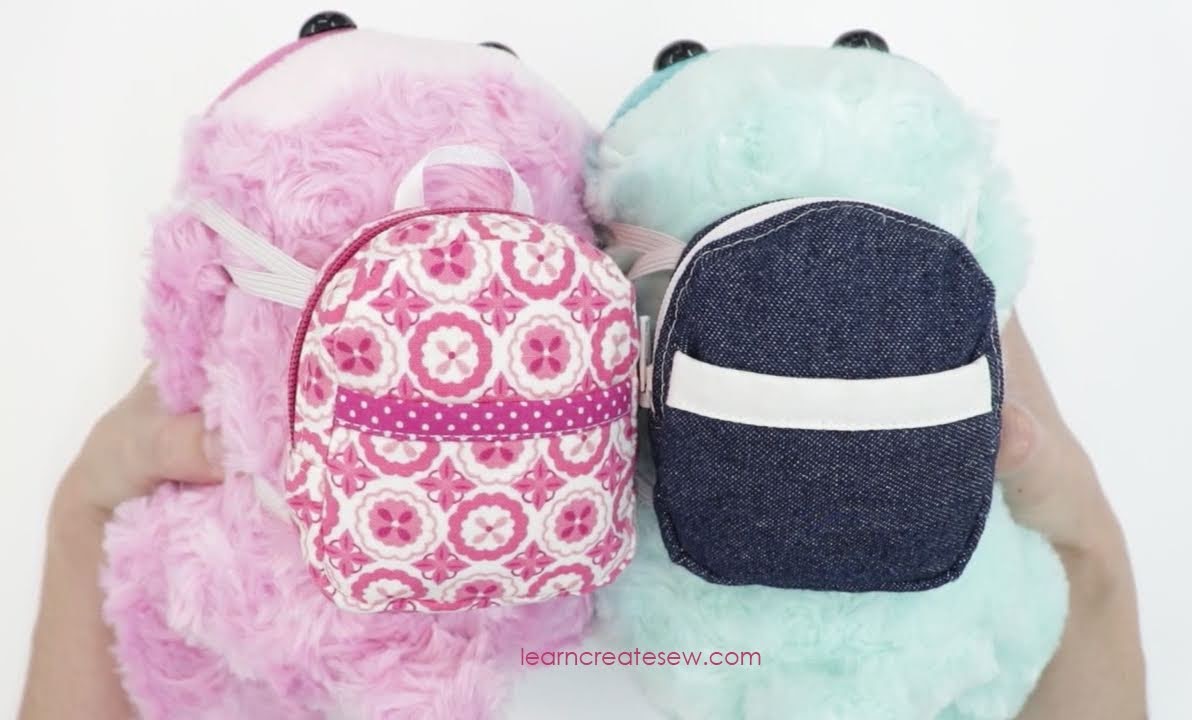
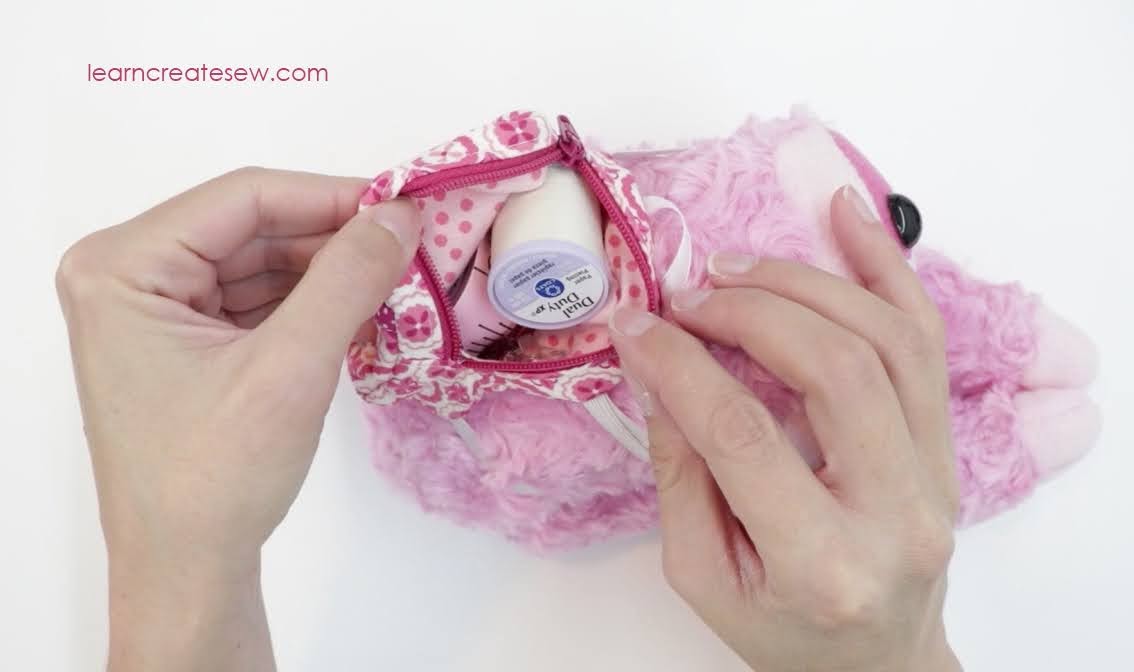
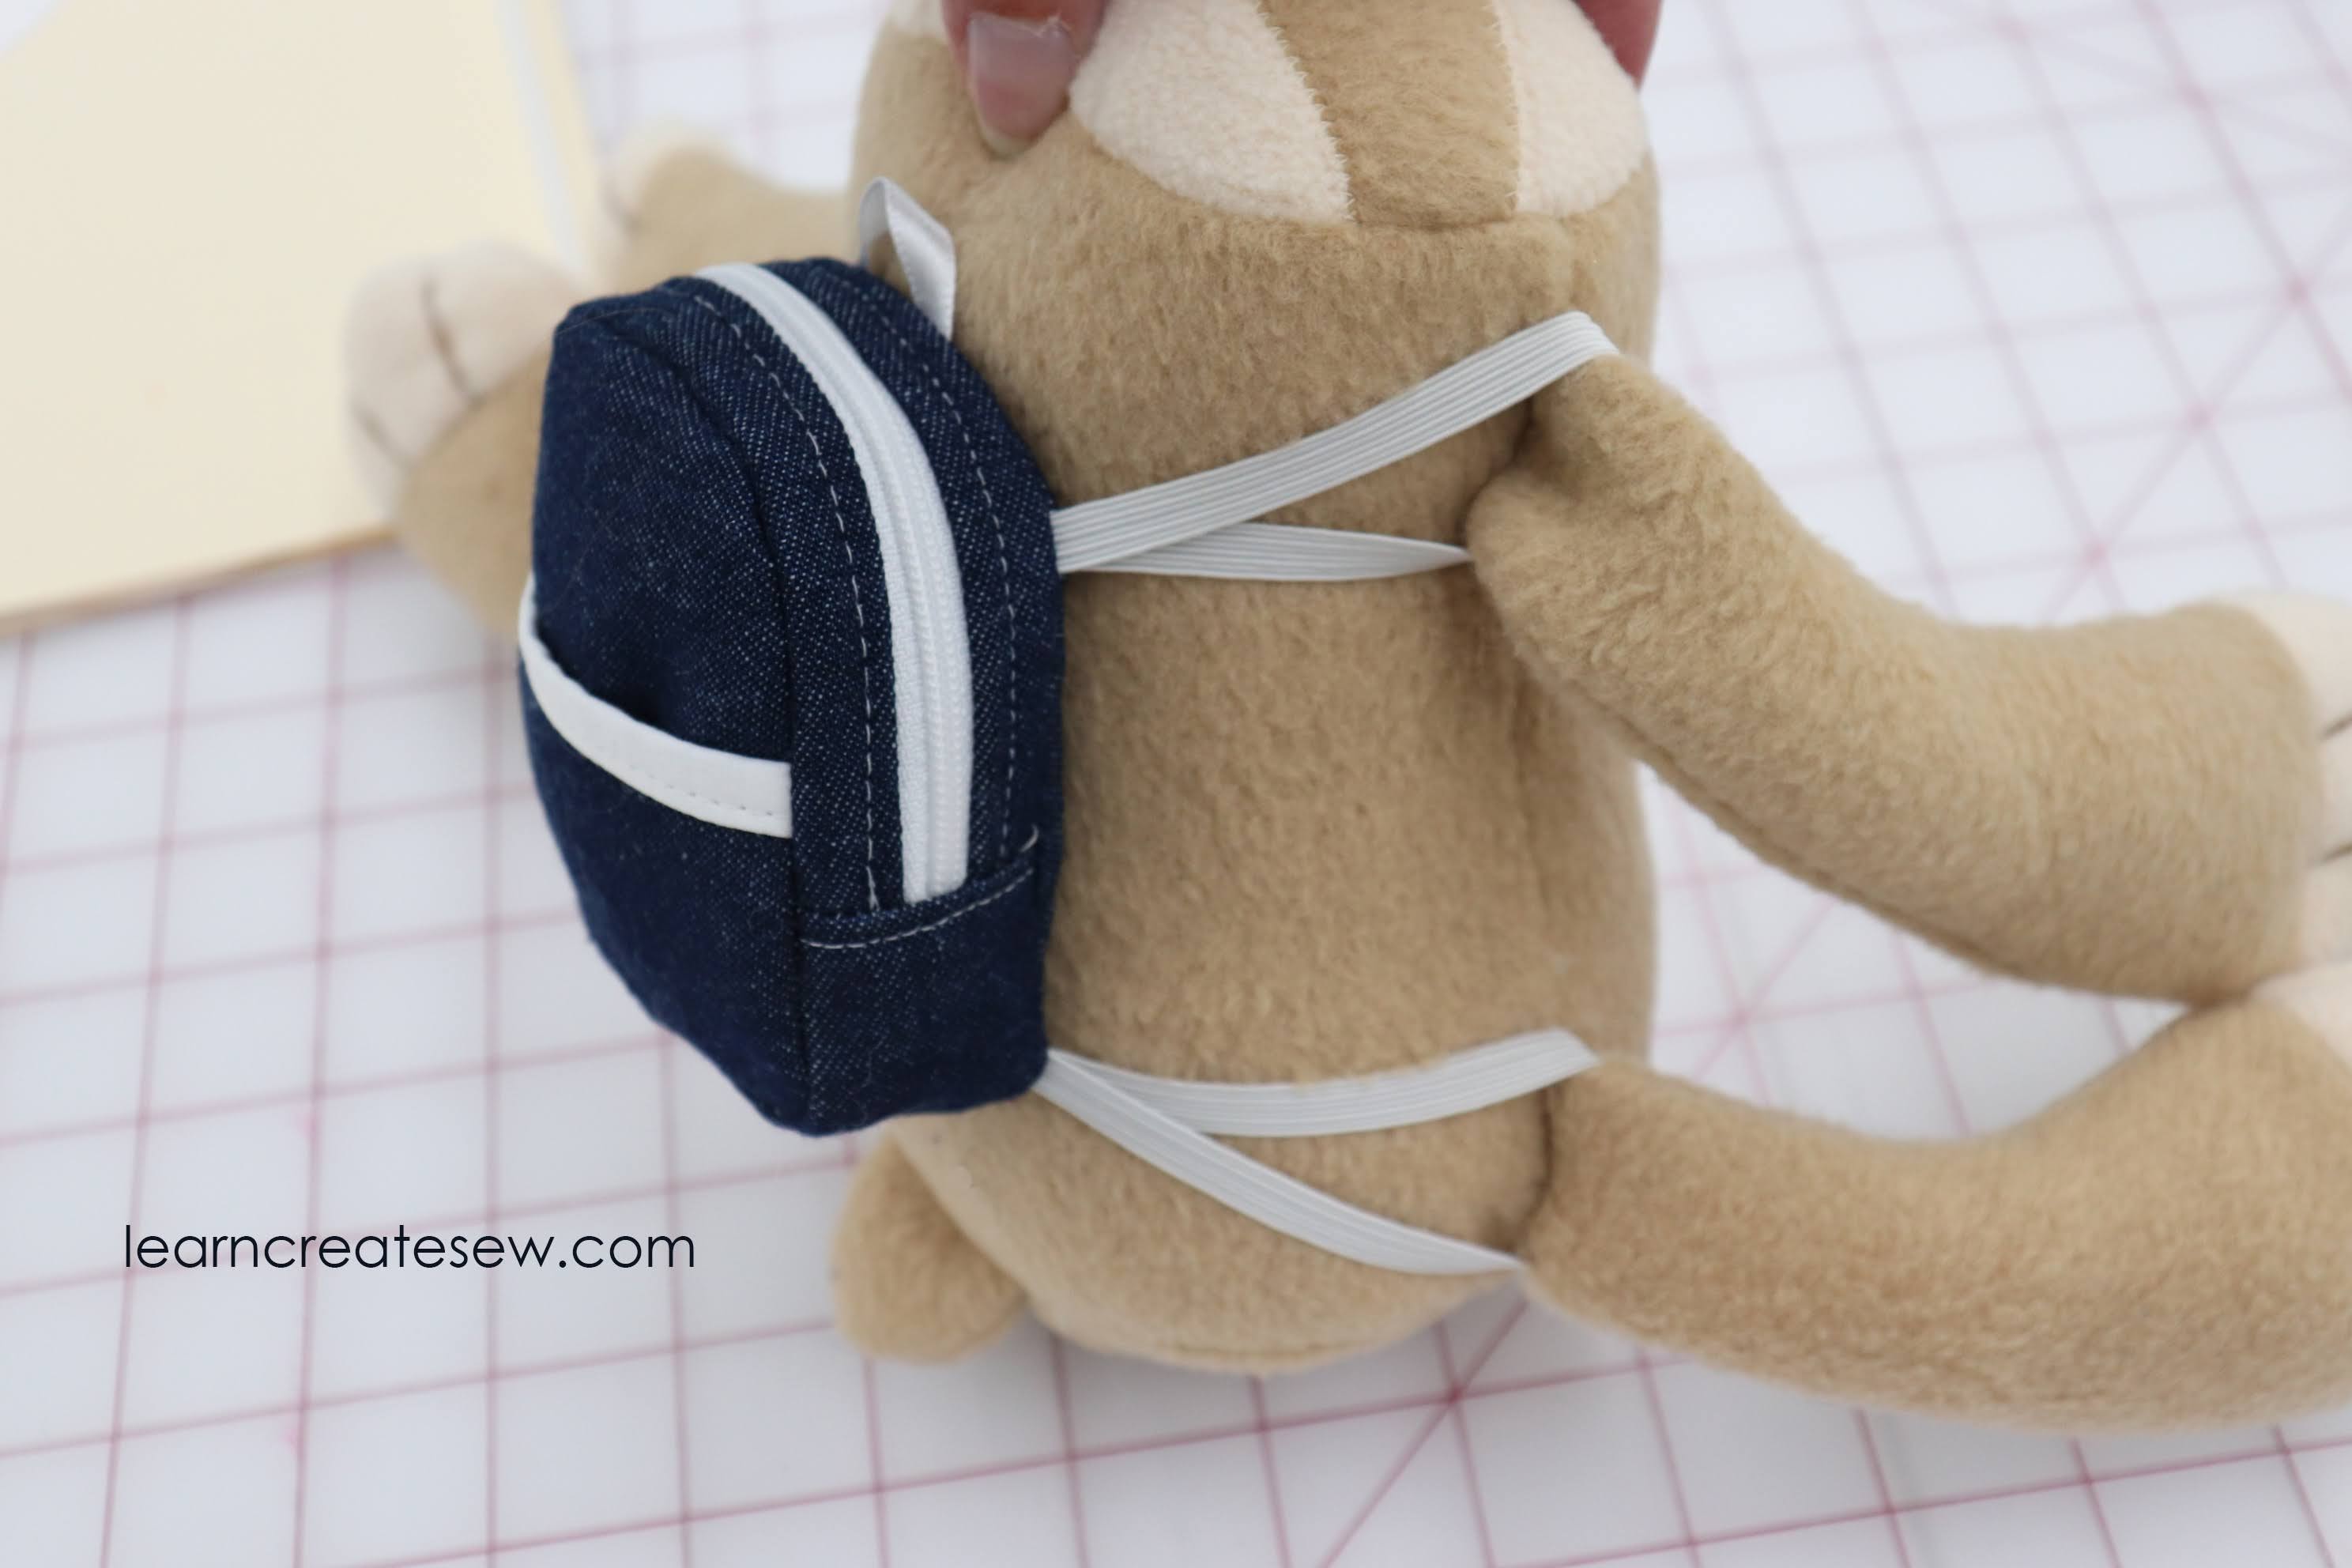
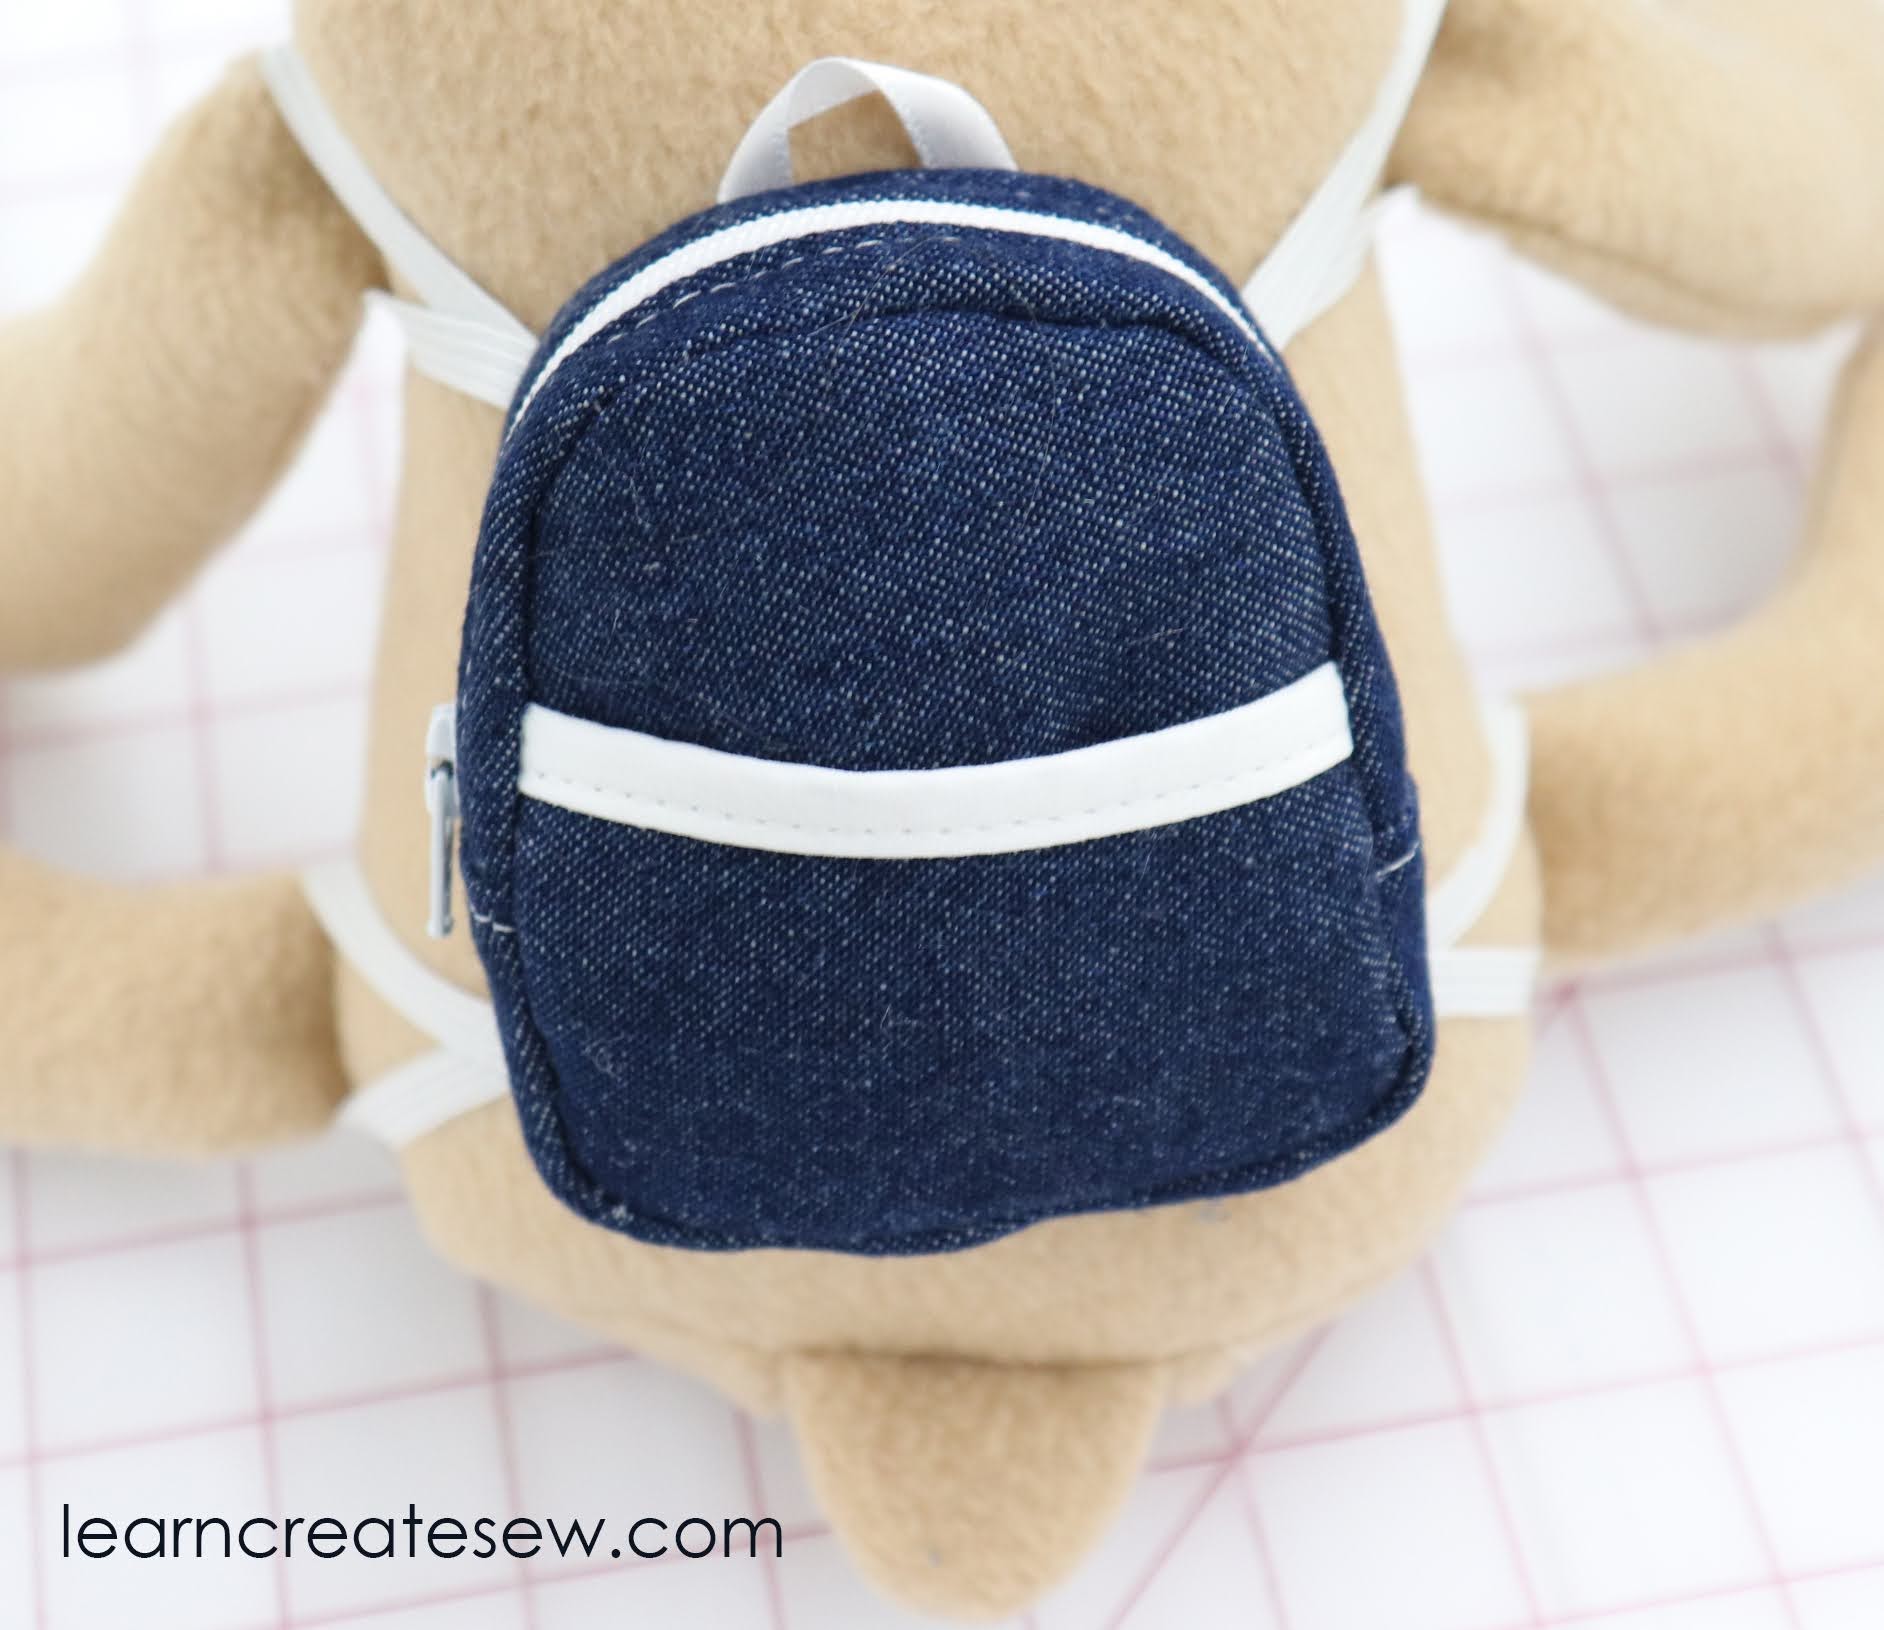
When I made the sloth plush project I always intended for there to be accessories to go with it. So, here is the first!
This is a tiny little backpack that is just adorable on the sloth project!
It could easily be adapted for other dolls and stuffed animals by adjusting the elastic straps.
You can choose to make the backpack out of a single layer of fabric (like my denim example), or you can make it with lining (pink example). There are also two different options for the lower straps. Loops that go around each leg, or a single strap that goes around the belly.
Overall, I was really happy with how this one turned out. I hope you enjoy it as well!
Supplies:
4.5 x 18 inches of Main Fabric
4.5 x 18 inches of Interfacing (optional – I used Pellon SF101)
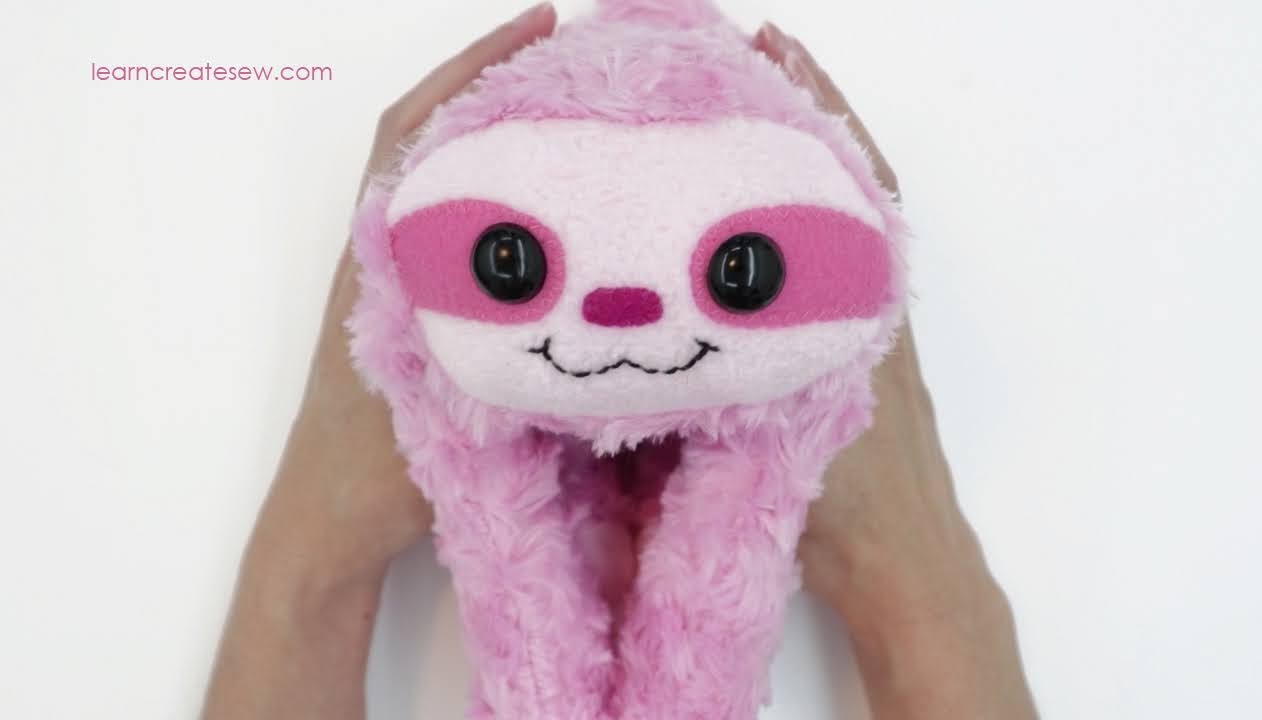
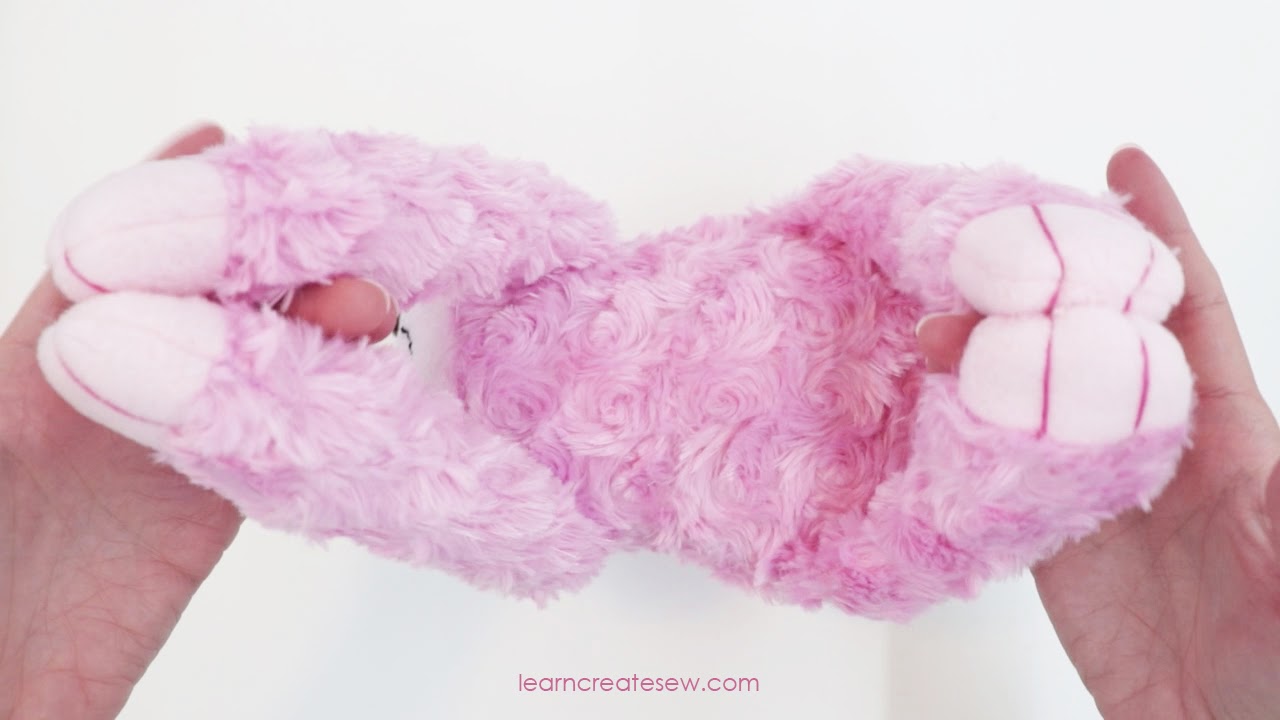
The sloth plush has been one of my posted free projects for quite some time, but I thought it was time to make a video!
I absolutely LOVE this project! It is so cuddly, which just makes me happy! It does take a bit of time, especially if you choose to work with fur, so the instructions for this project will be in two parts.
Supplies:
7 x 48 inches Faux Fur or Fleece for body and legs
4.5 x 18 inches of fleece for the face and claws
Scrap felt for face details
Two 16mm Safety Eyes (You could also use felt circles or buttons if you prefer)
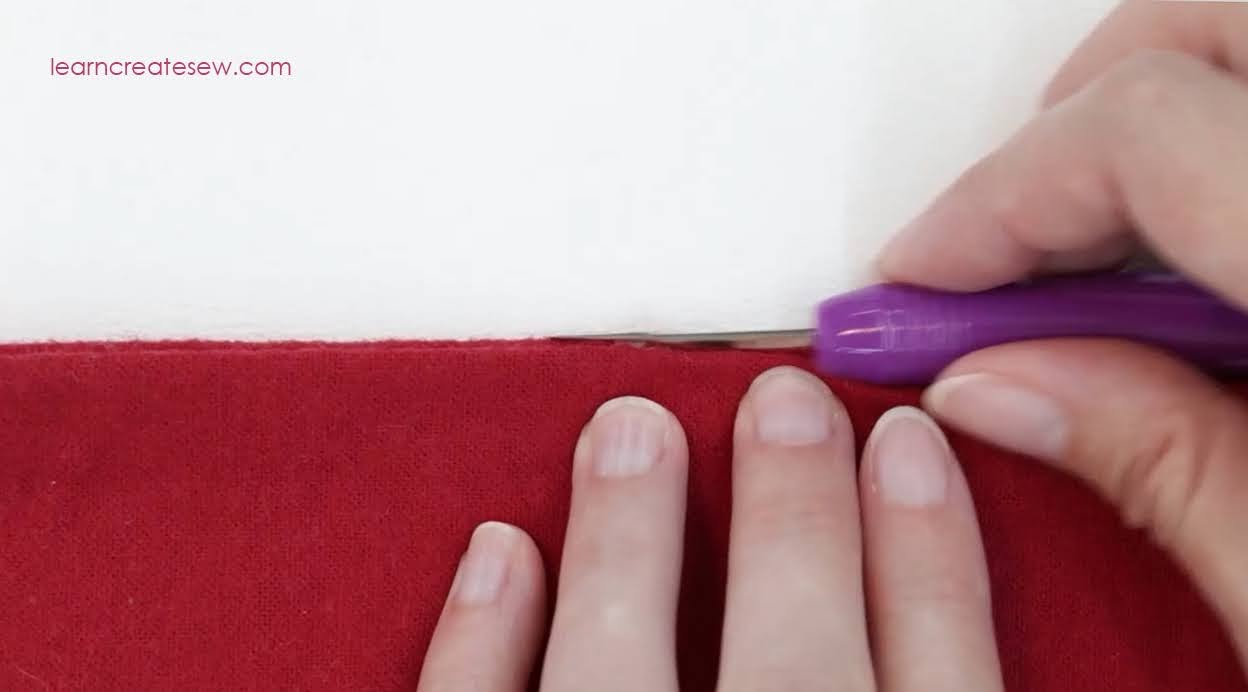
One thing that comes up frequently in sewing is finishing seams. This can be just as important on simple projects as it is on garments and in more complex construction.
Having a bag of tricks for finishing seams can remove the need for linings and can simplify projects. It can also provide a more polished and professional look.
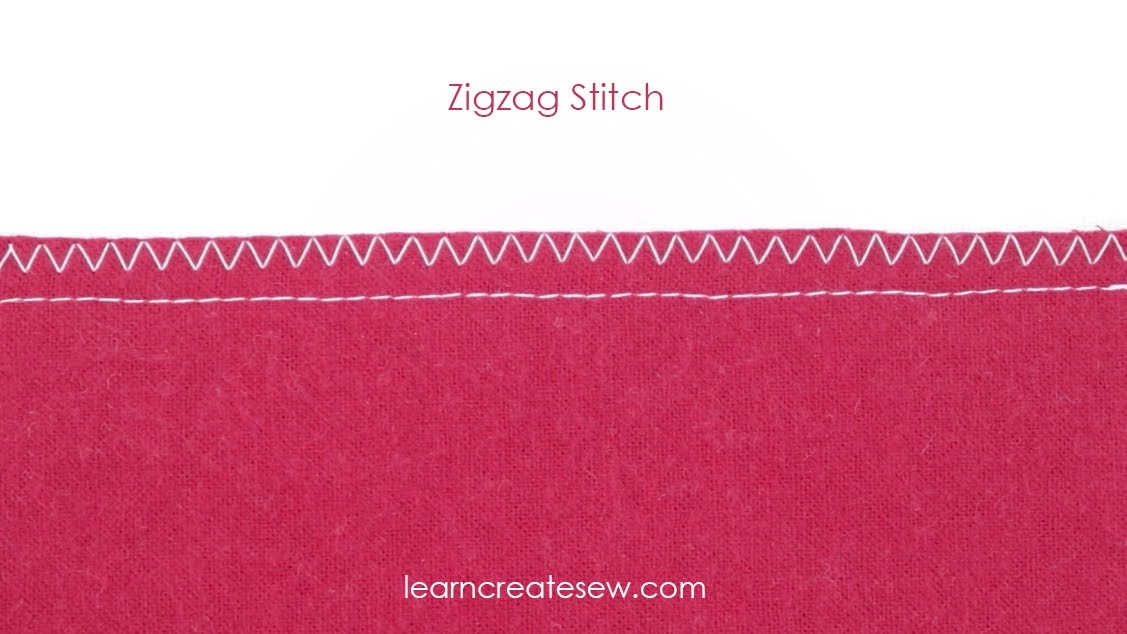
In my video I will demonstrate four different methods of finishing seams.
PINKING SHEARS
This is the easiest method for finishing seams. It takes very little time and is really convenient. However, it does require a nice pair of pinking shears and they can be a bit pricey.
Zigzag Stitch
This method is very convenient as well. Most sewers are comfortable with the basic zigzag. It doesn’t require any special tools or accessories and it gets the job done.
Zigzag Over the Edge
This is a quick substitute for the overcast stitch if you don’t have the overcast foot available. However, depending on the weight of your fabric the edge may roll a bit when it is met with the tension of the stitch. I find it works well on heavier weight fabrics. The fabric shown in the example is a mid-weight flannel.
Overcast Stitch
This stitch provides the most professional finish. Since it is actually designed to go over the edge it is great for finishing seam allowances. However, it usually requires a special foot for your machine, and depending on your machine the stitch may or may not be an option.
Watch the video and learn how to use these seam finishing methods!
Thanks for your patience for this latest post! I am a full time teacher, and with school starting back in full swing I haven’t had as much time to devote to new posts as I would like. Don’t worry! I still plan to post new content. However, it just may not be as frequent as it was over the summer. I hope you enjoy the new projects as they come and until then check out my free projects that are already available!
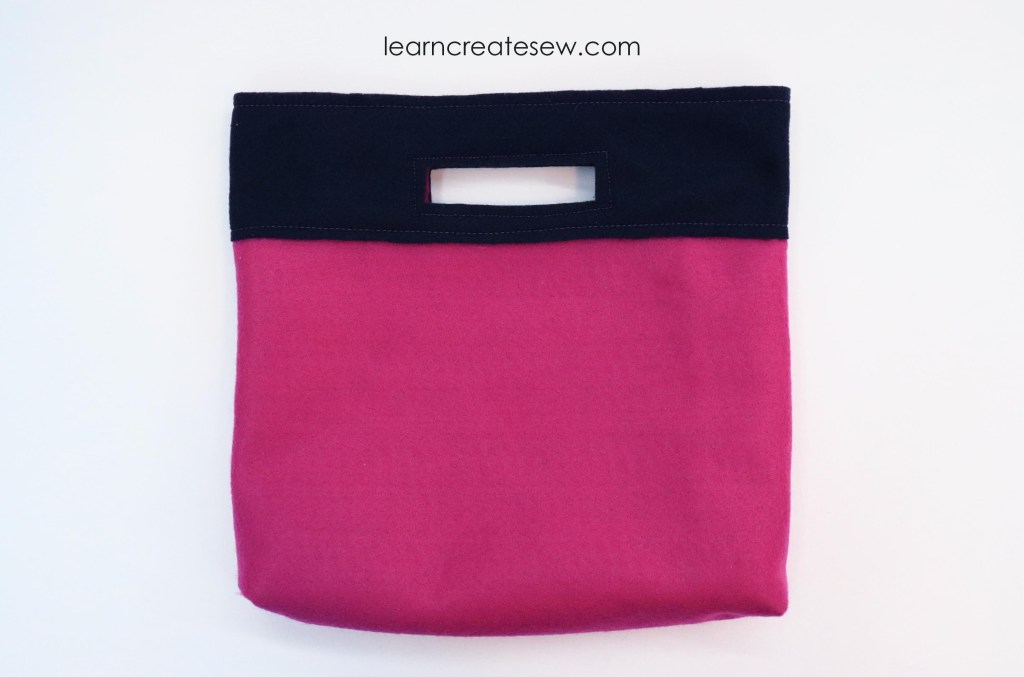
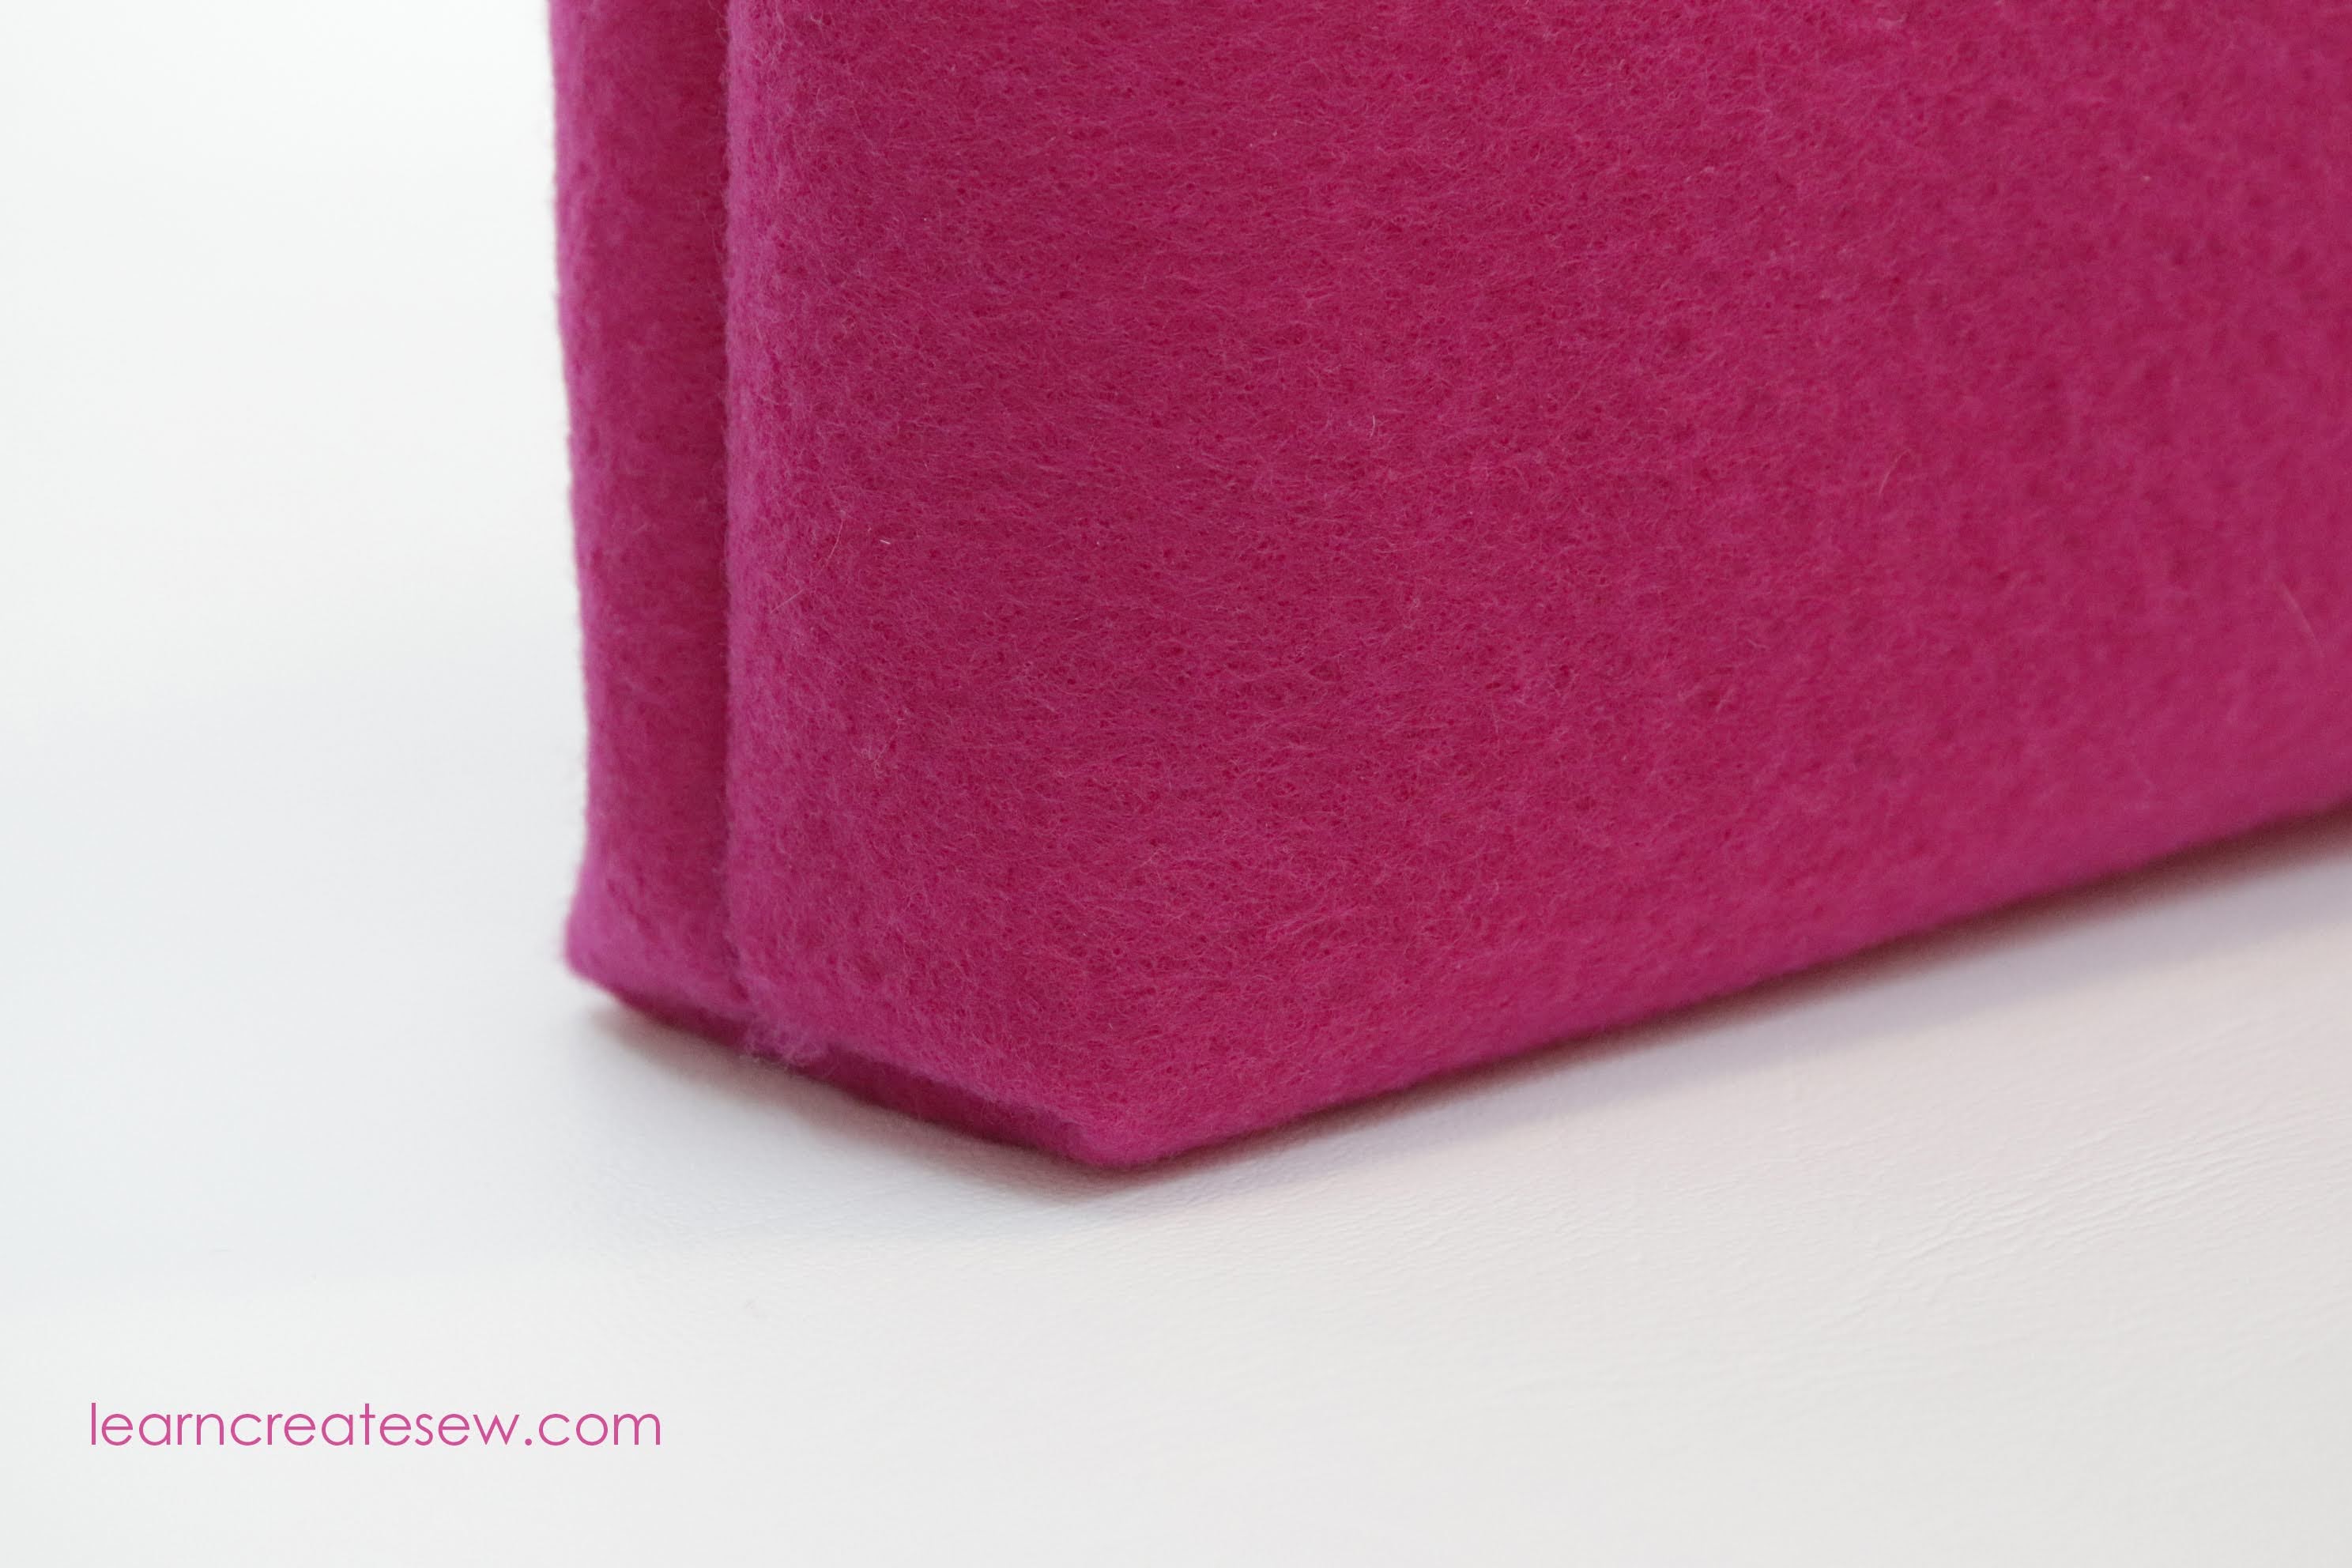
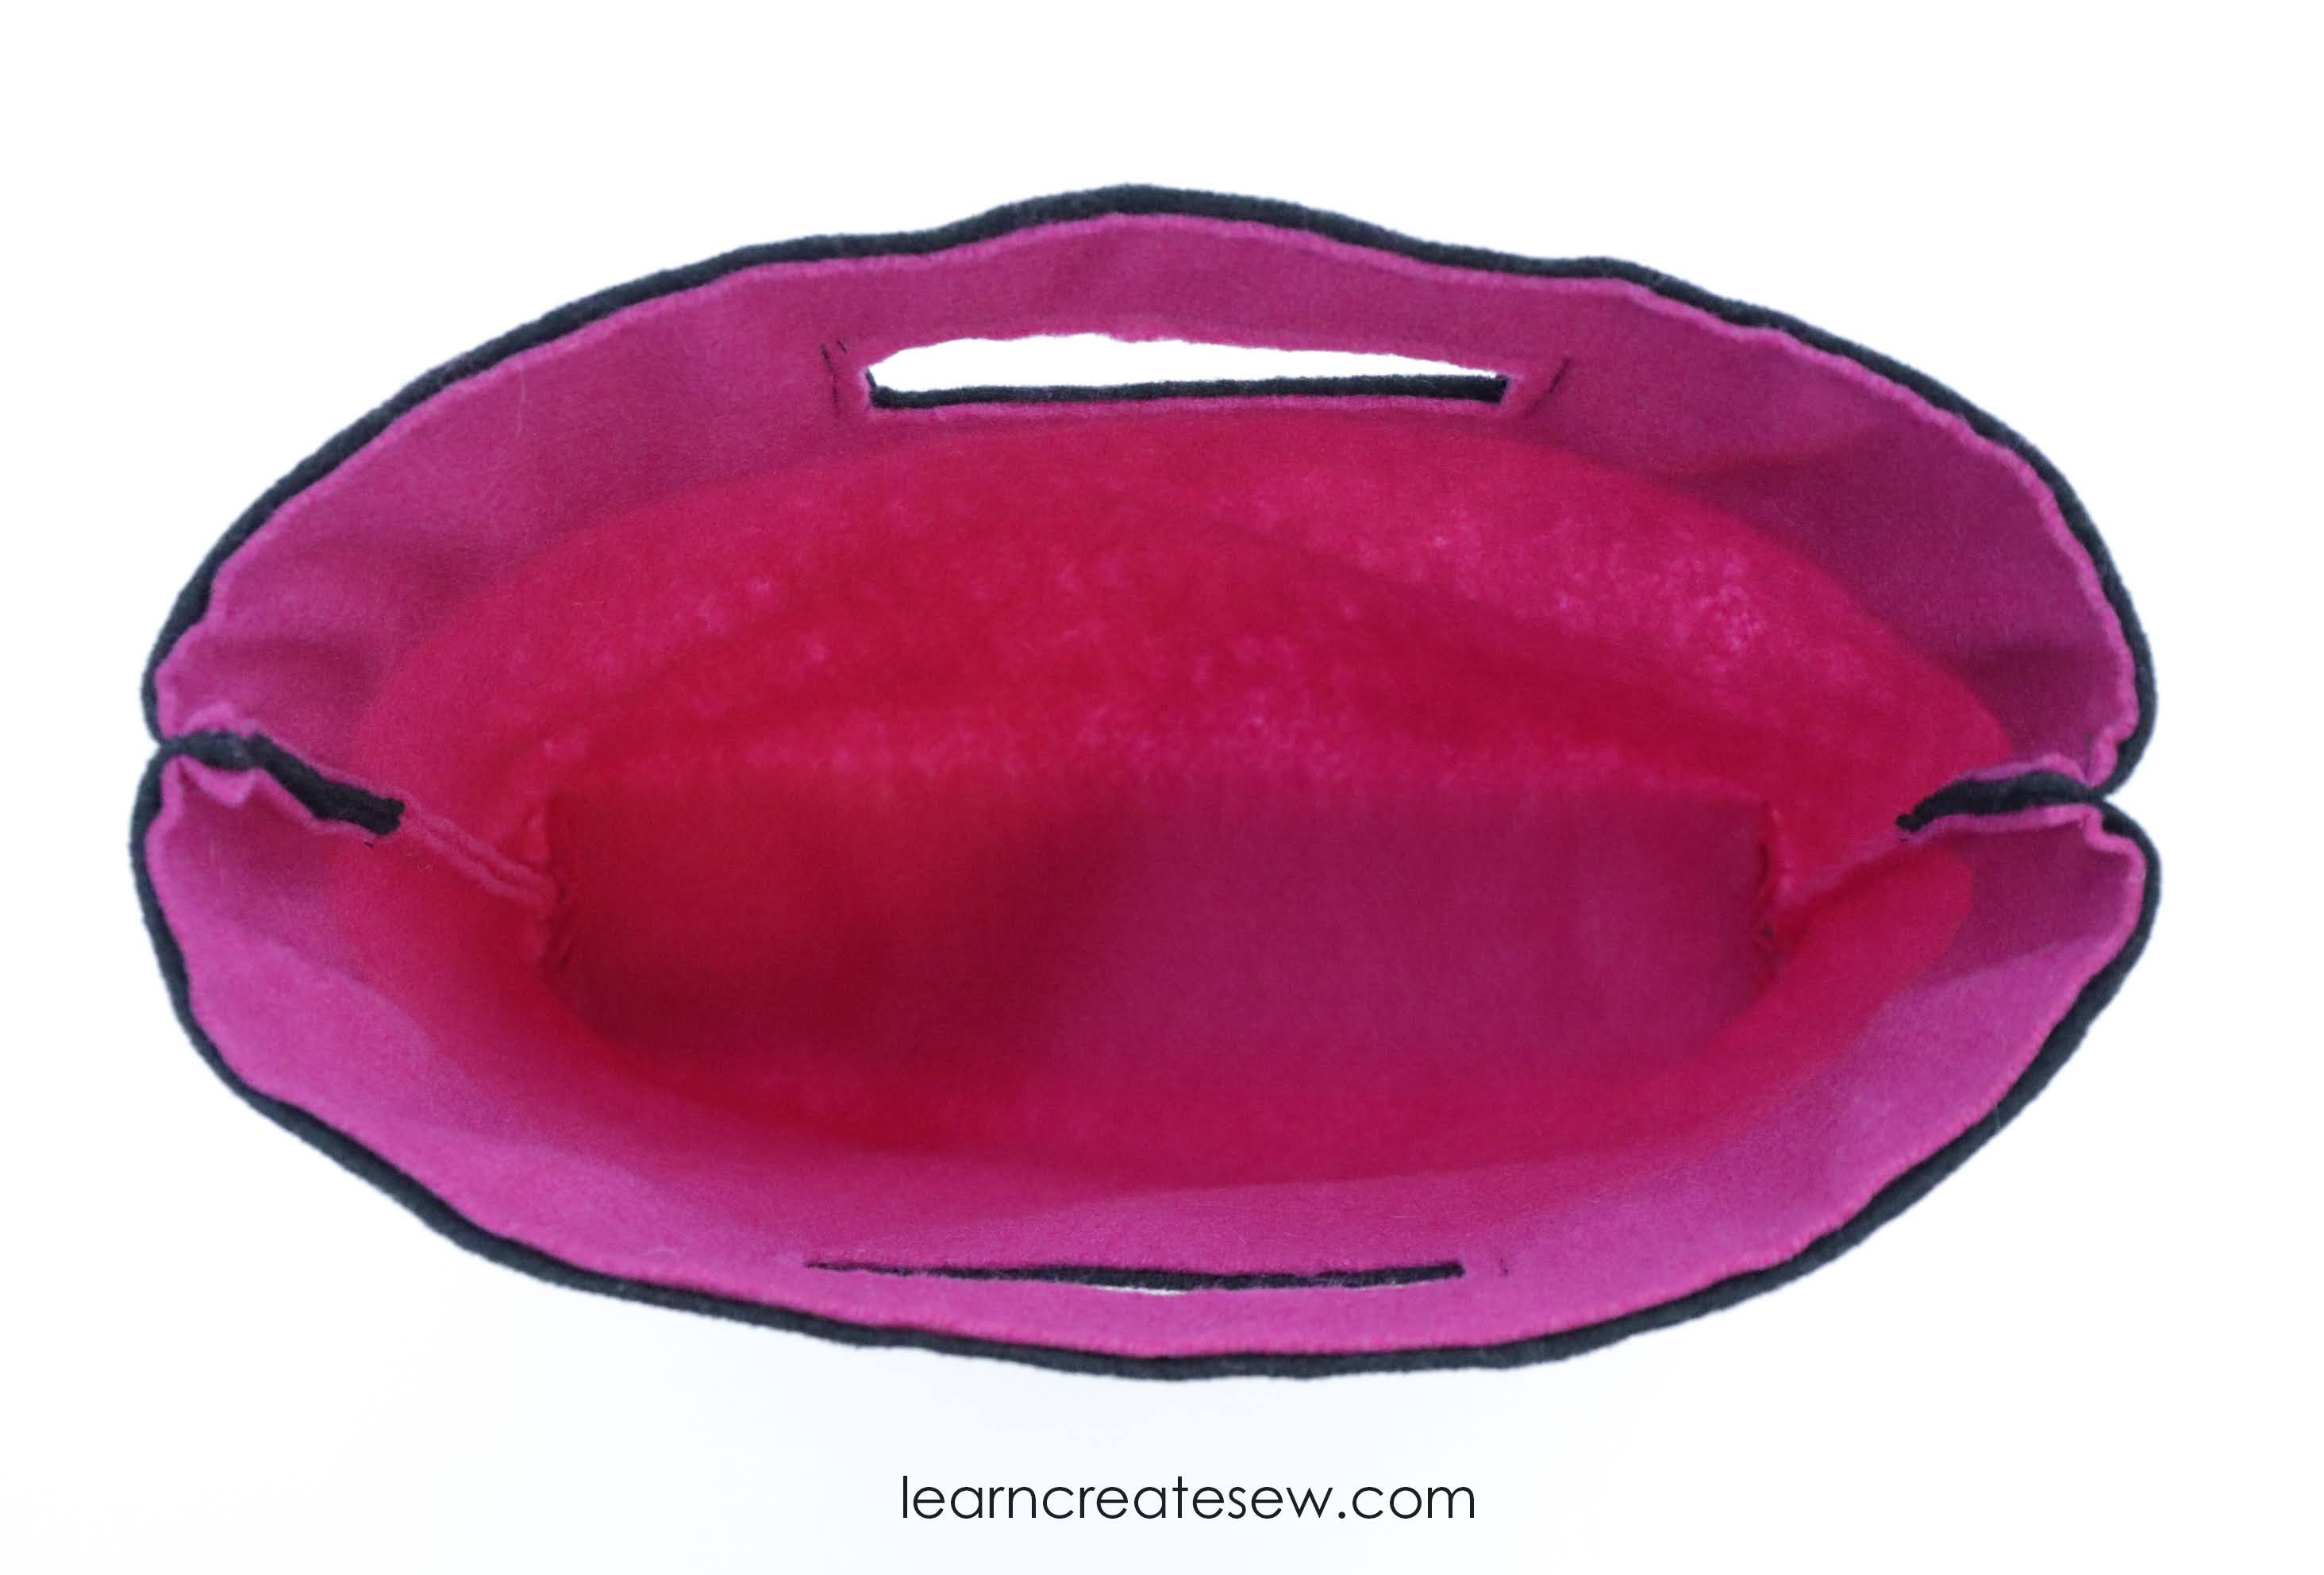
This is a fun quick project that helps practice sewing straight seams. It also introduces bag making basics with boxed corners.
Lesson Category:
Machine Sewing – Straight Seams
Lesson Topics:
Essential Tools
Cutting Rectangles
Sewing Straight Seams
Boxing Corners
This project uses large sized felt fabric, since the pieces are larger than the standard sized felt sheets available in most stores.
Felt is a great fabric to start with for your first projects because it doesn’t fray. You don’t have to worry about raw edges and it will look nice inside and out!
The top of the bag is made with two layers of felt stitched together for added strength and to provide contrast.
It also has boxed corners. Boxed corners can be a bit of a challenge, but it adds a lot of great features to your bag.
It provides space at the bottom of the bag so it is no longer flat.
In this case it also allows the bag to stand up. Once you learn how to add boxed corners it is a great feature to add to many different types of bags and cases.
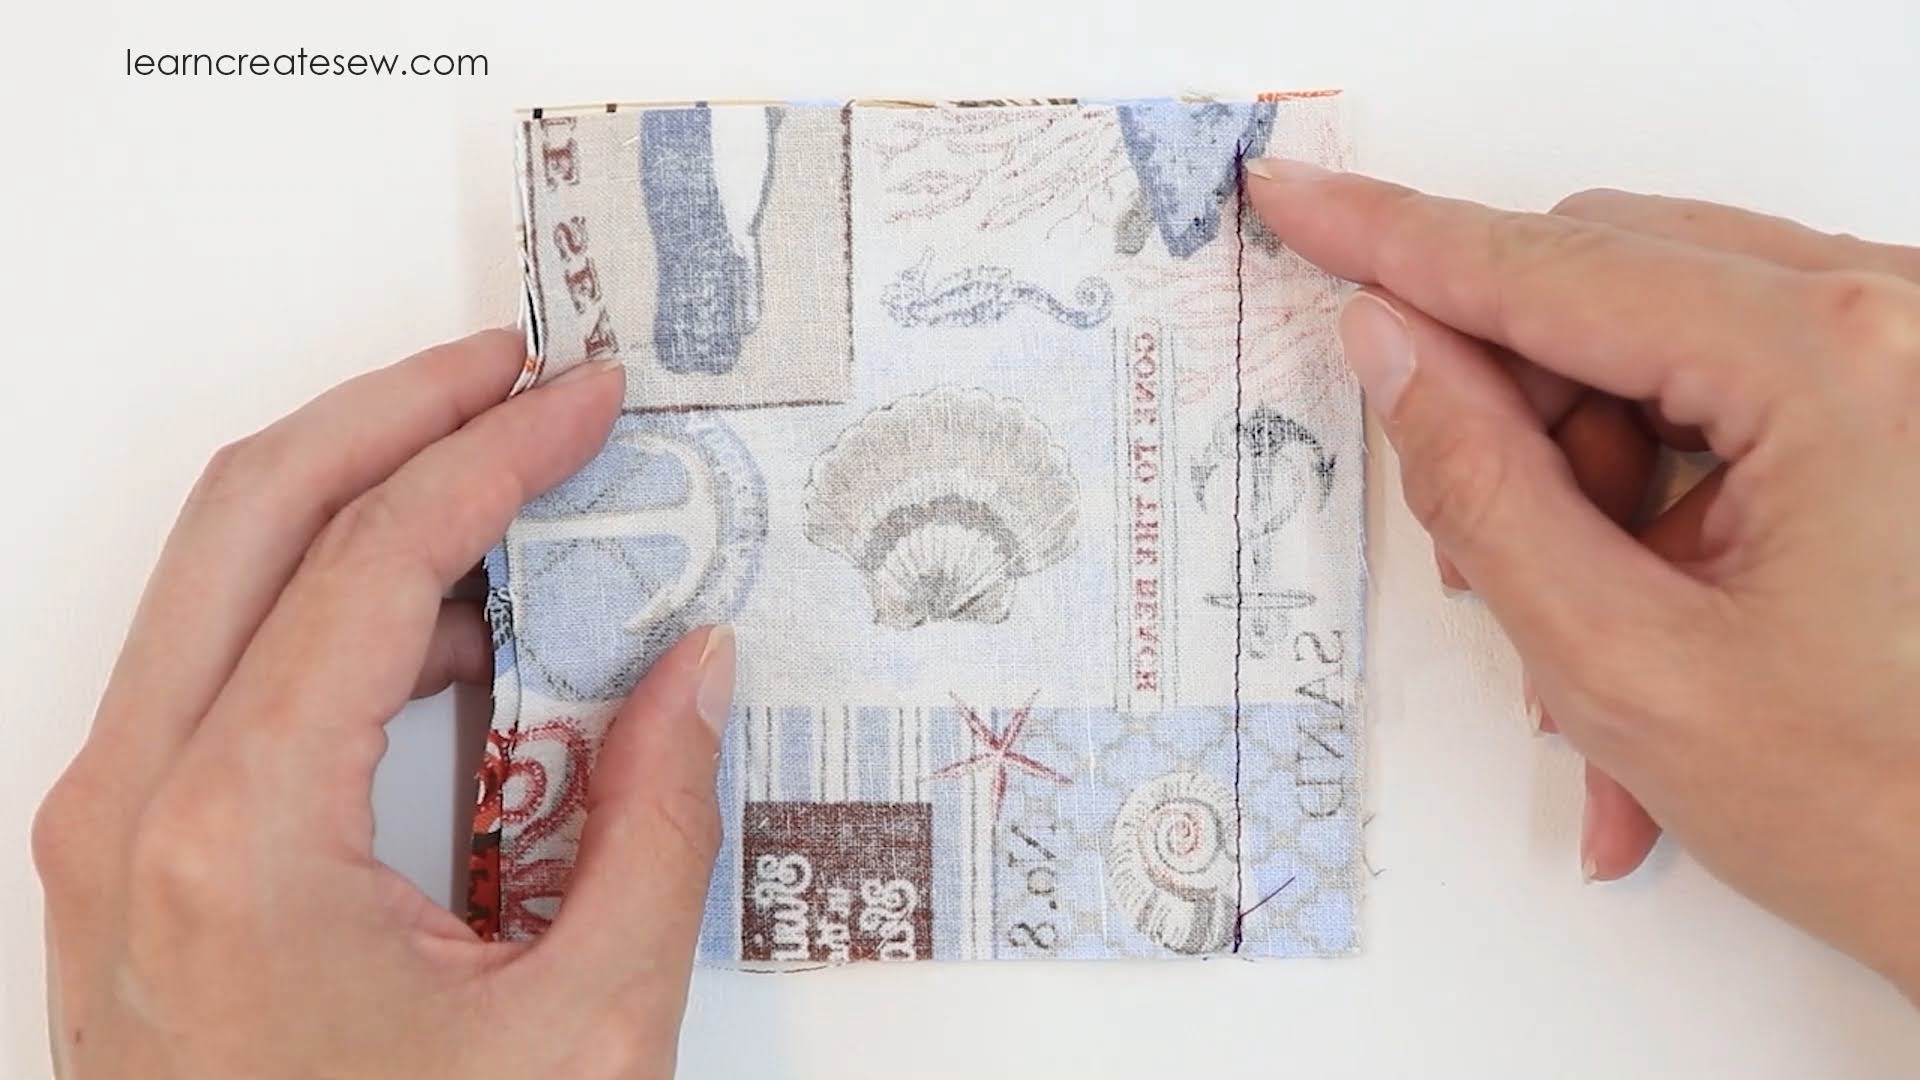
Once you’ve mastered threading and using seam allowances, as we studied in Lessons 3 and 4 of the Learn to Sew videos, you are ready to sew a seam.
This is where all machine sewing begins!
It’s important to be able to distinguish between the Right Side of the fabric, the bright side, the side you want to see on your final project, and the Wrong Side of the fabric, the dull side, the side you want hidden inside.
Almost always, when you sew a seam you sew with right sides together. This means the pretty sides of the two pieces of fabric will be touching.
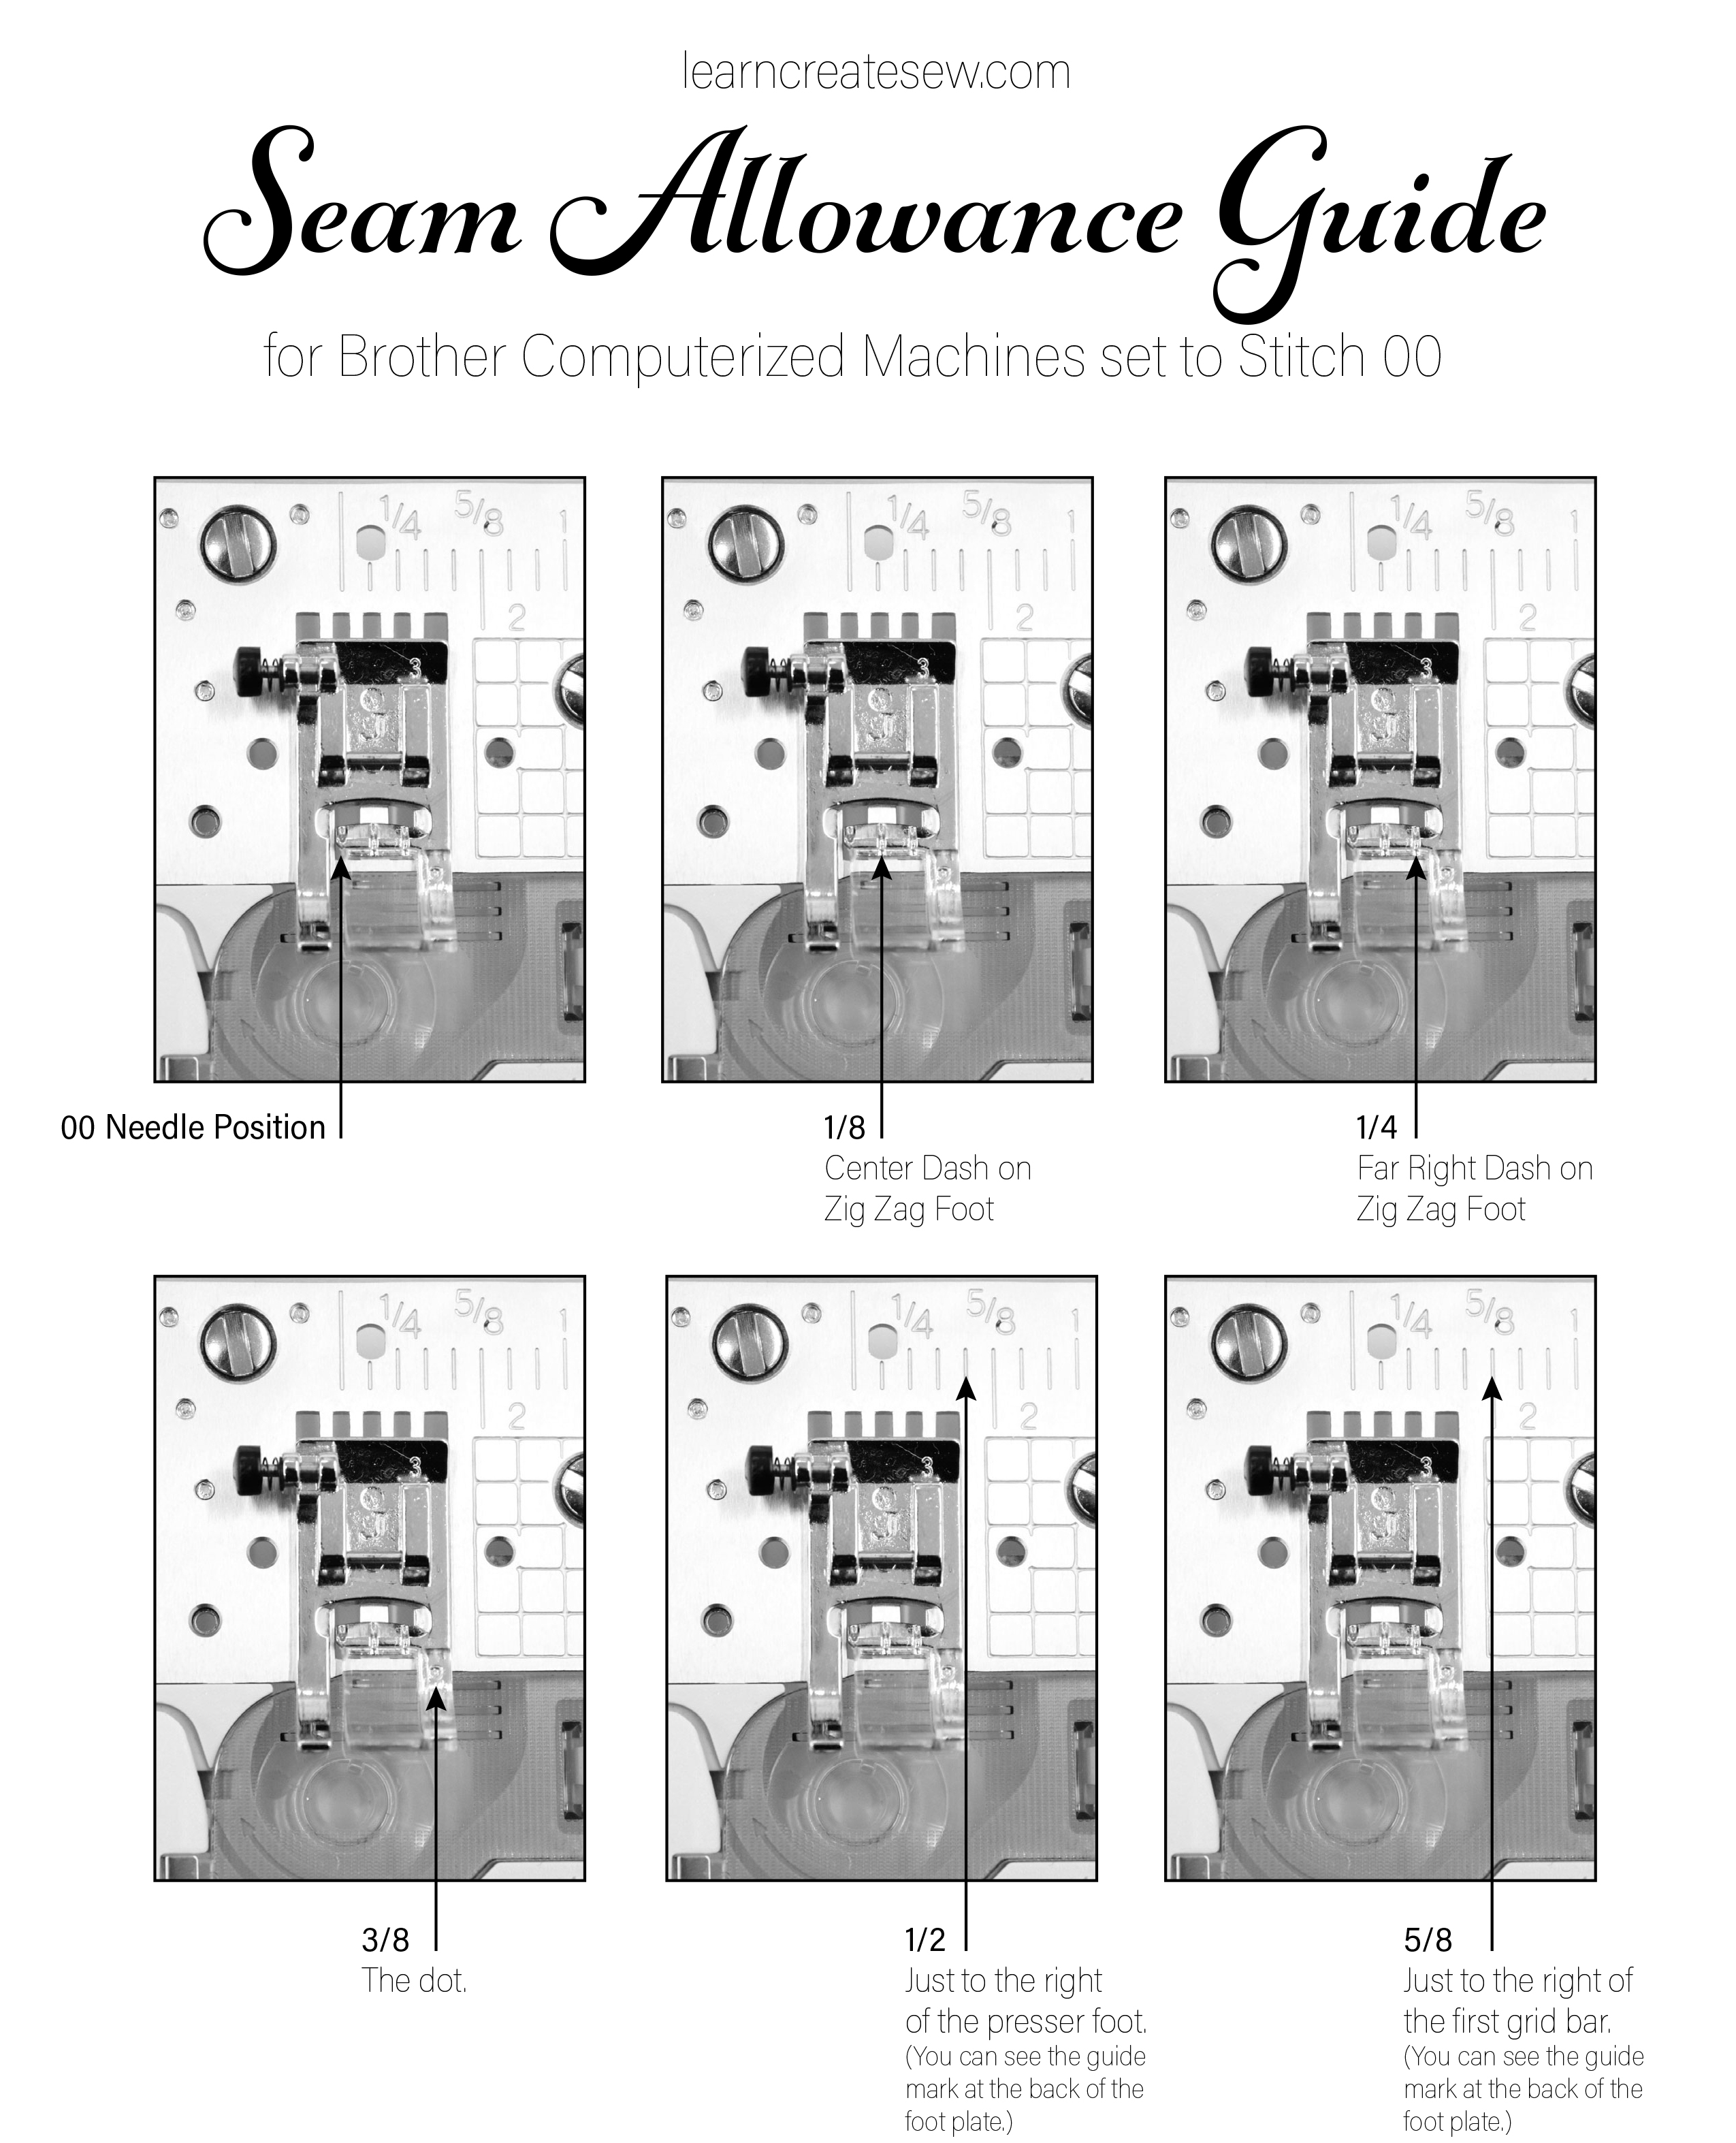
You then align one of the sides with your seam allowance guide mark on your machine, and sew along the edge.
You use the needle plate on your machine as a guide to measure your seam allowance. As a result it is important to know your machine so you can ensure that your needle position aligns with the markings on your needle plate.
Once your needle is on the correct position and your machine is set to the correct stitch you can follow your guides as you sew to create a nice even seam allowance. It’s helpful to practice using different seam allowances so you feel comfortable using the different guides. That way when those seam allowance sizes appear in a project you are prepared.
It’s important to always back stitch when you start and stop your seam, unless told to do otherwise. This acts as a knot and prevents the seam from coming undone. Back stitching on a machine is different from the hand sewing back stitch. On a machine it’s when you make a few stitches in the opposite direction to secure your thread in place.
It’s also a good idea to trim your threads after each seam. This helps prevents tangles and having a lot trim at the end of your project. It also improves the overall appearance of your project.
In the videos below I have demonstrated sewing a seam on two different machines, on both a Brother Mechanical and a Brother Computerized Machine. The principles are the same for both, but there are slight differences in how you select your stitches and prepare your machine.
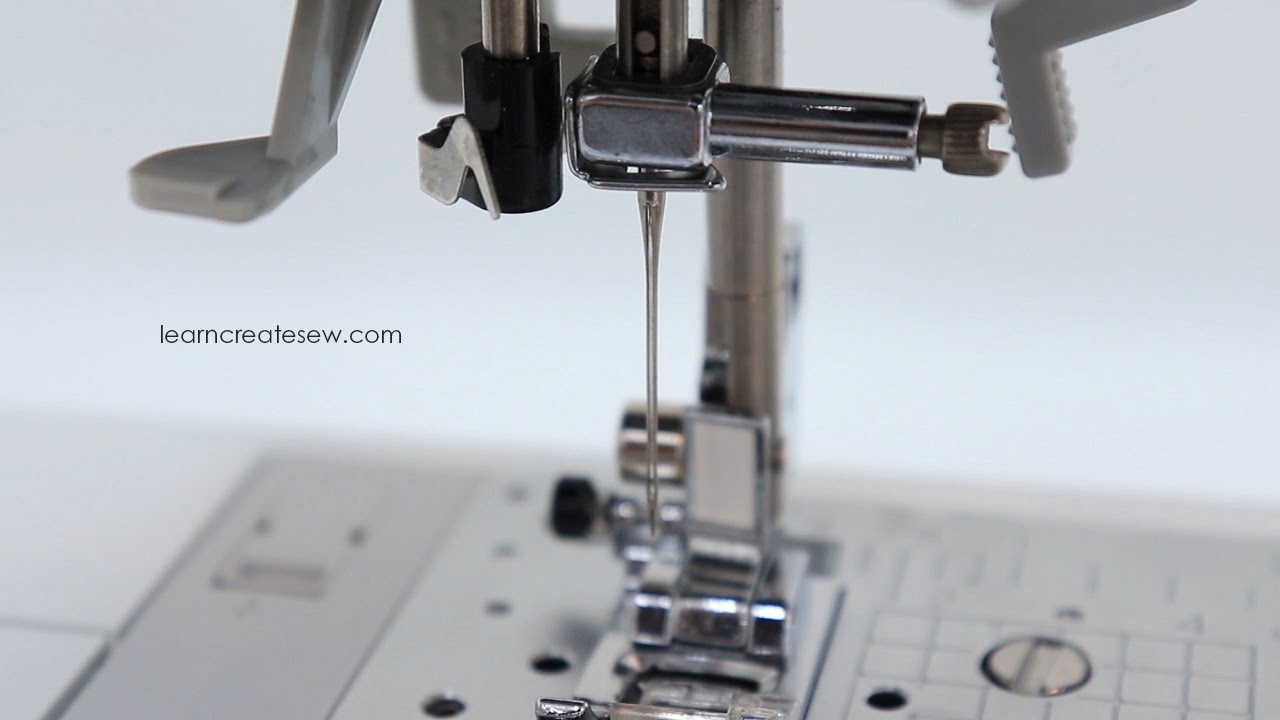
When I was younger and had been sewing for just a few years, my sewing machine started acting funny and I thought for sure it was broken. Turns out, that wasn’t the case at all. The problem was I had been using the same needle the whole time I had been using the machine. My goodness, I was lucky it lasted as long as it did!
Now that I have quite a bit more experience I realize how important your needle is, both the type of needle and its quality and condition.
When to change your needle?
There are many times and situations when changing your needle is a good idea. Here are a few examples.
Every 8 – 10 hours of sewing
Whenever your needle is bent or damaged
Whenever you need a specialty needle or specific size
Ball point / Stretch Needles (knits)
Denim Needles
Quilting Needles
Microtex Needles (vinyl)
Small Universal Sizes (8 -10) Lightweight fabrics
Medium Universal Sizes (11 – 14) Mid-weight fabrics
I usually use a size 12 when sewing cottons
Large Universal Sizes (16 – 18) Heavyweight fabrics
For every new project (or every few projects if they are small and/or lightweight)
After sewing heavy duty projects
When your machine is sewing with irregular stitches
When your machine has tension issues
Once you become familiar with how to change a needle it’s really quick and easy! And since you can usually find needles at very affordable prices it’s best to change your needle rather than use an old one, if you are in doubt.
Using a sewing machine for the first time can be exciting, intimidating, and often frustrating.
With this lesson I hope to provide you with tips and instructions that will help you feel comfortable and confident as you begin to use your sewing machine.
Lesson Category:
Sewing Machine Basics
Lesson Topics:
Basic Machine Functions
A Brother Computerized Sewing Machine is used as the example
How to control the speed
Basic Stitches and Parts
Sewing Lines
Sewing Corners
Sewing Curves
Sewing with a Seam Allowance
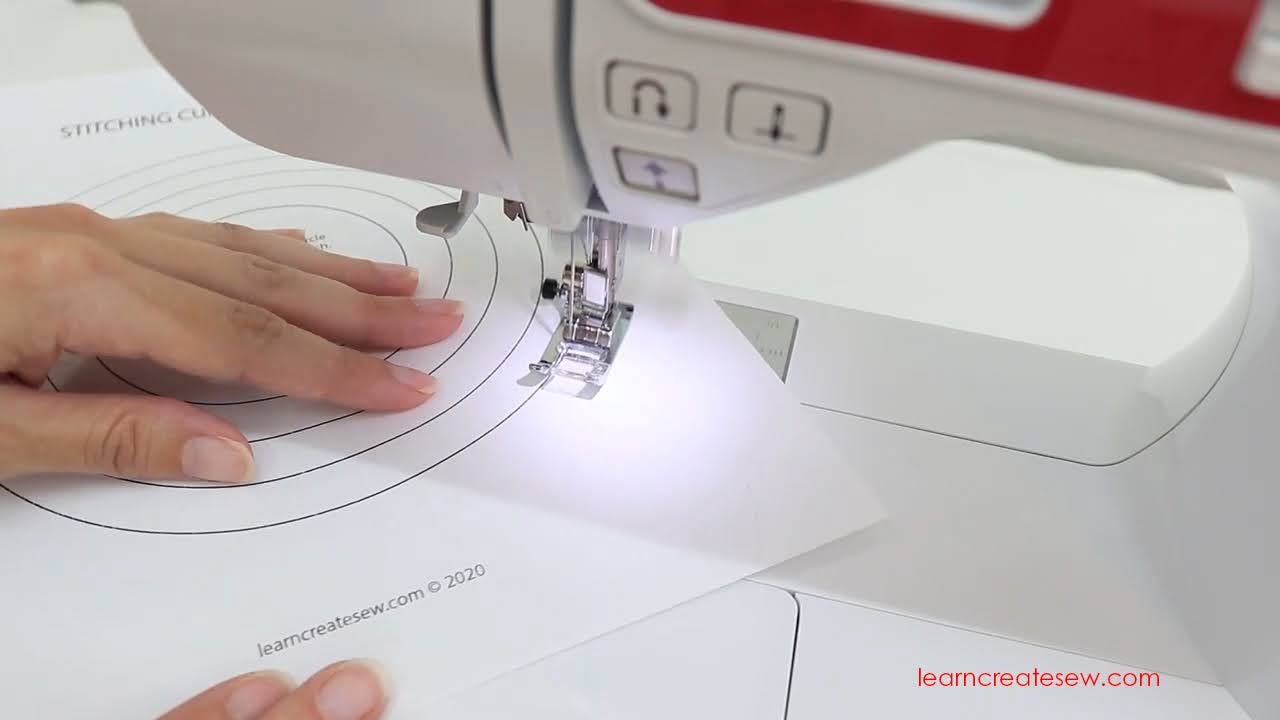
It may seem strange, but the best way to start using the machine is to practice sewing on paper.
This allows you to learn how to control your machine without having to deal with the complications that arise when using fabric and thread.
We’ll learn how to sew corners and curves. We’ll also learn how to use a seam allowance.
This lesson uses a Brother Computerized Sewing Machine for the example, but the principles can be applied to any machine. If you are using a different type of machine you may want to do some research or consult your manual to find your machine’s default needle position as well as how to use the seam allowance measurement guides so you can accurately read your needle plate.
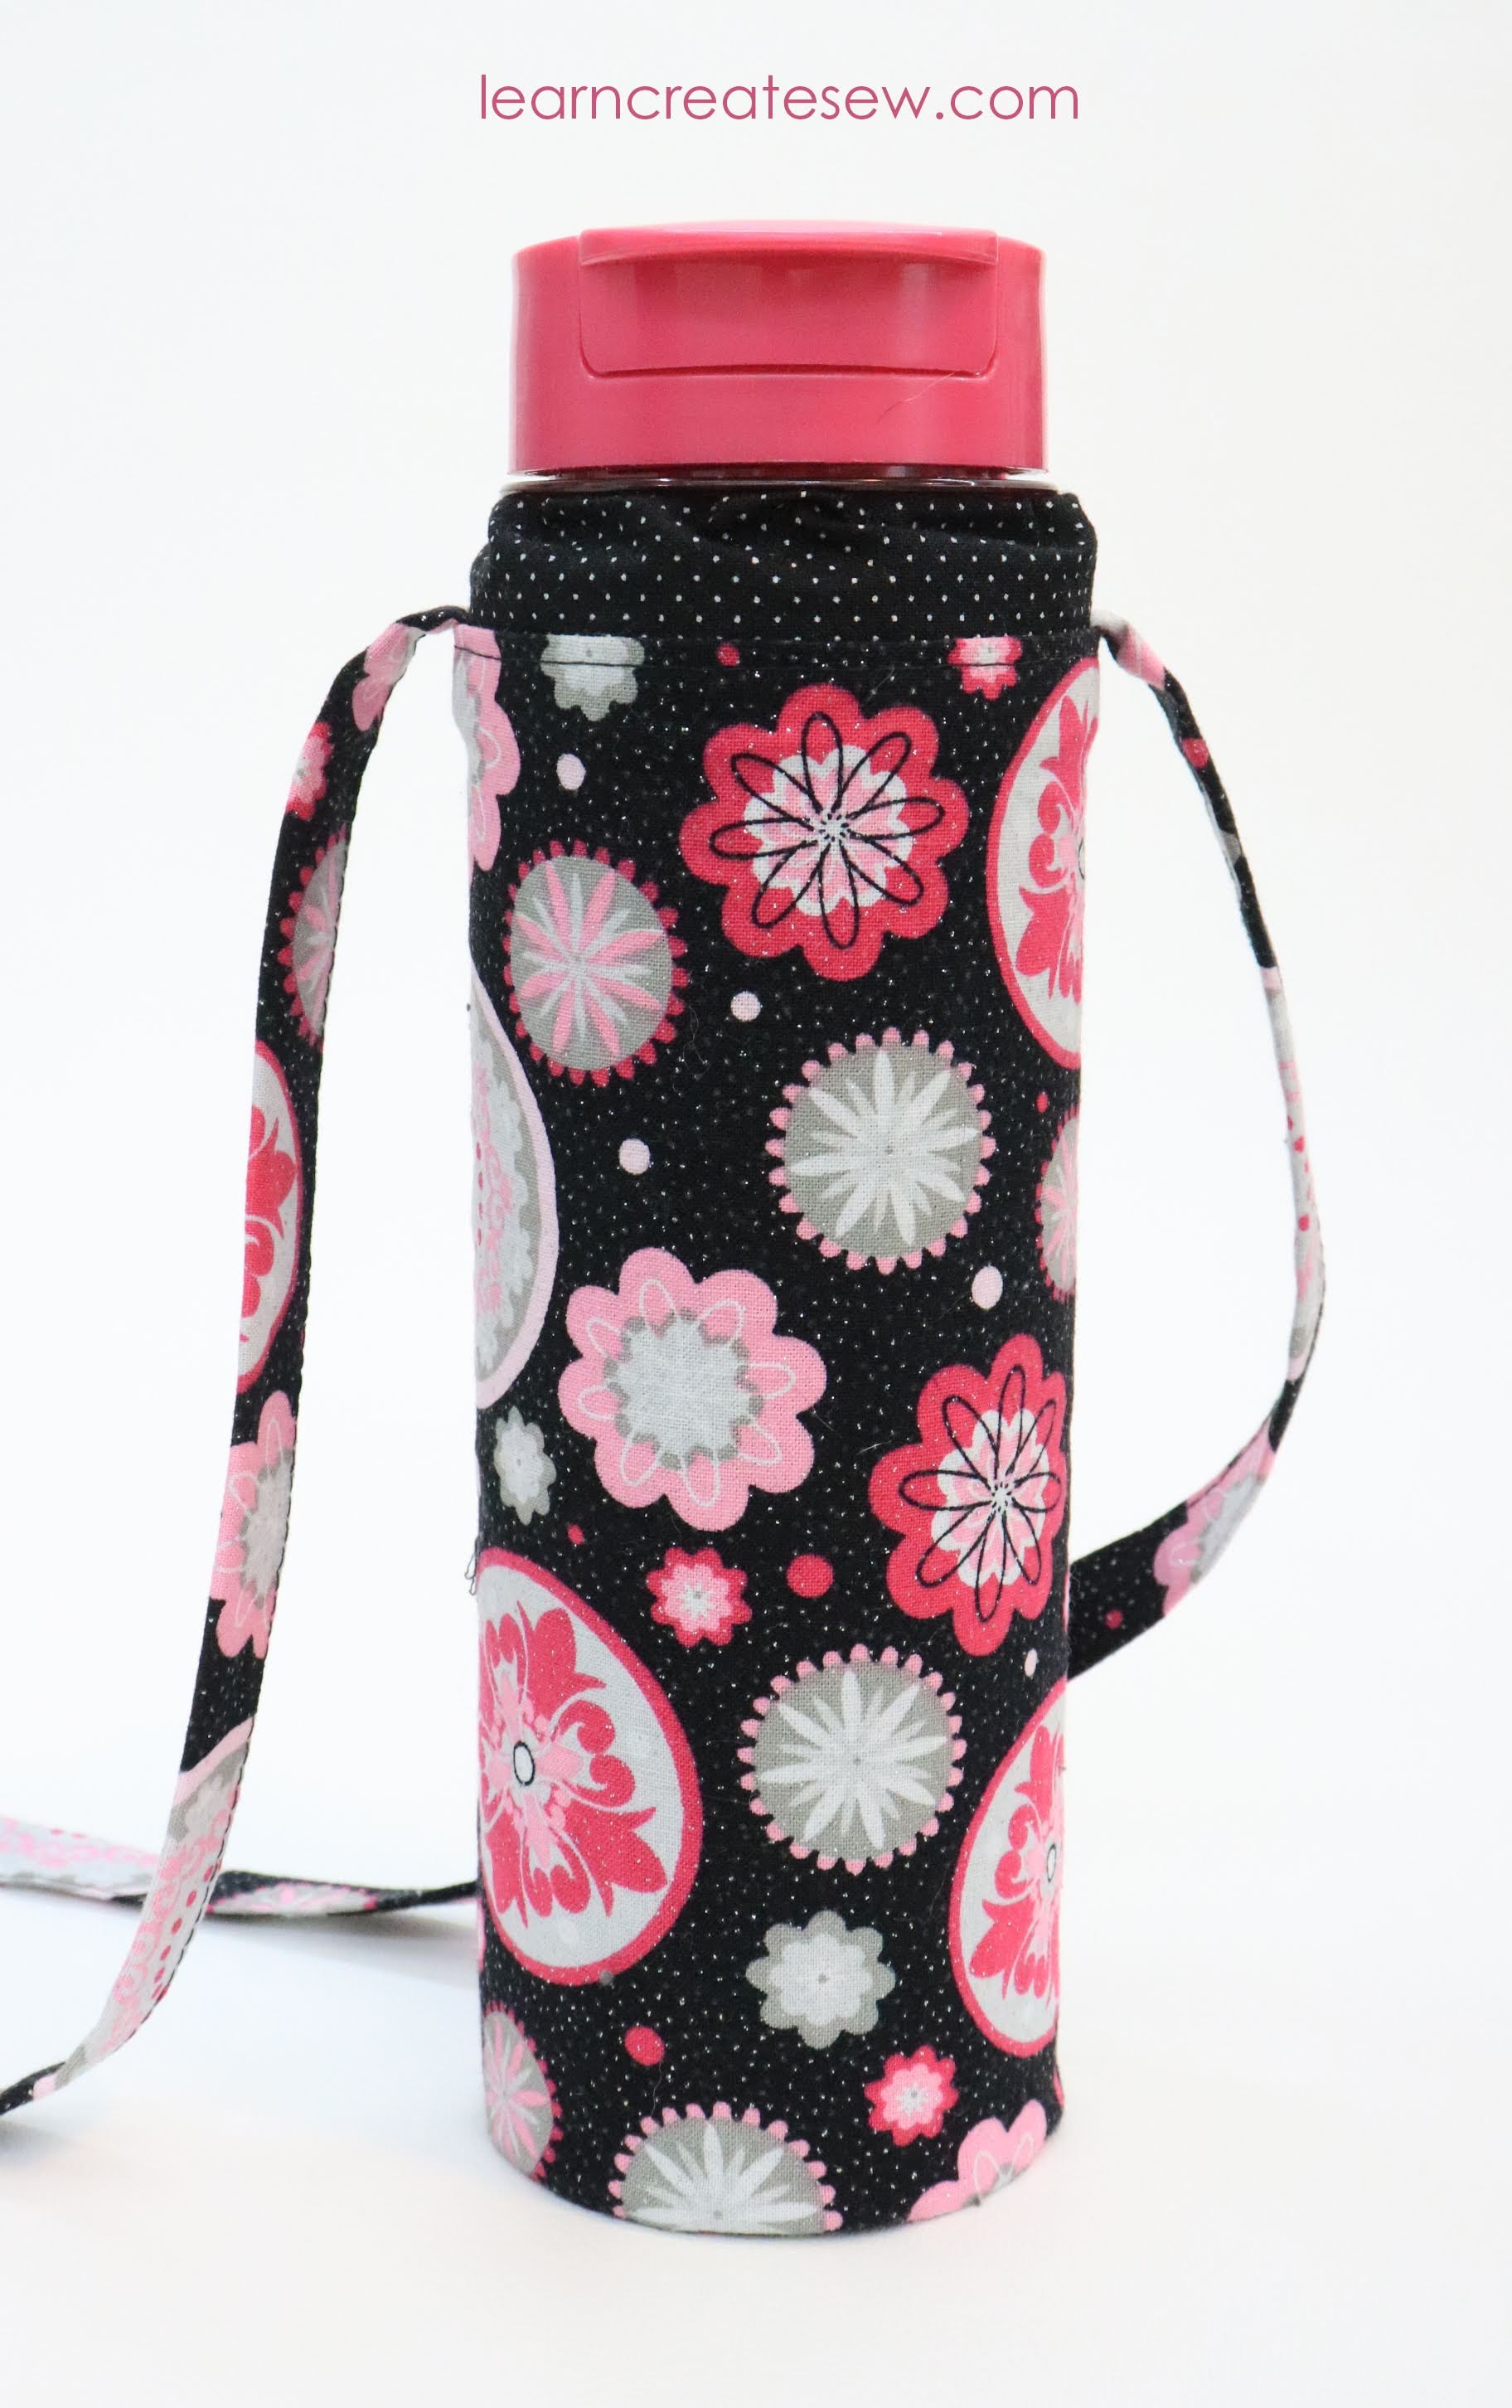
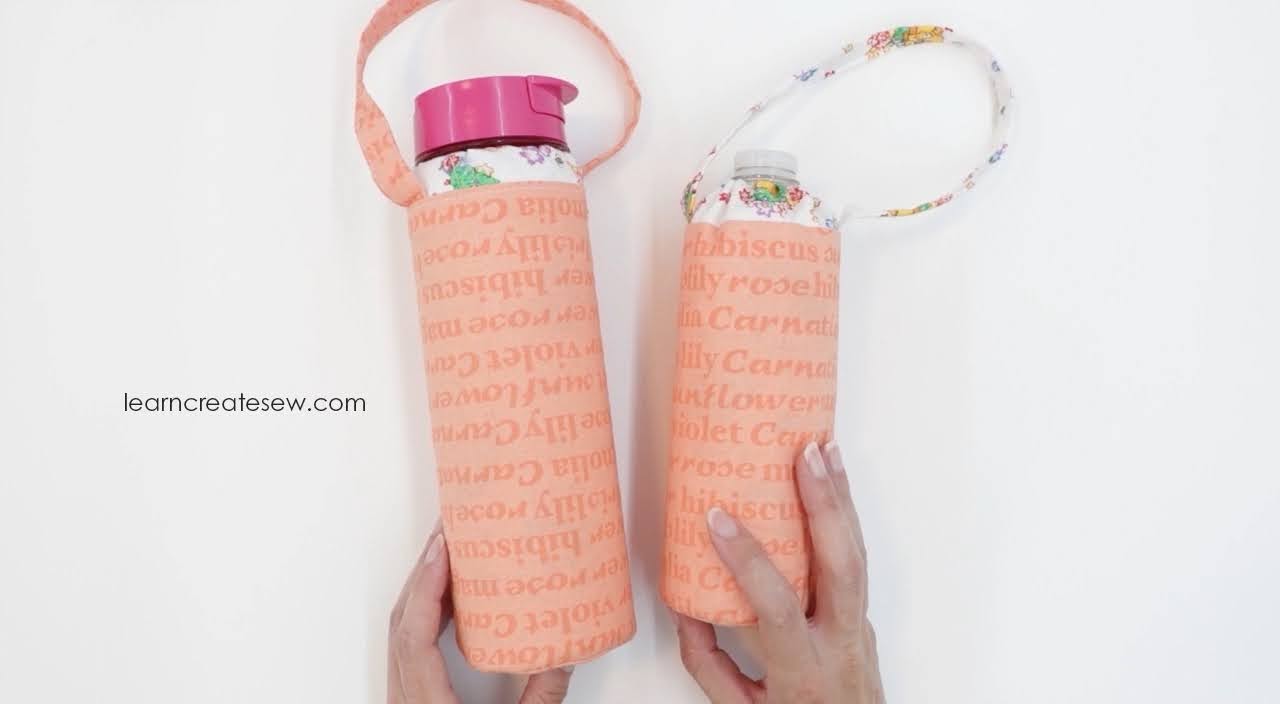
The supplies for making a water bottle holder have been sitting in my closet for quite a while, and I was excited to finally use them!
I was walking through the Dollar Tree and found this super cute water bottle and thought it was just perfect for the water bottle holder that I wanted to make.
This water bottle has an optional drawstring at the top. The pattern is adjustable and can work for water bottles of various sizes. The pattern has templates and measurements calculated for water bottles with diameters from 2.5 – 3.125 inches. You can also adjust the height and the handle length as you like.
So, whether you are using a disposable water bottle or one that is more durable, this pattern can work for you.
I have been using this water bottle holder for a week now and I have to say that I LOVE IT! I have started carrying it around with me and have found it super handy 🙂
Supplies:
Exterior Cotton Fabric (1/3 yard should be enough for holders up to 9 inches tall)
Lining Cotton Fabric (1/3 yard should be enough for holders up to 9 inches tall)