Mini Tool Bag

I had so much fun with this project, and it turned out beautifully!

I had been exploring different tool bag ideas and really wanted to work with a framed purse, but purse frames are so expensive! And…you are usually very limited in the sizes you can find.

1img_9228

In an effort to find an affordable way to make a framed purse I decided to make a mini sized tool bag. Since it is small the frames would not need to be as sturdy as on a full sized bag.

I found an EXCELLENT tutorial by sewingtimes on Youtube and absolutely fell in love with the bag construction and wanted to test it out right away. I would highly recommend it.

I changed the size a bit.

1img_9197

I also didn’t want to have to worry about using a lot of interfacing, so I used a heavy weight denim.

1img_9196

I also added embroidery and top stitching to decorate the front and add a jeans look.

1img_9227

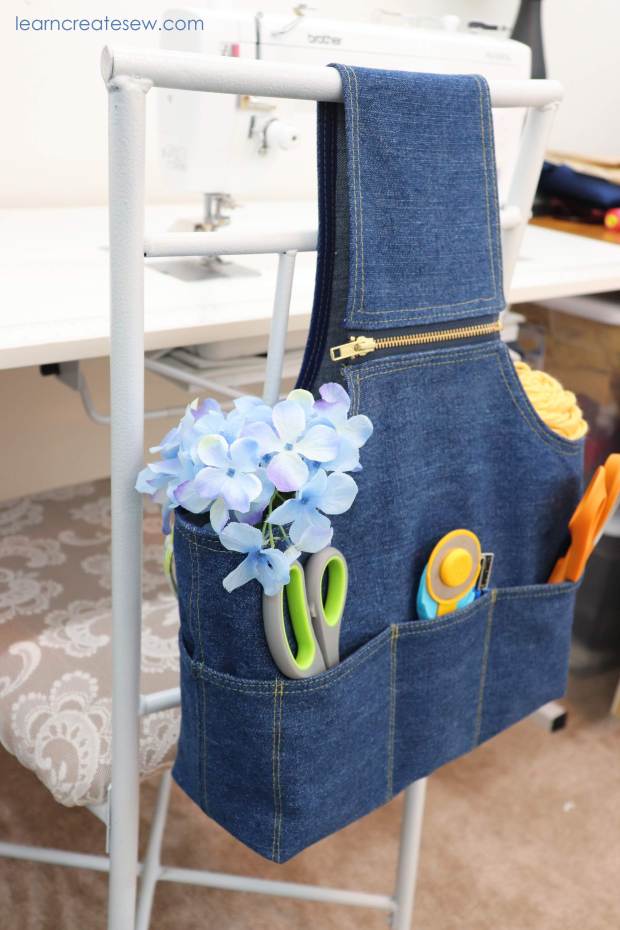
I really love how much the bag opens! It provides such a great amount of space.

1img_9179

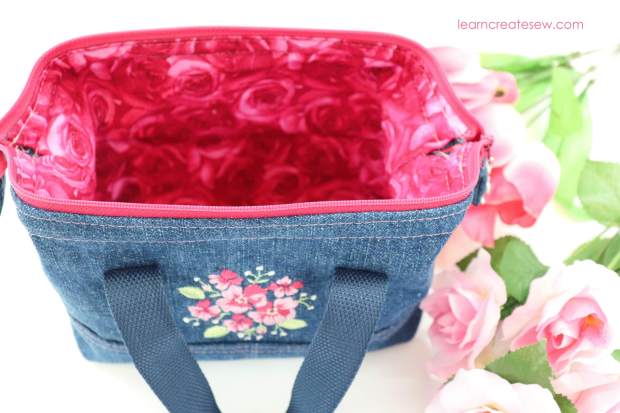
The tool bag fit basic sewing supplies, scissors and small dollar tree containers perfectly.

1img_9205

Instead of purse frames I used two pieces of heavy gauge wire taped together with electrical tape and bent the ends.


I played with several different ways to wrap the wire. In the end I preferred the option where the wire was completely covered, just in case of tarnishing, etc. What I love about using the wire instead of the purchased purse frames is that you can make them any size you want! It’s also significantly cheaper.

It worked better than expected and I hope to make a framed bag again in the future.

1img_9157


Zip-On Tool Caddy Instructions Available!

I hope you have as much fun making this project as I did.

The difficulty level of this bag is about a 5/10. You need to be comfortable working with thicker fabrics. It also requires a good amount of pressing, and precision is needed for the top stitching, binding, and zipper. That said, it is an unlined bag without interfacing, which makes cutting and prep work a breeze!

Zip On Tool Caddy – Unlined – Instructions

Zip On Tool Caddy Pattern

1img_8941-1

Zip-On Tool Caddy

For my latest project I wanted a tool bag that you could hang on the back of the chair. I find that in the Sewing classroom tools can end up all over the place, and tripping over them is not a fun experience.

1img_8950

I decided to make a simple tote that you could zip on and off of the chair. It was super simple and after making it I found the tote had a lot more uses than expected!

1img_8941

I works perfectly on the back of a chair, just like I wanted! It even fits nicely on the back of student desk chairs.

1img_9088
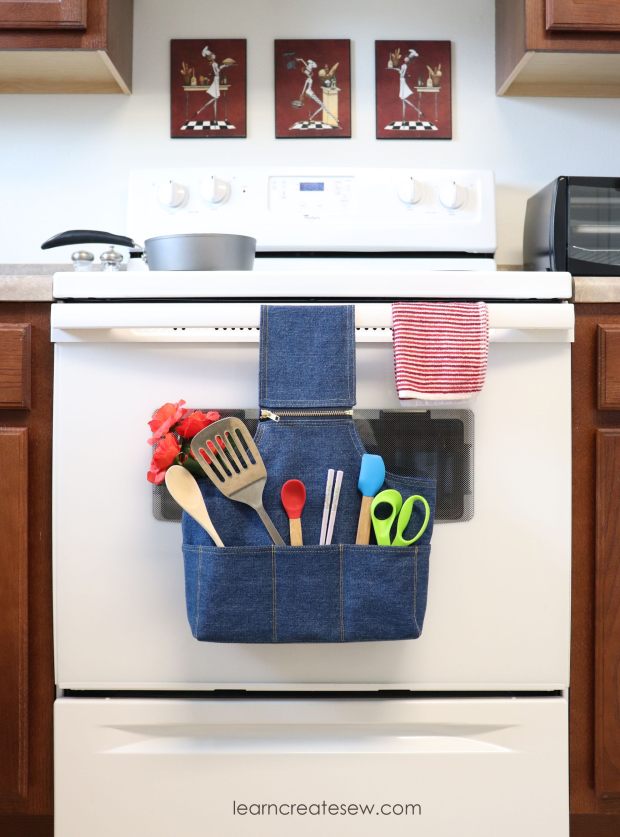
It’s handy in the kitchen!

1img_9056

It’s also great for toiletries. Especially, when traveling.

I absolutely love it! Sewing instructions and pattern coming soon!

Pencil Pouch Instructions

Who doesn’t love a great little clutch pouch? Here is a tutorial for a quick and easy pencil pouch.

2img_5224

You can make two pouches with just 1/4 yard of fabric. It is also a great way to use that scrap fabric that you may have laying around the house.

2img_5224-1

TWO OPTIONS:

There are two tutorial options of the pouch available.

Option 1: The “Easy” option has a standard zipper installation and raw edges inside the bag. Difficulty level 3/10. You need to know how to use a zipper foot. The project also has lining and interfacing.

Easy Pencil Pouch Instructions

2img_5213

Option 2: The regular tutorial provides options for a decorative zipper as well as detailed instructions for hidden and bound seams. Difficulty level 4/10.

Pencil Pouch Instructions with Options

2img_5202

Happy Sewing!

Rag Edge Tote Bag Instructions

The Rag Edge Tote Bag Instructions are finished!

2img_5197

The rag edge gives this tote a casual vintage feel.

2img_5179

While the exterior has a plethora of decorative seams, the interior is nice and smooth and even has the option of an added pocket.

2img_5192

I hope you enjoy making this bag as much as I did!

Difficulty level for this project is a 4/10, mostly due to the grommets required for the handles.

difficulty-rating-spool-small-4           Rag Edge Tote Bag Instructions

Pig Plush Pattern & Instructions

The Pig Plush pattern and instructions are finally ready!

3img_5956

They are cute and cuddly! With awesome little tails.

3img_5988

The pattern comes with two different sizes so you can choose the size that best suits you.

The smaller plush stands 5 – 6 inches tall and the larger 7- 8 inches. The size varies a bit depending on the stretch of your fabric and how much you fill your plush.

Pig Plush Pattern and Instructions

Adorable Plush Pig

A few months ago I made a Panda Plush and just loved it! So, over the holiday break I worked on a few more. My favorite is this adorable Plush Pig. I haven’t chosen a name for her yet, but I think she needs one.

3IMG_3404

She is the same shape as the panda, but without a center stripe.

I also changed the shape of the arm pieces.

3IMG_3362

The panda had long arms, and they worked great. However, on the pig, they just looked odd. So, she has delicate round arms and legs.

No pig would be complete without an sweet curly tail!

3IMG_3433

How cute! It was a bit tricky getting the curled shape, but totally worth it.

3IMG_3359

I had constructed the whole pig, and she was cute, but I felt like something was missing. She had a cute tail, sweet pink ears, but she needed something else. So, I added the bow and eyelashes, giving her a more feminine look.

3IMG_3449

The plush could definitely be constructed without these touches, but I think it adds a little something extra that gives her personality!

I think this Precious Pig is my favorite plush to date! I am currently working on the pattern and instructions and hope to have them available to post in the future.


Santa Hat

I just uploaded another project tutorial with a free pattern and instructions.

Spread the joy of the holiday season with Santa Hats!

A sure way to bring a smile!

santa-hat-image

Santa Hat Pattern

Santa Hat Instructions

Enjoy!

Making Mittens

The mittens are done! I spent the holiday working on my mitten pattern. I was able to create four different styles from ONE pattern! Here is a preview.

Fingerless Mittens

img_2758

Flip Back Mittens

img_2662

Simple Split Palm Mittens

2018-11-18-15-53-41

Basic Mittens

2018-11-18-14-53-28

The gloves are made with fleece and trimmed with other accents. They require about 1/4 yard of 60 inch fabric.

The instructions and free pattern will be coming soon!

Here they are!