Flat Zipper Pouch

This is a classic zipper pouch! It is a great project to start sewing zippers if you want to learn. These make great pencil bags. They are also fun to fill and give as gifts.

1img_0415

This is also a fun project to use decorative stitching on. I love adding a cute stitch to the contrasting bottom panel.

2img_0355

This is a flat pouch, kind of like a pencil pouch. So, it does not stand up on its own.

1img_0386

That said, it still holds quite a bit!

1img_0387

You can easily adjust the size of the rectangles to make the bag as bid or small as you would like.

The bag I made has final dimensions of approximately 6 x 9 inches.

Supplies

Two 7 x 10 inch rectangles for the lining fabric

Two 7 x 10 inch rectangles of lightweight fusible interfacing (optional)

Two 4.5 x 10 inch rectangles for the outside TOP fabric

Two 3.5 x 10 inch rectangles for the outside BOTTOM fabric

One 11 inch Zipper

Here is the free pattern if you would like it.

Flat Zipper Pouch Pattern by learncreatesew

DETAILED INSTRUCTIONS:

QUICK OVERVIEW:

Needle Book

This is a cute fun little project. It is super fast to make, and handy to have around the sewing room, especially if you do a lot of hand sewing. These also make really cute gifts.

1img_0209

It doesn’t take much fabric, so it is a good way to use up your scrap fabric!

1img_0286

I love the little pockets. You can store thread, needle threaders, needle grips, and even tiny travel scissors.

This book measures approximately 3.5 x 2.625 inches when finished.

Supplies:

Scrap Cotton Fabric (or 1/4 yard)

Felt

12 – 14 inches of narrow ribbon (I used 1/4 inch wide)

Featherweight Fusible Interfacing (optional)

Cotton Batting (optional)

Here is the free pattern:

Needle Book Pattern by learncreatesew

DETAILED INSTRUCTIONS:

QUICK OVERVIEW:

Fun Size Backpack

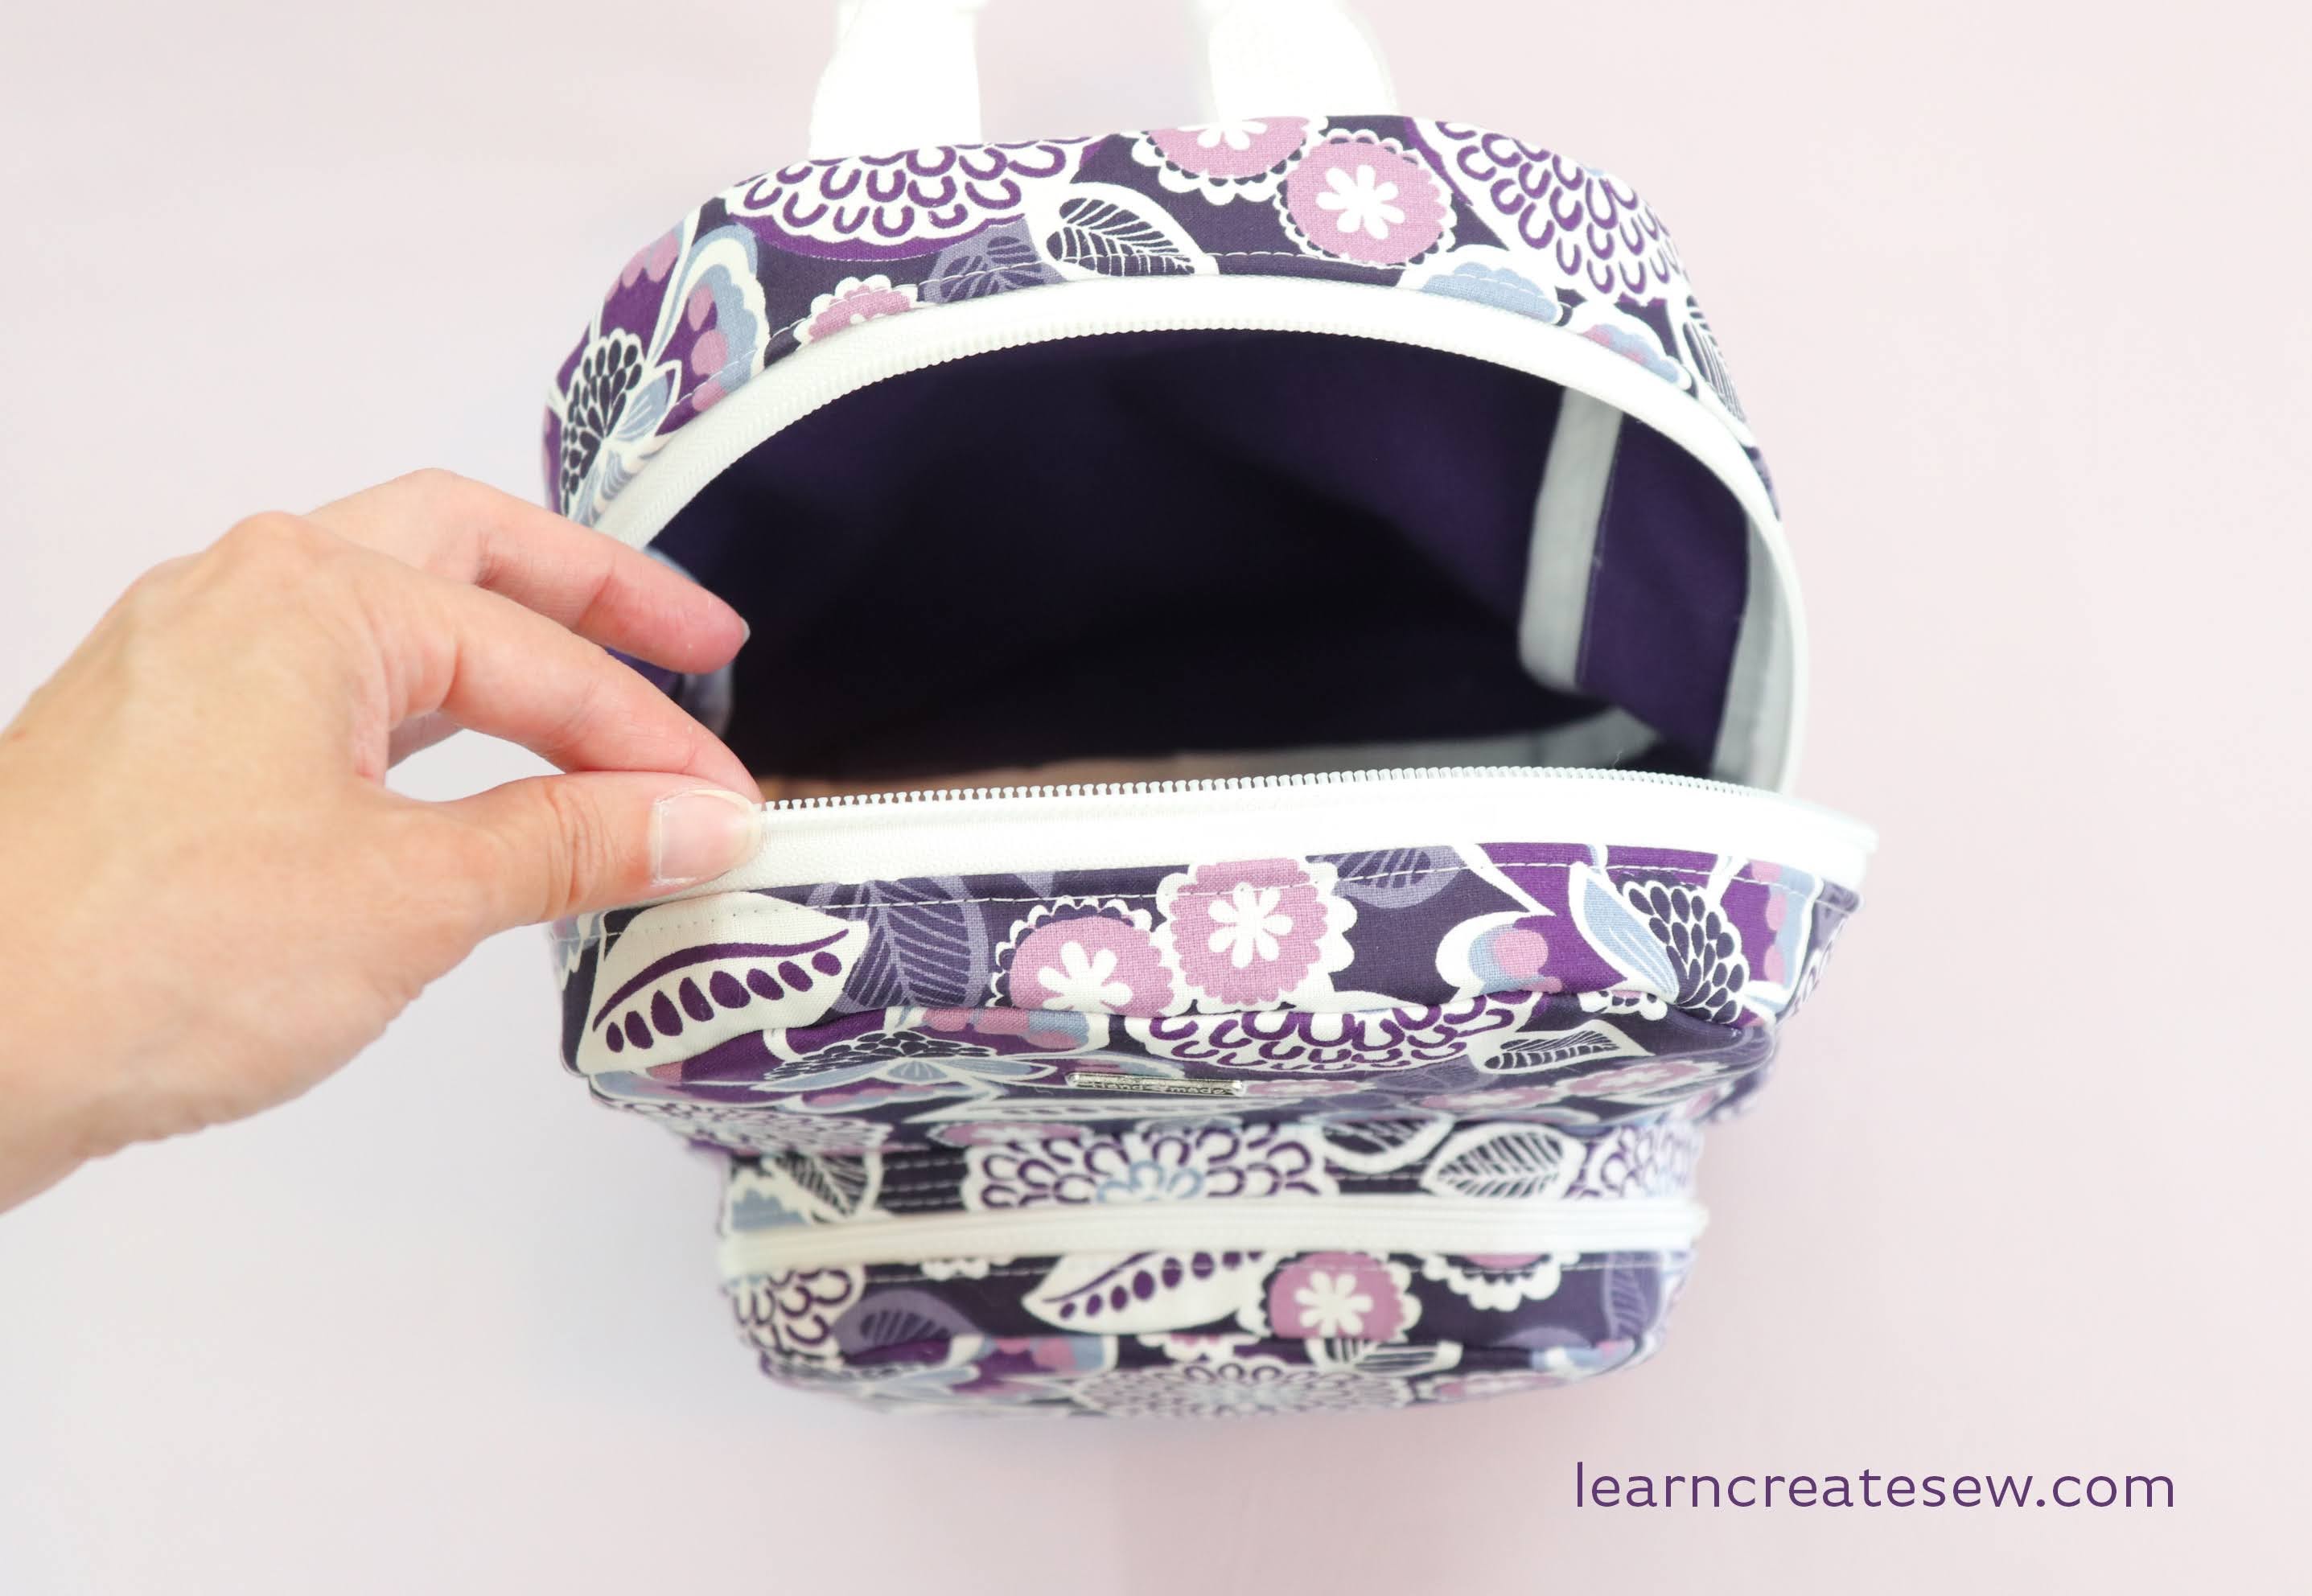
I absolutely LOVE this backpack! This is my favorite size backpack to take to amusement parks. At 9 x 11 inches it is smaller than regular sized backpacks, but large enough to hold a lot. I’ve stuffed this thing with water bottle, snacks, extra sweatshirt, wallet, keys, notebook, first aid kit, and more. However, it’s not so big that it gets too heavy, as regular sized backpacks can.

It even fits in a lot of the ride compartments at Disneyland. That is it’s best feature in my book!

3img_0172

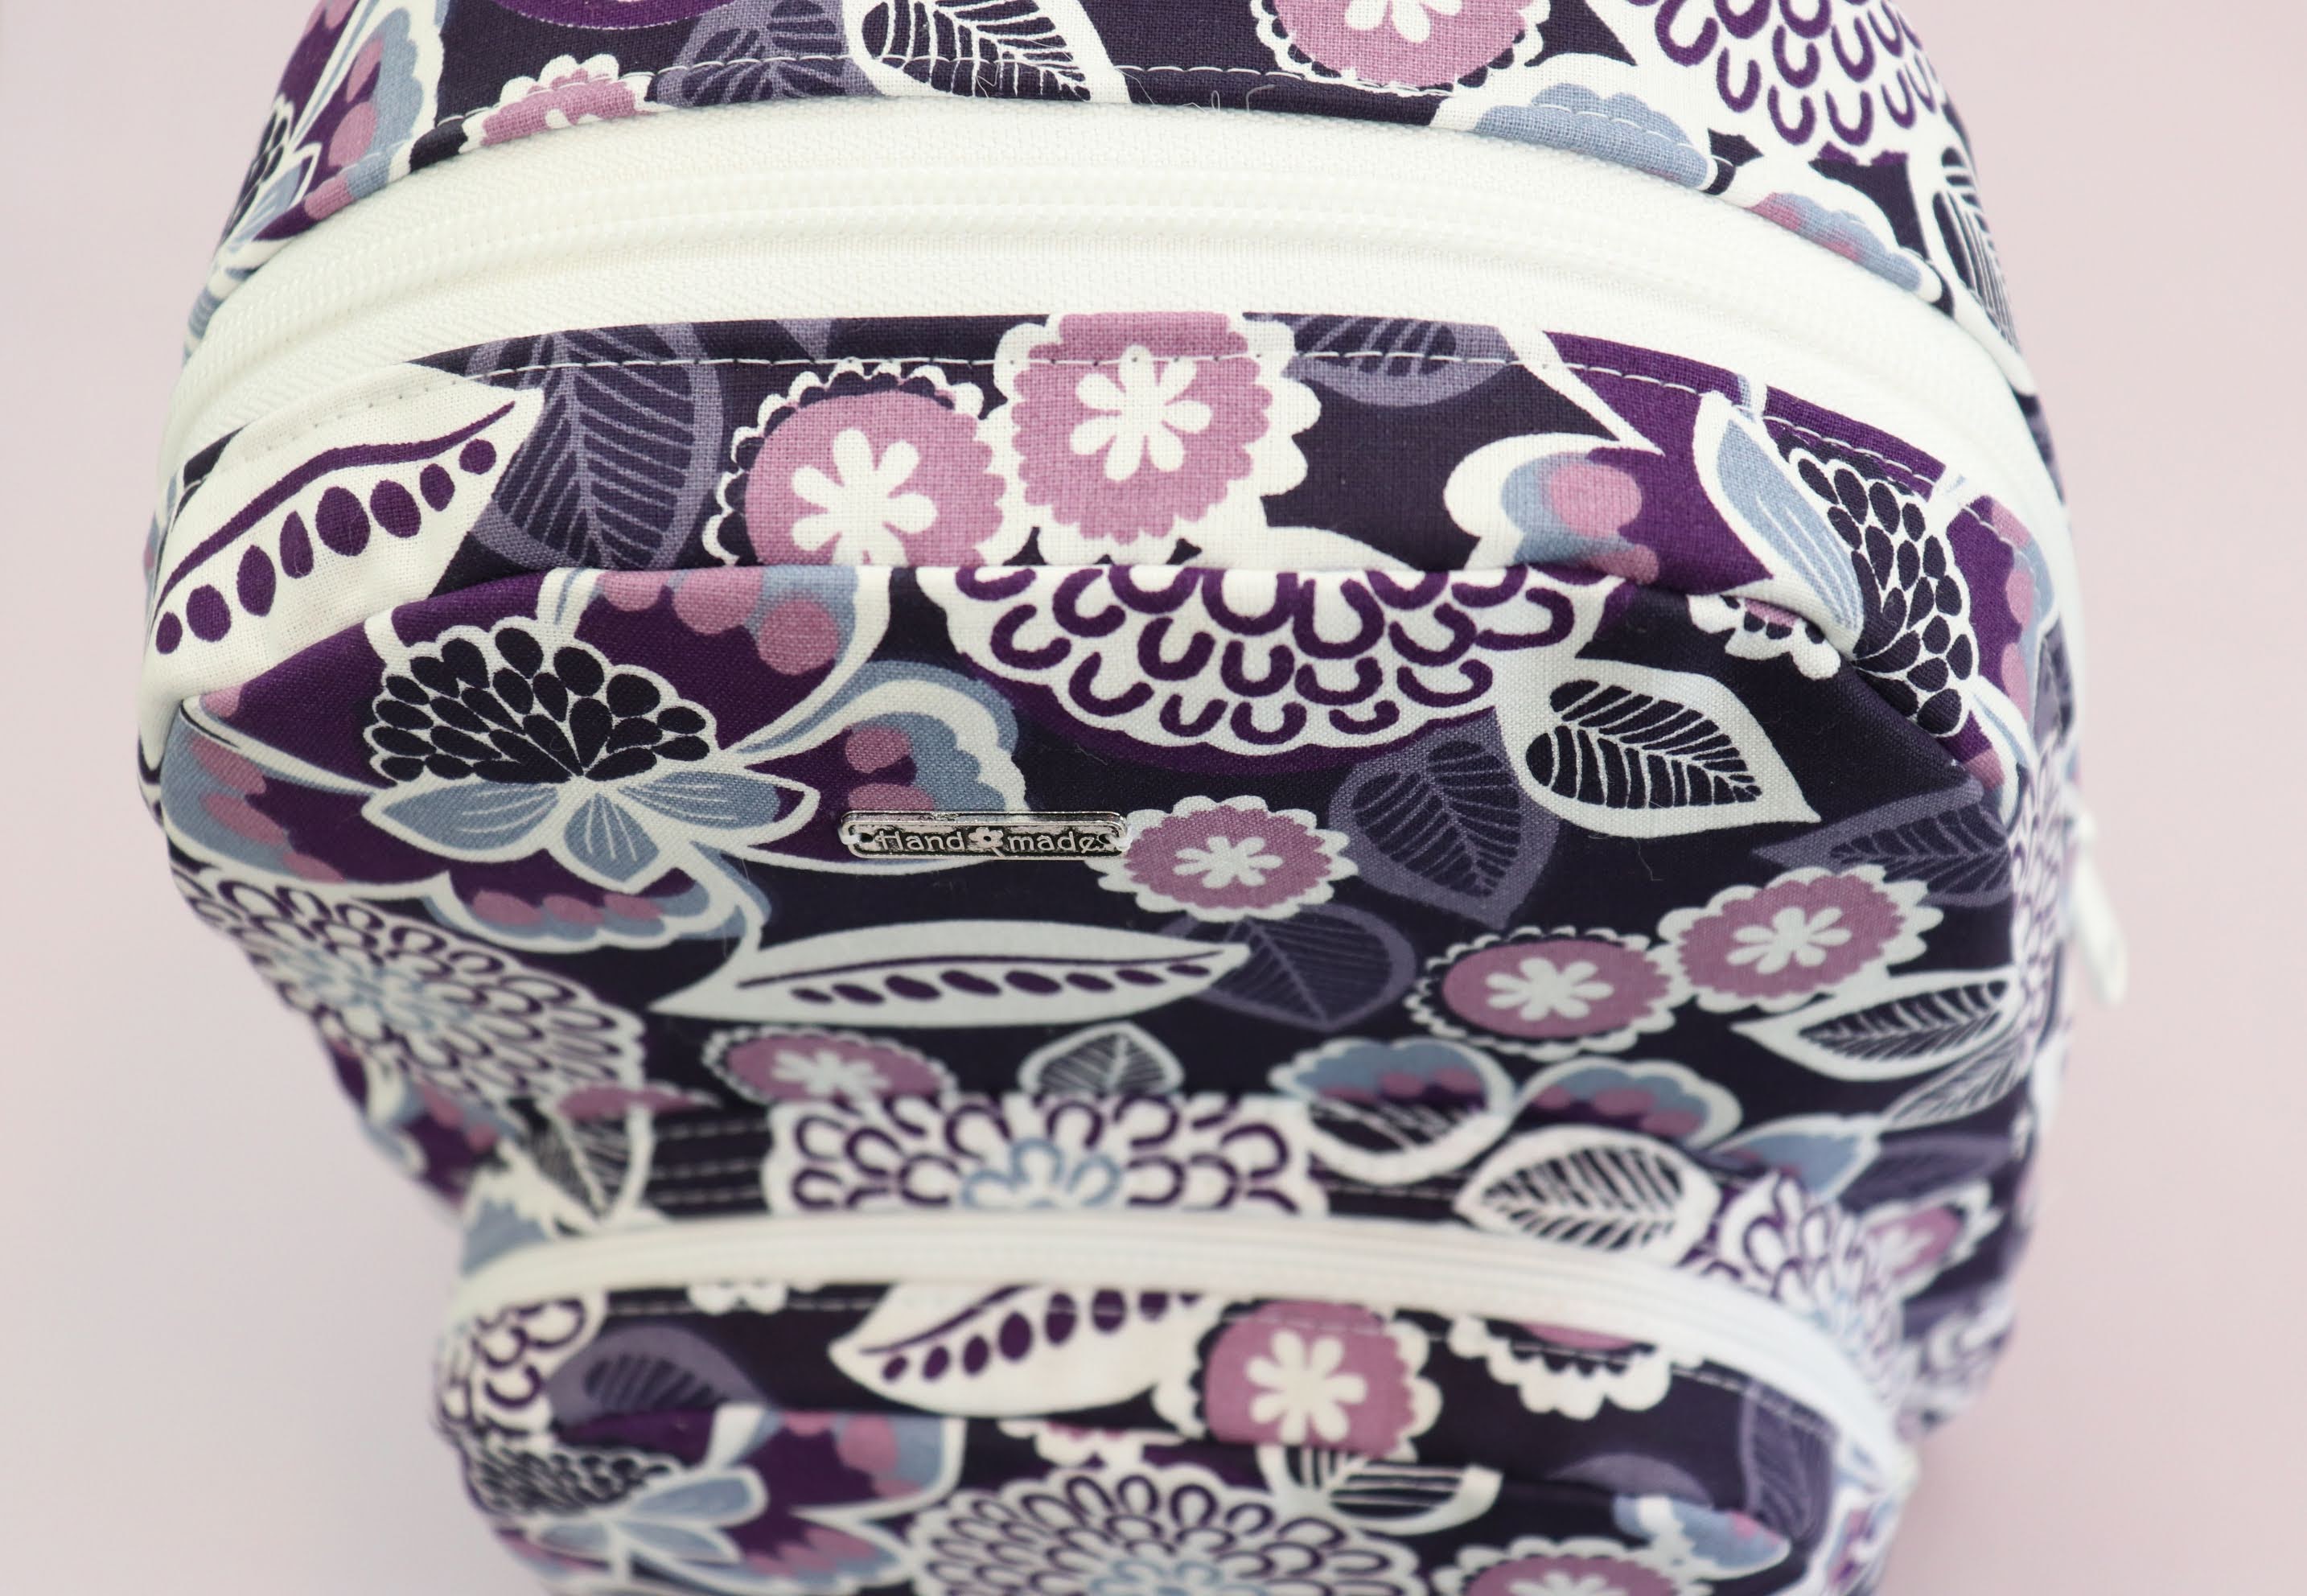
It is constructed with a layer of cotton overlaying duck canvas. I used bias tape to bind the seams.

1img_0090

I’ve made six or seven of these bags using a variety of fabrics and interfacing. I’ve used vinyl, suede, plain canvas, fusible fleece, and even satin. The cotton covered canvas, with woven interfacing is my favorite combination! It is nice to work with, strong without being bulky, and holds its shape very well.

3img_0056

I love the pocket in front. While it takes patience to construct it’s not too difficult once you know the method.

1img_0039

This bag also has adjustable straps depending on how you like to wear your backpack.

Supplies Needed:

1/2 yd 41” wide Main Cotton Fabric
42 inches 19” wide Interfacing (I used Pellon SF101)
3/8 yd 58” wide Canvas (I used duck canvas from JoAnn)
One 20 inch zipper
One 13 inch zipper

1 pkg Extra Wide Double Fold Bias Tape
75 inches 1” wide Strapping
Two 1” wide Rectangle Rings
Two 1” wide Tri-glide adjusters
One “Handmade” Metal Tag (Optional)

This project takes a bit of time and patience when working with multiple pieces, zippers, curves, and interfacings. Difficulty 7/10.

Approximate Finished Dimensions (inches):

Main Compartment 9 x 3.75 x 11, Pocket 7 x 1.5 x 5.75

DETAILED INSTRUCTIONS: PART 1: Fabric, Zippers, Pocket

DETAILED INSTRUCTIONS: Part 2: COMING SOON!

Free Pattern:

Please note, this pattern has been updated. There was an error in the first version of the pattern, the bottom pocket gusset piece should measure 12.75 inches in length. Sorry for the inconvenience!

Dog Poop Waste Bag Holder

Thank you to my Grandparents for giving me the idea for this project! It was a challenge, but a lot of fun. I have to say, I never thought I would be making a tutorial that had anything to do with dog poop, but here it is 🙂

12img_9076

I have two dogs and they always…always…do their business while we are out and about. As a result, I have to carry these with me every time we go for a walk. Having a case to store the bags in is a must.

The pattern and instructions provide two different styles for the bag.

1img_9034

One is a loop handle which can be attached to the leash using Velcro, snaps, buttons, or more. This is a really cute style and is the typical style for waste bag holders.

1img_9013

The other is a simple drawstring bag. Both options have a slit in the side to allow for easy removal of the plastic bags.

1img_8980

This project is a bit challenging. I would say 6/10. Primarily because it is so small. Special tools can help, such as the Purple Thang to protect your fingers, and a detail pressing tool to reach the small areas.

1mvi_8920-1

Here is the free pattern.

Dog Poop Bag Holder Pattern by learncreatesew

DETAILED INSTRUCTIONS:

Scrunchies with Removable Ties

One of the projects that my students request to make most frequently is scrunchies! They are quick, easy, and don’t take a lot of fabric.

1img_873

You can use a variety of fabrics to make scrunchies, so it’s a great way to use the fabric in your scrap bin. Scrunchies are great in cotton, flannel, velvet, satin, and more.

1mvi_8725

You can mix and match removable ties to add a bit of flare to your scrunchies.

1img_8846

Scrunchies only take a few minutes to make and even beginning sewers can be successful with this project.

1img_8870

You can make the scrunchies without the ties if you prefer.

Here is the pattern for the removable ties!

Scrunchie Tie Pattern by learncreatesew

DETAILED INSTRUCTIONS:

QUICK OVERVIEW:

Rag Doll Part 1 – Constructing the Body

I have finished my rag doll pattern! I’ve been working hard to create the instructional videos and I am happy to say that I have the body instructions ready to share with you today.

1img_7538

I really enjoyed working on this project and mixing and matching fabrics to create the body of the doll.

1img_7423

I love all of the different styles you can design to make the doll uniquely your own!

This project is a bit more time consuming than others and does require a bit of patience. It is probably a 5/10 in difficulty just for the amount of time needed to hand stitch the hair and for the exactness of seam allowance that is needed. When sewing plush projects, a small error in your seam allowance can make a big difference in the appearance of your doll. You also need to be comfortable slip stitching and working with small curves.

The doll measures between 14 and 14.5 inches tall when finished.

Rag Doll Pattern by learncreatesew

Rag Doll Hair Tutorial COMING SOON!

Casual Flannel Skirt with Pockets

This was a really fun project to make! It took me a few tries to perfect the sizing, but I was very pleased with the results.

When I designed this project I was looking for something to lounge around in, especially in the summer.

1img_7022

Pockets are a must for me, so that was the first thing I decided the skirt needed.

Next, slits were a priority for ease of movement. I also ended up choosing an elastic waistband for simplicity. The elastic doesn’t have a casing, but is exposed on the inside of the skirt.

2img_7035

Then, I looked at my huge stack of flannel. That definitely needed some attention. You don’t necessarily need to make the skirt using flannel fabric, but that is the only fabric I have tested the project on.

The skirt is designed to sit at your natural waist, where you bend, and is very comfortable. Here is my casual skirt in action as I tried to take photos. My dogs decided it was a great time to be helpful. Unfortunately, their photography skills are lacking. Luckily, they make up for the lack in cuteness.

1img_7077

Casual Skirt Cut Layouts and Measurements by learncreatesew.com

Casual Skirt Pocket Pattern by learncreatesew.com

DETAILED INSTRUCTIONS:

QUICK OVERVIEW:

Thanks to my mom once again for being my photographer on this project!


Free Fleece Slipper Pattern – Adjustable Sizing

I know this project is a little unexpected. I wasn’t planning to make fleece slippers. The idea has been sitting around in the back of my head for a while, but I hadn’t had great success in making a pattern that worked for me.

Thank goodness this week my mom came to stay with me 🙂 The subject of slippers came up and since she wanted to make slippers it got me started on this project again, and I am very pleased with how it turned out!

1img_6859

We just wanted a simple fleece slipper. Something casual and easy to make.

Of course, then we had to make them cute and add decorations!

1img_6825

Flowers were the first addition 🙂

We also played with contrasting binding. My mom made this cute pair with purple binding.

1img_6901

After cuteness, we moved on to comfort. The first addition for comfort was two layers of fleece for the base! My mom’s brilliant idea! This really made a difference. It made the side seams less noticeable, hid all raw edges, and added a layer of cushion as well.

1img_6800

We also found that each of us preferred a different style of slipper. While my mom loves the classic snug fit with a lot of coverage, I found that the high opening wasn’t what I was used to.

1img_6871

So, we altered the pattern. We decided to add a second style, ballerina fit, with a larger opening and longer band. We then added an optional mary jane strap, just for cuteness.

1img_6865

In the end, while we hadn’t planned to spend several days making slippers, it was totally worth it. We both love our homemade slippers!

The project is fairly easy. You just need to be comfortable working with fleece and using a zigzag stitch.

The pattern is a woman’s size 7 but can be adjusted slightly for other women’s sizes.

Fleece Slipper Pattern Letter Size by learncreatesew

Fleece Slipper Pattern BALLERINA Letter Size by learncreatesew

DETAILED INSTRUCTIONS:

QUICK OVERVIEW:

Also! A special thanks to my mom for being my photographer and pattern tester for this project!

Project Brainstorm Sketchbook – Hanger Storage Bag & Casual Skirt

I had a few more ideas for possible projects!

First, I am thinking of making a closet storage bag, one that could easily hang from a hanger. It would have an open window for easy access. It is very similar to a clothespin bag.

hanger-bag

I am also thinking of making a casual skirt. My idea for this was a skirt that you could wear lounging around the house or on weekends. Just a simple flannel skirt with pockets. I can’t decide if I would prefer a drawstring or elastic waistband. I would definitely want comfort to be the priority.

casual-skirt

Composition Book Cover with Zipper Pouch

This composition book was a lot of fun! It was a challenge to construct, but I think it turned out great!

1img_6608

It is a bit more difficult than the pocket cover as you have to work with vinyl, a zipper, and several more pieces. That said, the result was worth it!

2img_6683

Composition Book Cover Cut Layouts by learncreatesew

DETAILED INSTRUCTIONS: