Zip-On Tool Caddy

For my latest project I wanted a tool bag that you could hang on the back of the chair. I find that in the Sewing classroom tools can end up all over the place, and tripping over them is not a fun experience.

1img_8950

I decided to make a simple tote that you could zip on and off of the chair. It was super simple and after making it I found the tote had a lot more uses than expected!

1img_8941

I works perfectly on the back of a chair, just like I wanted! It even fits nicely on the back of student desk chairs.

1img_9088It’s handy in the kitchen!

1img_9056

It’s also great for toiletries. Especially, when traveling.

I absolutely love it! Sewing instructions and pattern coming soon!

Pencil Pouch Instructions

Who doesn’t love a great little clutch pouch? Here is a tutorial for a quick and easy pencil pouch.

2img_5224

You can make two pouches with just 1/4 yard of fabric. It is also a great way to use that scrap fabric that you may have laying around the house.

2img_5224-1

TWO OPTIONS:

There are two tutorial options of the pouch available.

Option 1: The “Easy” option has a standard zipper installation and raw edges inside the bag. Difficulty level 3/10. You need to know how to use a zipper foot. The project also has lining and interfacing.

Easy Pencil Pouch Instructions

2img_5213

Option 2: The regular tutorial provides options for a decorative zipper as well as detailed instructions for hidden and bound seams. Difficulty level 4/10.

Pencil Pouch Instructions with Options

2img_5202

Happy Sewing!

Rag Edge Tote Bag Instructions

The Rag Edge Tote Bag Instructions are finished!

2img_5197

The rag edge gives this tote a casual vintage feel.

2img_5179

While the exterior has a plethora of decorative seams, the interior is nice and smooth and even has the option of an added pocket.

2img_5192

I hope you enjoy making this bag as much as I did!

Difficulty level for this project is a 4/10, mostly due to the grommets required for the handles.

difficulty-rating-spool-small-4           Rag Edge Tote Bag Instructions

Pig Plush Pattern & Instructions

The Pig Plush pattern and instructions are finally ready!

3img_5956

They are cute and cuddly! With awesome little tails.

3img_5988

The pattern comes with two different sizes so you can choose the size that best suits you.

The smaller plush stands 5 – 6 inches tall and the larger 7- 8 inches. The size varies a bit depending on the stretch of your fabric and how much you fill your plush.

Pig Plush Pattern and Instructions

Fox Plush

I took the pattern I used for the Pig Plush and altered it to make a Fox Plush!

5img_5703square

I was really pleased with the results.

I don’t know why, but the cute little tails are always my favorite 🙂

5img_5708


I also changed the size of the pattern, making two different size options.

5img_5772

You can also decorate the plush as you like, or leave it simple.

5img_5761  5img_5757

I’m happy to say that the pattern and instructions are done and ready to share!

Happy Sewing! I hope you have just as much fun making these cute little plushies as I did.

Fox Sewing Pattern and Instructions


Scrap Fabric Challenge – Rag Edge Tote Bag

After making a few pencil pouches, I still had piles of scrap fabric. Most of the fabric was left over from a rag quilt that was made smaller than expected.

Since I had rag quilts on the brain, I figured, why not a rag quilted bag!

2img_5197

The fun fabric, with a sea shore theme, instantly made me think of sunny days at the beach.


The ragged edges from the quilting give the bag a vintage look that pairs well with sun bonnets and sandals.

2img_5179-1

The inside has a clean finish, but maintains the patchwork look.

2img_5192

To get this look I simply made two mini rag quilts, sewed them together at the bottom and sides, boxed the corners, and added grommets and cord handles.

For a quick weekend project, I was very pleased with how this bag turned out.

Pencil Pouch

Oh, what to do with scrap fabric? This weekend I sat looking at a pile of scrap fabric, trying to figure out how to make the most of it. A lot of the fabric had already been cut into small pieces, so I was left with only small projects as options.

A pencil pouch seemed like the perfect solution! Who doesn’t love making pouches? They are are quick, useful, and easy.

2img_5224

Most of the fabric was in neutral colors. I decided to pair that with a more vibrant lining and zipper.

2img_5260

I really love how the contrast turned out!

To add interest I also added decorative trims and stitches.

2img_5213

The pouches can be made really quickly, but with great results.

2img_5202

I am currently working on putting together the instructions.

2img_5253

Adorable Plush Pig

A few months ago I made a Panda Plush and just loved it! So, over the holiday break I worked on a few more. My favorite is this adorable Plush Pig. I haven’t chosen a name for her yet, but I think she needs one.

3IMG_3404

She is the same shape as the panda, but without a center stripe.

I also changed the shape of the arm pieces.

3IMG_3362

The panda had long arms, and they worked great. However, on the pig, they just looked odd. So, she has delicate round arms and legs.

No pig would be complete without an sweet curly tail!

3IMG_3433

How cute! It was a bit tricky getting the curled shape, but totally worth it.

3IMG_3359

I had constructed the whole pig, and she was cute, but I felt like something was missing. She had a cute tail, sweet pink ears, but she needed something else. So, I added the bow and eyelashes, giving her a more feminine look.

3IMG_3449

The plush could definitely be constructed without these touches, but I think it adds a little something extra that gives her personality!

I think this Precious Pig is my favorite plush to date! I am currently working on the pattern and instructions and hope to have them available to post in the future.


Disney Backpacks

Over the last few weeks I have been playing with my canvas backpack pattern. What better way than with Disney themes!

My backpack pattern makes a smaller sized backpack, perfect for a child, or for an adult who wants to be able to stuff their backpack in the little parcel holder pouches on the Disneyland rides!

I started with a basic canvas backpack, no lining or anything, I have have been updated it, trying different fabrics and interfacing, to see which I like best.

Here was my first adapted backpack!

IMG_36142

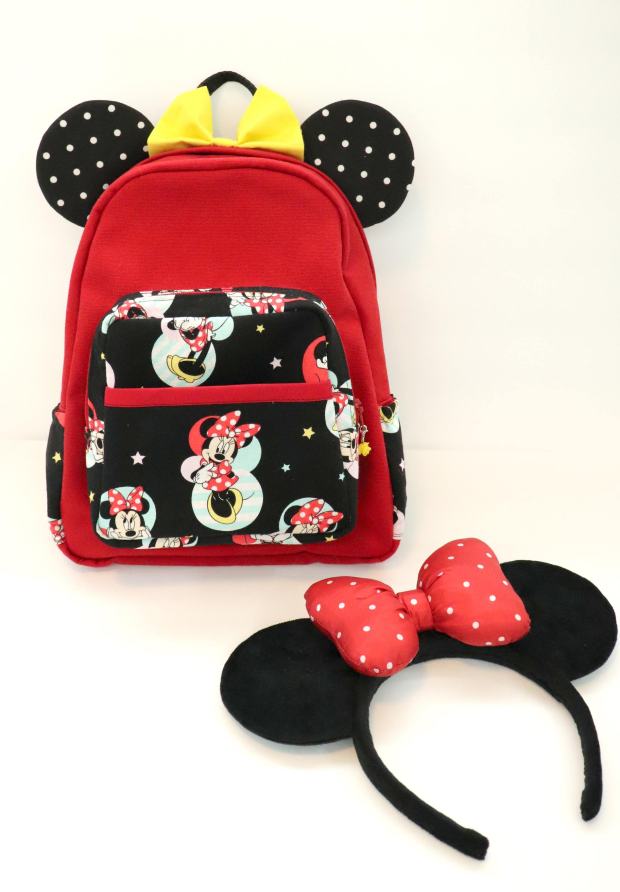
I went with Classic Minnie for this one! I love the traditional ears, with the red dot bow which I also made from one of my patterns. I wanted something I could wear with it. The base fabric is red canvas. There is no interfacing on the main bag. To make it fun I added the ears and bow to the bag as well.

IMG_36002

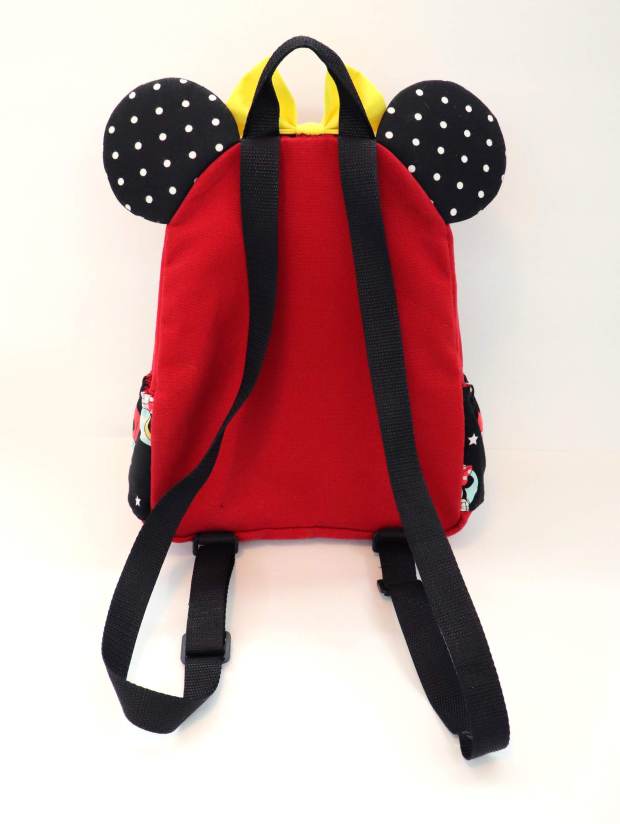
The straps are simply 1 inch wide nylon webbing with two tri-glide plastic rings to make them adjustable.

I really liked how this bag turned out. It was fairly simple, and very cute 🙂

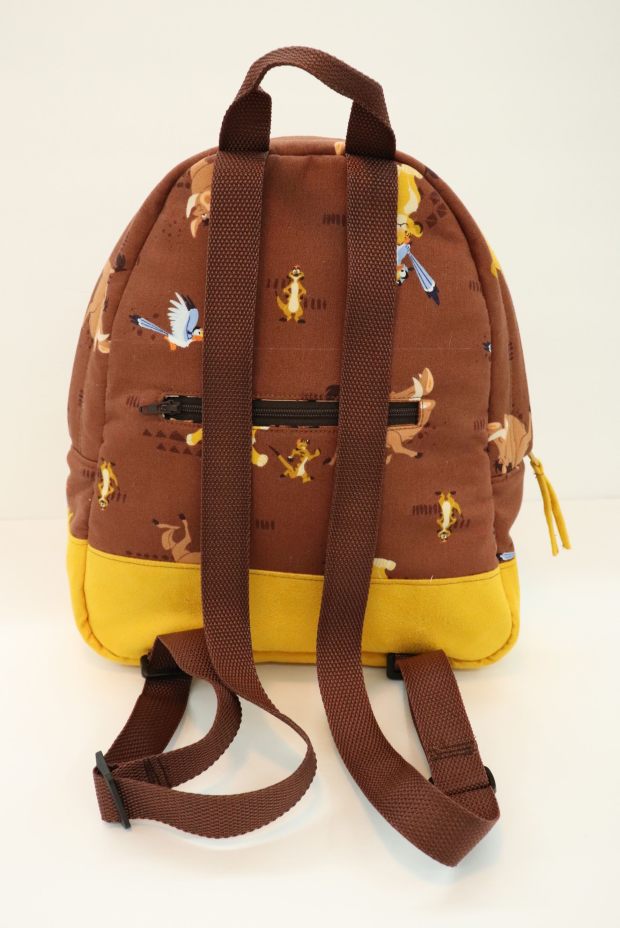
For my next backpack I wanted to take it a step further. I really like the look of the classic Jansport backpacks with the leather base. I decided to try something like that to see if it would work on my mini sized backpack. Since I am hoping to visit the Animal Kingdom at some point, I figured Lion King would be an appropriate them for this version.

IMG_36262

I really liked working with the suede which I purchased from fabric.com. However, since the suede was quite thin, I used fusible fleece interfacing over the entire bag. I also lined the back with cotton fabric. I used my embroidery machine to make the front tag, using one of the standard fonts.

For this bag I added a metal zipper to the front pocket as well as a lobster clasp inside for keys.

IMG_36442

I also added a back wallet pocket (my mom’s idea!) so a separate wallet is not necessary.

IMG_3639

Overall, I am pleased with how it turned out.


IMG_36332

While the canvas backpack was by no means flimsy, this bag is much sturdier. It is quite bulky and thick. This bag feels very solid, like it would last quite some time.

Of course, no bag is complete without a pair of ears to wear with it. These were inspired by a picture I found on Pinterest.

IMG_36512

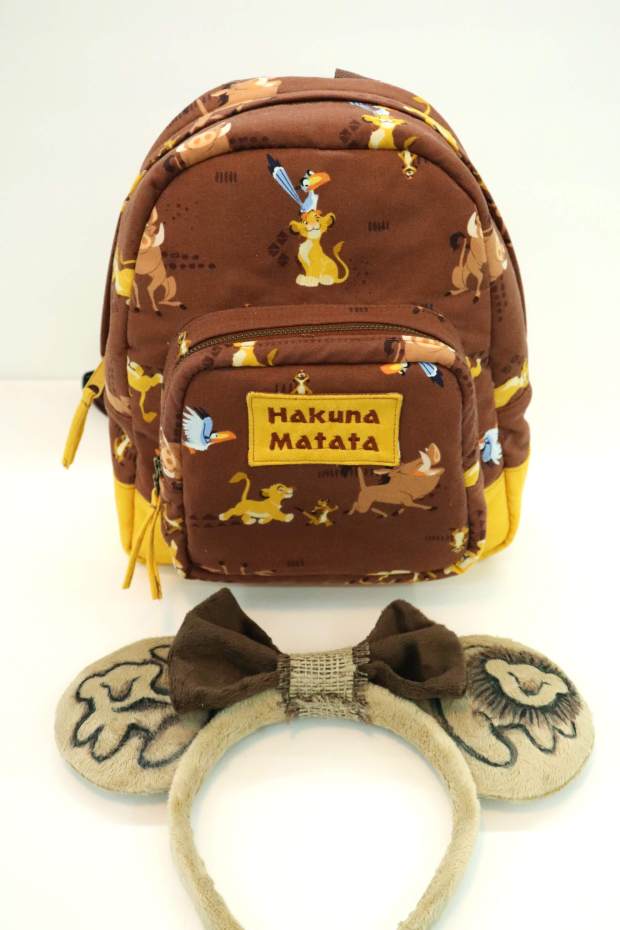
I can’t wait to wear them!

Next, I wanted to try something a little sleeker. Something that didn’t look like a school bag. So, for the next version I made the entire main bag out of vinyl. For a lining I used rose jacquard. No interfacing was necessary. I LOVE the classy look. However, I think it needs a bit of something. I am tempted to add some rose jacquard ears to the top!

2IMG_3673

I also started a Princess backpack. This one has a vinyl base and canvas interlining. I also used Pellon SF101 interfacing on the back of the exterior cotton as it was a bit see through. I altered the pattern a bit for this bag, curving the top more and extending the front pocket width but reducing the depth. I am loving the change in design. I want to add a bow to the top and perhaps a few tags, but I think the structure of this one was my favorite so far.

IMG_35852

I added vinyl straps for the Princess bag. While the black the main part is vinyl, the straps are still webbing. While I like the look of the vinyl straps a lot, I think the simple webbing was more comfortable for me. I might try some fleece interfaced cotton straps on my next bag.

2IMG_3517

For both the Princess and black vinyl bags I changed the wallet pocket. It is still in the back of the bag, but I extended it all of the way across the bag (another tip from my mom).

2IMG_3325-1

While the original wallet pocket worked, it was a little tight getting in and out of it. It would be great for a hotel key card or a gift card holder. However, there also was not enough space for bills and receipts. I really like how easily accessible the

2IMG_3676

I am working on refining my backpack pattern and hope to post the pattern and instructions once it’s complete.

Keep an eye out for new picks. I will post updated versions of the bags once I add the finishing touches! I also plan to keep making new designs. You can never have too much Disney Gear!