I just had to give this project a try, I couldn’t help myself. I normally do a lot of costuming, and when I had the idea to branch away from cotton fabrics for the mask I couldn’t resist!
This was a lot of fun to make 🙂 I don’t think it would be my everyday mask, but for special occasions or when I feel the need to be a bit fancy, this mask would be great.
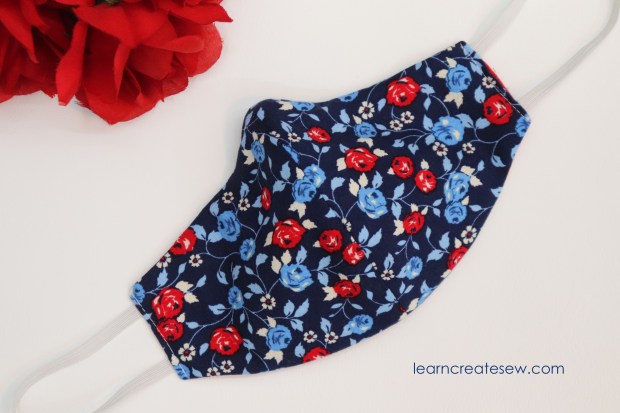
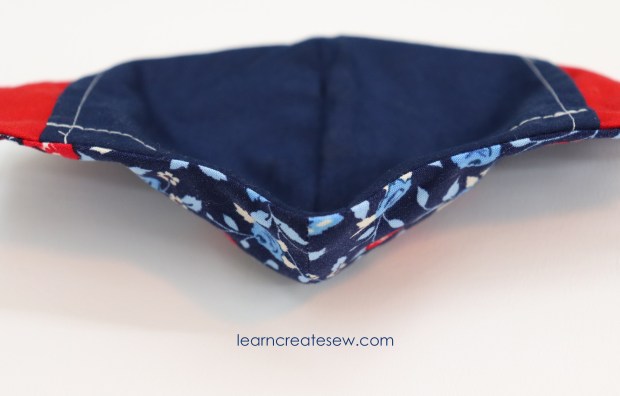
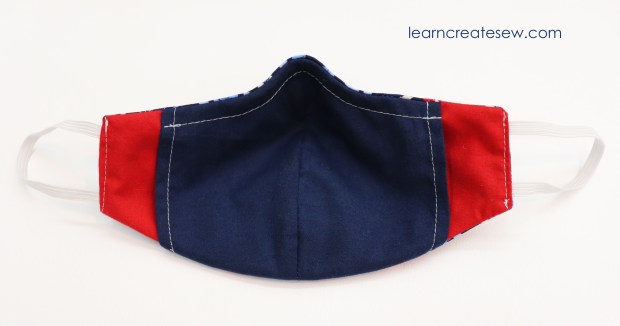
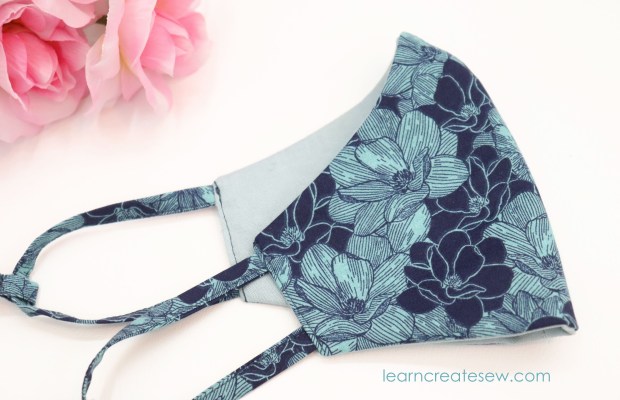
This mask uses my contoured face mask pattern with adjustable ties. I used 1/8 inch ribbon.
This mask also has a satin lining. It’s a little bit trickier working with specialty fabrics, but I was really pleased with how it turned out!
Supplies:
These dimensions will work for all sizes. Actual size needed may be smaller if you make a smaller size. Make sure the fabric can be washed and pressed.
About 8 x 15 inches Main Cotton Fabric ( I used satin)
About 8 x 15 inches Lining Fabric (I used satin)
About 8 x 15 inches of Lace
About 8 x 15 inches Interfacing (Optional – I used Pellon SF101.)
I am happy to share with you today my first Sewing Skill Builder video. There are a lot of essential skills in sewing that if mastered, make your projects beautiful and professional looking. However, when those same skills remain a mystery sewing can become a challenge and at times frustrating. In this series I hope share with you essential skills that you can use and build upon as you make projects in the future!
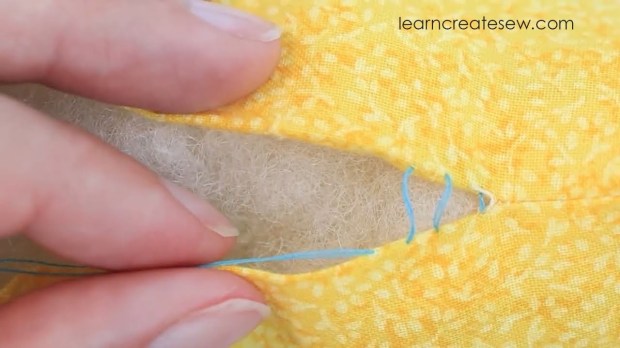
The slip stitch is also often referred to as a ladder stitch or invisible stitch.
The slip stitch is used to close pillows, linings, stuffed animals, and more.
The slip stitch comes up again and again in sewing regardless if you are making bags, plush toys or garments. Being handy with a slip stitch is extremely useful.
When you slip stitch you are usually joining or closing two folds.
We make our stitches parallel to the folds, essentially hiding the thread inside.
Your stitches often begin to look like the rungs of a ladder, hence the name.
Once you pull the thread, the layers will join making the stitching invisible.
It helps when slip stitching if you use a thin sharp needle. I also like to double thread my needle so I don’t have to worry about it sliding off.
If you are looking for a face mask that provides additional protection, then this may be the mask for you. Nose bridge wire allows for a more personalized fit, and a filter will make your mask more effective.
This mask uses the same basic pattern shape as my regular Contour Face Mask, but has additional features. The updated pattern, with pockets, is linked below.
Adding nose bridge wire will let less air escape from the top of the mask and will force more air through the filter. I have heard it also helps minimize the fog you get if you wear glasses.
I made a size Medium and my purchased filters that I found on Amazon fit quite nicely inside. The filters are 4.72 x 3.15 inches. Smaller sizes may need filters or filter fabric that can be trimmed.
Supplies:
These dimensions will work for all sizes. Actual size needed may be smaller if you make a smaller size.
About 8 x 15 inches Main Cotton Fabric
About 8 x 15 inches Lining Fabric (I used cotton)
About 8 x 13 inches of Pocket Fabric (I used cotton)
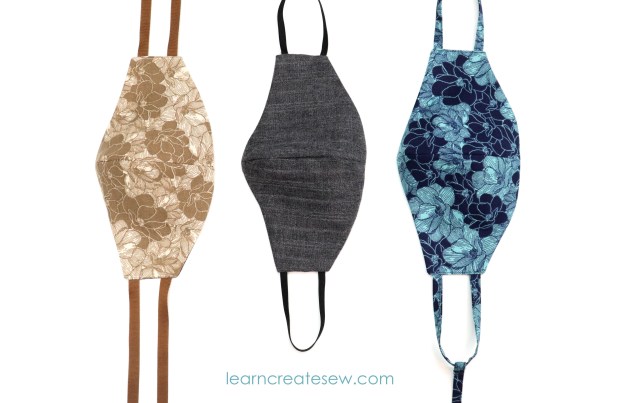
I really like the look of contoured face masks! Making a pattern has been on my to-do list for several weeks, and I am happy to share it with you today!
With many of the patterns I tried, I found that the mask would move around a lot when I spoke. This drove me crazy, and as I result this project sat at the bottom of my stack for a while. But this week I found new motivation and tested it out again.
Lo and behold I made a pattern that works! This mask has a great shape, but allows me to talk without worrying about having to adjust my mask every two seconds. Since you are supposed to touch your mask as little as possible, I think this is a big plus!
This pattern makes two different styles of mask. Masks with either fixed ties or masks with adjustable ties.
FIXED TIES & ELASTIC
I have to say, I definitely prefer fixed ties. Maybe it’s because I have made so many masks that I know exactly what size works for me, and since the ties don’t move I feel like I always get a really good fit.
Even with fixed ties you still have plenty of options for the ties that work best for you. There is the single tie back mask, elastic, or the basic two tie option. Also, with fixed ties you use less elastic, so if you have a limit supply, that is something to consider.
ADJUSTABLE TIES & ELASTIC
While fixed ties are my favorite, there is no question that there are definite advantages to using adjustable ties. If you are planning to use elastic, and you want to donate the mask to a charity, friend, or relative, adjustable elastic is great as the wearer can adapt it to their preference and size.
You can also make a single fabric tie that is adjustable.
While this option looks great, I found this to be one of my least favorite options, as I had a hard time tying the mask to fit just right, but I know a lot of people prefer this design.
You can also use two basic ties on the side to tie behind your head or ears. If you are planning to tie behind your ears, I would definitely choose a thin ribbon.
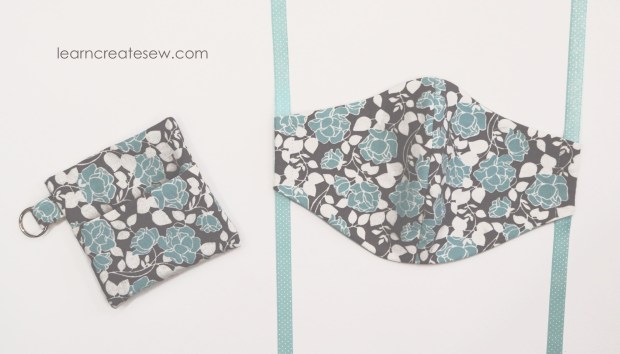
All of the masks fit in my key chain carrying cases, which I always love 🙂
MY FAVORITES
My overall winner for comfort and fit was the single tie back mask. I don’t know what it is, but it is just comfortable! I never have to worry if it is going to fit right.
For convenience you can’t beat either of the elastic masks. They are still really comfortable if you make the elastic the appropriate size, and so easy to use. There is nothing better if you need something that is a quick on and off. Plus you don’t have to worry about the long ties when storing or washing.
Supplies:
These dimensions will work for all sizes. Actual size needed may be smaller if you make a smaller size.
About 8 x 15 inches Main Cotton Fabric
About 8 x 15 inches Lining Fabric (I used cotton)
About 8 x 15 inches Interfacing (Optional – I used Pellon SF101 for some of the masks. The black and gray mask has no interfacing.)
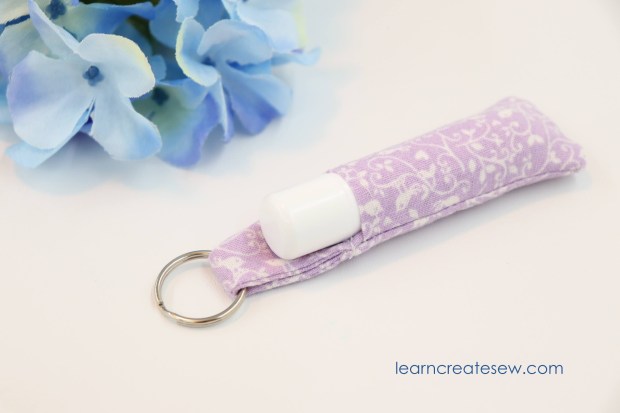
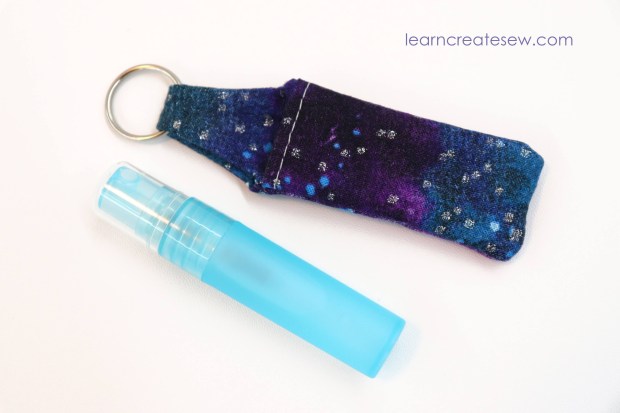
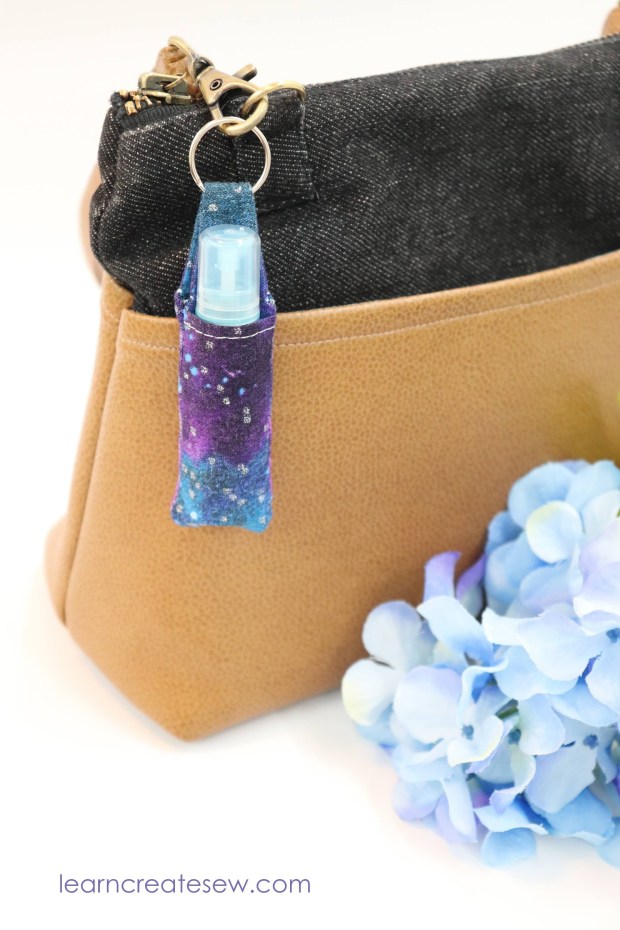
I have been wanting to make a lip gloss key chain for a while and finally had the chance to do so. I LOVE IT! They turned out just the right size 🙂 I was very pleased.
Once I had the lip gloss version done I was very happy to find a similar size spray bottle that works perfectly for liquid hand sanitizers! It would be awesome for perfume as well.
Once I had this key chain ready, I couldn’t resist making another size for larger hand sanitizer bottles. This works great for many 1 oz flip top bottles that usually hold gel hand sanitizers.
Since this project is so small, I used my purple thang a ton while sewing.
I used them for the first time today and I already love them. Perfect to add to your key ring or purse. These are also super cute as gifts! And since they don’t take much fabric, they are very affordable.
This lesson is the first in a series that will teach the basics of sewing. Through a series of projects and exercises we will learn a variety of skills and techniques that are essential to sewing. We will cover everything from hand-sewing to basic bags and crafts, how to use store bought patterns, and general garment construction.
I look forward to sharing with you all that I have learned! I hope you enjoy these lessons.
Lesson Category:
Hand Stitching
Lesson Topics:
Using a grid ruler
How to select your needle
Threading the needle
Tying a knot
Sewing a Backstitch
Sewing a Running Stitch
Sewing a Whip Stitch
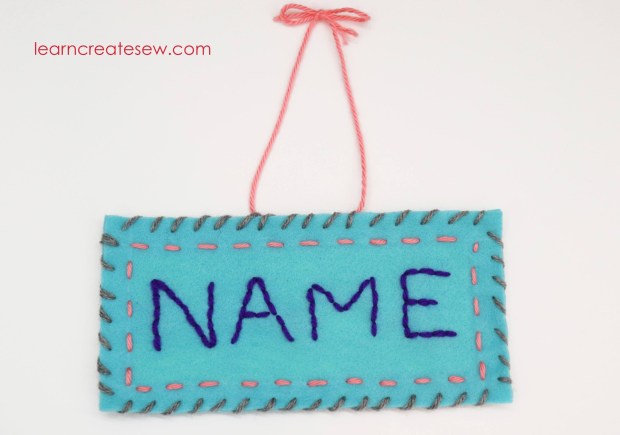
Whether you have been sewing for years or are picking up a needle and thread for the first time, hand stitching is essential. To learn a few basic stitches we are going to make a Name Tag Stitch Sampler. It’s a great project to begin your sewing experience, and it’s fun to display in your room, or on a shelf or locker.
The backstitch is great for the name. It is a strong stitch and there are no spaces between the stitches.
The running stitch is your most basic sewing stitch, and one that is used in most hand sewing projects. The whip stitch also comes in handy in general sewing.
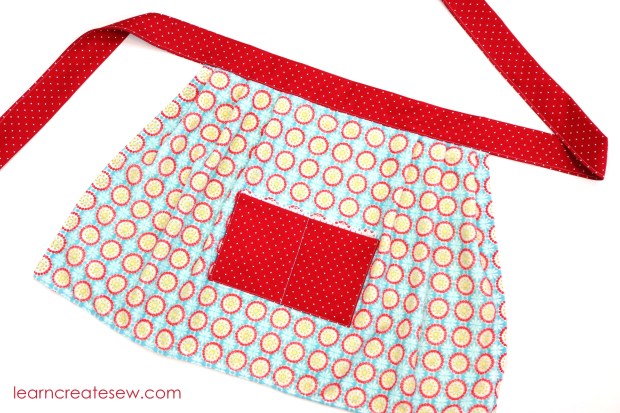
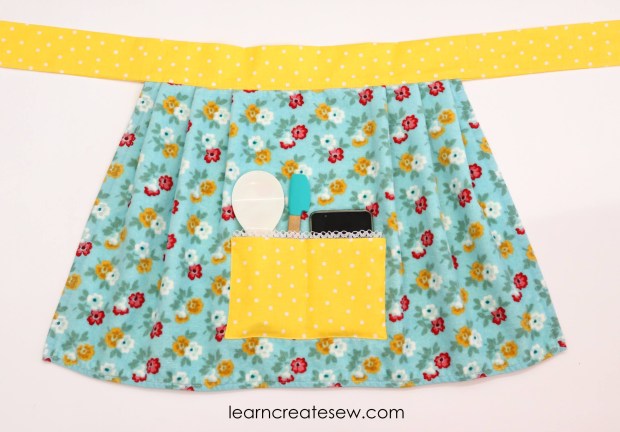
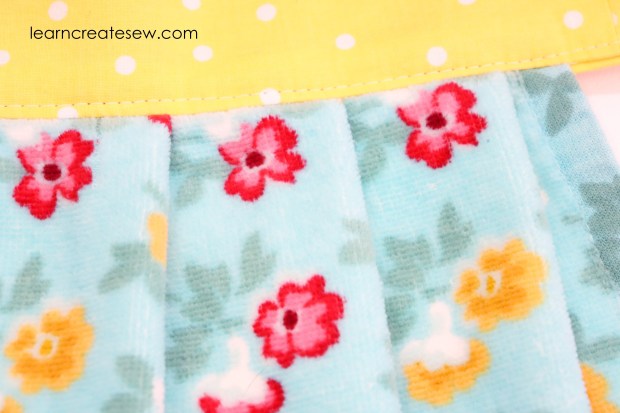
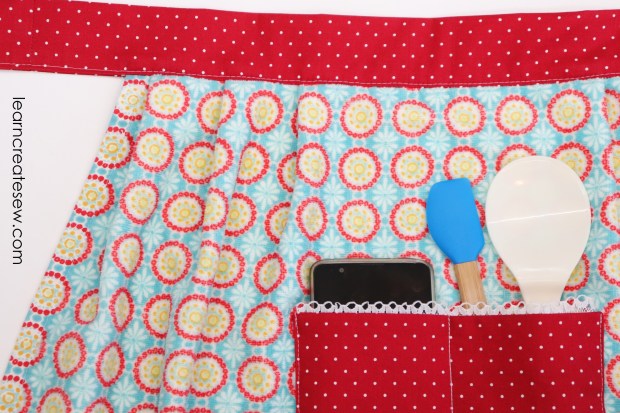
A special thank you to my Aunt for giving me the idea for today’s project! This is a cute little apron made from a dish towel. It’s pretty fast to make and doesn’t take a lot of fabric. It is a good way to practice sewing pleats and pockets.
It works best to have a dish towel with a general pattern design, rather than something that is directional, as the towel will be arranged horizontally along the waistband.
The width of the hand towel is adjusted using pleats to give the apron a skirt like feel.
It also has a good sized pocket that fits a cell phone and more.
This project was a lot of fun to make! It’s also pretty simple compared to many aprons. The only difficulty really lies in working with the terry cloth itself. I would rank this project a 3/10 for difficulty.
Supplies
1/3 yard cotton fabric (Fabric may shrink in the wash. I like to purchase a few extra inches just in case.)
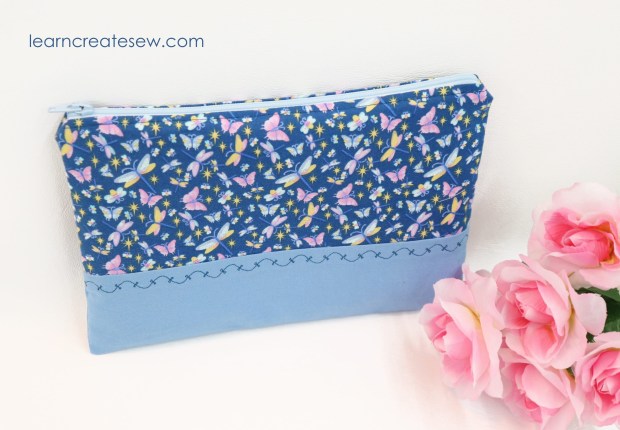
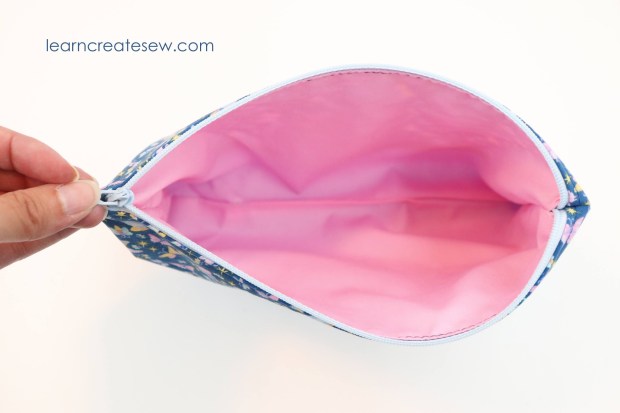
This is a classic zipper pouch! It is a great project to start sewing zippers if you want to learn. These make great pencil bags. They are also fun to fill and give as gifts.
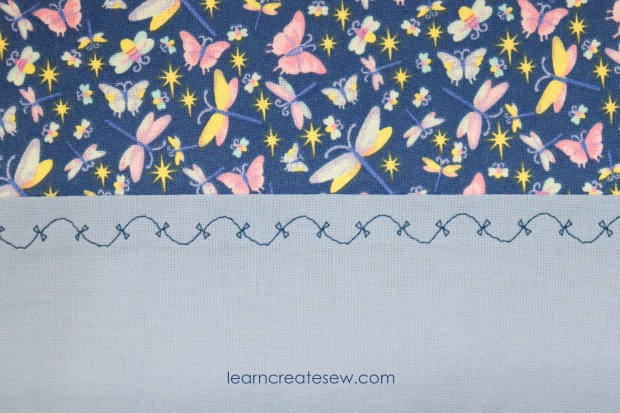
This is also a fun project to use decorative stitching on. I love adding a cute stitch to the contrasting bottom panel.
This is a flat pouch, kind of like a pencil pouch. So, it does not stand up on its own.
That said, it still holds quite a bit!
You can easily adjust the size of the rectangles to make the bag as bid or small as you would like.
The bag I made has final dimensions of approximately 6 x 9 inches.
Supplies
Two 7 x 10 inch rectangles for the lining fabric
Two 7 x 10 inch rectangles of lightweight fusible interfacing (optional)
Two 4.5 x 10 inch rectangles for the outside TOP fabric
Two 3.5 x 10 inch rectangles for the outside BOTTOM fabric
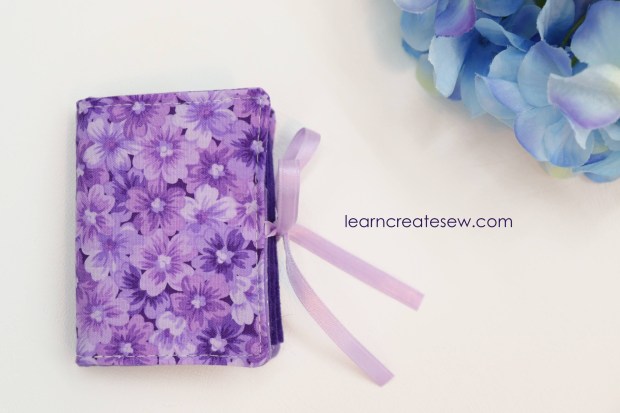
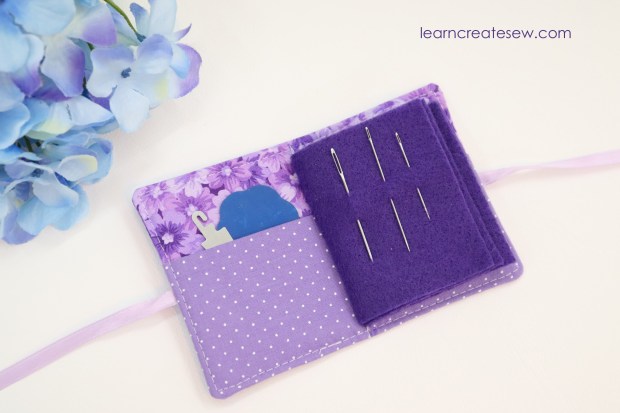
This is a cute fun little project. It is super fast to make, and handy to have around the sewing room, especially if you do a lot of hand sewing. These also make really cute gifts.
It doesn’t take much fabric, so it is a good way to use up your scrap fabric!
I love the little pockets. You can store thread, needle threaders, needle grips, and even tiny travel scissors.
This book measures approximately 3.5 x 2.625 inches when finished.
Supplies:
Scrap Cotton Fabric (or 1/4 yard)
Felt
12 – 14 inches of narrow ribbon (I used 1/4 inch wide)
Please note: This pattern has been updated. There was an error on the original pattern. The bottom pocket gusset should measure 12.75 inches in length. Sorry for the inconvenience!