Pintuck Throw Pillow

I have been wanting to finish this project for years! I made it a few years ago, but never got around to writing the instructions. I am super excited to finally have it completed 🙂


1img_9688

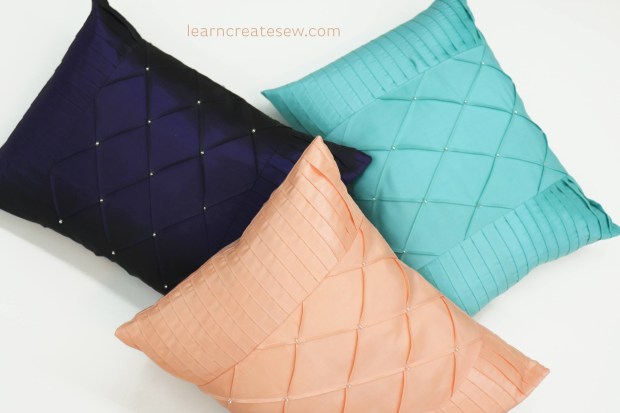
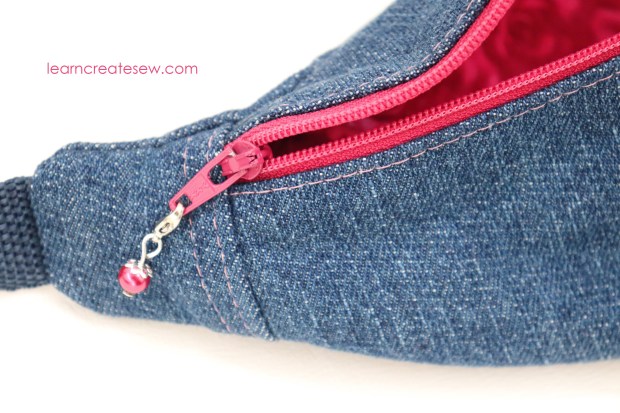
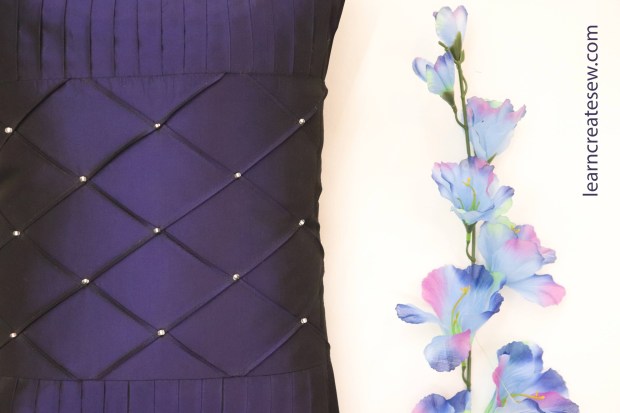
This is a cute little throw pillow and is a lot of fun to make. I absolutely love the beads attached, especially on the dark colored fabric.

1img_9787

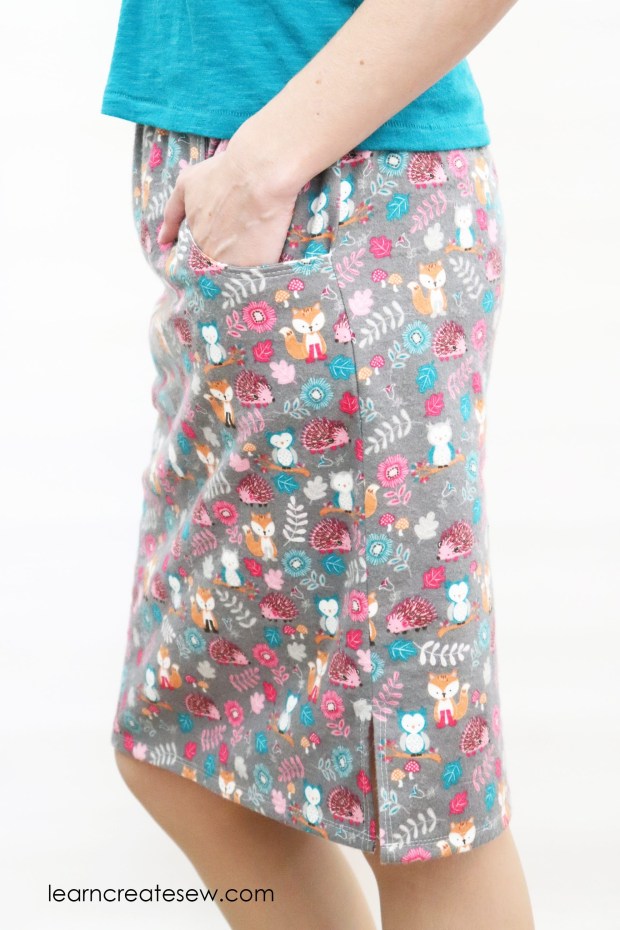
You have to be quite precise in your measurements and seams when completing this project. For example, on the side pleats if you are consistently off by even 1/8 inch, you could end up several inches off the mark when you finish. As a result, this project is for more advanced sewers, or those confident in stitching accurate seam allowance sizes. Difficulty 6/10

3img_9756

This is one of my first home decor projects and I really like the results!

To make this project you need the following:

5/8 yard 60 inch fabric (I used taffeta)

One 9 – 11 inch zipper (I used an invisible zipper)

One 12 x 16 inch pillow form

Beads (Optional)

Coordinating Thread


Here is a cut layout and pressing guides for the pillow if needed. I recommend printing the pressing guides on a heavyweight cardstock.

Pintuck Pillow Pressing Guides and Cut Layout by learncreatesew

DETAILED INSTRUCTIONS:

Dog Poop Waste Bag Holder

Thank you to my Grandparents for giving me the idea for this project! It was a challenge, but a lot of fun. I have to say, I never thought I would be making a tutorial that had anything to do with dog poop, but here it is 🙂

12img_9076

I have two dogs and they always…always…do their business while we are out and about. As a result, I have to carry these with me every time we go for a walk. Having a case to store the bags in is a must.

The pattern and instructions provide two different styles for the bag.

1img_9034

One is a loop handle which can be attached to the leash using Velcro, snaps, buttons, or more. This is a really cute style and is the typical style for waste bag holders.

1img_9013

The other is a simple drawstring bag. Both options have a slit in the side to allow for easy removal of the plastic bags.

1img_8980

This project is a bit challenging. I would say 6/10. Primarily because it is so small. Special tools can help, such as the Purple Thang to protect your fingers, and a detail pressing tool to reach the small areas.

1mvi_8920-1

Here is the free pattern.

Dog Poop Bag Holder Pattern by learncreatesew

DETAILED INSTRUCTIONS:

Stretch Knit Face Mask

This is one of my favorite face masks. SO comfortable! And I love the fit!

1img_9140

With a lot of face masks I have a hard time finding just the right fit. Since the knit fabric stretches, it wraps around the face quite nicely.

1img_9265

I used a brushed polyester spandex from JoAnn that has a great stretch and holds its shape.

1img_9176

In addition to providing a safer environment, these masks also double as protection against dog licks.

1img_9311

This masks can be made using a zigzag stitch and stretch or ball point needle, or with a combination of a zigzag and twin needle. I used a stretch twin needle with width 2.5. The purple thang tool was very handy when sewing the binding.

1mvi_9120

Here is the pattern for the face mask. The pattern is available in a variety of sizes. I made a medium for myself and used 26 – 26.5 inches of trim. I used 26.5 of the zigzag stitched trim, and 26 with a twin needle.

Stretch Knit Face Mask Pattern by learncreatesew

DETAILED INSTRUCTIONS:


Little Bear with Accessories

This simple bear plush is great for beginning sewers and service projects! My first year sewing students made these bears for a children’s hospital. They were a big hit for both those making the bears and those receiving them. They are quick to make and even my new sewers were successful! They are also a lot of fun 🙂

1img_8465

This bear can be made with or without accessories, and it is adorable either way! The dress may be a bit of a challenge for beginning sewers as it involves gathering.

1img_8421

The body of the bear can be made with cotton, flannel, or fleece. Felt is great for the details. I used fleece for the I love You sweatshirt and flannel for the little dress. I also used 8mm safety eyes, buttons are also a great option. Embroidery floss was used for the eyebrows.

2-1

It is really fun to personalize your bear. Decorate as you prefer! Be creative and make it all your own. Since much of the decoration is simply felt shapes, this is really easy to do.

3-1

I hope you enjoy making this project as much as I did.

Little Bear Pattern by learncreatesew

DETAILED INSTRUCTIONS:

This video introduces the use of some pressing tools, like the seam roll.

5

That Purple Thang tool also comes in really handy when sewing the tight curves.

1-1

When using cotton or flannel fabrics don’t forget to clip the curves and corners in the seam allowance to get the best possible shape.

4

In the end, this is a cute, fun little project that is great to make over and over.

1img_8522

Flat Fanny Pack

Here is my second fanny pack! This one is a flat version.

1img_8083

The construction of this fanny pack is quite a bit easier than my classic fanny pack.

It has a zipper window rather than a zipper on a curve. This is a great option if you are learning how to sew zippers. The difficulty level on this project is about a 3.5/10. You have to use a zipper foot. You will be working with lining, and your stitching has to be exact.

1mvi_8027

Since it is flat it can’t hold much, but it is perfect for your phone, lip gloss, or to act as a wallet. There is even an optional credit card pocket.

1img_8100

The pattern has two sizes, small and regular. The regular fanny pack is about 14.5 inches wide, 6 inches tall from tip to top, with a pocket about 5.25 inches deep. The small size is about 13 inches wide and has a pocket approximately 4.75 inches deep.

Here is the free pattern!

Flat Fanny Pack Pattern by learncreatesew

DETAILED INSTRUCTIONS:

Classic Fanny Pack

I have been wanting to make a fanny pack for years, and I finally did!

1img_8339

This is a classic fanny pack with a curved top flap. It’s what I always picture in my head when I think of a fanny pack. I made several different patterns before I settled on this one, and it was by far my favorite. It is fully lined, so no raw edges! But you could definitely make it with a single layer if you wanted to.

1img_8269

The waistband is also adjustable.

1img_8151

Since the zipper is on a curve, there is a bit of difficulty, probably a 5/10. If you aren’t as comfortable sewing zippers and think this might be a bit much for you, don’t worry! My next tutorial is a flat fanny pack and the zipper installation is much easier.

1img_8189

The dimensions of the fanny pack are approximately 13.5 inches side to side, 4 inches tall, and the top flap is about 2.5 inches deep. It tapers to a point at the bottom.

Here is the free pattern & my video instructions!

Enjoy!

Classic Fanny Pack Pattern by learncreatesew

DETAILED INSTRUCTIONS:

You can use different fabrics for the fanny pack.

1mvi_7984

Canvas and denim are great for the exterior. You can even use regular cotton fabric, but I do recommend interfacing. I used SF101, but a fusible fleece would probably work good as well.

1mvi_8011

You can use top stitching as  a decorative element and to add stability to the bag.

1mvi_8004

On my denim bag I used contrasting thread so the top stitching would stand out, and two rows on the sides to give it more of a “jeans” feel.

1img_8284

Keep an eye out for my next tutorial and I’ll show you how to make a different style of fanny pack!

Rag Doll Part 2 – Adding the Hair

Here is the second installment of my rag doll tutorial. This was by far one of the most difficult videos I have made. Not because the process is hard, but because there are so many different styles of hair that can be selected and so many methods with which it can be applied.

I spent a lot of time deciding what I would share because I didn’t want anyone to feel limited in the approach they had to use. Not to mention, there was a whole lot of yarn that did not want to cooperate and stay in place while filming! Apparently it does not take direction well.

1img_7279

I really enjoyed using multi-colored hair on this doll. Mixing and matching colors strand by strand was a lot of fun, and I really like the look it created.

On the above doll the majority if her hair is the dark purple color. The wefts added at the bottom were all the same color, however at the top, I added just a bit of contrast.

I hope that you can take the methods used in this video and expand upon them to make something all your own 🙂

1img_7489

I love the drastically different looks you can create by altering hair styles and color.

Here is my rag doll pattern in case you missed it in the last post. The doll is just over 14 inches tall when completed.

Rag Doll Pattern by learncreatesew

ADDING THE HAIR DETAILED INSTRUCTIONS:

Rag Doll Part 1 – Constructing the Body

I have finished my rag doll pattern! I’ve been working hard to create the instructional videos and I am happy to say that I have the body instructions ready to share with you today.

1img_7538

I really enjoyed working on this project and mixing and matching fabrics to create the body of the doll.

1img_7423

I love all of the different styles you can design to make the doll uniquely your own!

This project is a bit more time consuming than others and does require a bit of patience. It is probably a 5/10 in difficulty just for the amount of time needed to hand stitch the hair and for the exactness of seam allowance that is needed. When sewing plush projects, a small error in your seam allowance can make a big difference in the appearance of your doll. You also need to be comfortable slip stitching and working with small curves.

The doll measures between 14 and 14.5 inches tall when finished.

Rag Doll Pattern by learncreatesew

Rag Doll Hair Tutorial COMING SOON!

Rag Doll Project Testing

A rag doll was one of the project brainstorm ideas that I posted in my sketchbook recently. The project is a bit time consuming, so I opted to do other projects first.

However, this weekend I was quite excited to have the time to work on the project.

First, I drafted two pattern options. After testing them both I made some adjustments to my favorite version and found a shape I was pretty happy with!

1img_7089

Next came the daunting task of tackling the hair! I do have to say that it took longer than expected to hand stitch all that yarn! Thank goodness for comfy couches and Netflix. It definitely helps the process.

Once I was happy with my rough drafts, I went on to test the project!

1img_7111

I have to say, I was quite happy with the results! I love all of the hair! It took about a half skein of yarn, but I love how puffy it is!

I hope to have instructions and patterns ready to share soon!

Casual Flannel Skirt with Pockets

This was a really fun project to make! It took me a few tries to perfect the sizing, but I was very pleased with the results.

When I designed this project I was looking for something to lounge around in, especially in the summer.

1img_7022

Pockets are a must for me, so that was the first thing I decided the skirt needed.

Next, slits were a priority for ease of movement. I also ended up choosing an elastic waistband for simplicity. The elastic doesn’t have a casing, but is exposed on the inside of the skirt.

2img_7035

Then, I looked at my huge stack of flannel. That definitely needed some attention. You don’t necessarily need to make the skirt using flannel fabric, but that is the only fabric I have tested the project on.

The skirt is designed to sit at your natural waist, where you bend, and is very comfortable. Here is my casual skirt in action as I tried to take photos. My dogs decided it was a great time to be helpful. Unfortunately, their photography skills are lacking. Luckily, they make up for the lack in cuteness.

1img_7077

Casual Skirt Cut Layouts and Measurements by learncreatesew.com

Casual Skirt Pocket Pattern by learncreatesew.com

DETAILED INSTRUCTIONS:

QUICK OVERVIEW:

Thanks to my mom once again for being my photographer on this project!