If you love English Paper Piecing, or are just starting out with the craft, here is a quick easy project to enjoy!
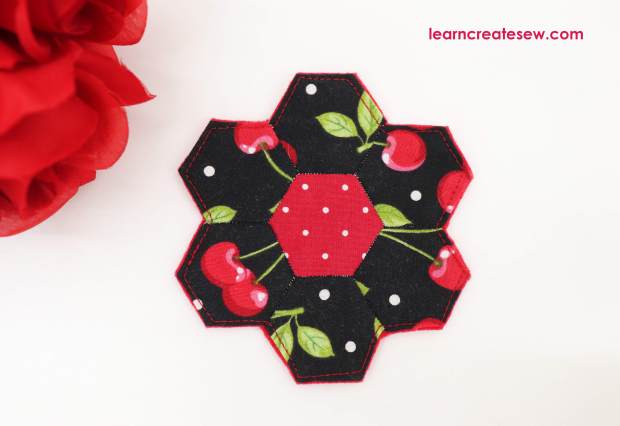
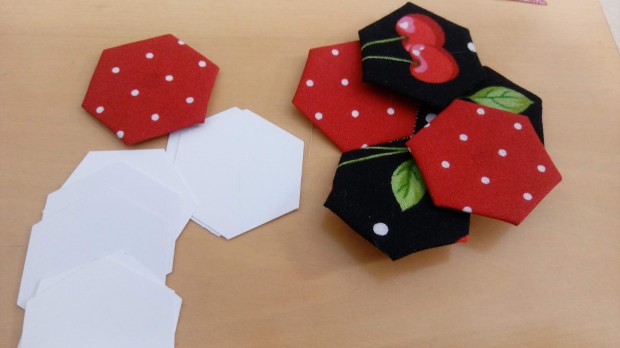
Visit my EPP page to learn how to make the hexagons and join them together.
If you love English Paper Piecing, or are just starting out with the craft, here is a quick easy project to enjoy!
Visit my EPP page to learn how to make the hexagons and join them together.
As soon as my hexagons were complete I was eager to start creating!
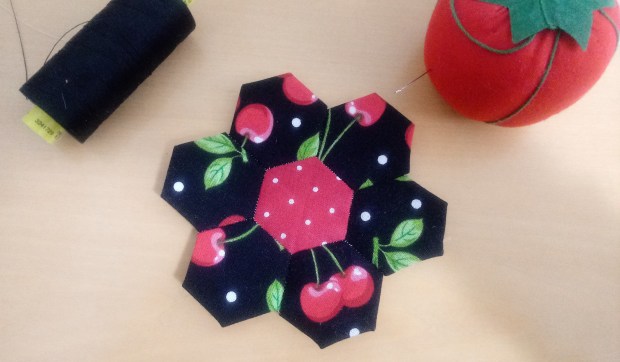
Here is how you join the hexagons together.
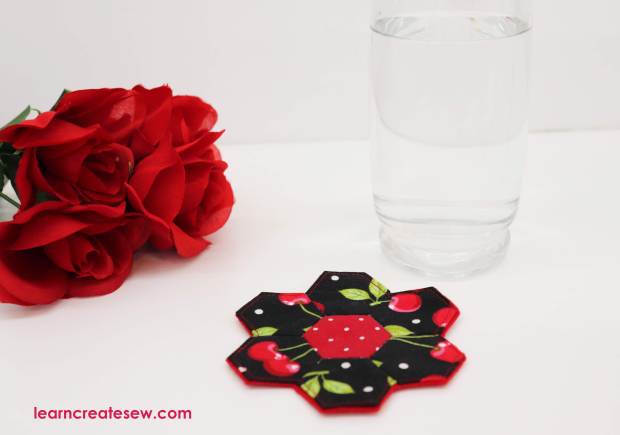
This week I went back to exploring English Paper Piecing. It amazes me some of the beautiful things that quilters can create with this method, and I am eager to learn more.
I am starting with the basics. Hexagons!
Here is a quick video on how to get started and some hexagon templates!
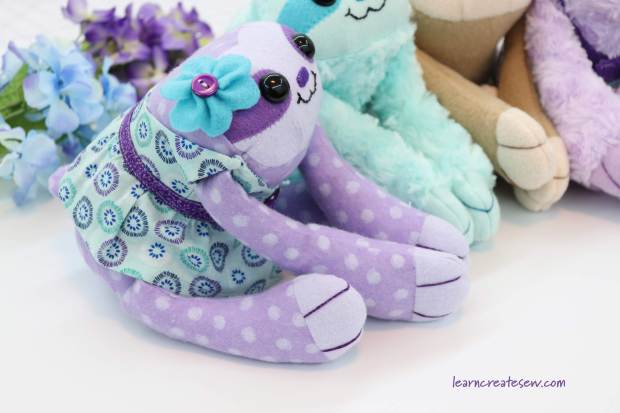
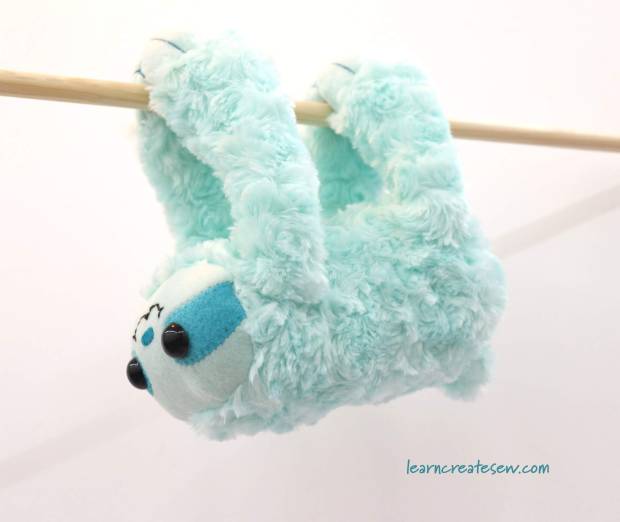
One of my favorite projects that I made this year was a sloth plush! My students absolutely love making plushies, and as I am sure you have noticed sloths are HUGE right now.
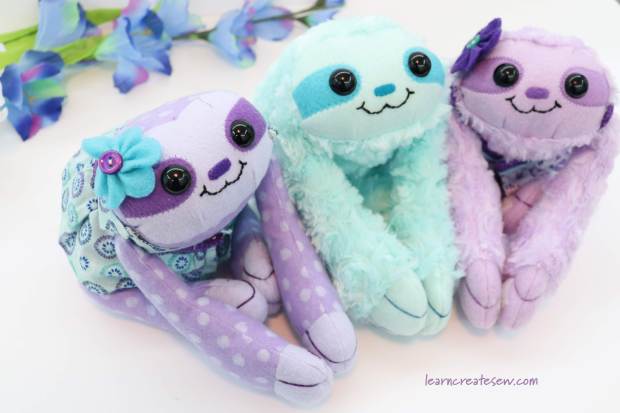
I tried several different designs for the plush before coming up with this one.
I really like that you can hang the plush if you want to.

You can also leave it simple or add accessories.
Sewing with fur is a bit of a challenge, but they are so cuddly!

This project difficulty is about a 4/10 if working with fleece, and a 5/10 if working with fur. The project is time consuming since there are a lot of piece, and you have to add a seam allowance to some of the pieces. But the whole project could be completed by hand if you didn’t want to use a machine.
Sloth Plush Instructions by learncreatsew
Sloth Pattern Updated by learncreatesew
I hope to add instructions for accessories in upcoming posts.
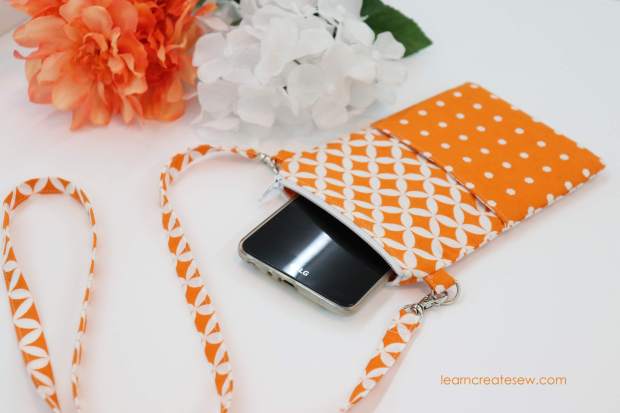
When I set out to make this project I wanted something simple. I wanted a cute, fun bag that even beginning students could make with success.
For that reason, this is a bag making basics project.
One zipper, one pocket, done.

I had intended this project for my younger students, thinking it would appeal mostly to young teenagers. I didn’t realize how much I would use it!
It is the perfect size to take on a walk, place inside another bag, or use for quick trips.
This week I went to a conference and was carrying around a gianormous bag with laptop, tablet, snacks, notebook, chargers, and more. It was super nice to place this little pouch with my phone, license, credit card, and lip gloss in the pocket of my large bag, and then simply pull it out when I left for lunch and breaks. That way I didn’t have to carry the huge bulky bag with me everywhere. It was very nice to have!

This project is a 3/10 in regards to difficulty. I would recommend being comfortable using your machine as well as knowing how to change to and use the zipper foot.
Here is a heads up for some of the projects we have coming up in the future.
A quilted and lined version of the Zip-On Tool Caddy.

A simple cell-phone pouch for any occasion.
 As you can tell, I have been in the mood to make bags lately 🙂 Hope you look forward to the free tutorials!
I had so much fun with this project, and it turned out beautifully!
I had been exploring different tool bag ideas and really wanted to work with a framed purse, but purse frames are so expensive! And…you are usually very limited in the sizes you can find.

In an effort to find an affordable way to make a framed purse I decided to make a mini sized tool bag. Since it is small the frames would not need to be as sturdy as on a full sized bag.
I found an EXCELLENT tutorial by sewingtimes on Youtube and absolutely fell in love with the bag construction and wanted to test it out right away. I would highly recommend it.
I changed the size a bit.

I also didn’t want to have to worry about using a lot of interfacing, so I used a heavy weight denim.

I also added embroidery and top stitching to decorate the front and add a jeans look.

I really love how much the bag opens! It provides such a great amount of space.
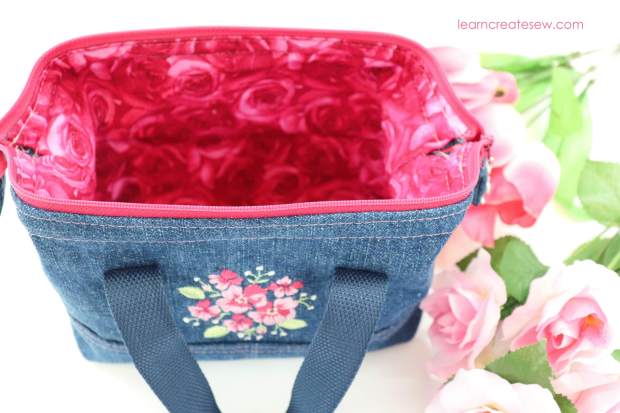
The tool bag fit basic sewing supplies, scissors and small dollar tree containers perfectly.

Instead of purse frames I used two pieces of heavy gauge wire taped together with electrical tape and bent the ends.


I played with several different ways to wrap the wire. In the end I preferred the option where the wire was completely covered, just in case of tarnishing, etc. What I love about using the wire instead of the purchased purse frames is that you can make them any size you want! It’s also significantly cheaper.
It worked better than expected and I hope to make a framed bag again in the future.

I hope you have as much fun making this project as I did.
The difficulty level of this bag is about a 5/10. You need to be comfortable working with thicker fabrics. It also requires a good amount of pressing, and precision is needed for the top stitching, binding, and zipper. That said, it is an unlined bag without interfacing, which makes cutting and prep work a breeze!
Zip On Tool Caddy – Unlined – Instructions
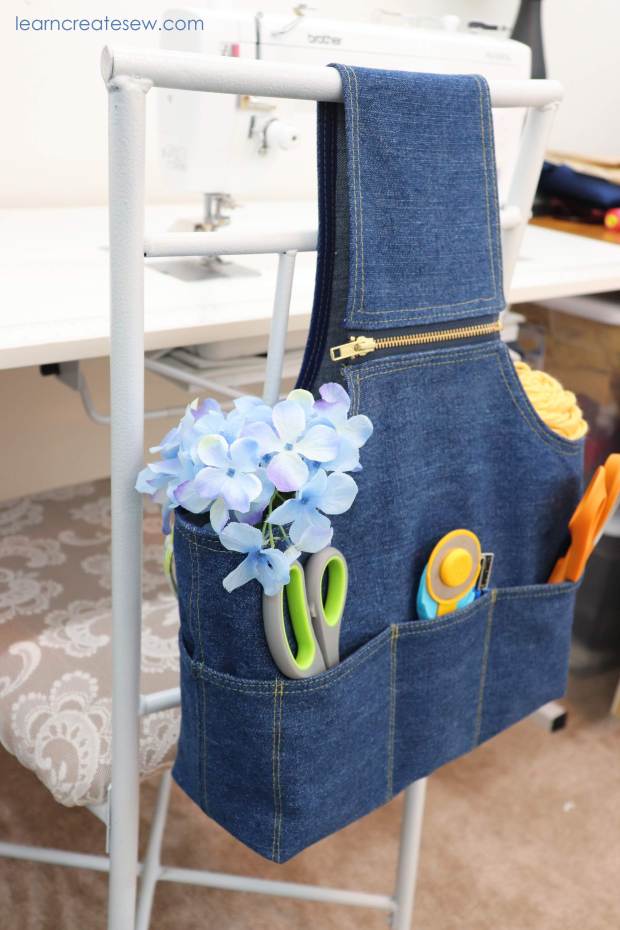
For my latest project I wanted a tool bag that you could hang on the back of the chair. I find that in the Sewing classroom tools can end up all over the place, and tripping over them is not a fun experience.

I decided to make a simple tote that you could zip on and off of the chair. It was super simple and after making it I found the tote had a lot more uses than expected!

I works perfectly on the back of a chair, just like I wanted! It even fits nicely on the back of student desk chairs.
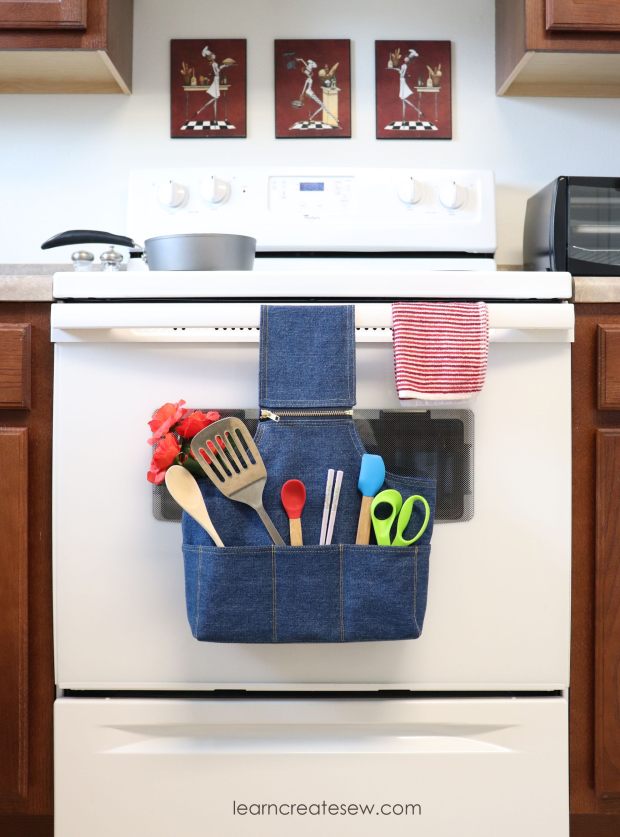 It’s handy in the kitchen!

It’s also great for toiletries. Especially, when traveling.
I absolutely love it! Sewing instructions and pattern coming soon!

Who doesn’t love a great little clutch pouch? Here is a tutorial for a quick and easy pencil pouch.

You can make two pouches with just 1/4 yard of fabric. It is also a great way to use that scrap fabric that you may have laying around the house.

There are two tutorial options of the pouch available.
Option 1: The “Easy” option has a standard zipper installation and raw edges inside the bag. Difficulty level 3/10. You need to know how to use a zipper foot. The project also has lining and interfacing.
Easy Pencil Pouch Instructions

Option 2: The regular tutorial provides options for a decorative zipper as well as detailed instructions for hidden and bound seams. Difficulty level 4/10.
Pencil Pouch Instructions with Options

Happy Sewing!
