My mitten pattern and tutorial has posted! Check it out and have fun making some mittens!
My mitten pattern and tutorial has posted! Check it out and have fun making some mittens!
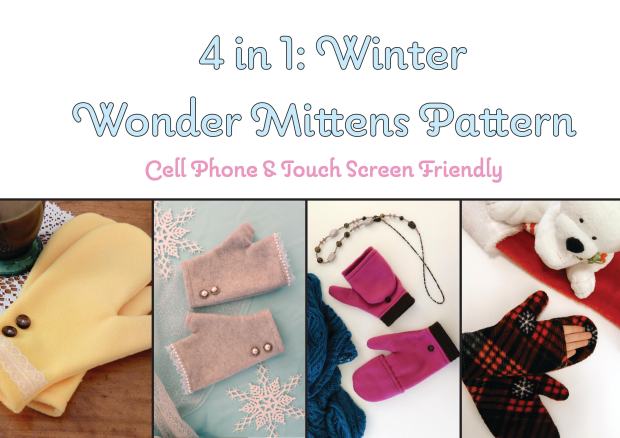
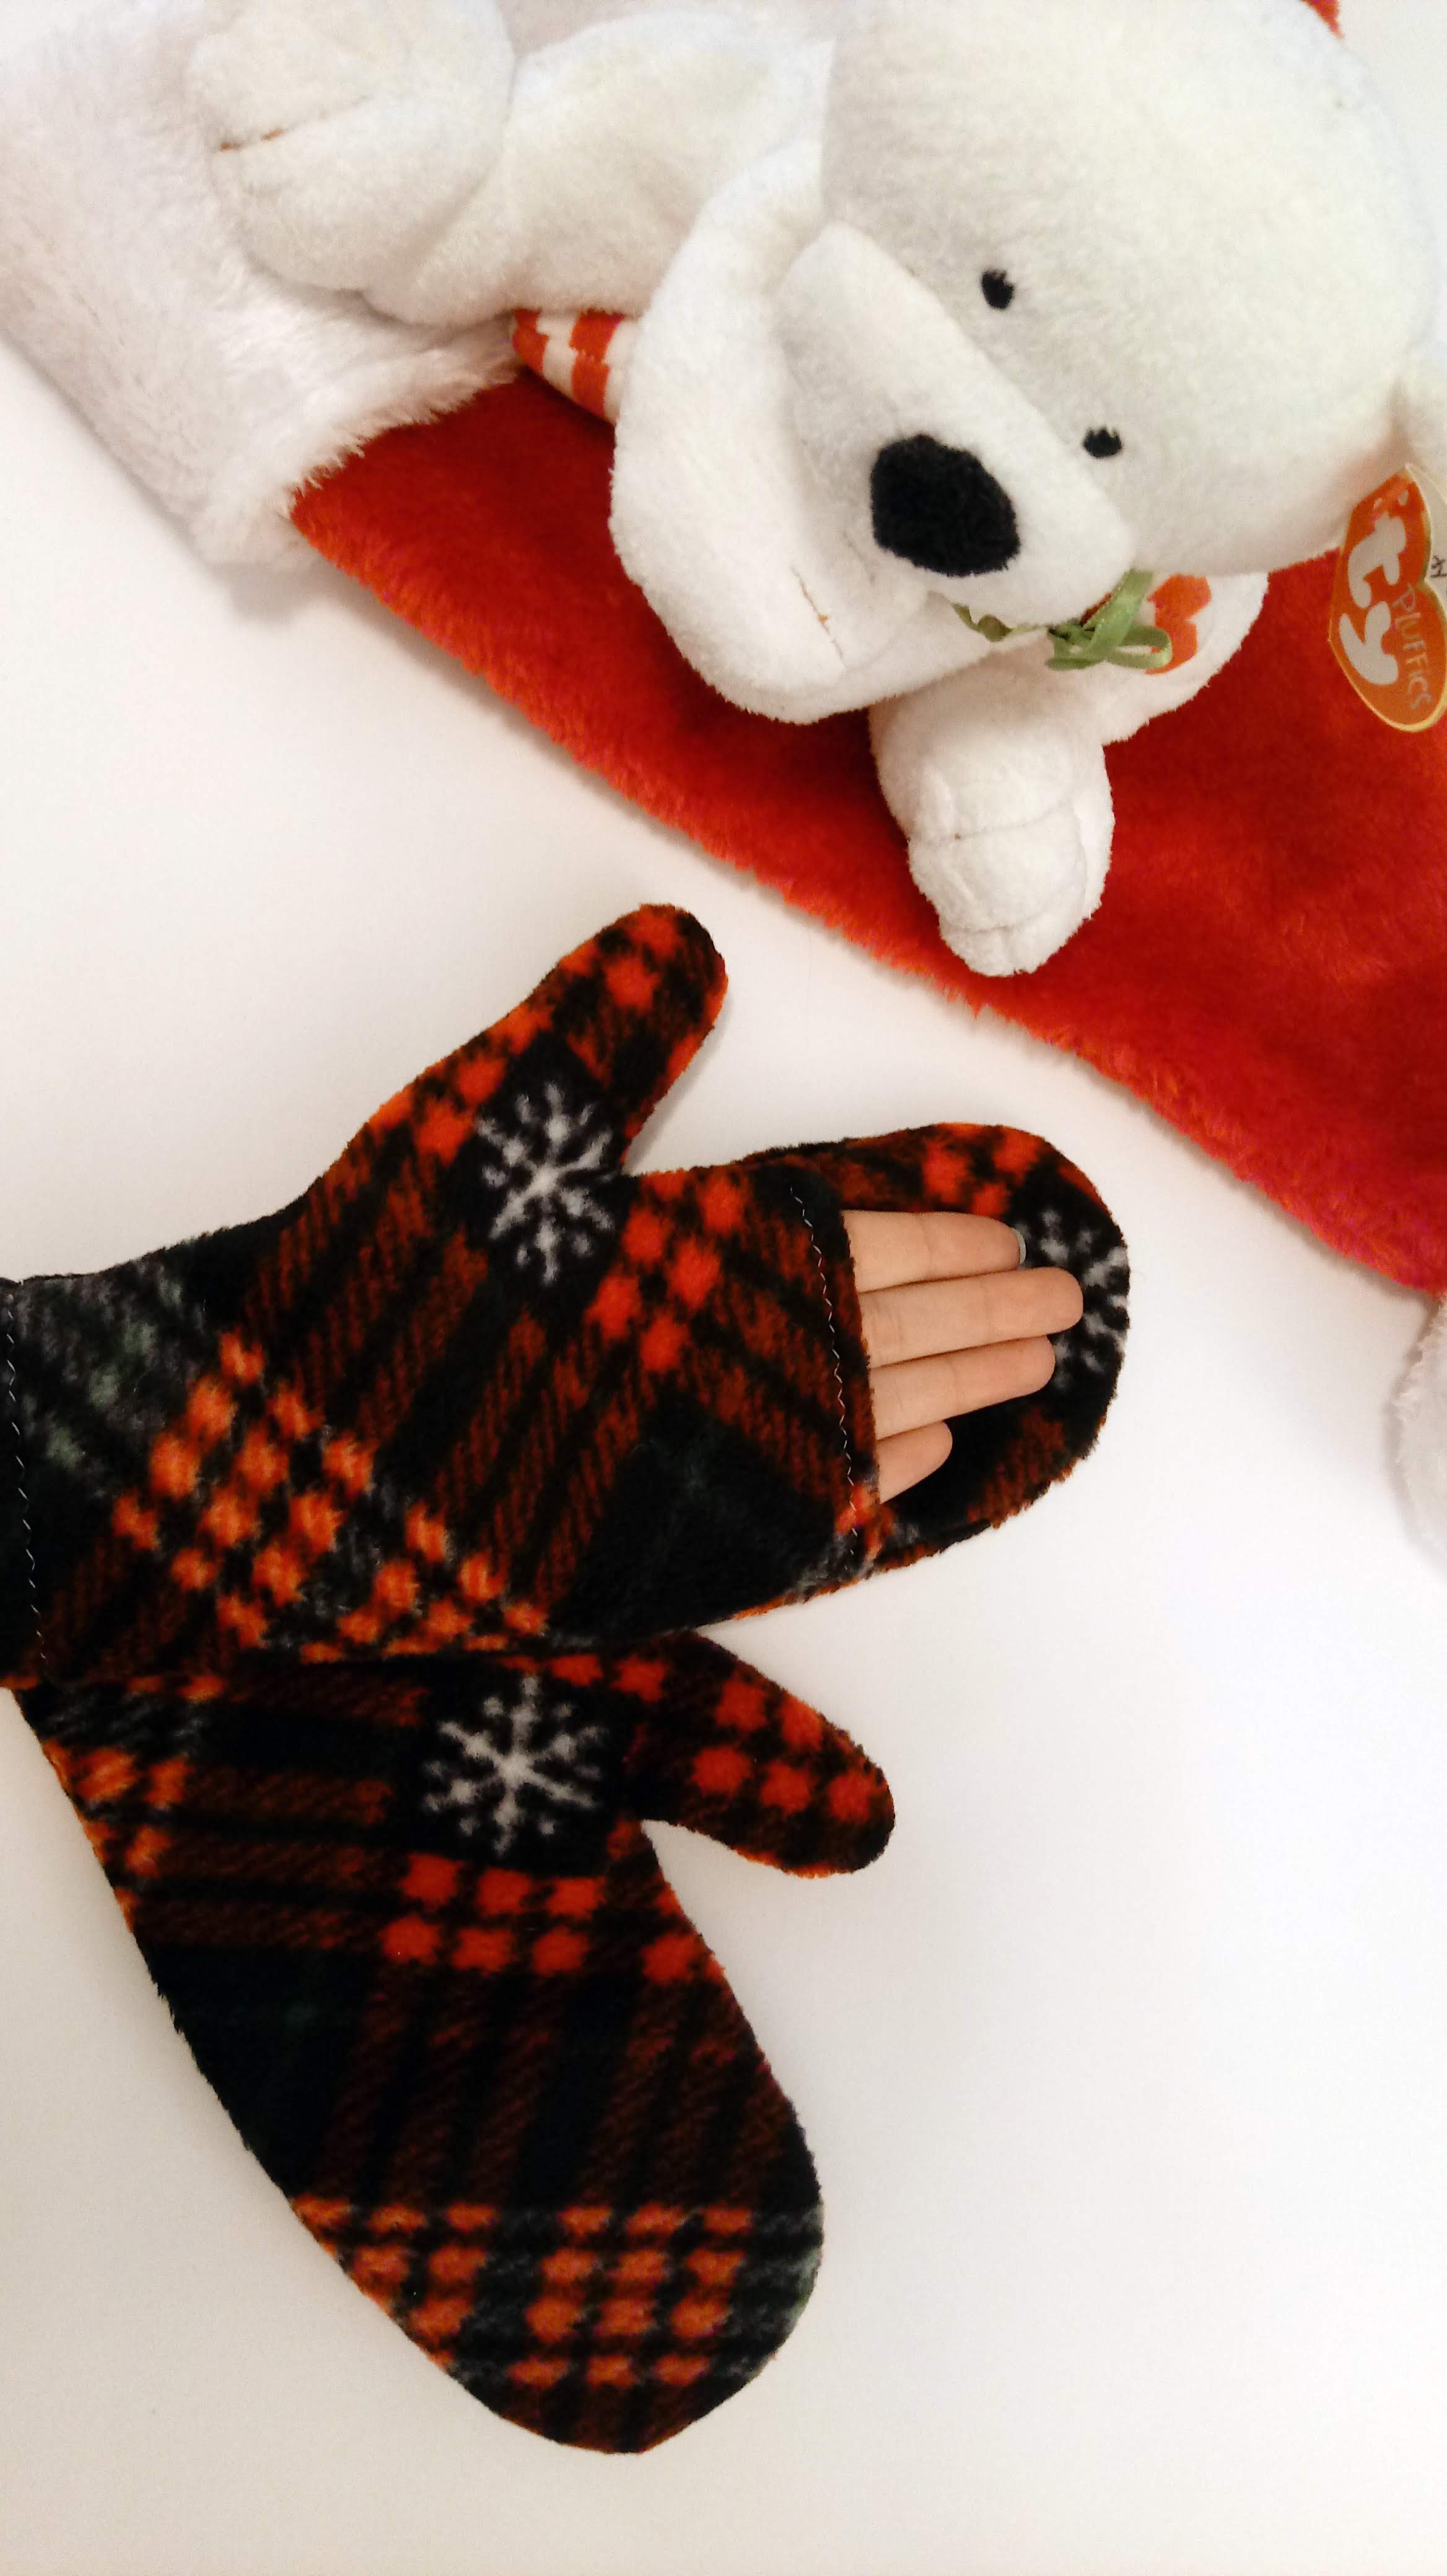
The mittens are done! I spent the holiday working on my mitten pattern. I was able to create four different styles from ONE pattern! Here is a preview.


The gloves are made with fleece and trimmed with other accents. They require about 1/4 yard of 60 inch fabric.
The instructions and free pattern will be coming soon!
Here they are!
The Panda was so much fun, that I really would like to make more plushies in a similar style. Last night I sketched a few different versions. I think the fox is my favorite 🙂 If I can get a good deal on some fleece at JoAnn this weekend (Hooray for Black Friday!) I think I will try to make another. Which do you like best?

Yesterday’s sewing project was a fun one! A student wanted to make a plush panda as a gift, but we didn’t have a pattern. After browsing for panda pictures online we were inspired by a squishy panda toy and modeled the design for our plush after it.
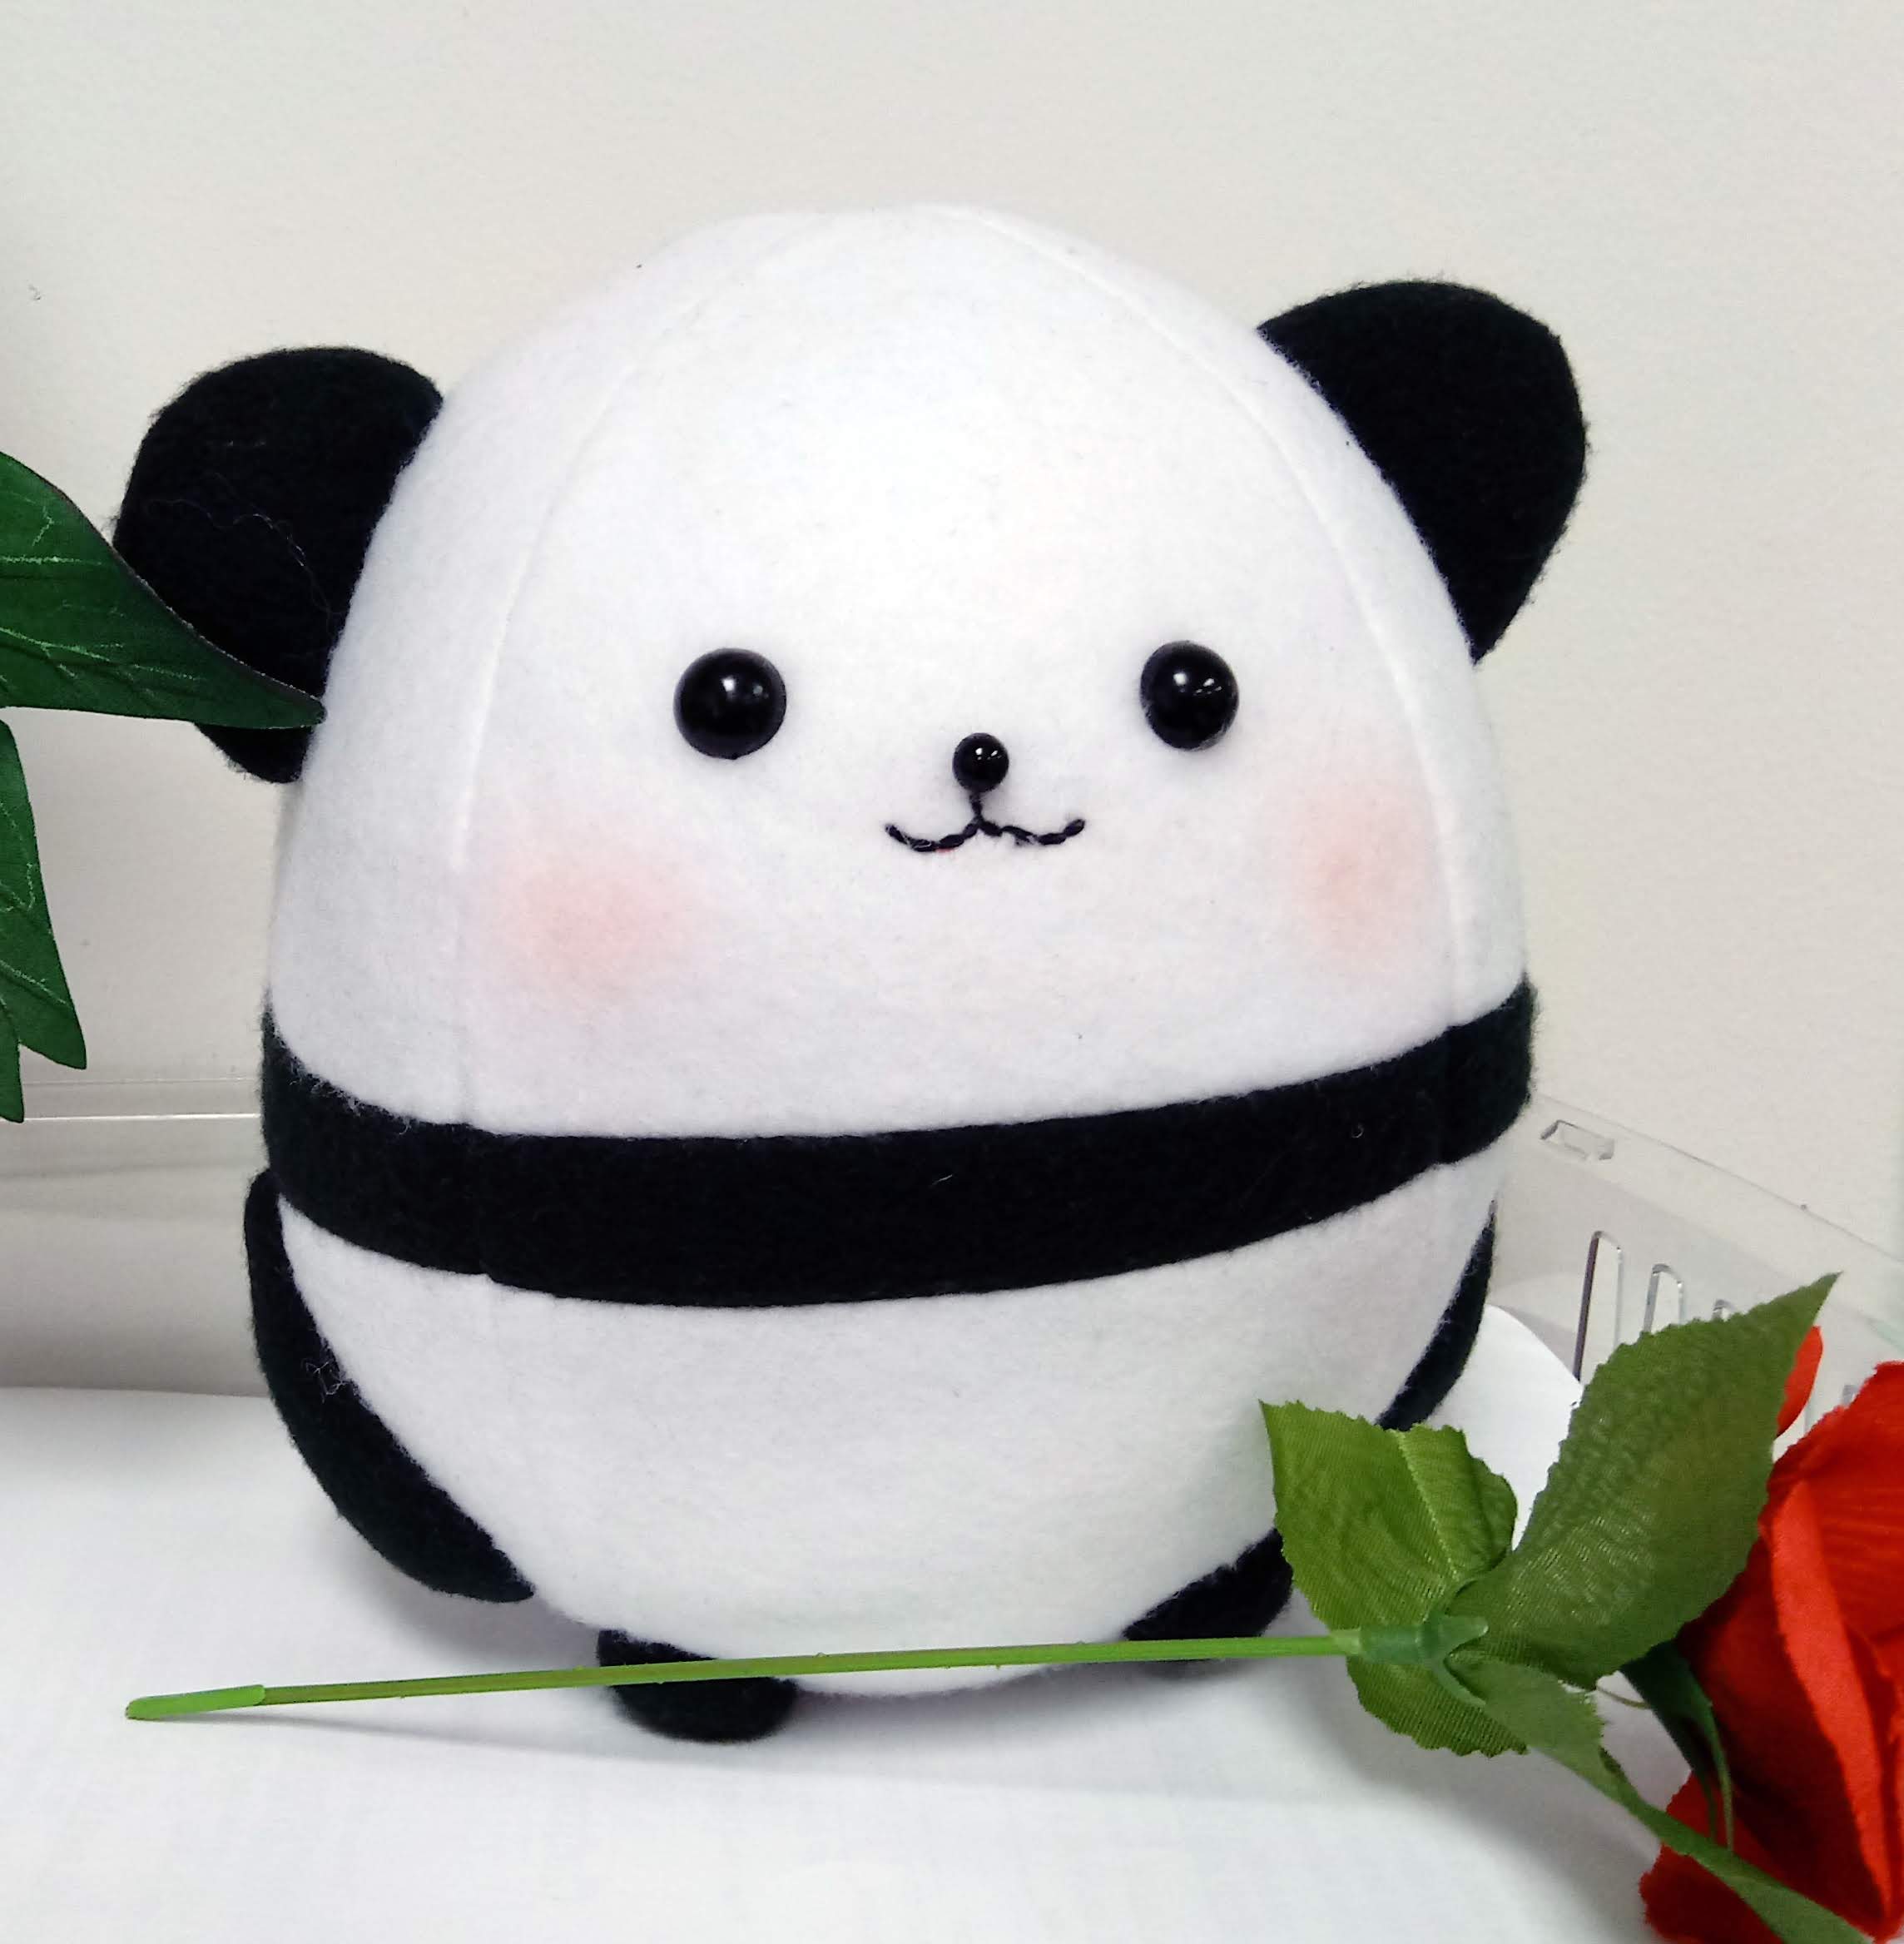
I think it turned out pretty cute!
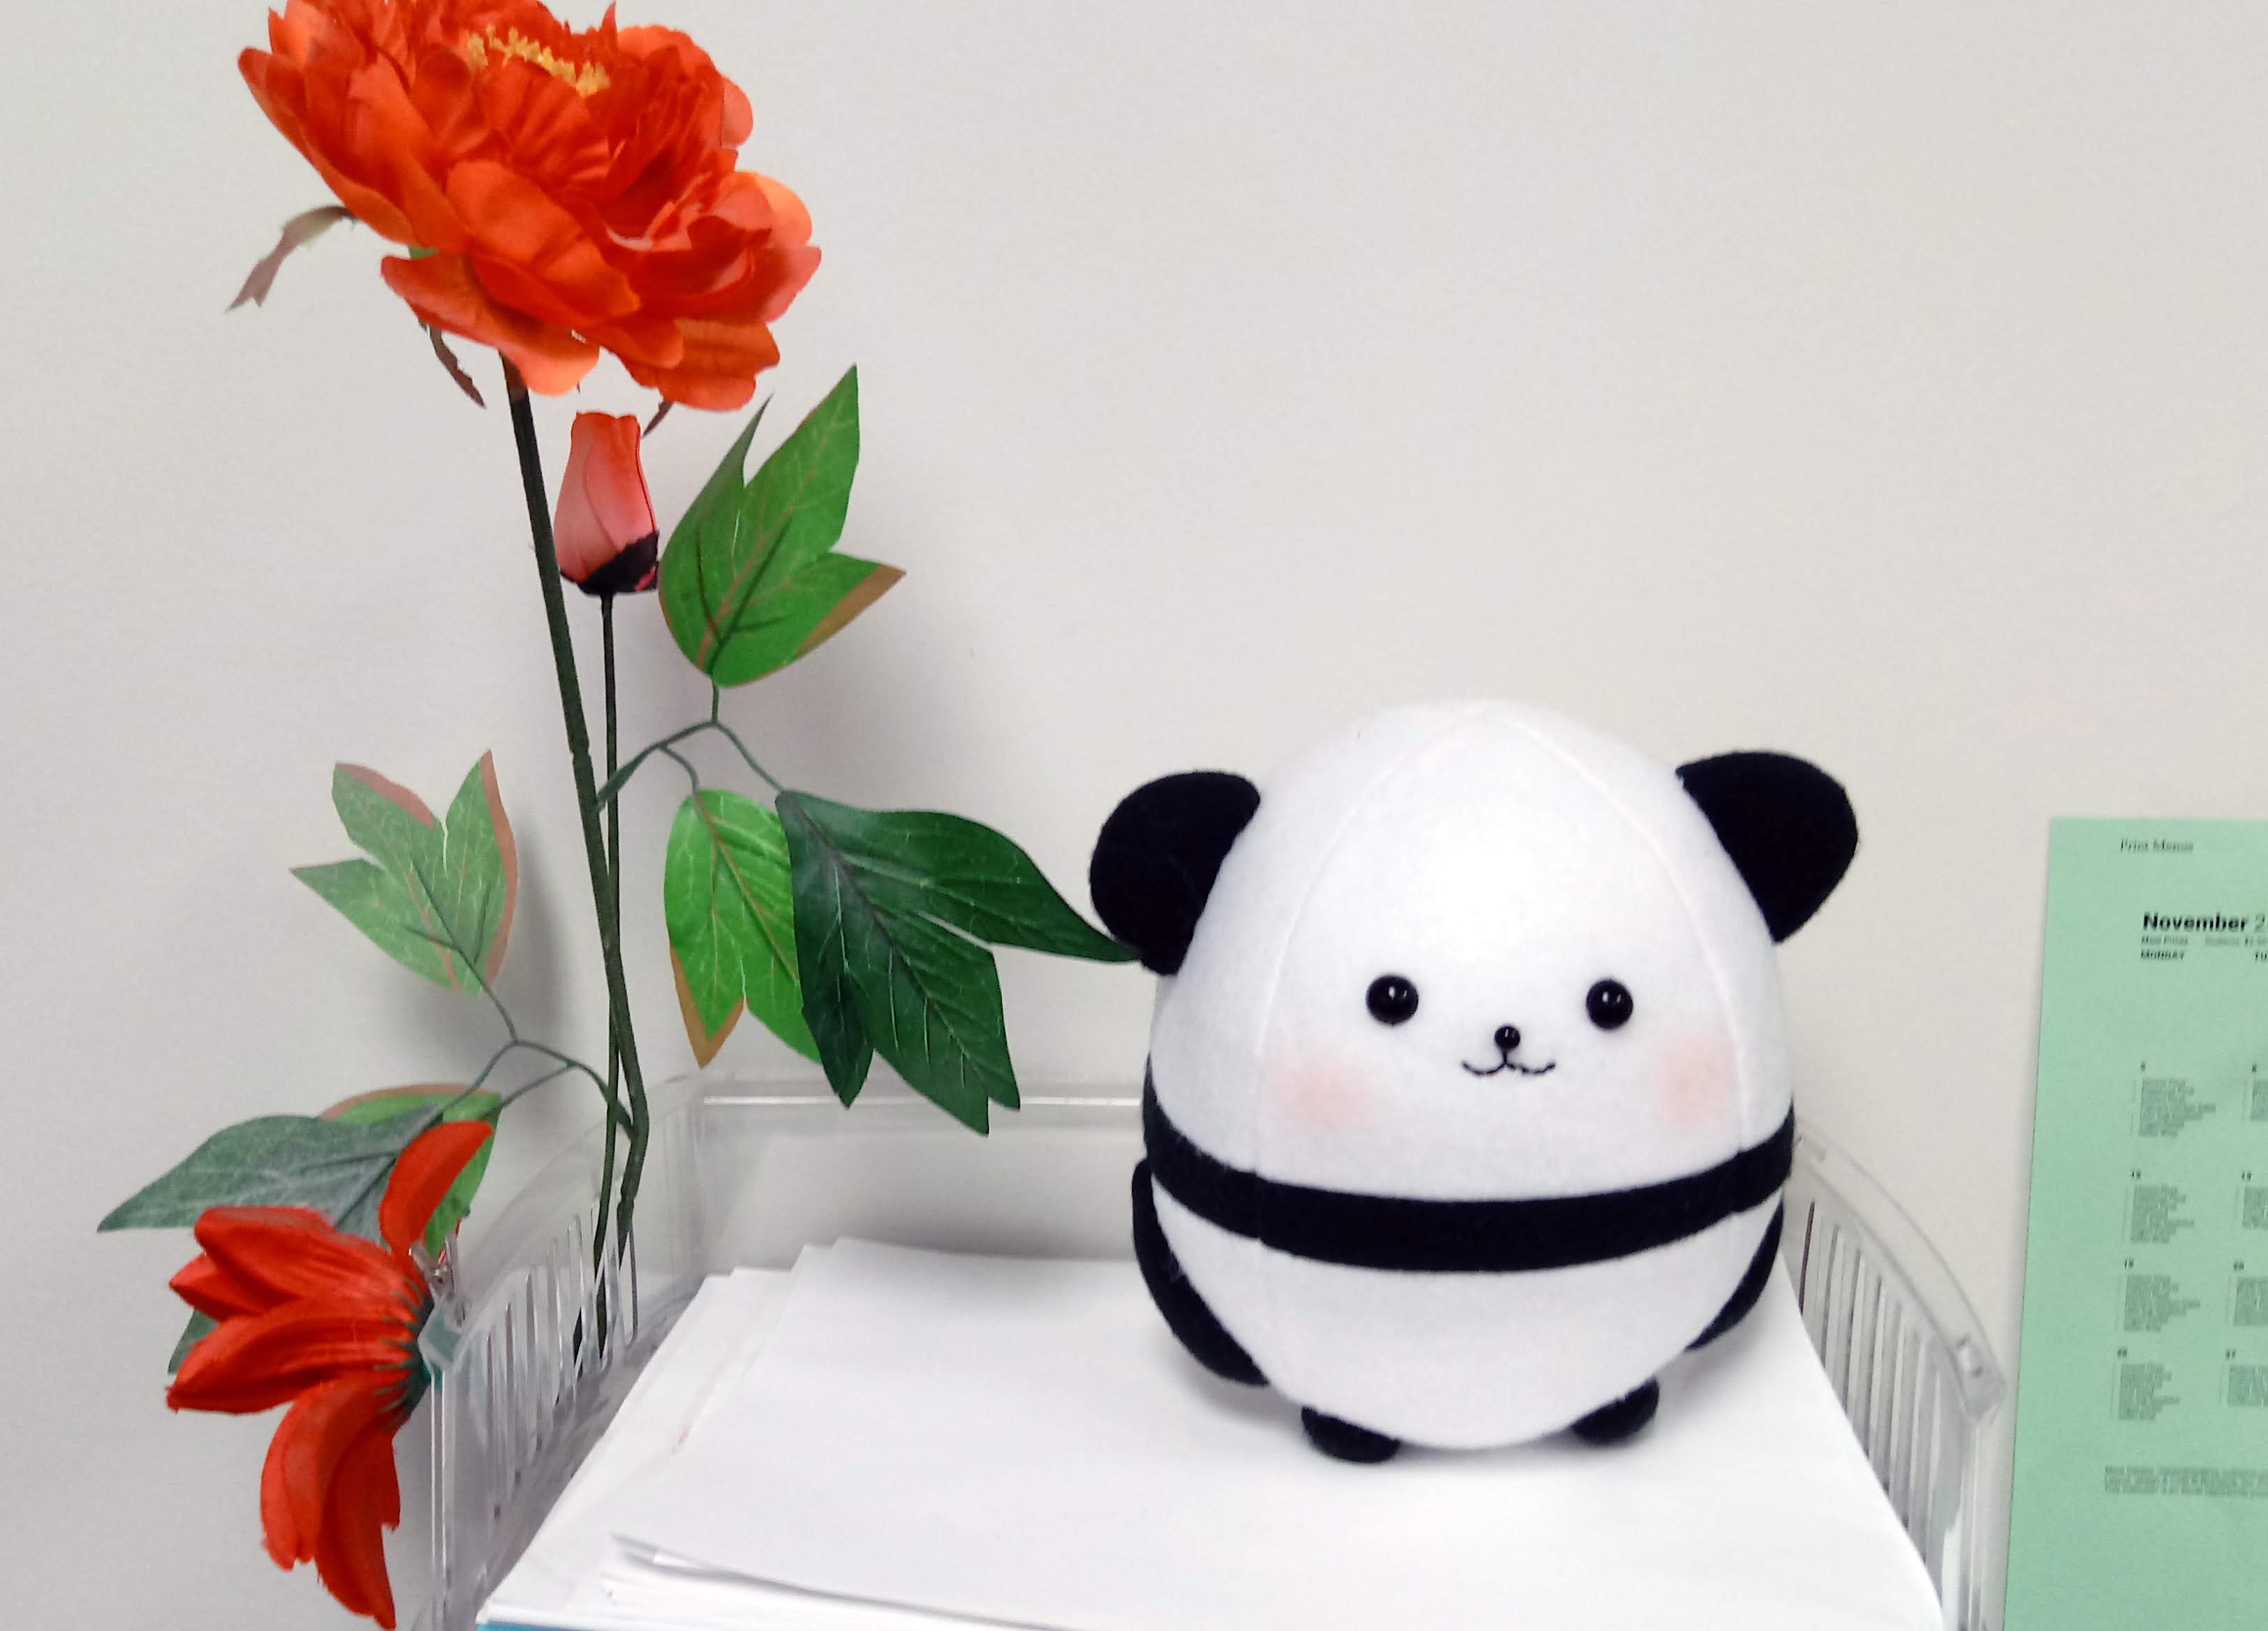
It went together very quickly from making the pattern to adding the details. We named him Felix, and the students thought adding a top hat would be a nice touch, though we haven’t done that yet.
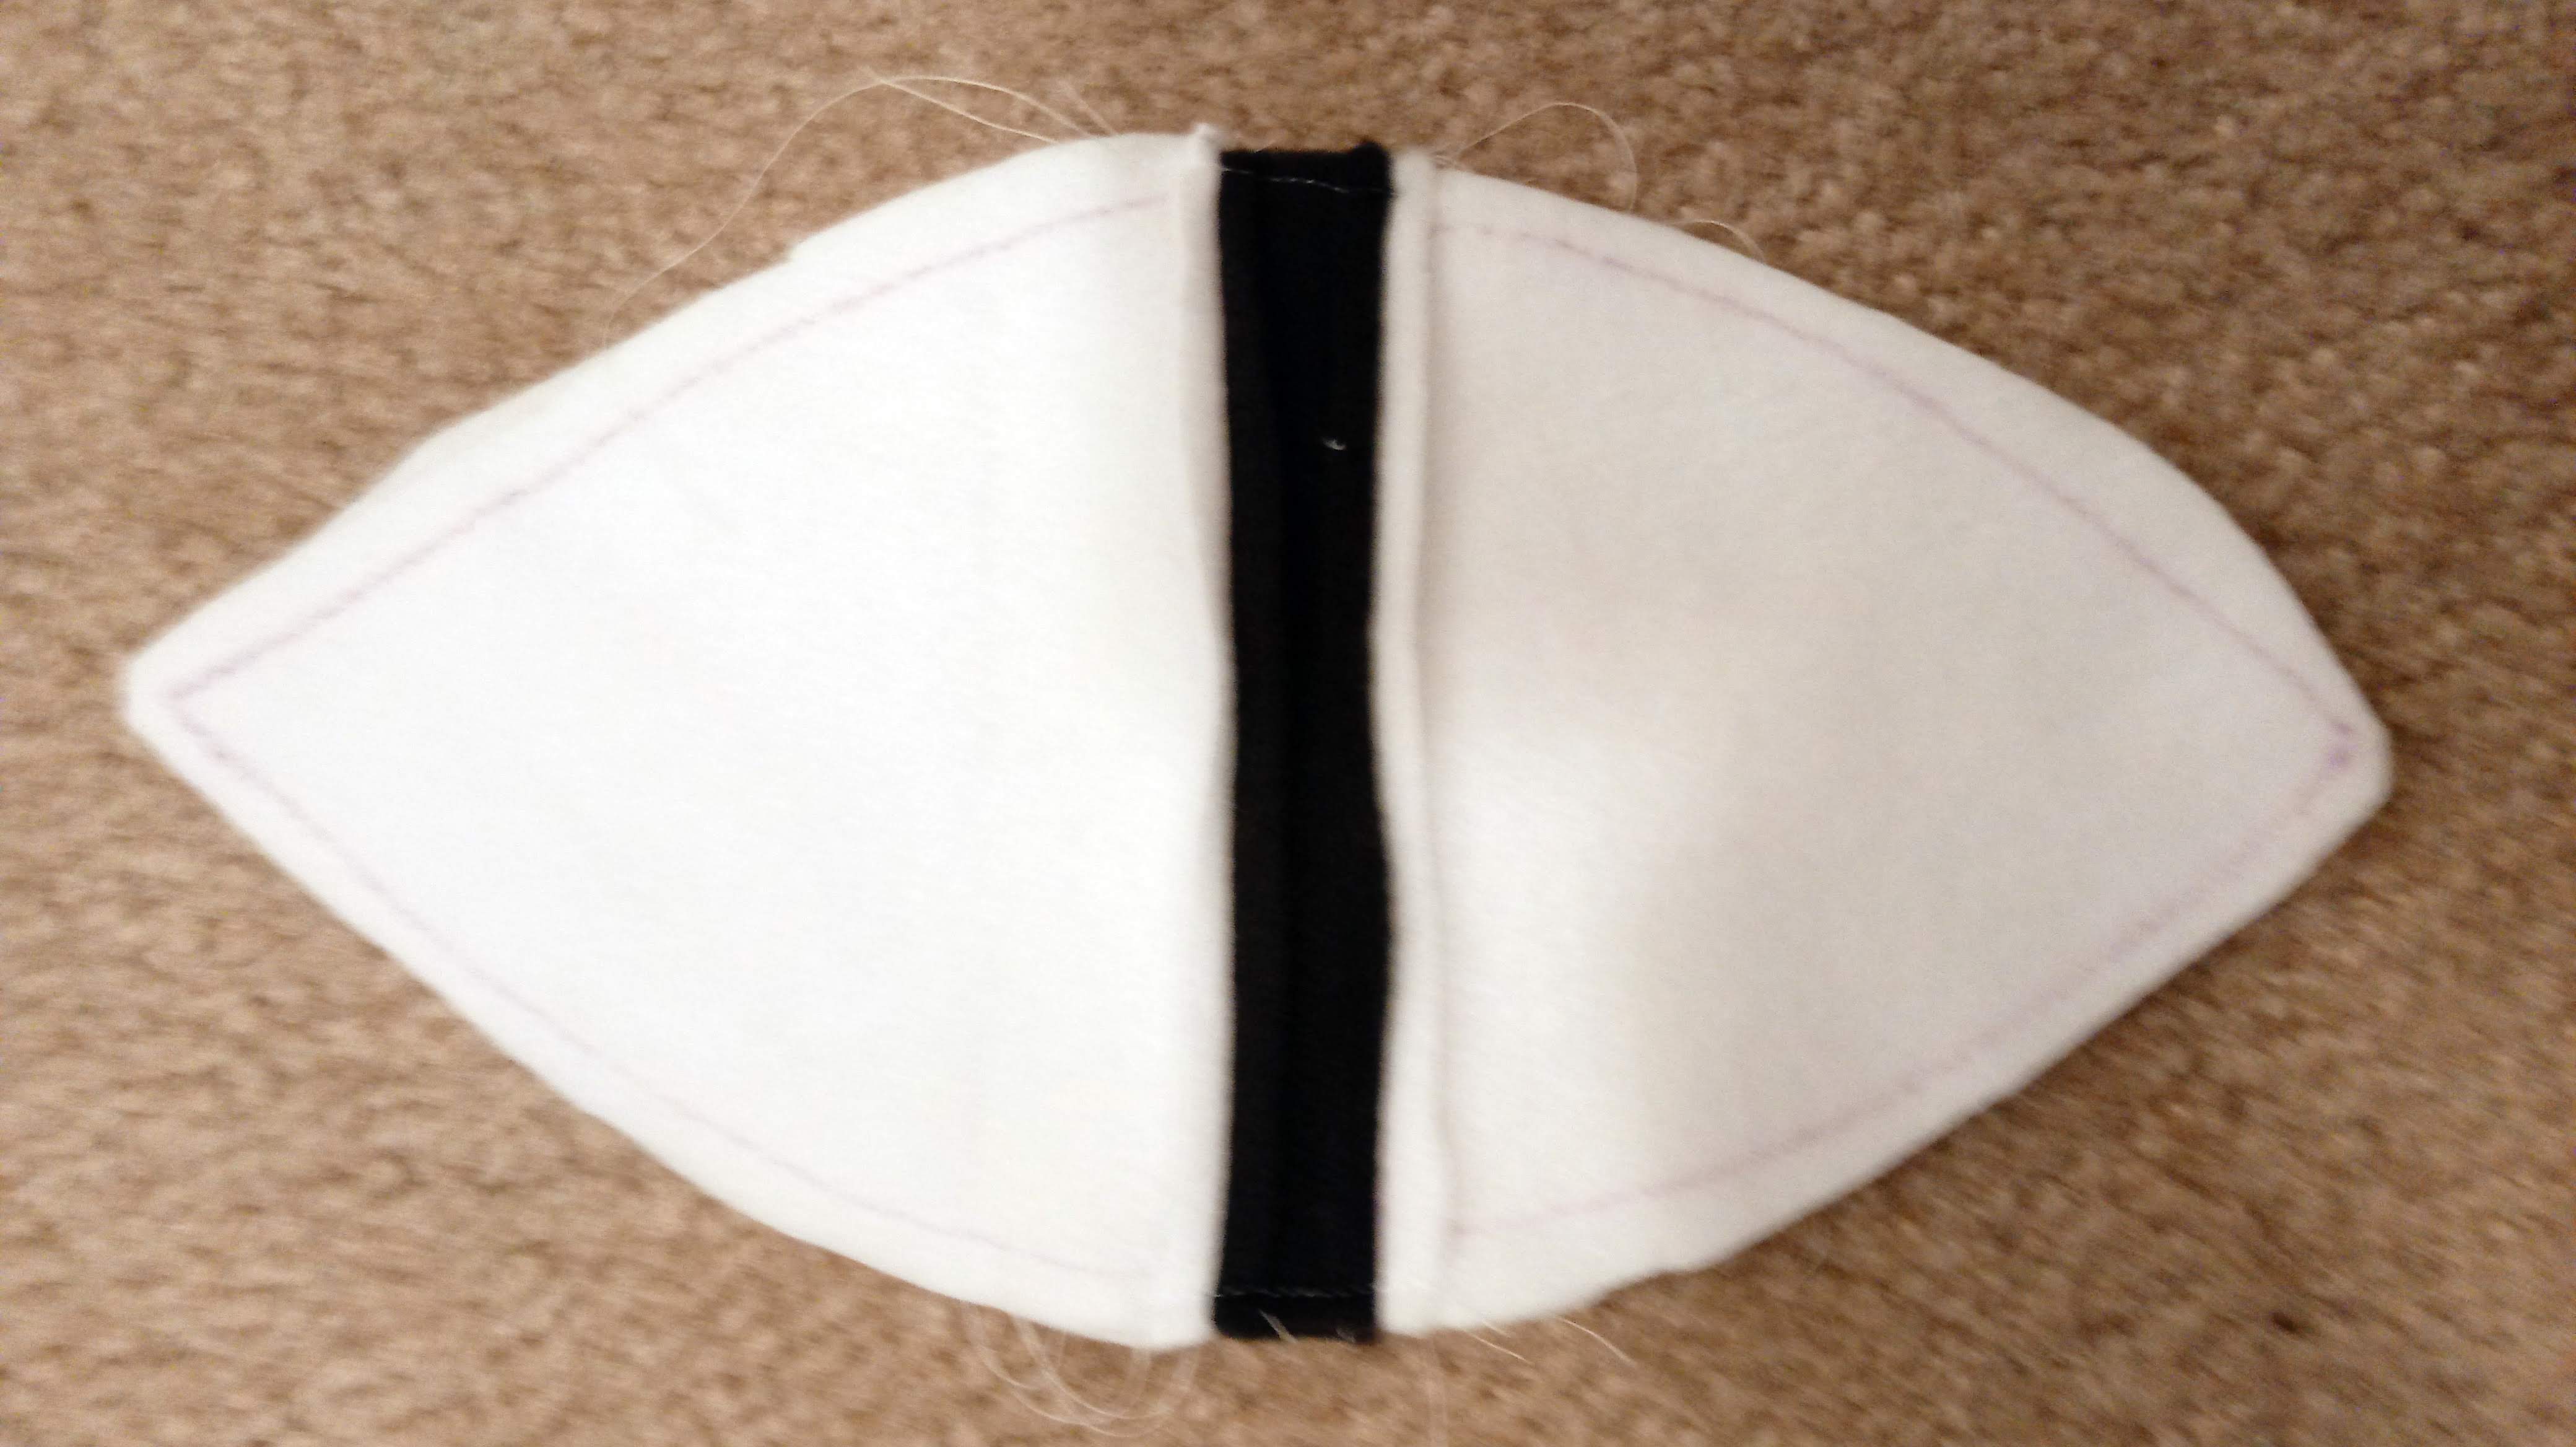
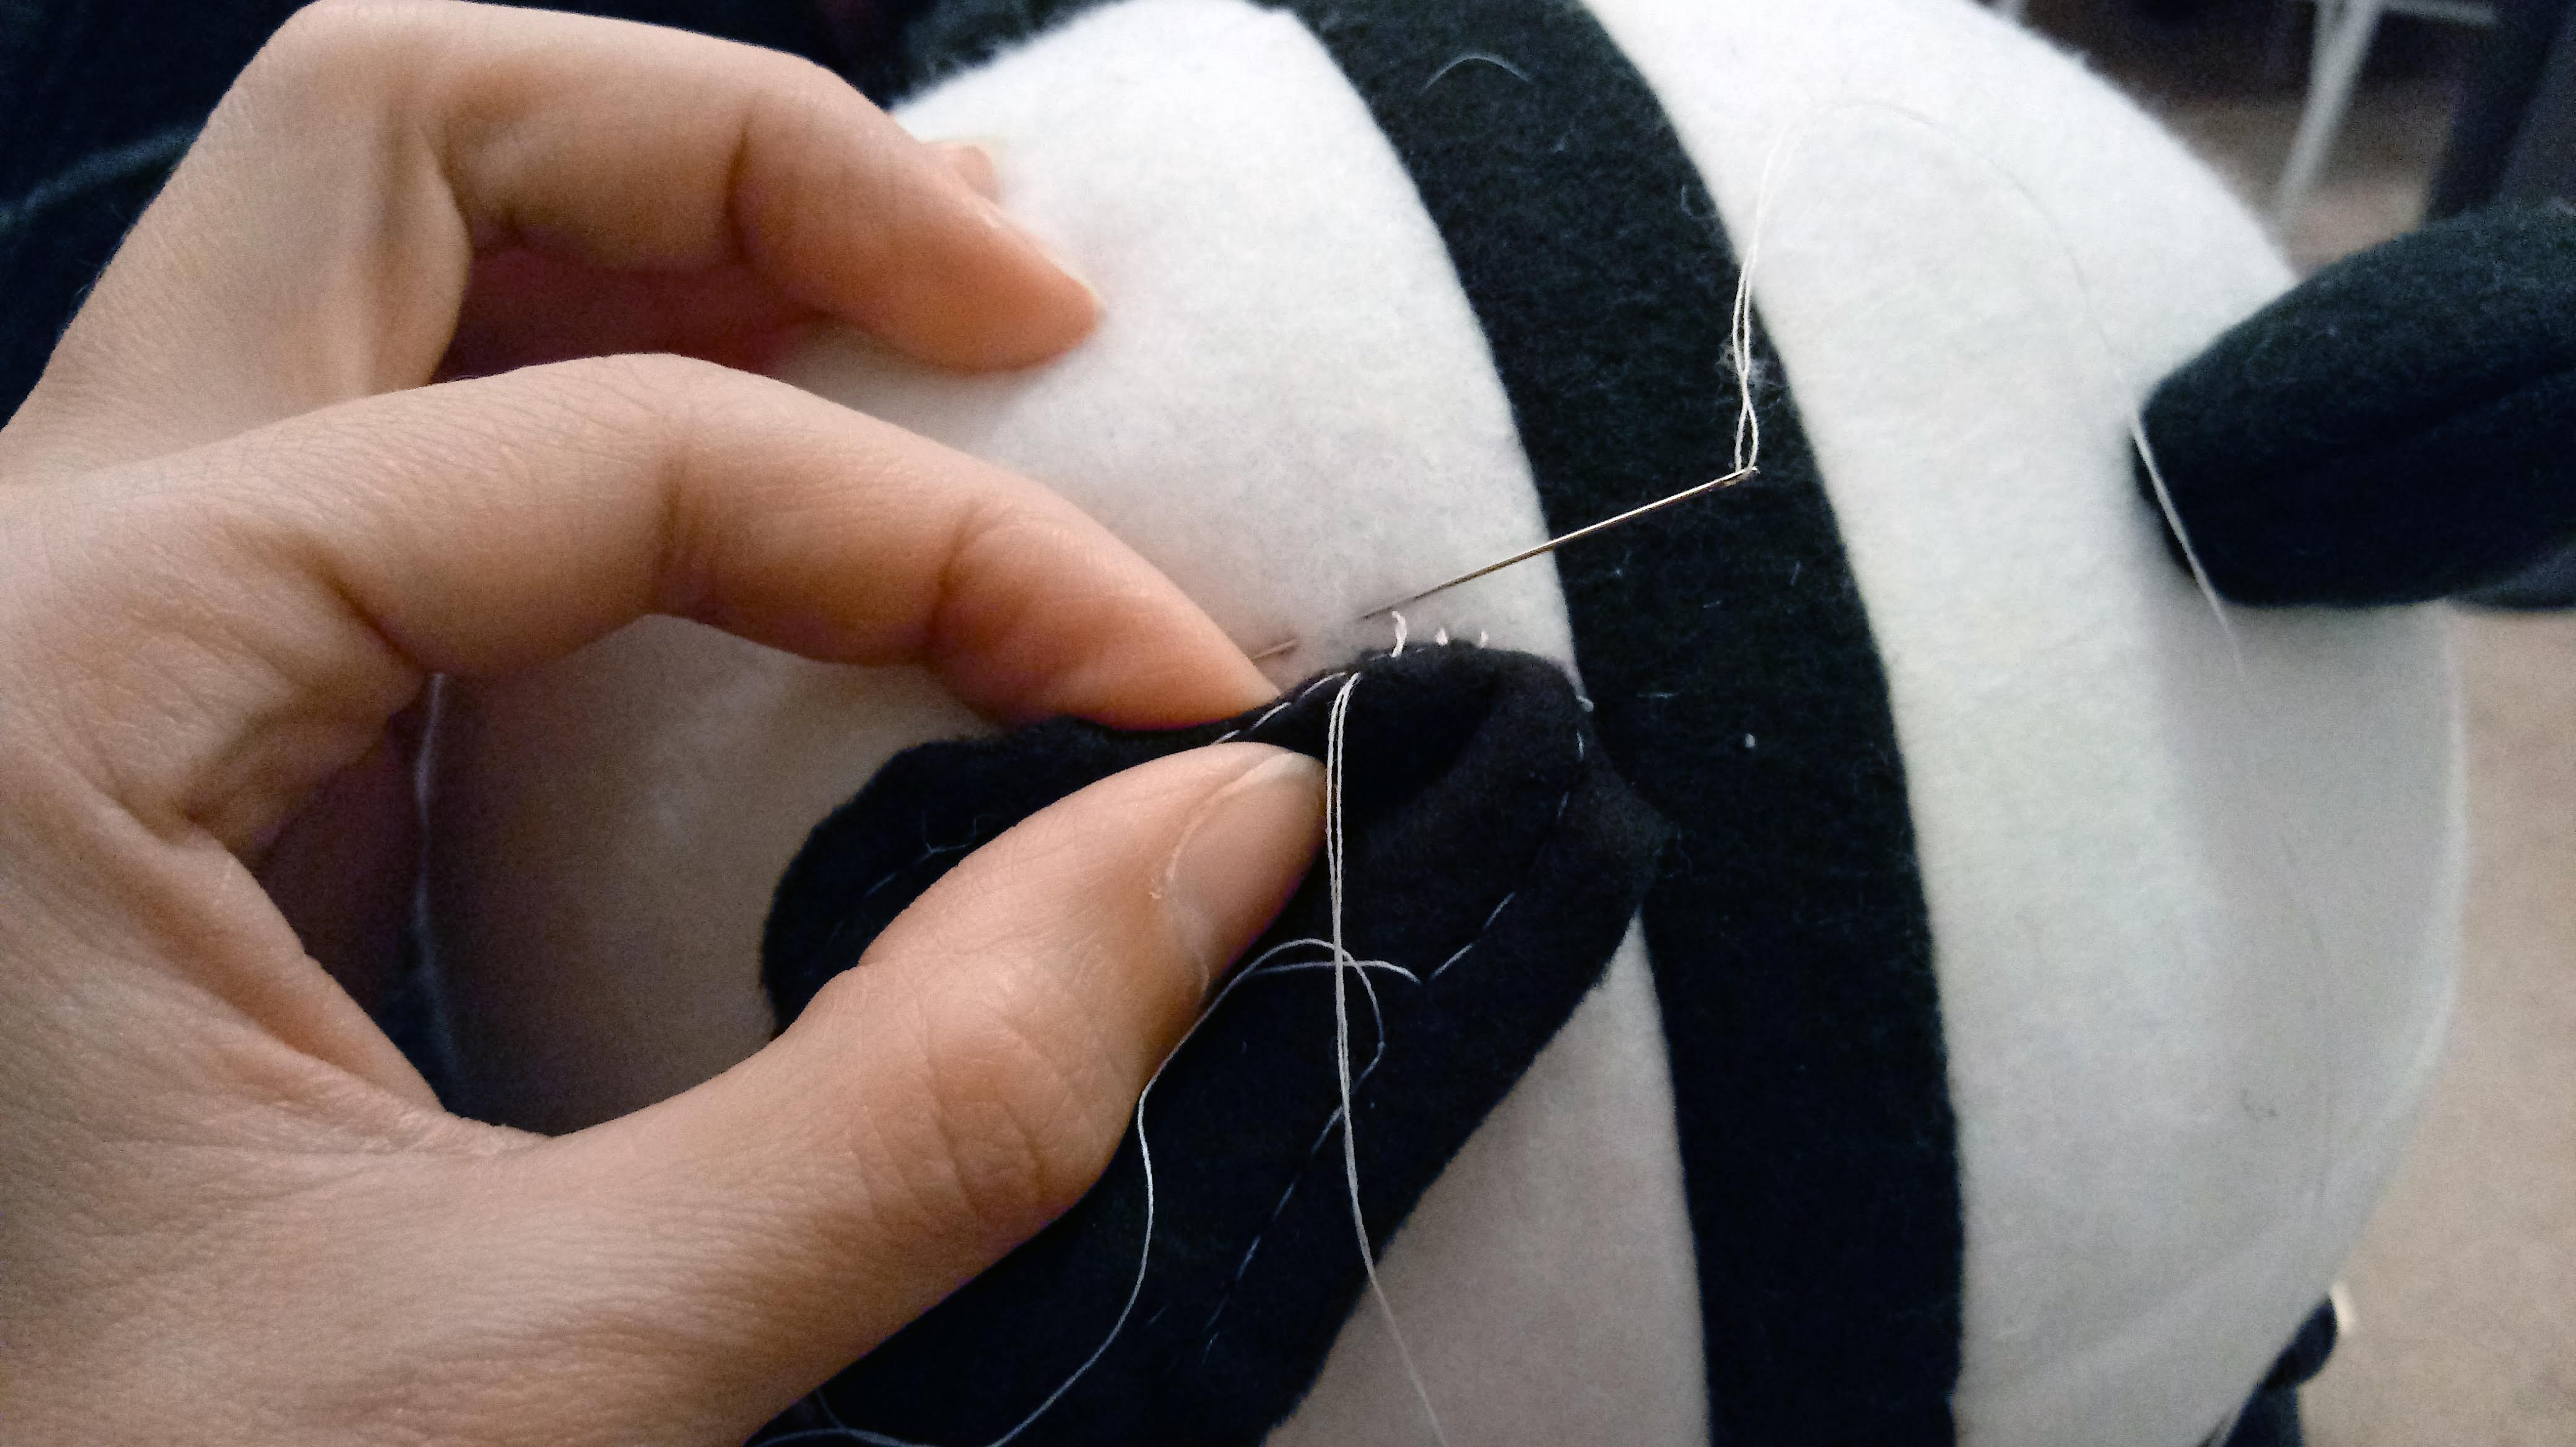
The project required about 6 x 45 inches of white fleece. 6 x 20 inches of black fleece. We used JoAnn Blizzard Fleece. It also required a good amount of polyfil (always more than you expect) and safety eyes. We used two 1/2 inch safety eyes for the eyes and one 1/4 inch safety eye for the nose. The mouth was stitched with embroidery floss, and bit of blush added the rosy glow to the cheeks. If you don’t have safety eyes you could just use felt and carefully cut out circles.
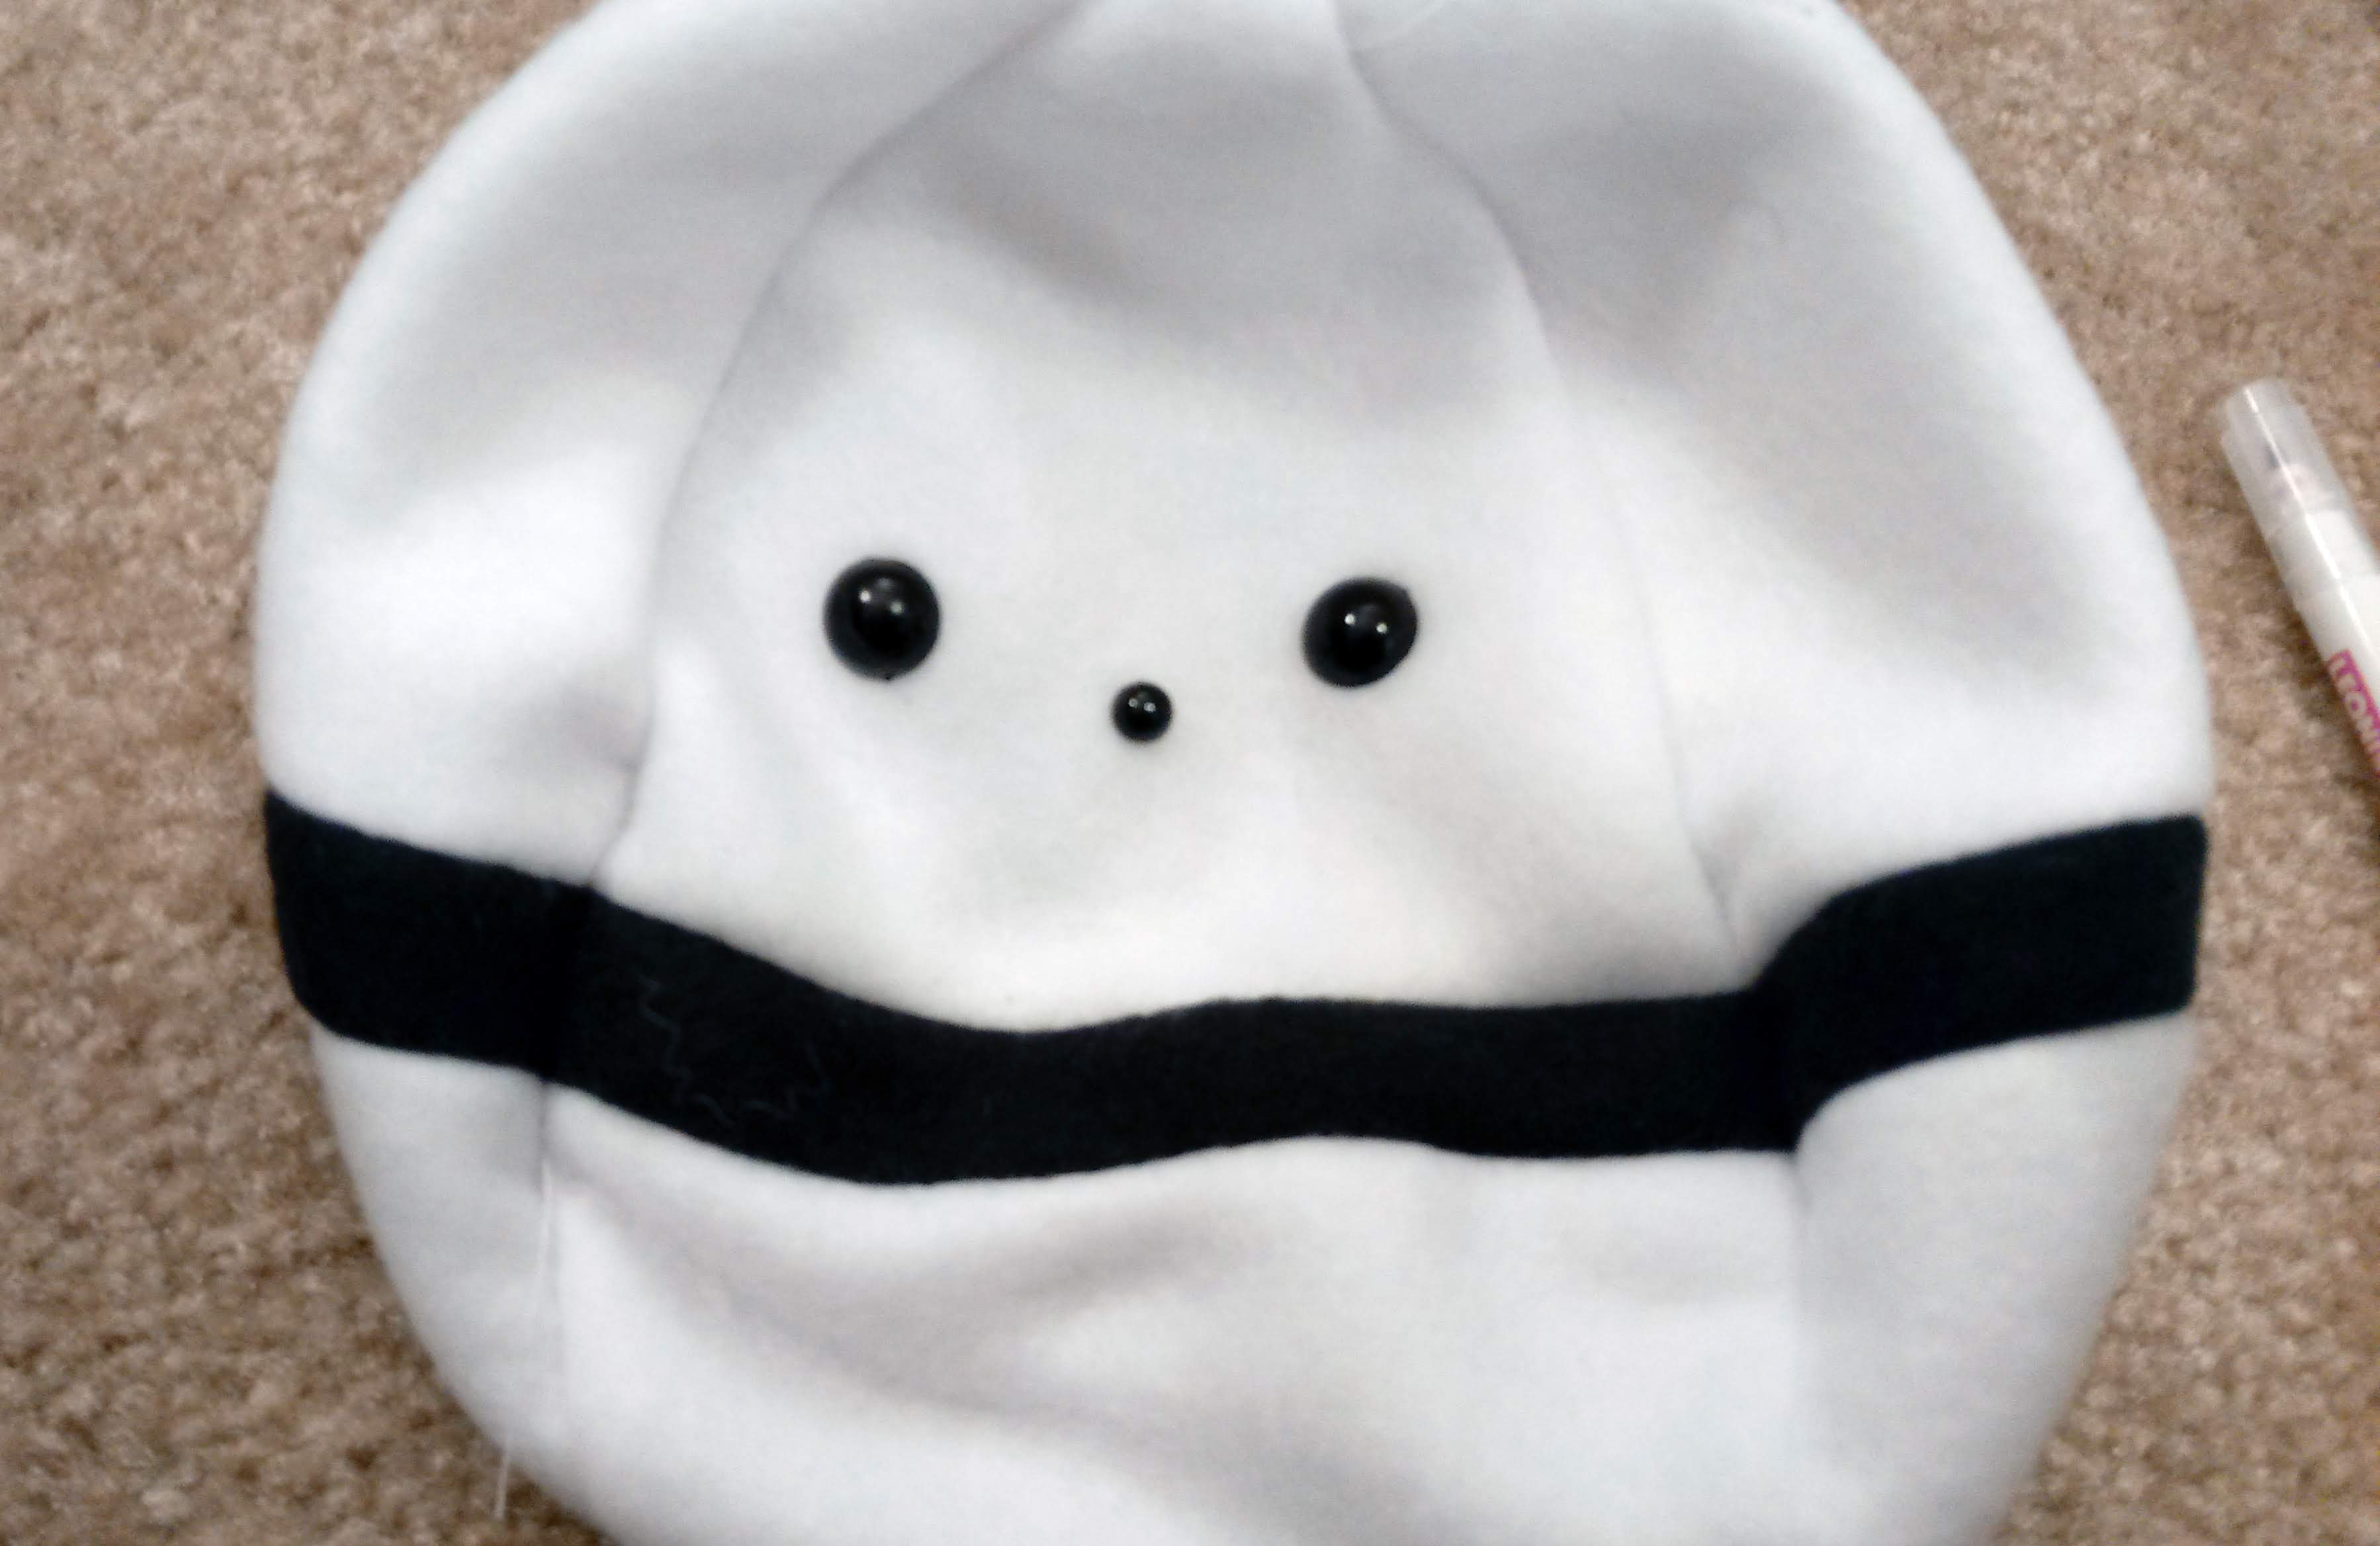
I found that the slip stitches were quite visible on the fleece, but no one seamed to mind, and it turned out to be quite adorable despite that. I think I will just need to work on my technique. I will keep you posted if I find anything that helps minimize the stitches.
The project went together so quickly with such great results that it makes me want to use this style to make other stuffed animals.
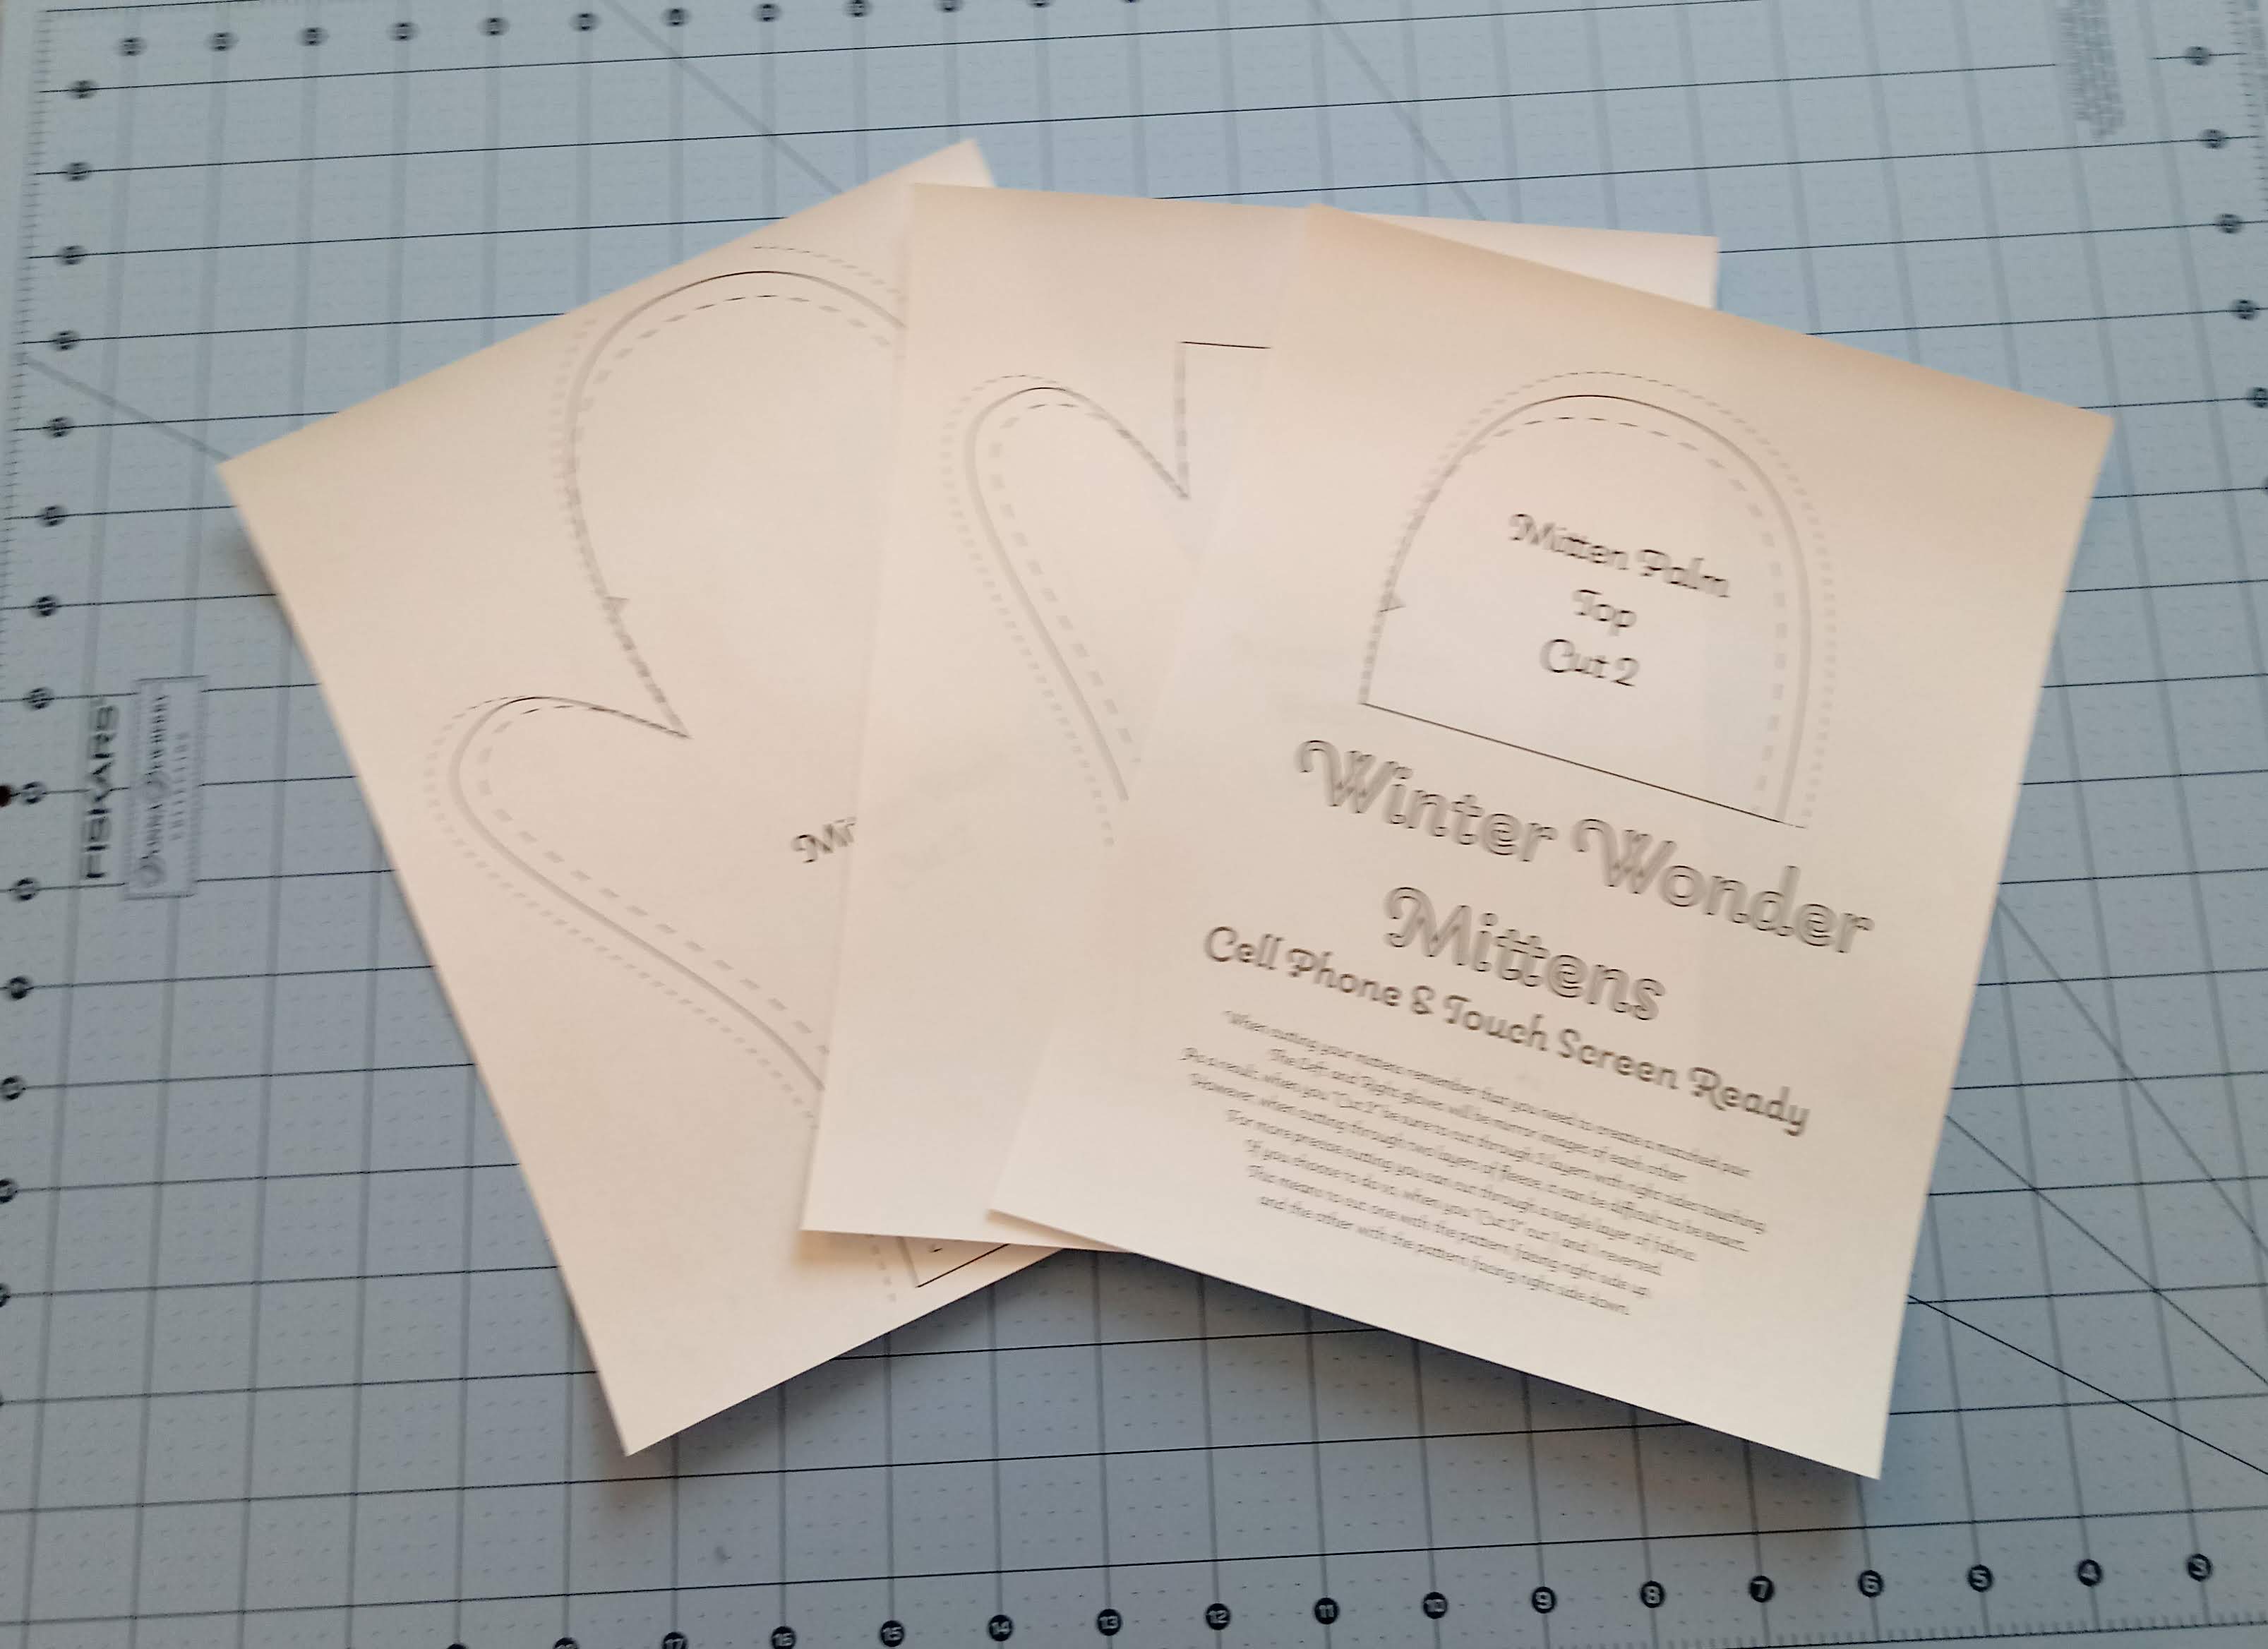
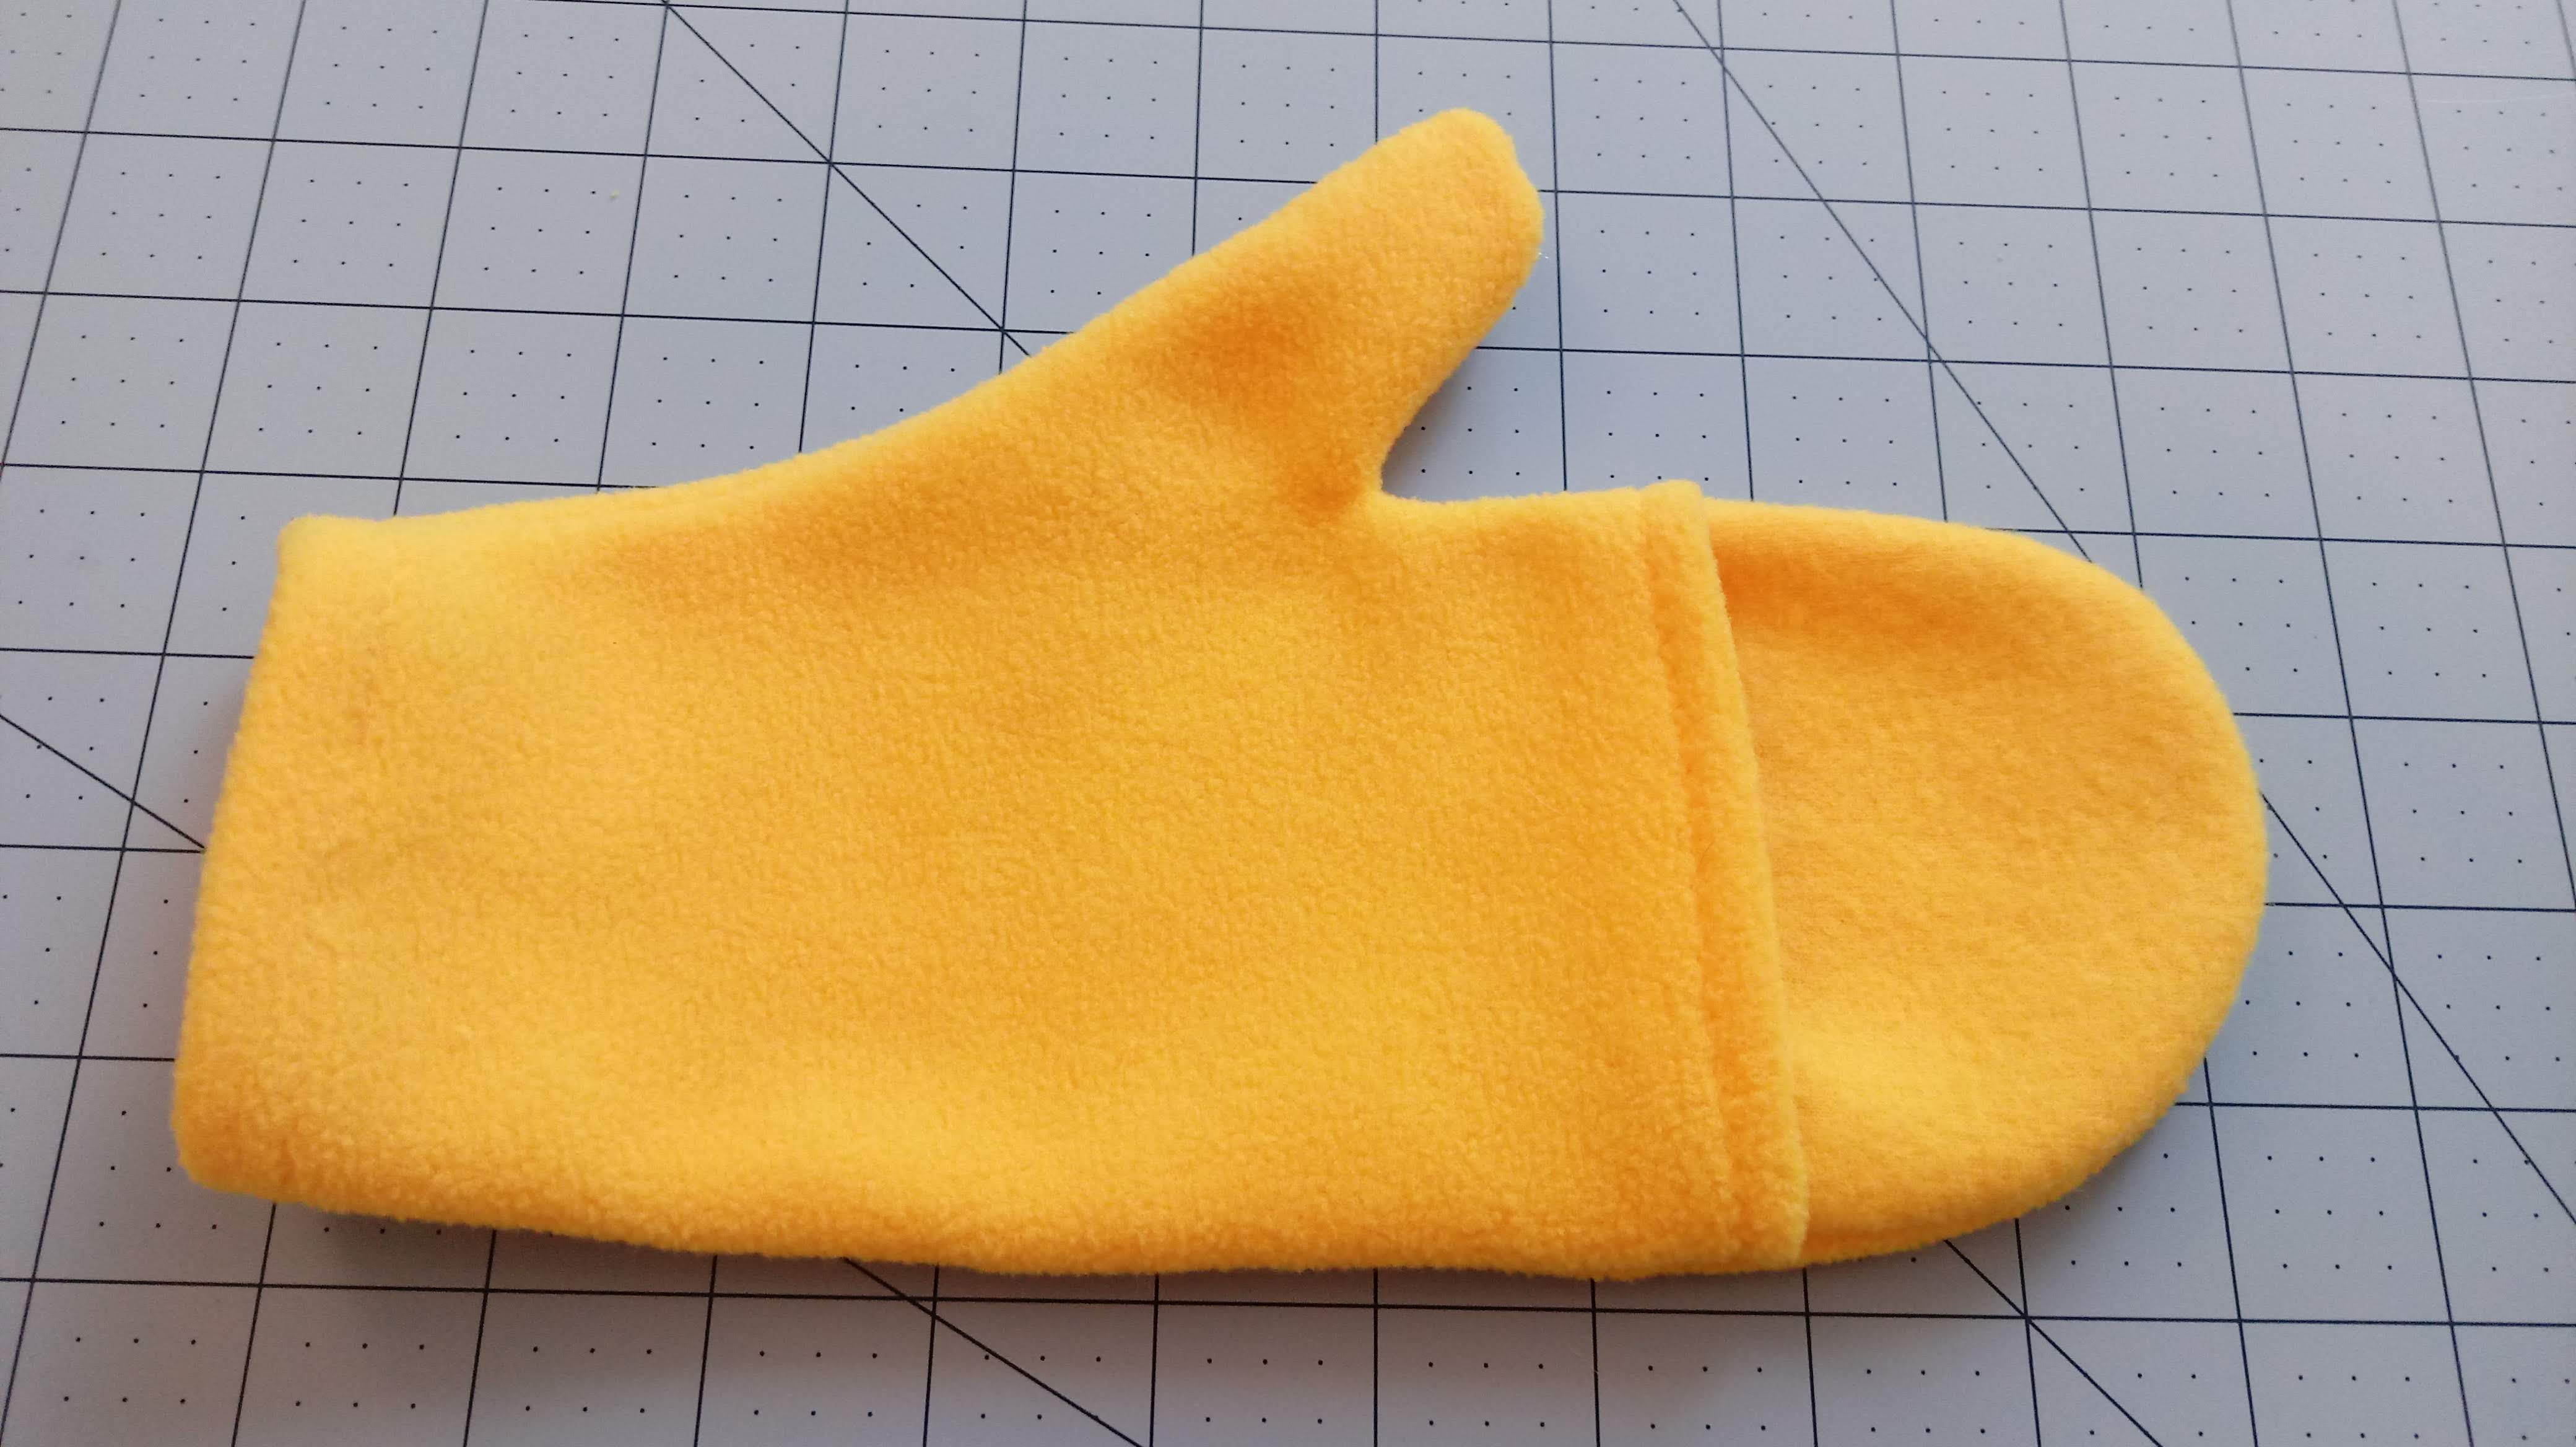
Work has kept me busy the last few weeks, and so I was very happy to get back to sewing yesterday. I had a grand time creating a pattern for mittens.
It is a quick simple project and doesn’t take that much fabric.
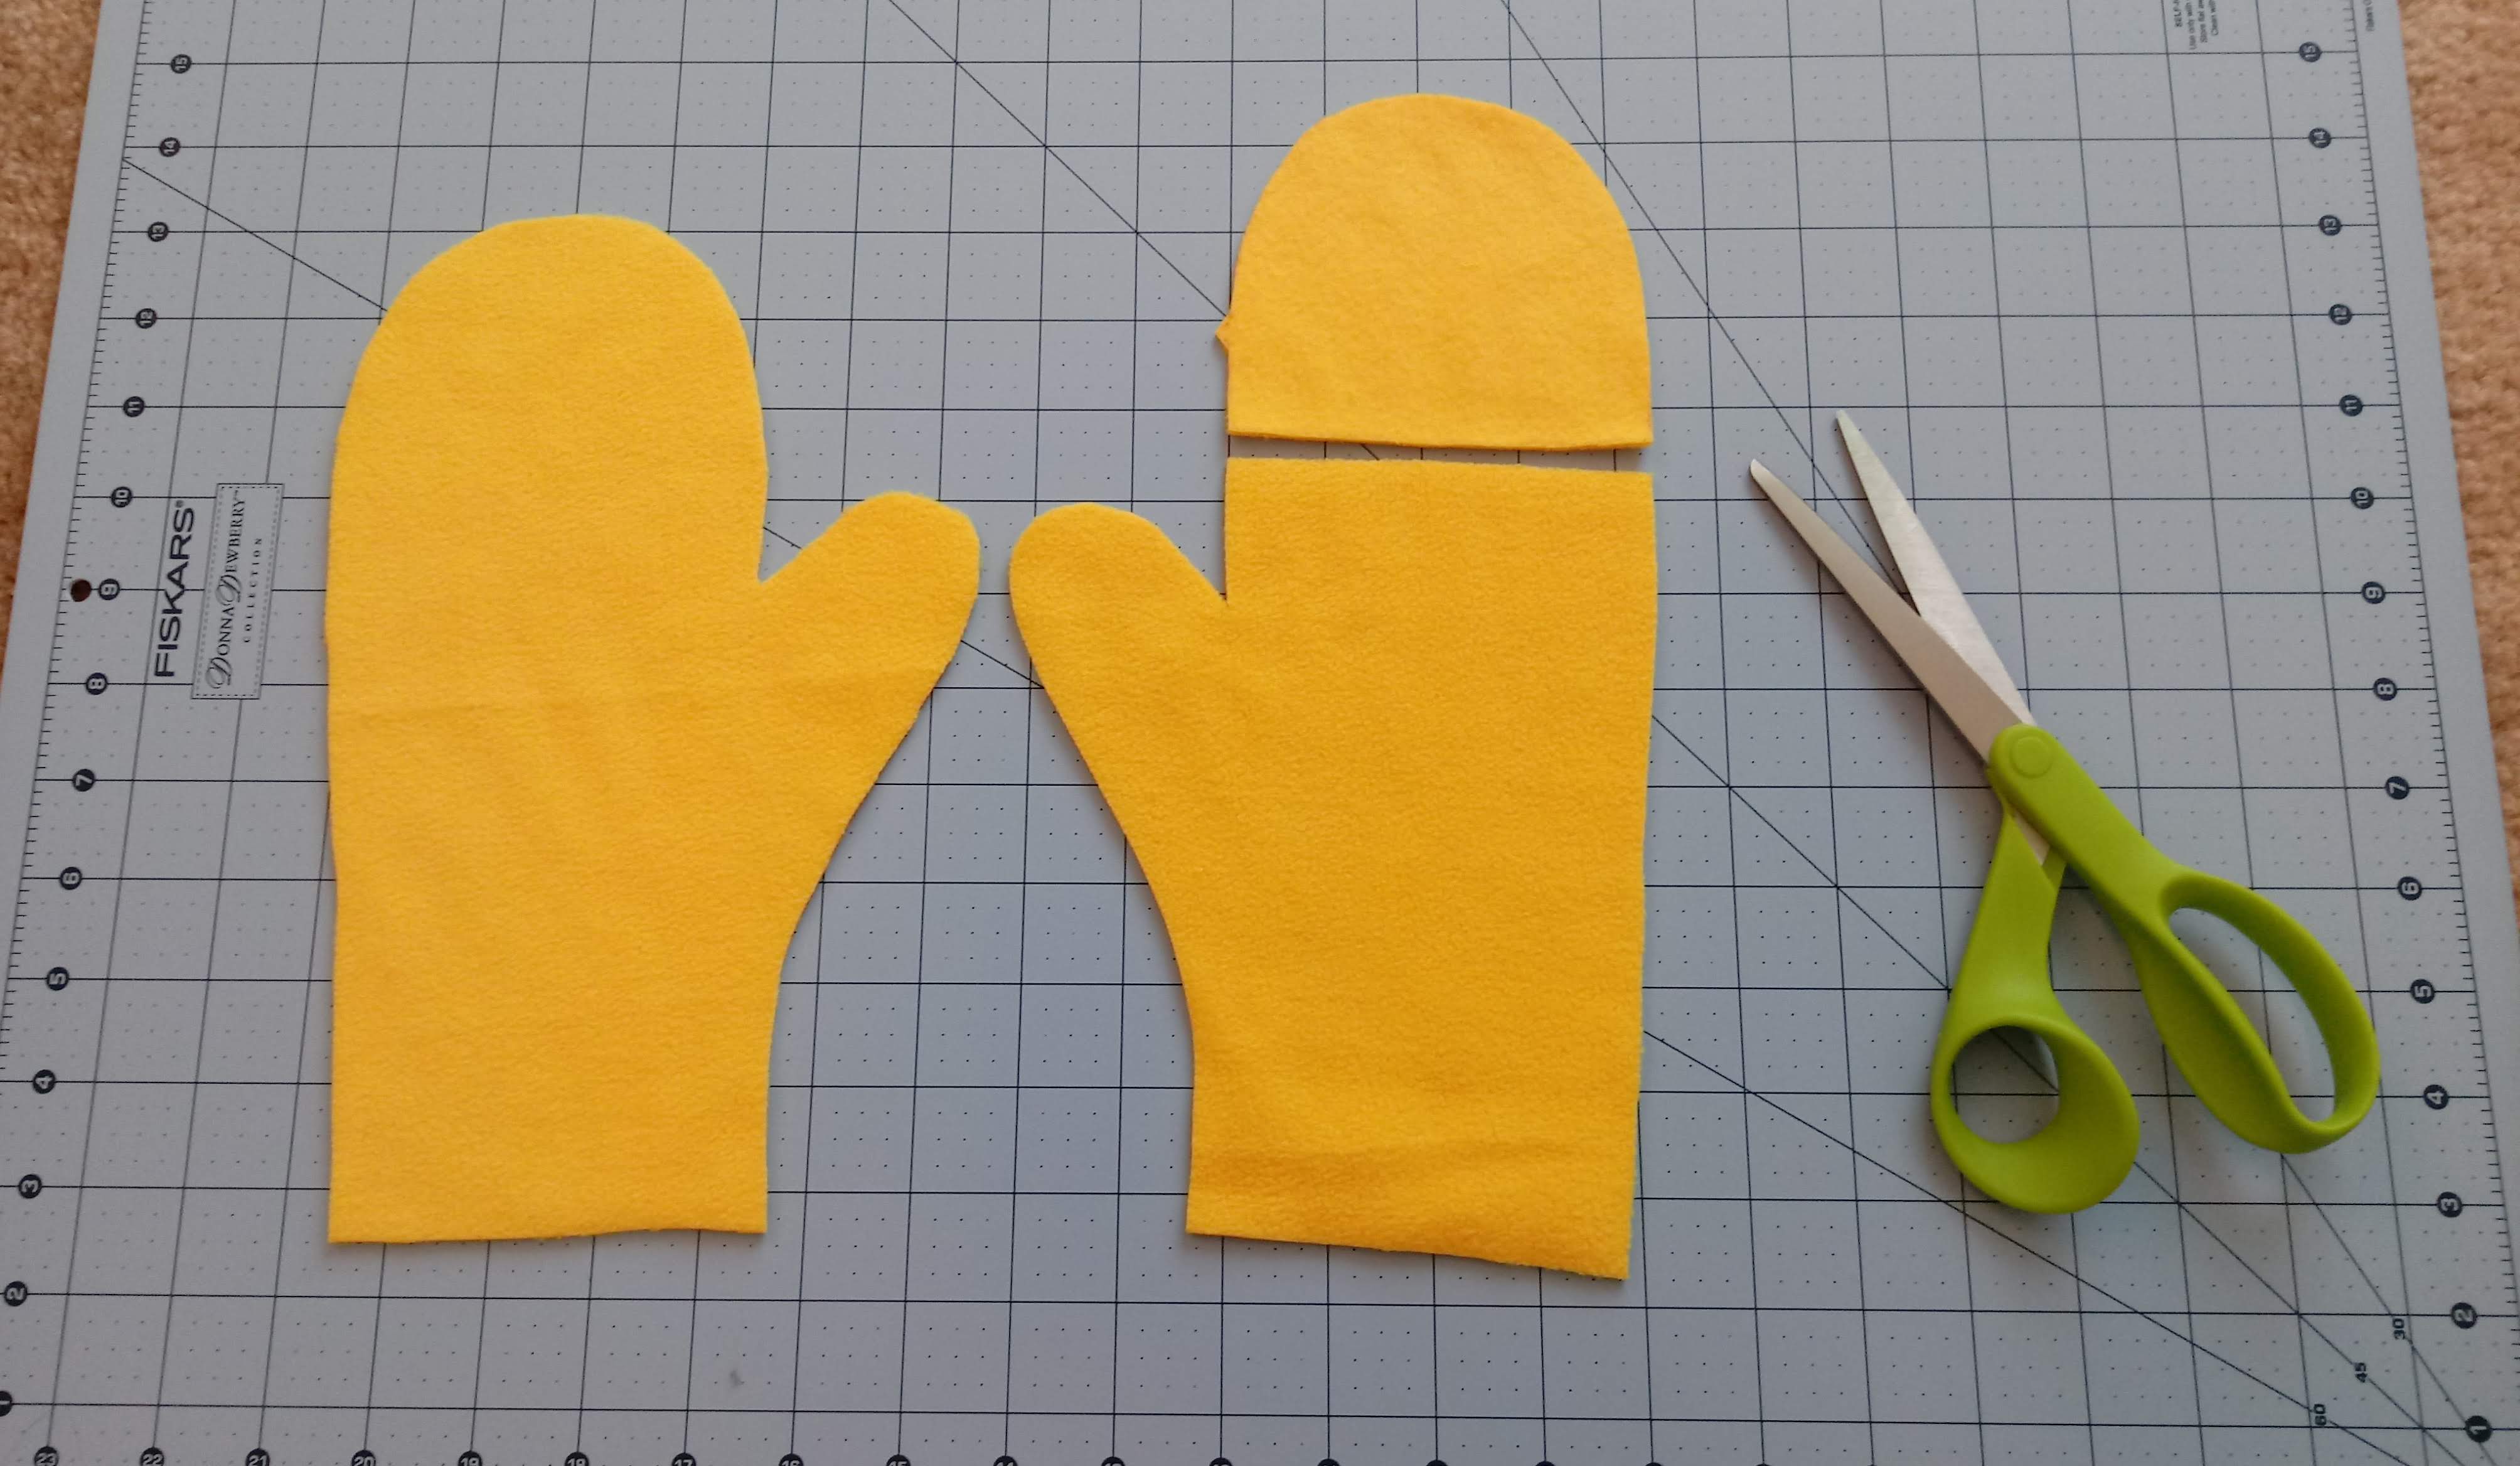
They were a lot of fun to make! I really wanted to make the mittens functional when using a cell phone or other touch screen device. So, I added an open slit in the palm.
After designing these my brain kept thinking of all of the different possibilities! In fact, they were so fun that I couldn’t stop designing. I have several more styles I am hoping to add to the pattern. Wait and see! It just might be an upcoming project!
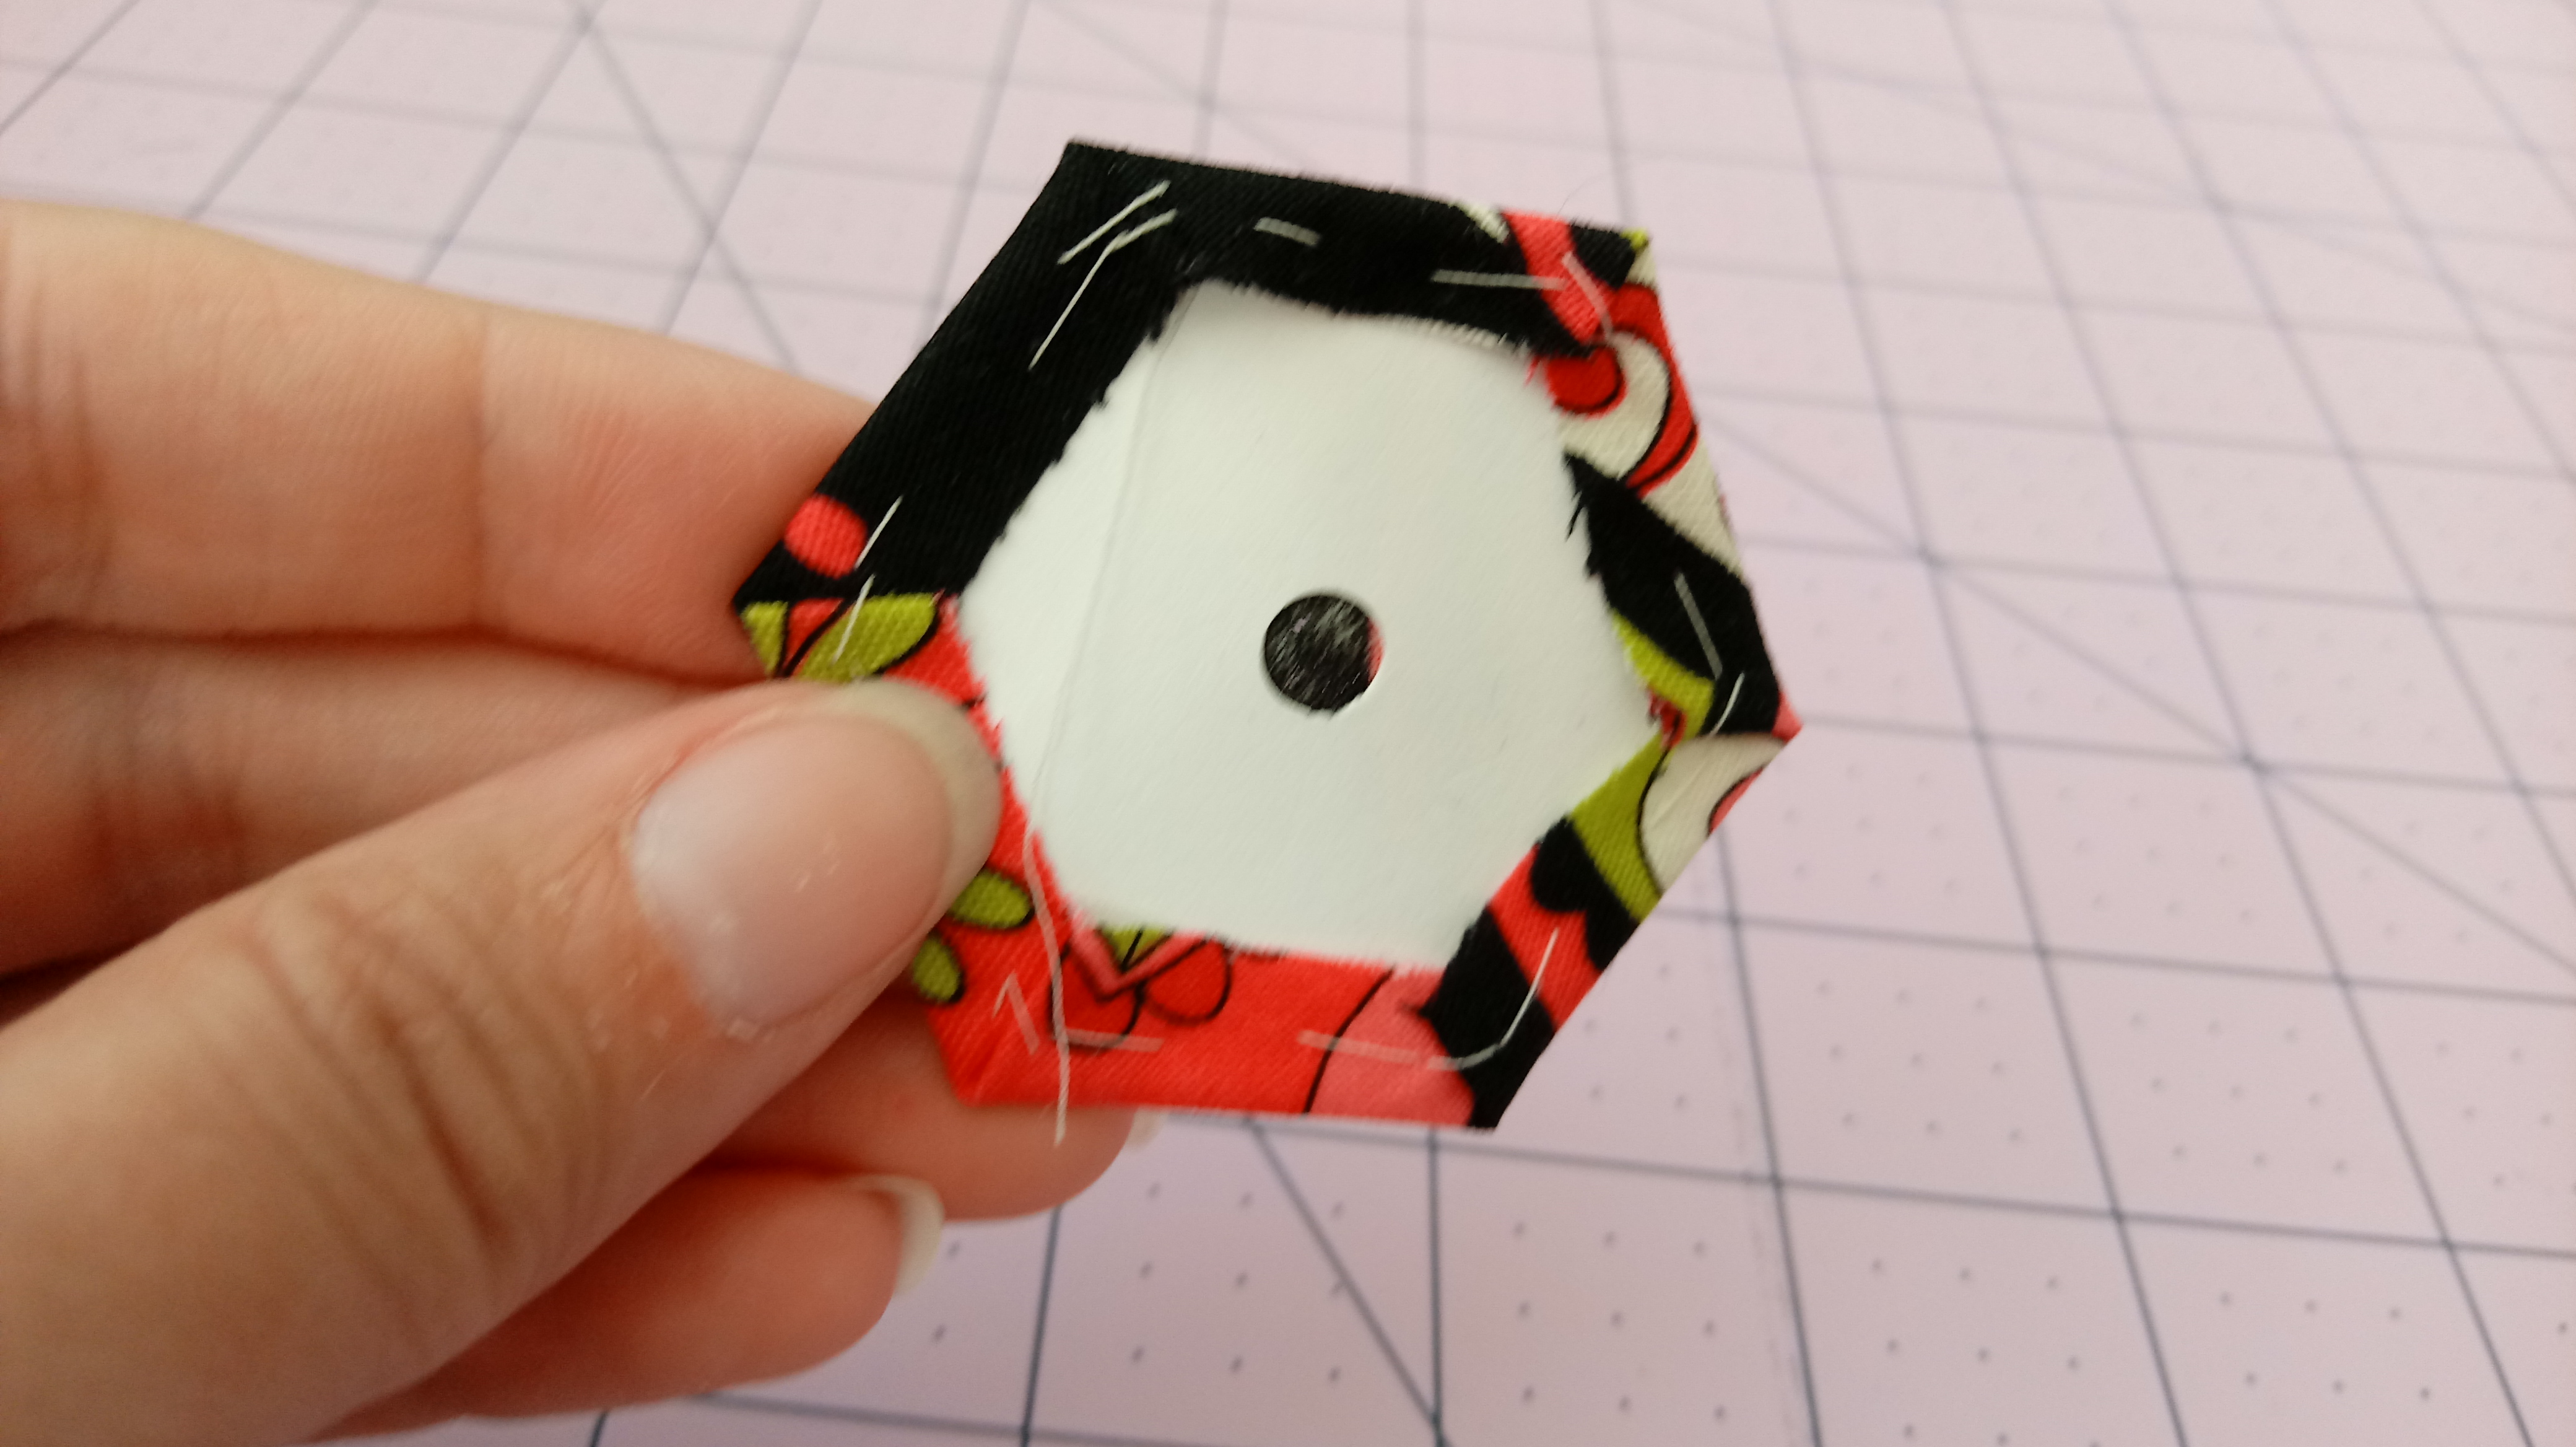
I felt a bit all over the place today! I worked a bit on hexagons. Take a look at my teenie tiny whip stitches! So, fun! I can’t wait to teach my students how to do this. Not only will it improve their hand sewing skills, I think they will have a lot of fun with it.
I also attached the ears to my Belle mouse ears headband. Whoo hoo!

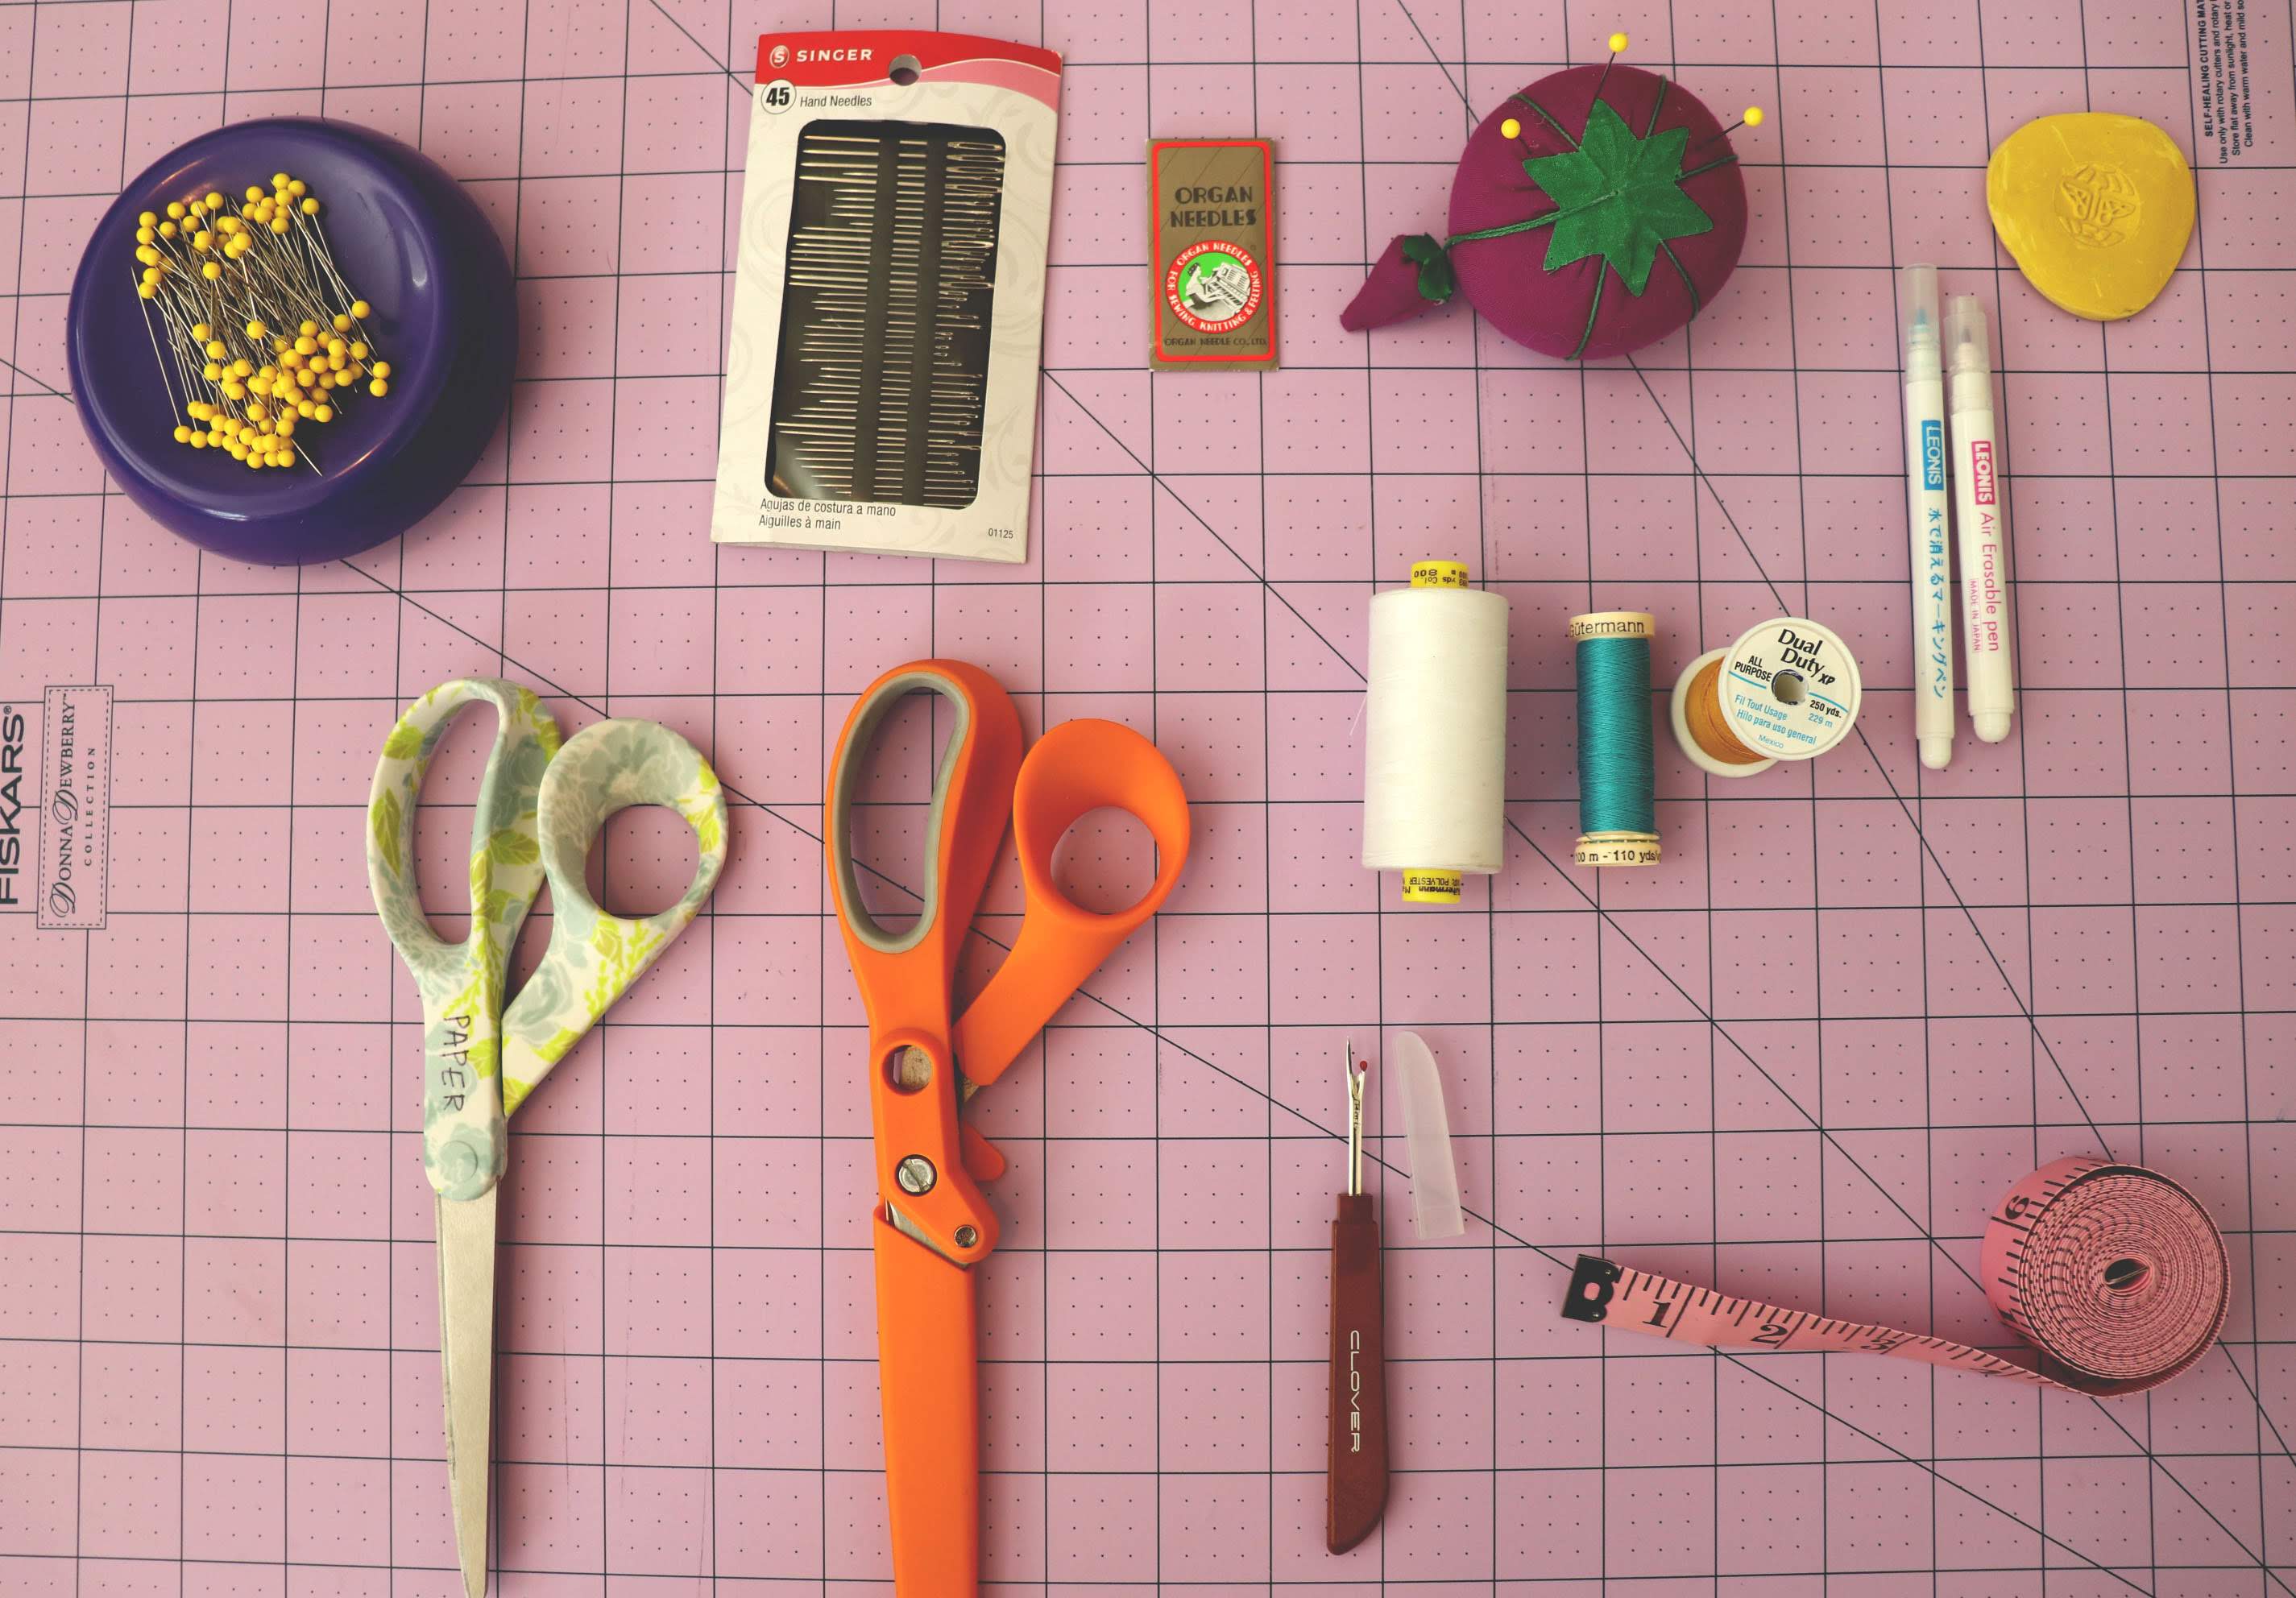
Next, I posted my first Learn to Sew page for Basic Sewing Tools. Take a look if you have a minute!
Happy sewing!
They’re getting closer! I was able to work a bit more on my Belle Mouse Ears Headband today. I purchased a few more trims as accents. I found gold cording at JoAnn and perfectly colored flowers at dollar tree. Isn’t it great when that happens!
I also, finished up the ears and wrapped the headband in gold net. Originally, the headband was just covered in Shannon Cuddle 3 Minky in Yellow. The minky works great, but it was a little too fuzzy for my liking next to the cotton fabric ears. The gold net overlay adds a bit more of a princess feel as well.
Next I started the bow using Confetti Dot fabric in Gold & White from JoAnn. I hope it will turn out nice! I am looking forward to finishing these!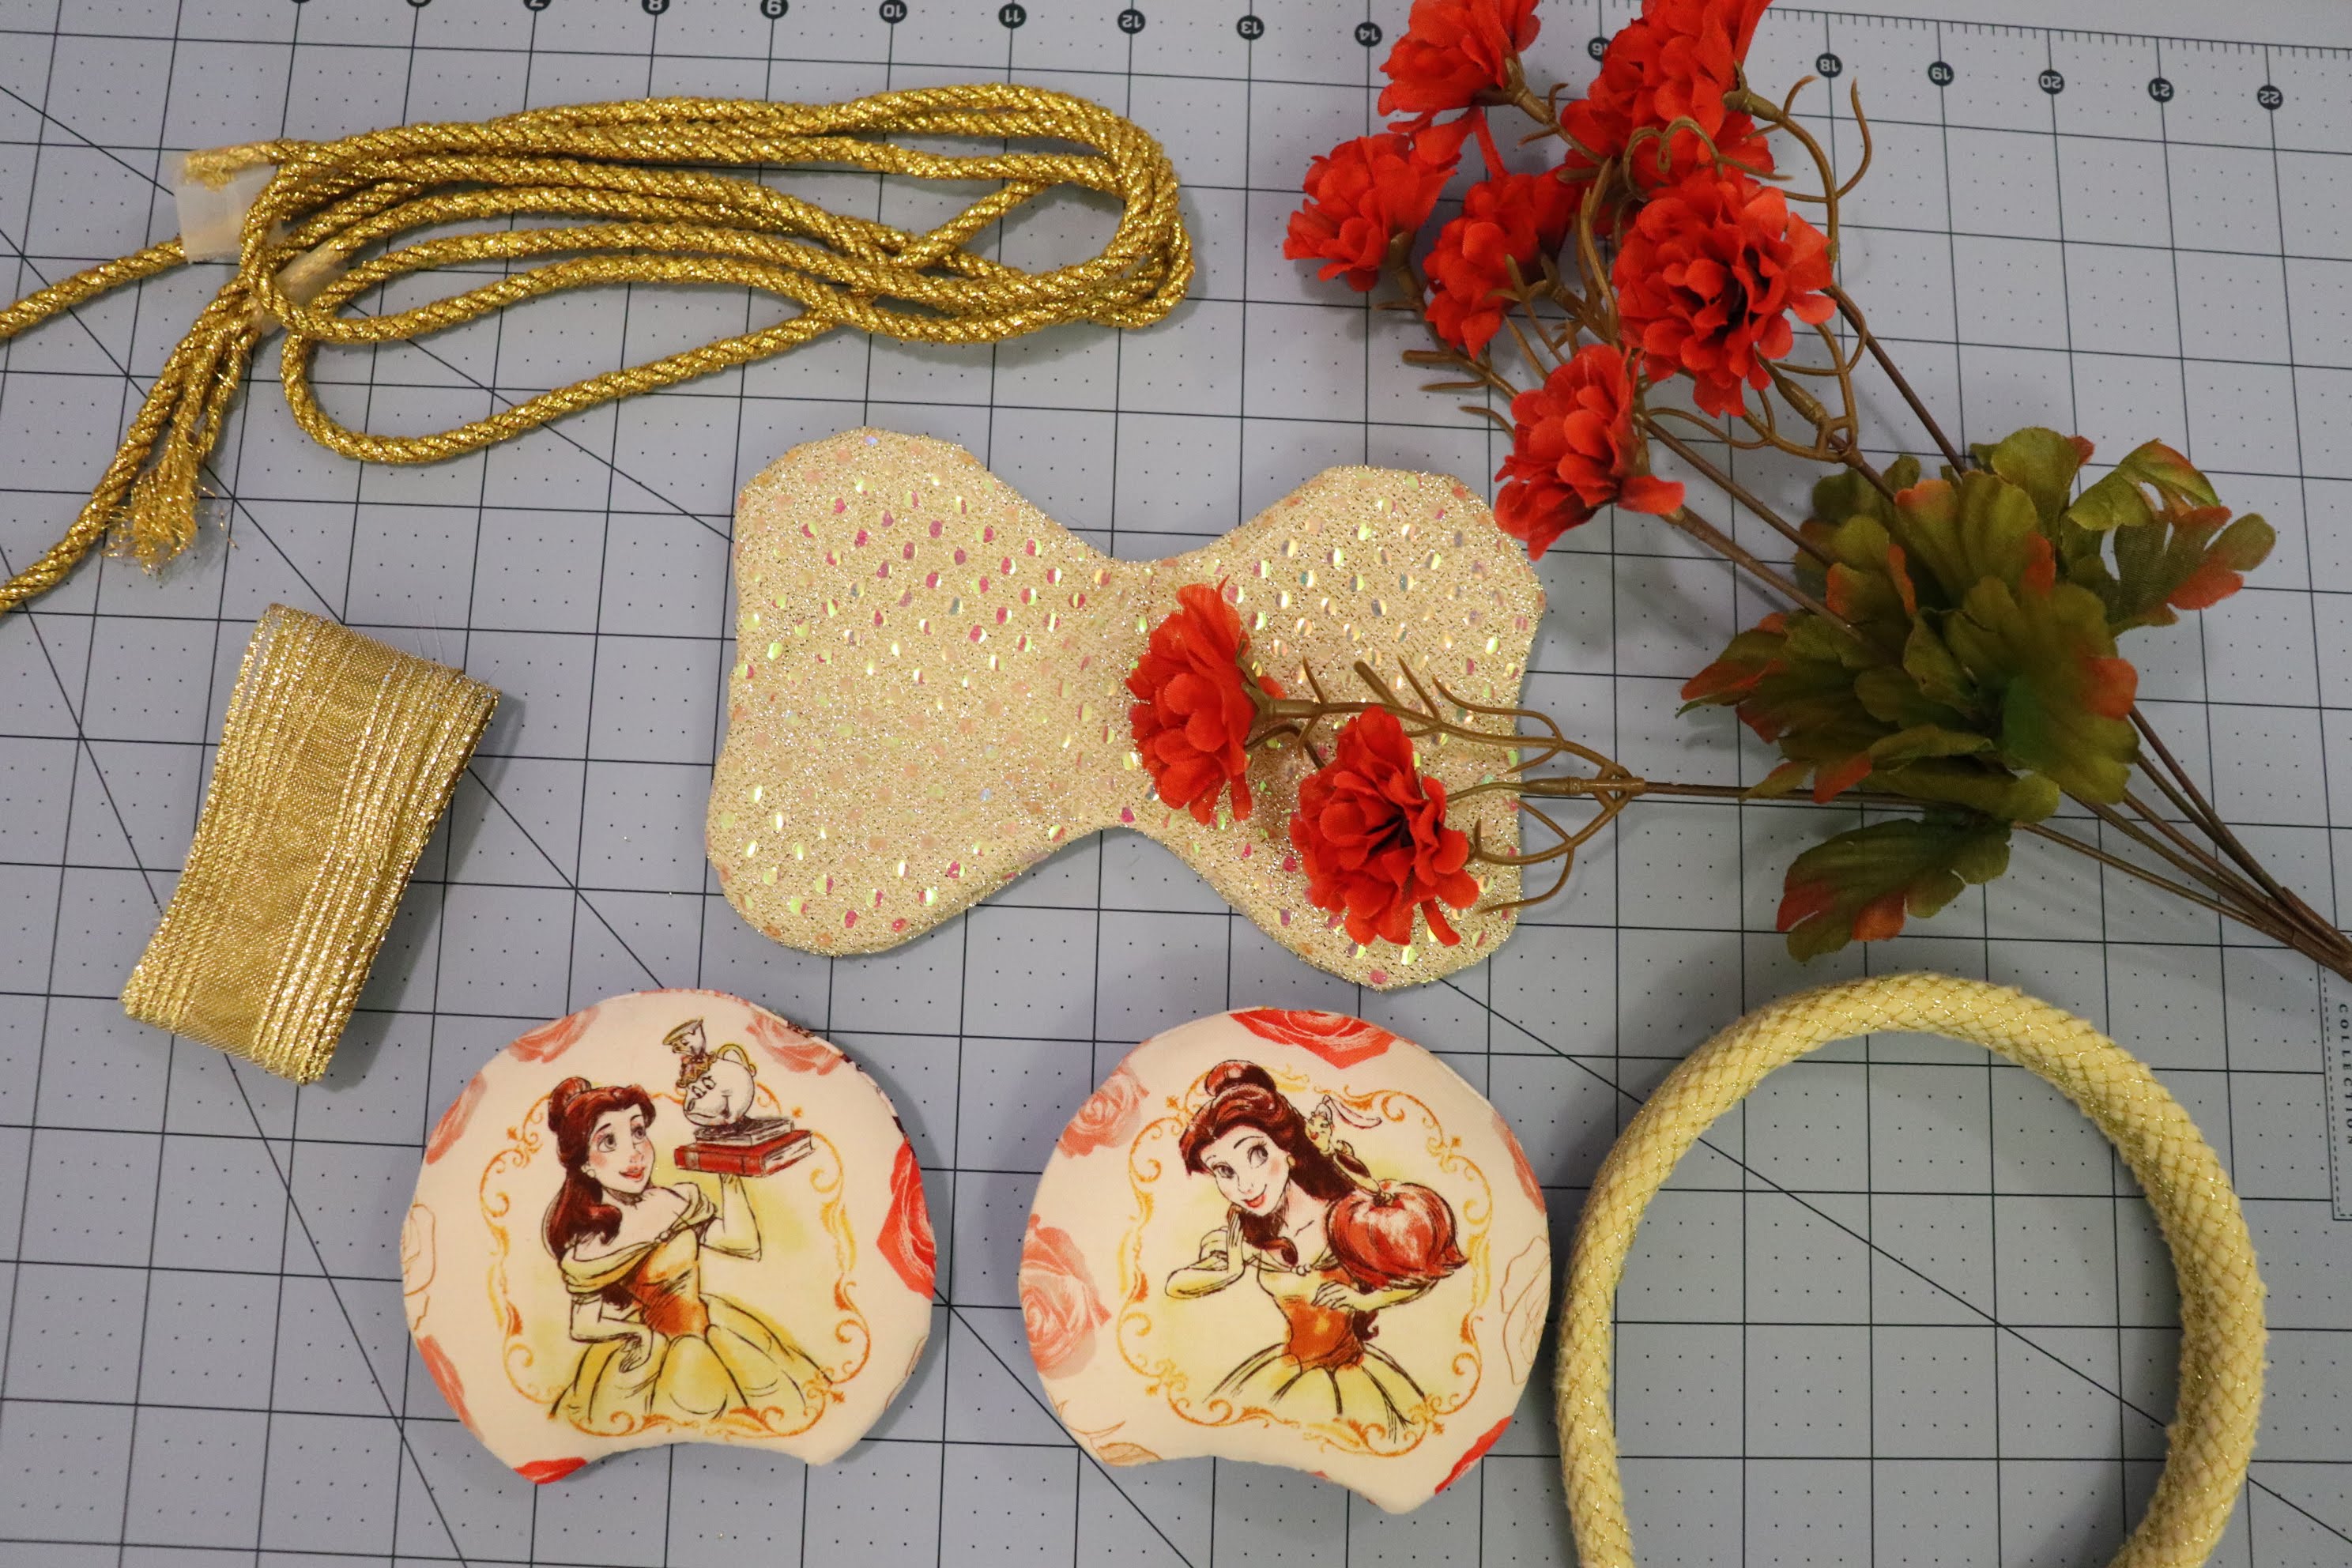
One of the main reasons I wanted to learn about English Paper Piecing was because of its portability. It is something I wanted to be able to do on the go. As a result, as I was making the hexagon pieces I had an idea for a project for storing them. I thought a mini messenger bag with more dividers would be really cute, especially for younger sewers. Here is a quick sketch of my idea.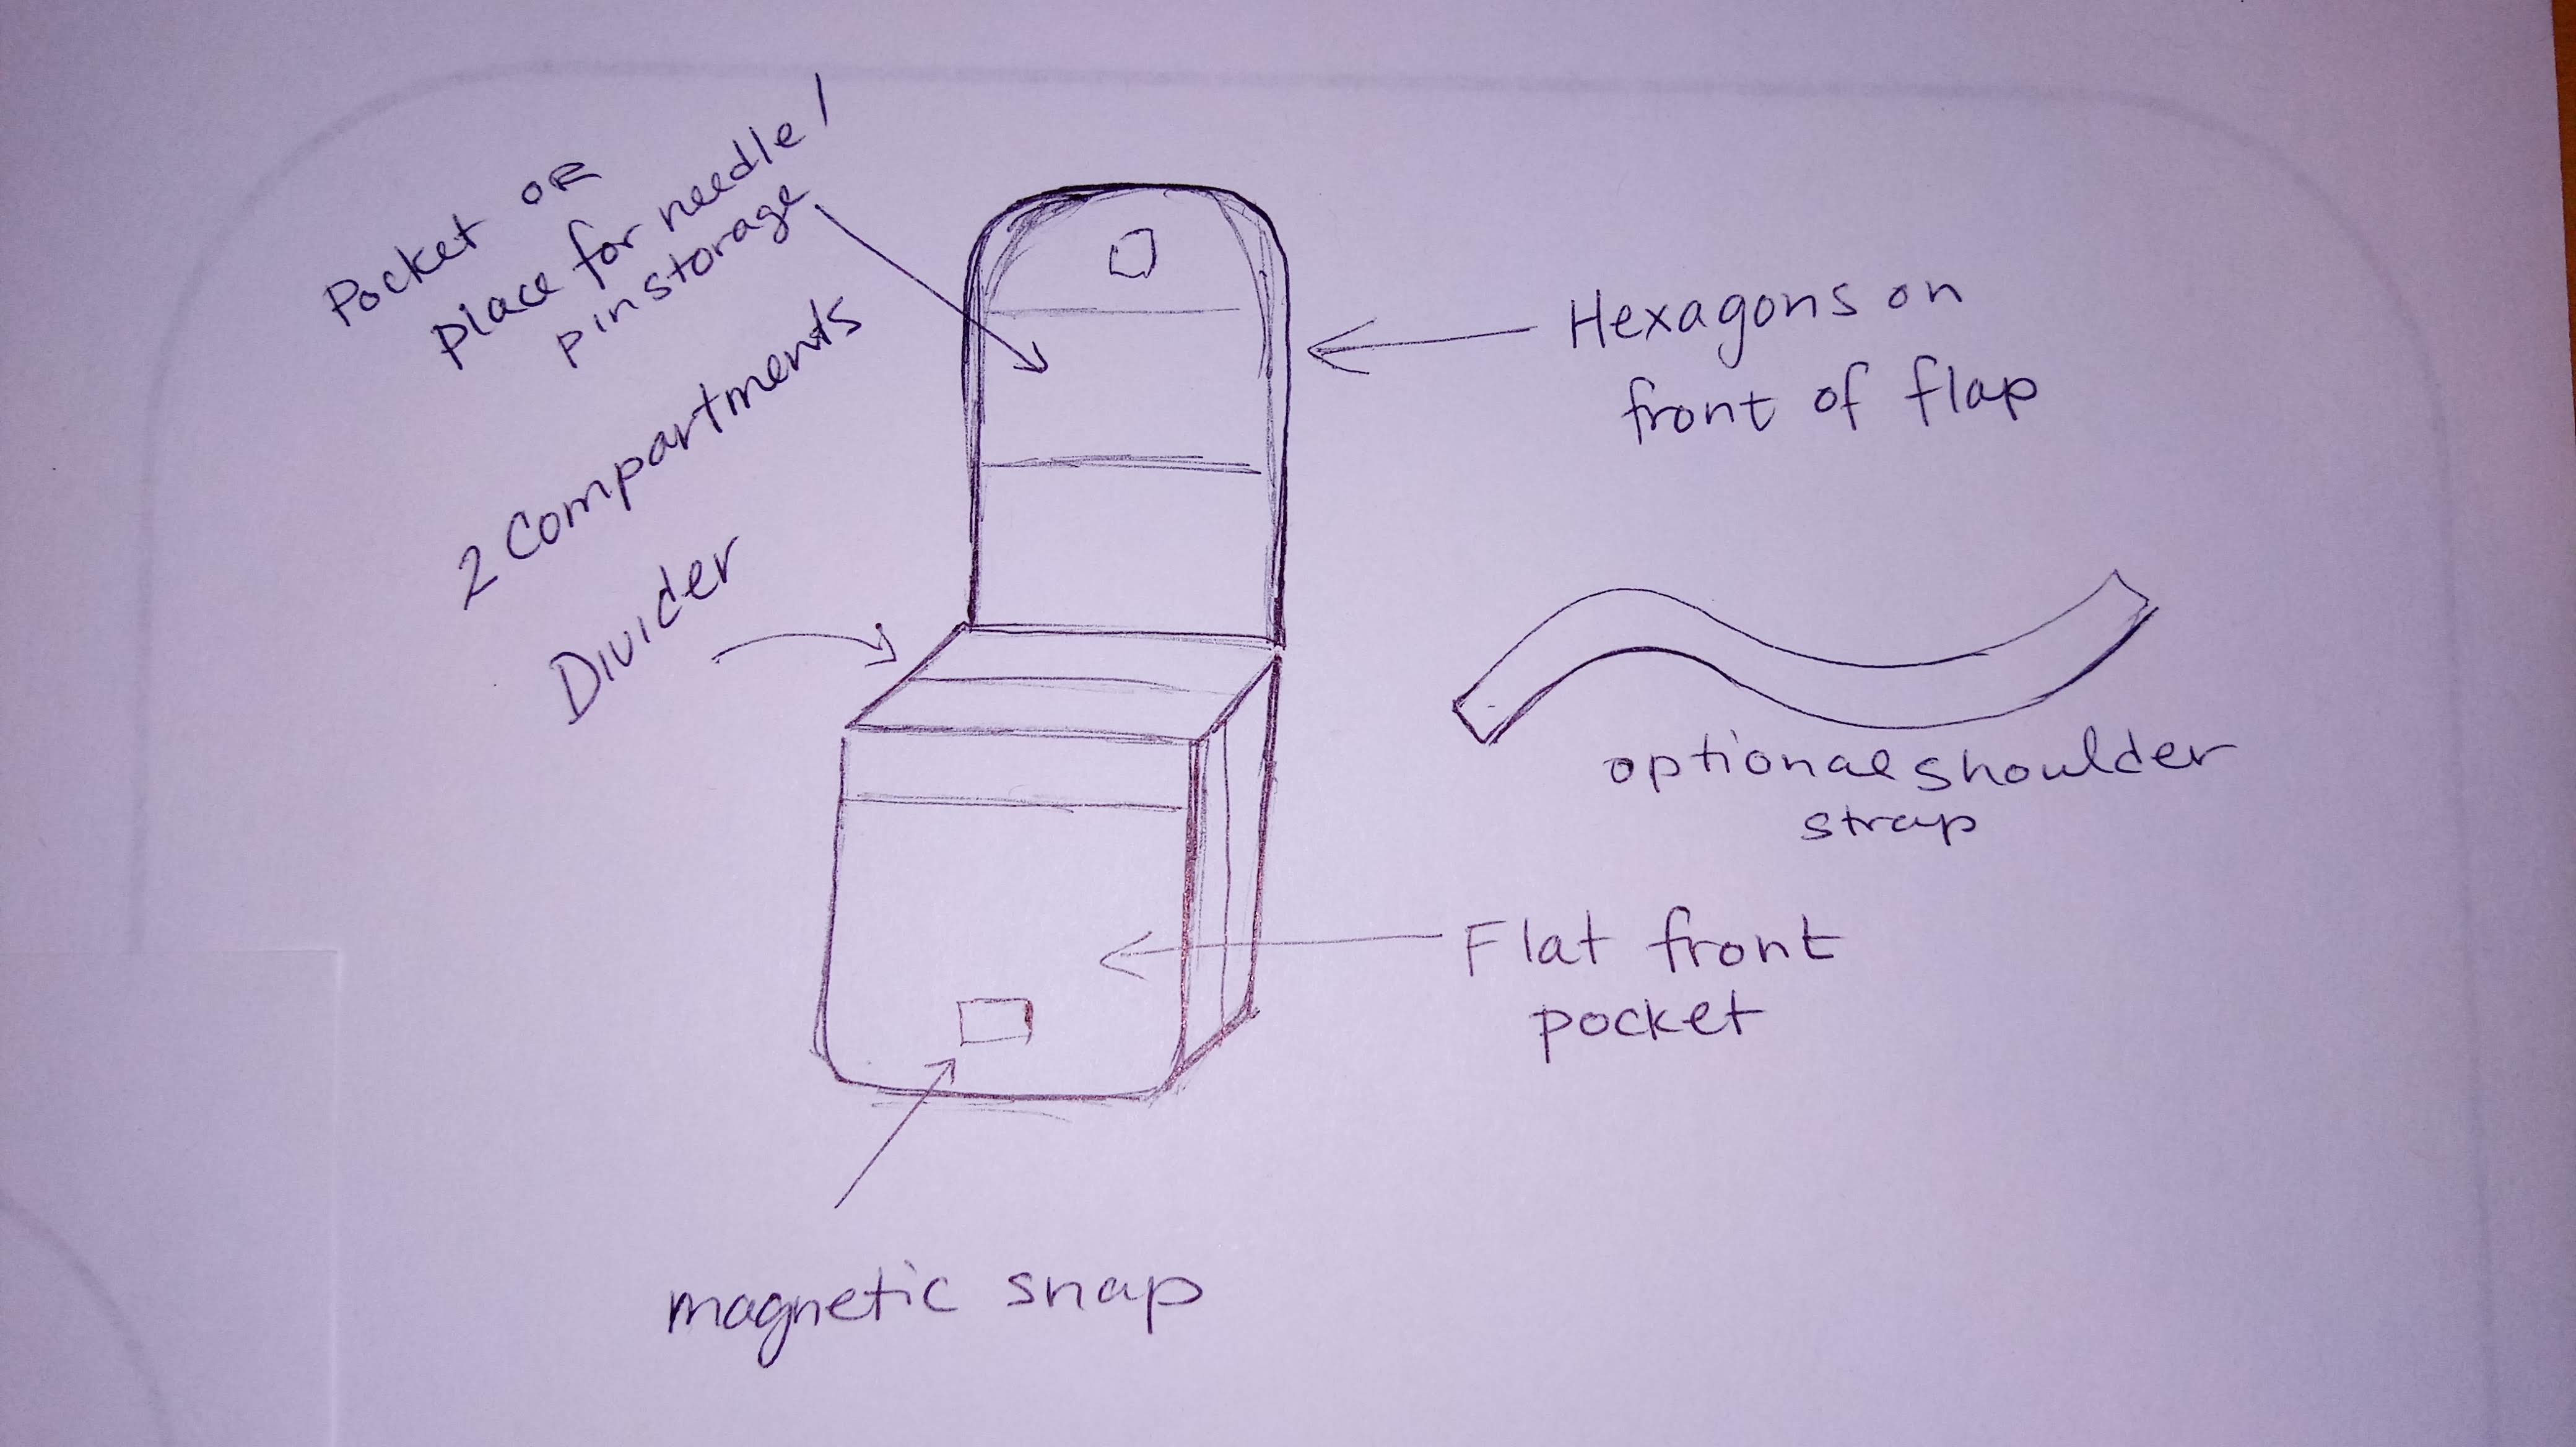
You’ve got to be prepared with the proper accessories whenever you have a Disney adventure, so today I started making a mouse ears headband.
My headband is Belle themed as I am hoping to eat at the Be Our Guest restaurant on my next visit to Disney World. I purchase my Beauty and the Beast fabric at JoAnn.

Just saying “Disney” makes a project sound so much more exciting! So far I have gathered most of my supplies.

I also fussy cut the fabric for the ears to showcase Belle.

Finally, I put together the ears. I will make a full tutorial in the intermediate projects section of Learn to Sew once they are finished. The project could probably be classified as easy if you complete most of the steps using hot glue, but if you prefer to sew as I do, it adds a bit of complexity.
I got stuck on the headband! I can’t decide what color fabric to use. Choices, choices. I am horrible about deciding 🙂 I am leaning toward gold! We will see how it works out! I am excited to finish these.
Today I read part of Diane Gilleland’s book All Points Patchwork. I started making hexagons with the enormous amount of scraps that I have. It was actually quite relaxing.
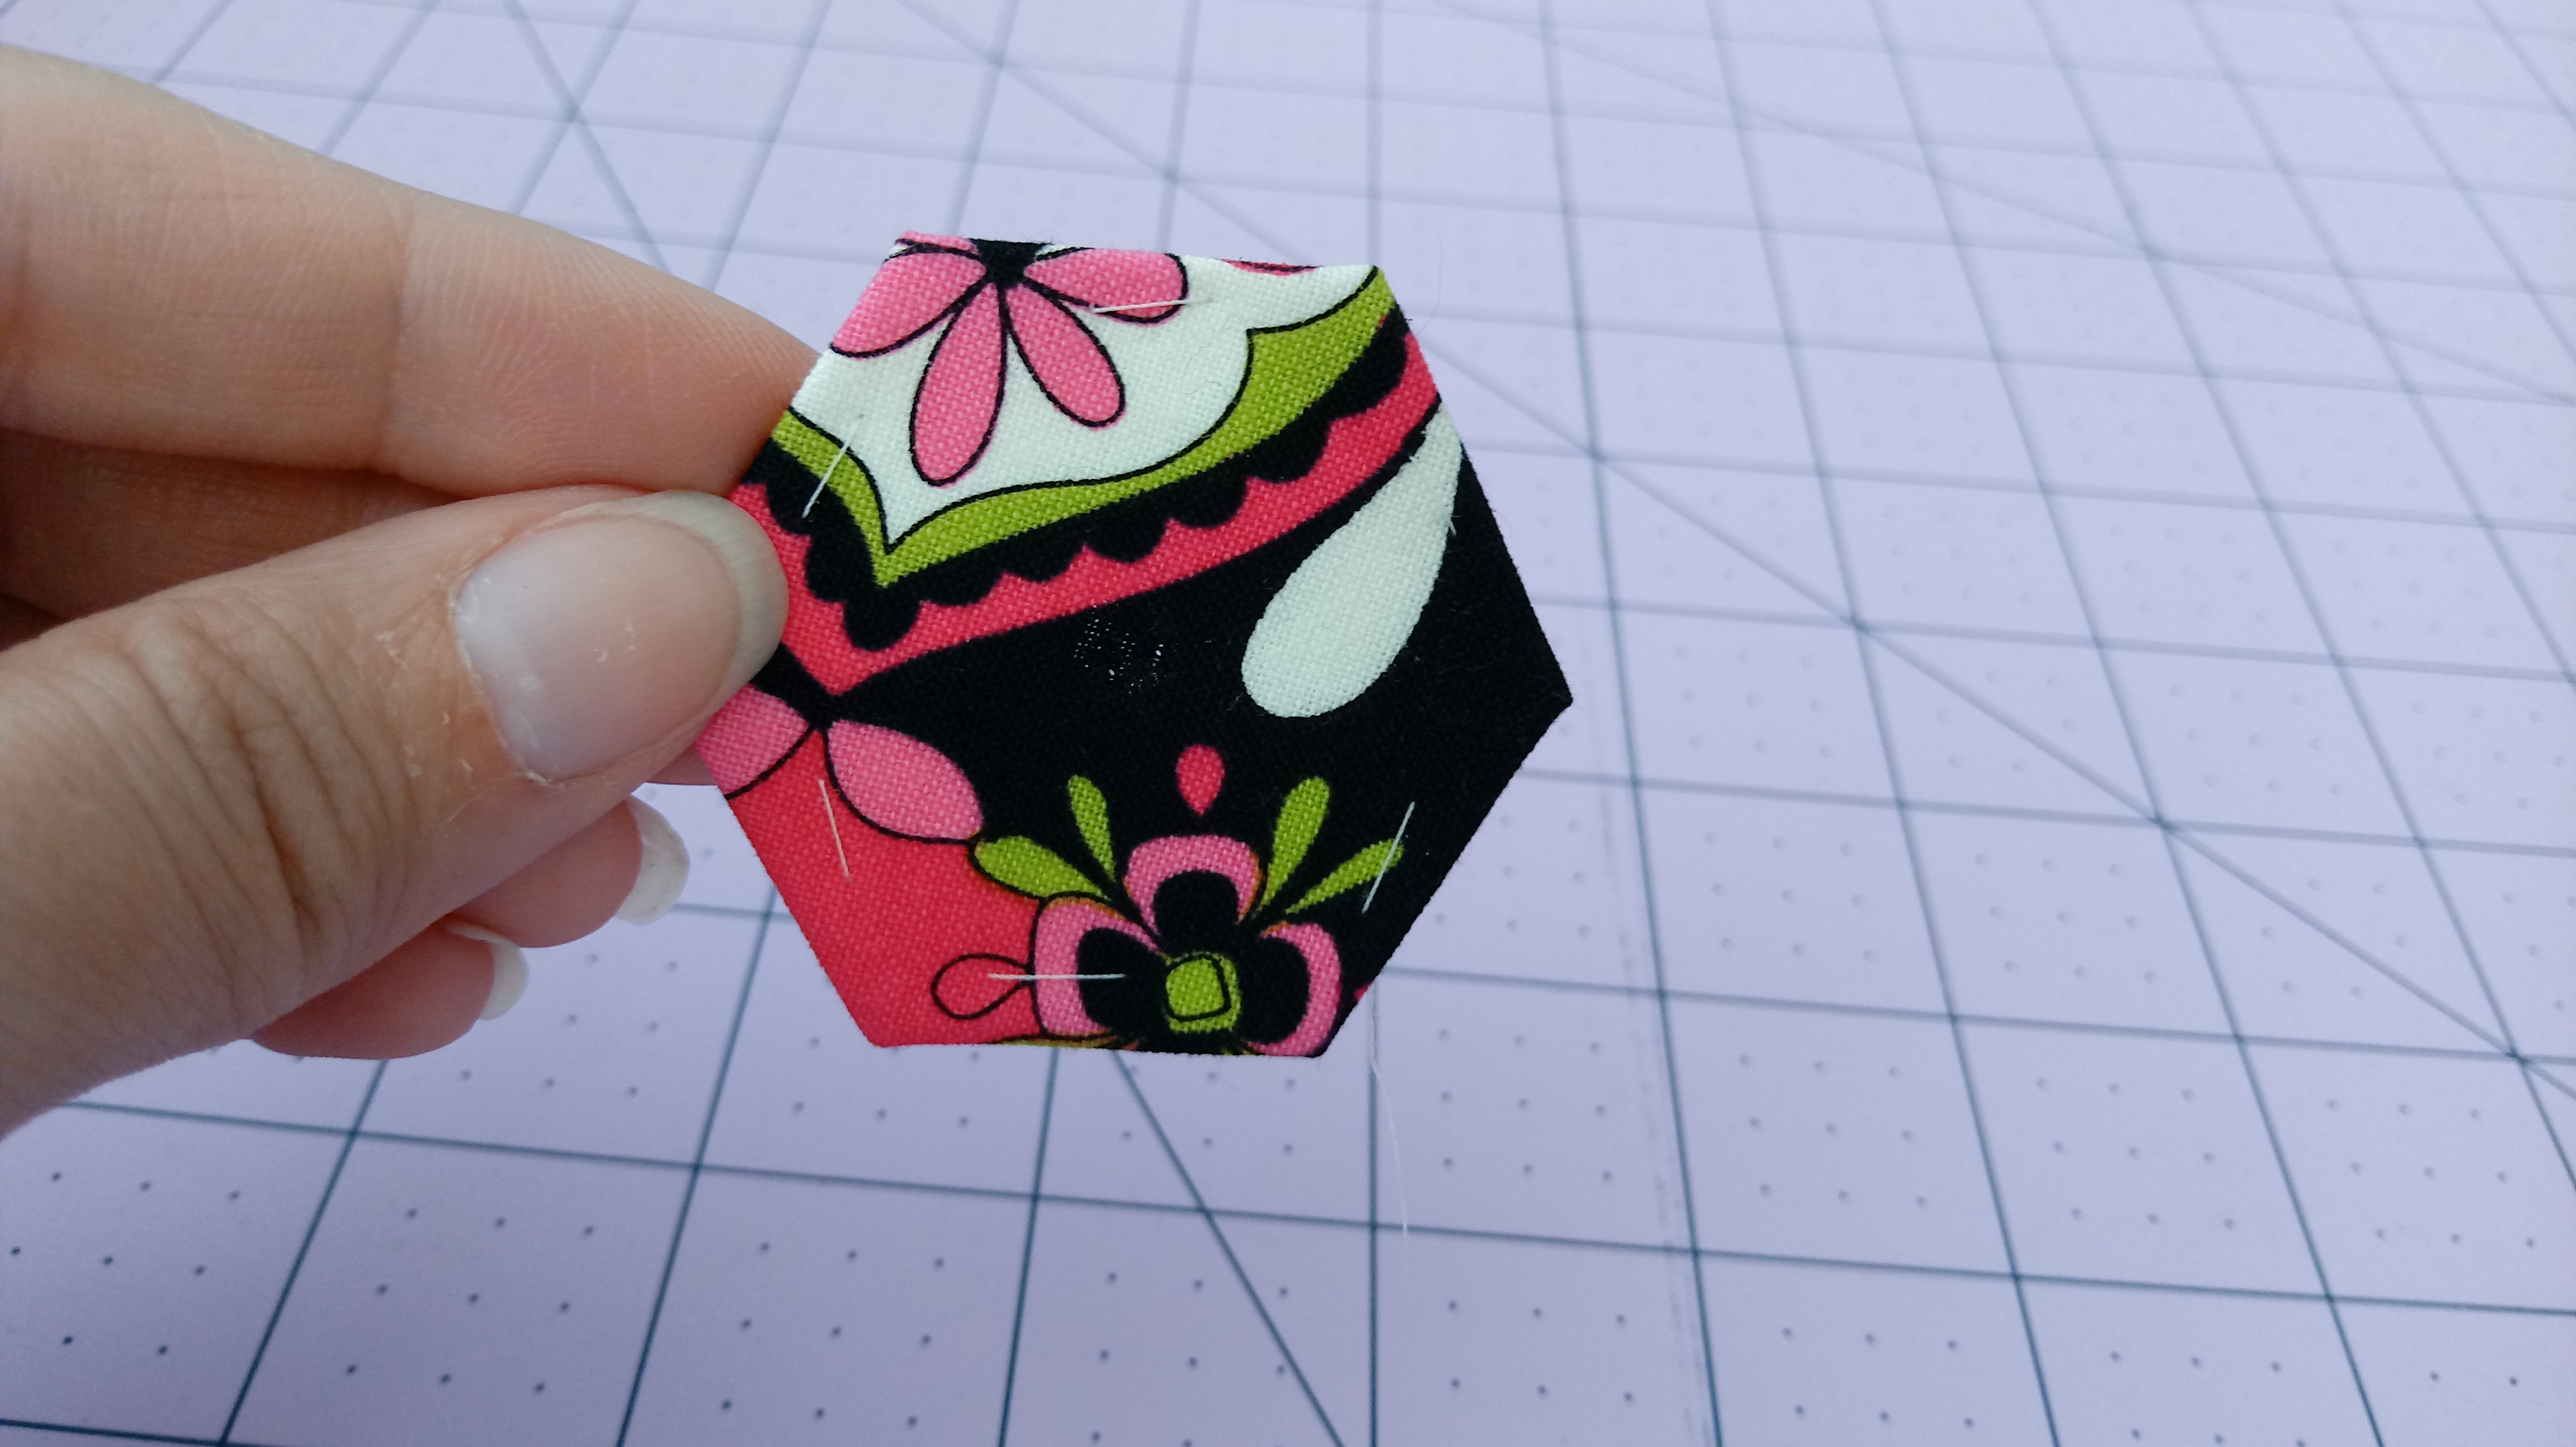
The hexagons I used have 1 inch sides. I punched them out of cardstock using the Fiskars Extra Large Punch. It worked great. I also used a tip from the book and punched holes in the center for easier removal later. I will keep you posted on what I decide to make with them!