
I’ve always loved westerns and western history. For years, I have wanted to make my own bonnet pattern and was excited to finally have the time to do so. I’m very happy with the results.

When I started planning the bonnet project, I wanted the project to be easy enough that beginning students could complete the project without too much difficulty. So, I started with a basic style. However, as often happens once I begin a project, I started expanding the project and exploring other style choices
The Brim
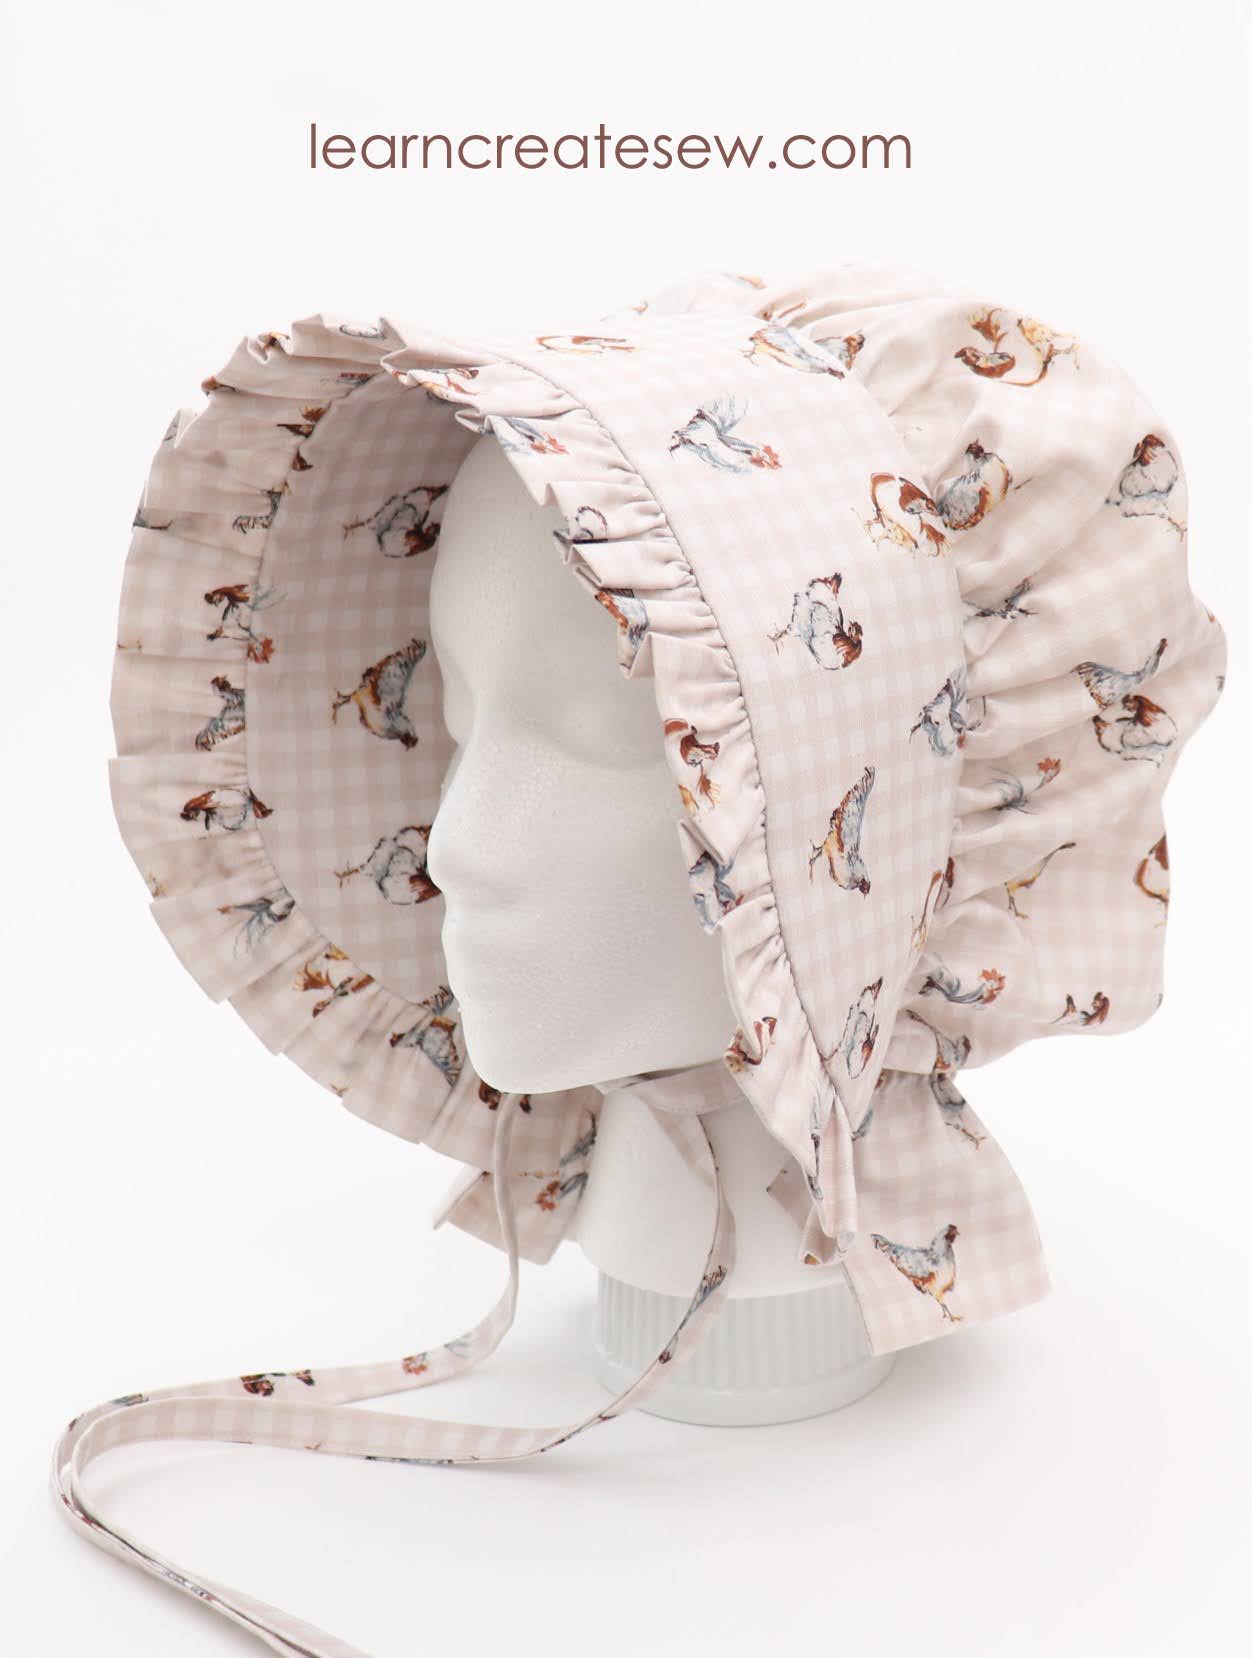
I tried various brim styles. The first brim I started with was basically a rectangle with curved ends. The result was exactly what I was looking for. Simple. straight forward. Classic. I just can’t resist ruffles, so next I tried adding a gathered trim to the edge of the brim. It’s simply one rectangle of the same fabric, folded in half and gathered. I really loved the result. So, cute!
Adding the ruffled trim does increase the difficulty. Gathering can be a difficult skill to learn and is often intimidating for new sewers. That said, I think it’s totally worth the time and effort.

After playing with the standard brim, I decided to see what would happen if I changed the shape. I extended the brim a few inches at the center front. This resulted in a more curved shape and a much more dramatic bonnet. It does limit visibility, but it is super cute 🙂 And the good news is, that swapping the standard brim for the extended brim does not increase the difficulty at all. The free pattern includes BOTH the standard and extended brim for each size. Simply choose the style you prefer.

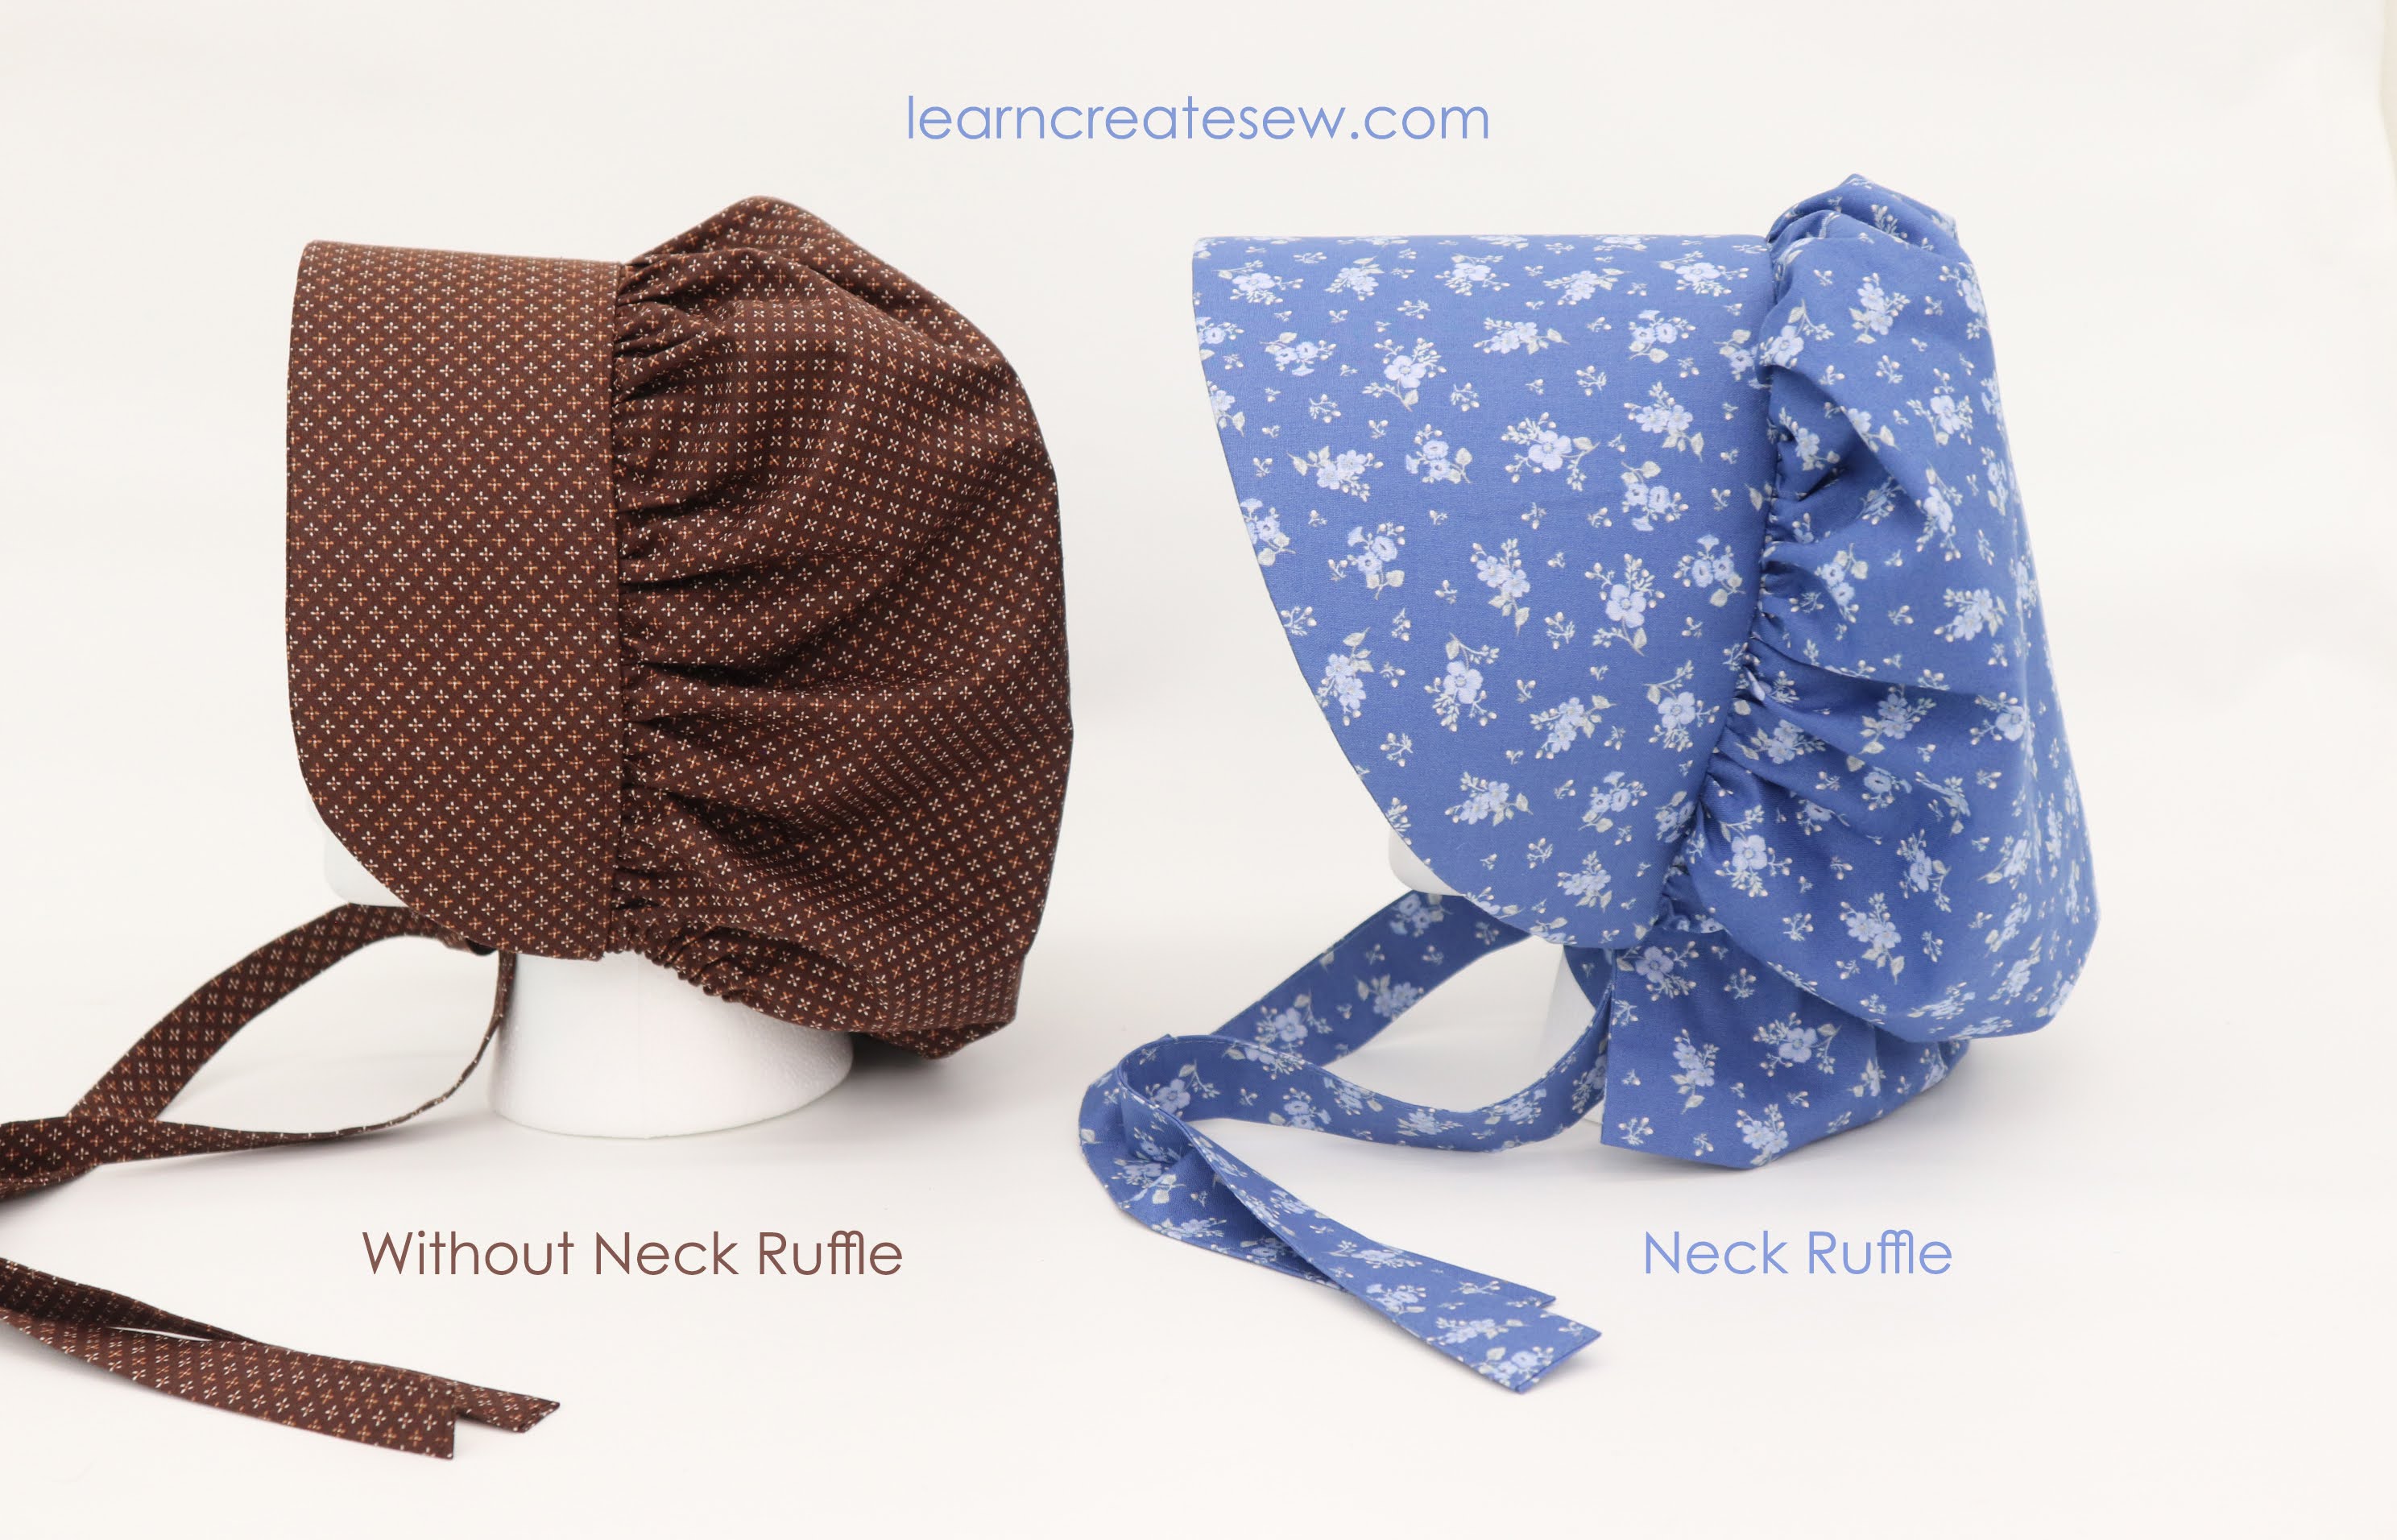
Neck Finish
The next style choice I decided to explore was the neck finish. I began with a simple elastic casing as I wanted the project to be as easy as possible, but neck ruffles are adorable and often seen in historical examples. So, I couldn’t make a bonnet pattern without at least looking into the possibility. So, I gave it a shot. I was happy with both styles and decided to include both options with the pattern.
Neck Ties
I also explored the neckties a bit. I played with different sizes, styles, and techniques. You could also use ribbons. I tried both hand-tacking the ties in place after the bonnet was complete and sewing the ties into the brim seam. I found that for the standard brim, I prefer to sew the ties into the seam, but for the extended brim, I like to hand-tack them on later. This way the ties can be attached to the brim itself, which helps to control the larger shape. I also prefer thinner ties, but wide ties could easily be added instead. The ties on the blue extended brim bonnet are about double the width of those on the plaid ruffled bonnet.


Supplies:
The supplies listed are for the largest-sized bonnet. Smaller sizes will require less fabric.
- 3/4 yard Cotton Fabric
- 10 inches of 1/4-inch wide Elastic
- 2/3 yard Medium weight fusible interfacing
- Coordinating Thread
- Optional brim Stabilizers: Stabilizer is not required but is recommended, especially for extended or ruffled brims. Stabilizers could include Duck Canvas or heavy-weight fabric, Fusible Web, Medium-weight fusible interfacing, and/or sew-through buckram. The quantity needed will vary based on the width of the fabric. 2/3 yards or less of each should be plenty. Use the stabilizer pattern as a guide. Stabilizers are used in addition to the interfacing listed above. My favorite stabilizer combination is below.
- 1 layer Duck Canvas
- 1 layer Fusible Web (I used Heat n Bond Lite)
- 1 layer Medium Weight Fusible Interfacing (I used Pellon’s SF101)
Pattern:
Video Instructions:
Now the question becomes…what to do with all of the bonnets I made while testing my pattern??? I have a dozen at least 🙂
