I am happy to share my latest project with you today! These are quick and easy drawstring gift bags.
I made mine quite small, but you can easily adjust the size. These are great for scrap fabric projects and are perfect for the holidays! They are also fun for beginning sewers.
There are two style options available, flat or standing. The standing bag has boxed corners.
Supplies:
1/3 yard (or more) fabric or scrap fabric – (The process is easier if you select a fabric that can be ironed)
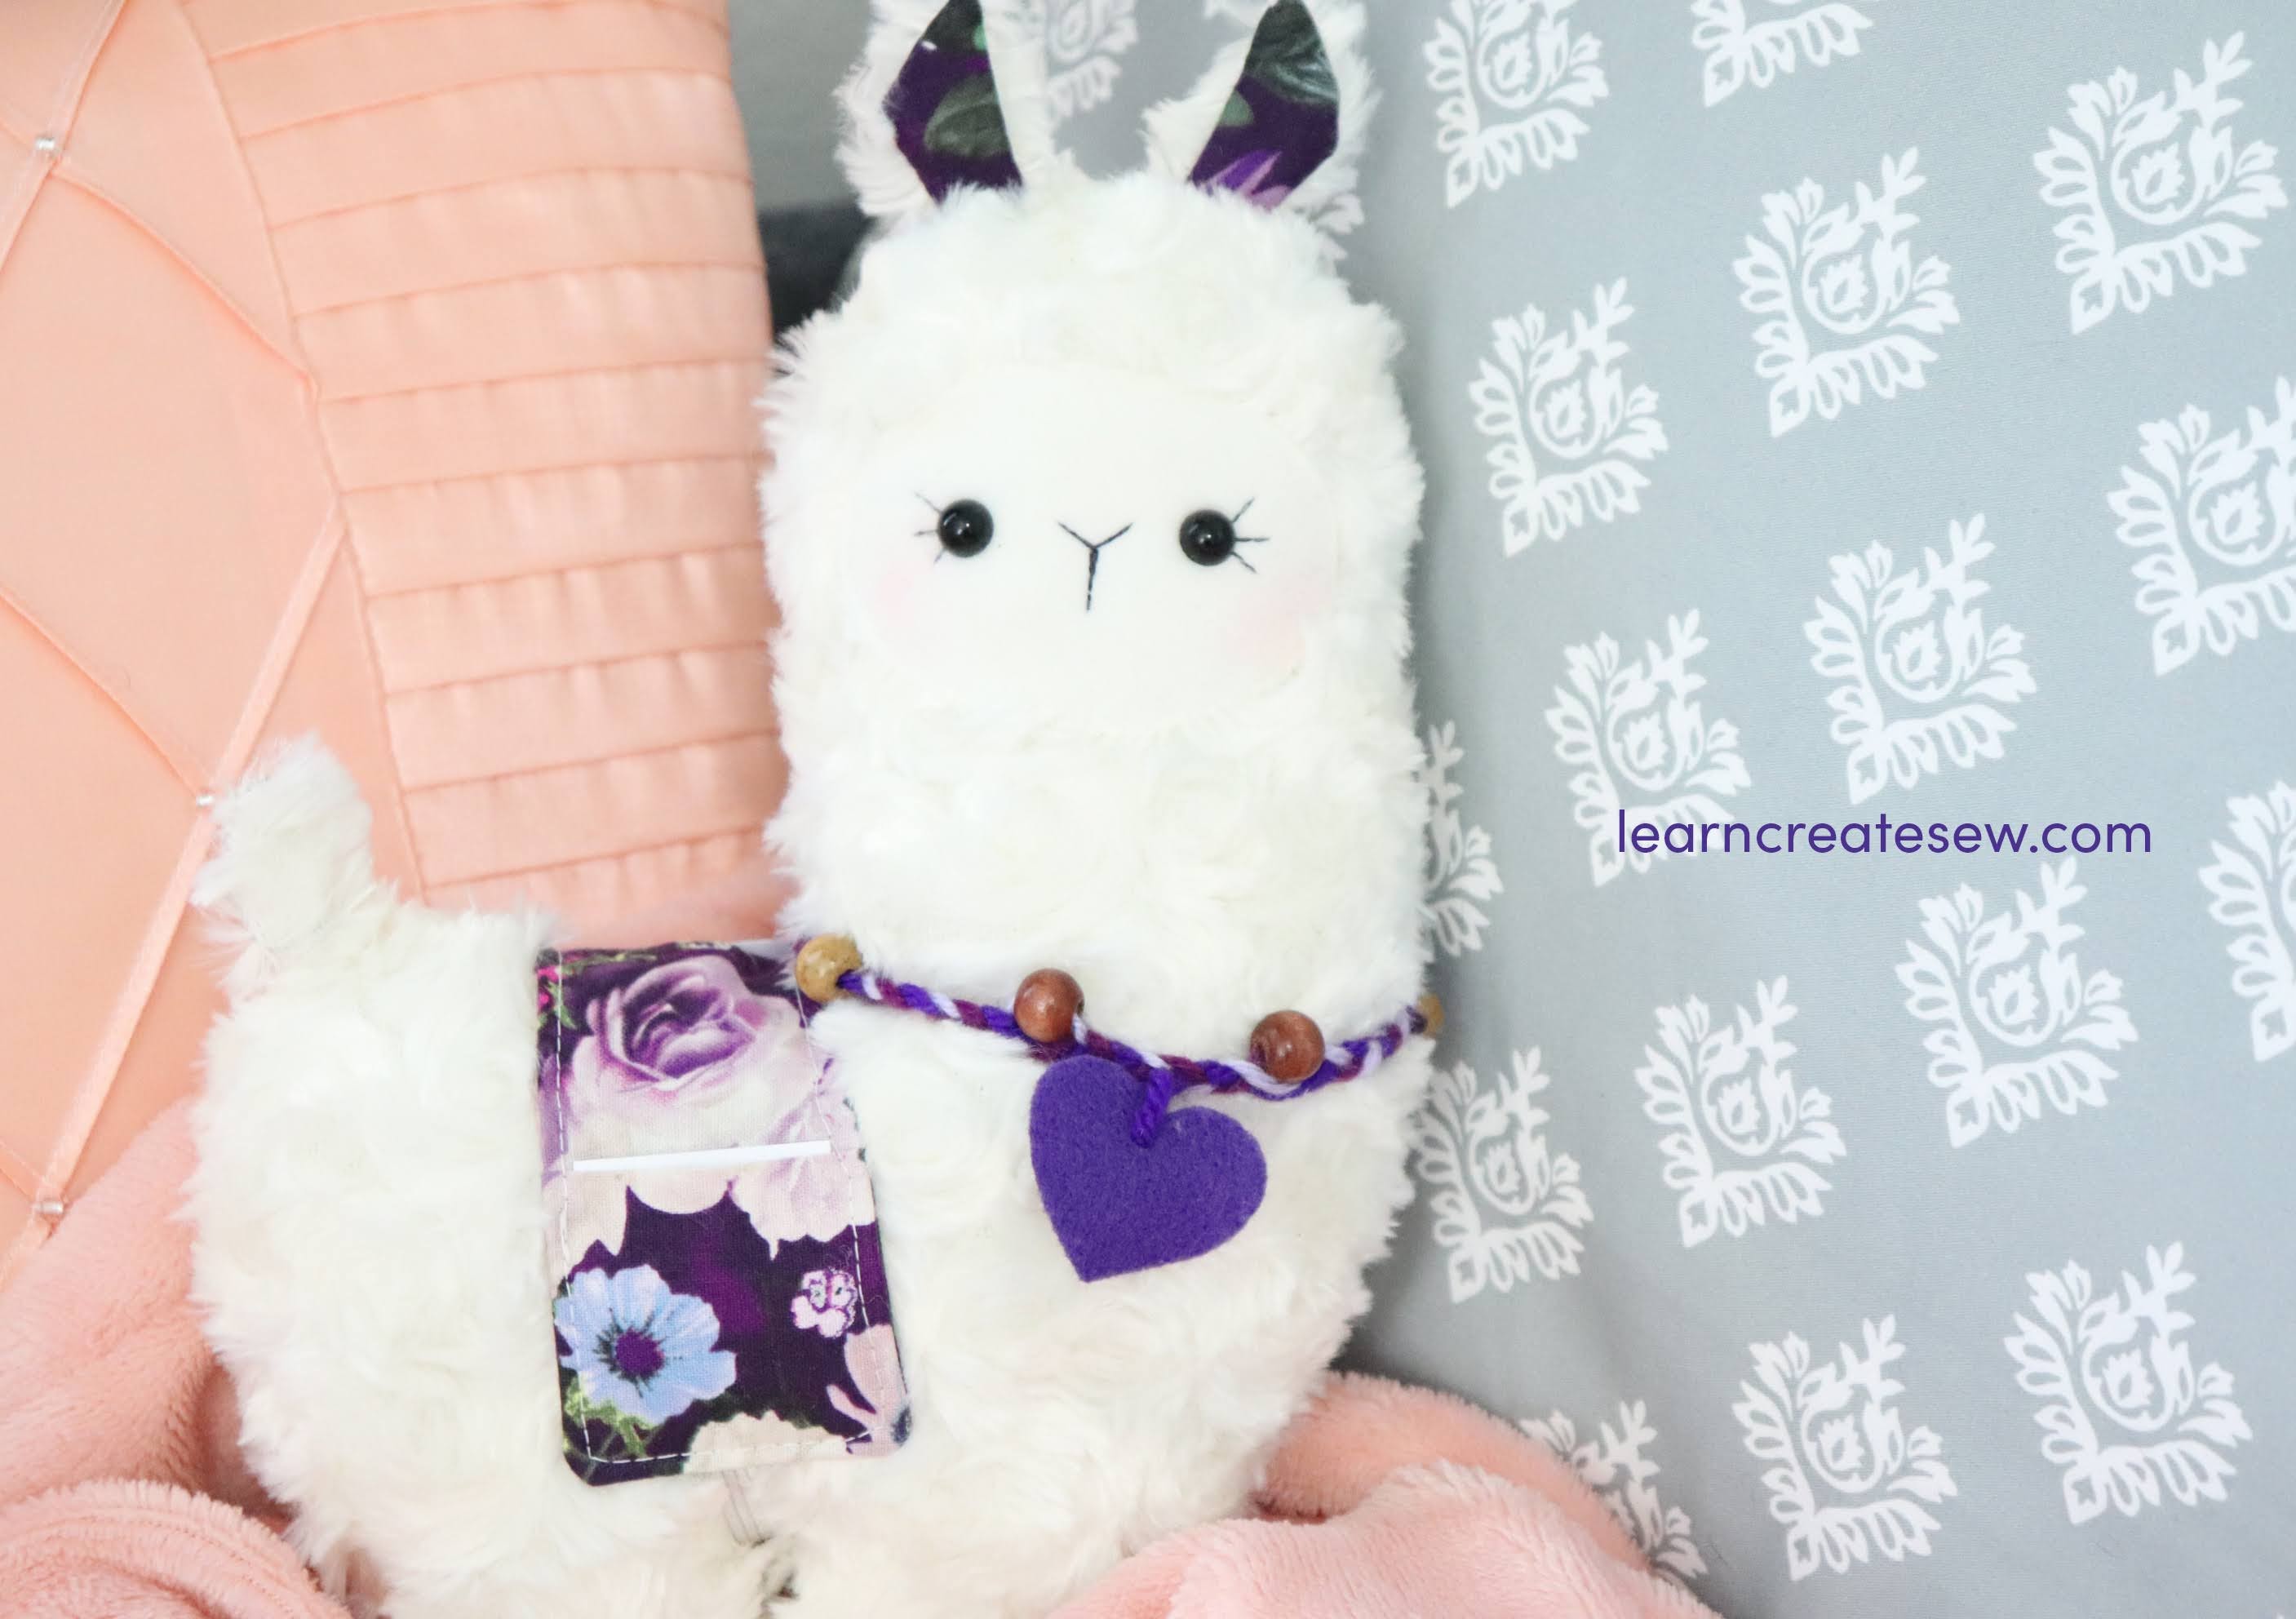
With Valentine’s Day coming up I was inspired by a cute new idea! A Lovely Little Llama Valentine!
This little llama has a blanket with two pockets that can deliver valentines for the big day 🙂
Not only would this llama be adorable for Valentine’s Day, but any holiday! Change the colors to green and red and you have Christmas. Dress it up for birthdays, Easter, or even Halloween. Changing the colors, accessories, and fabrics will completely change the feel of the project.
The pocket pouch is definitely my favorite part of the project, aside from the overall cuteness, of course! You can place notes, treats, and gifts in the little pockets.
The pattern is available in two sizes. The small size measures approximately 9 inches tall without the ears, and the large measures approximately 11.5 inches tall.
It is constructed with swirl fur which is great to work with and is super fluffy! It just calls out for cuddles 🙂
This project is fairly simple, but the fur does add a bit of difficulty. I would say it is about a 4/10 in terms of difficulty. You need to be comfortable using small seam allowances and sewing curves. Experience with fur or plush fabrics is also helpful.
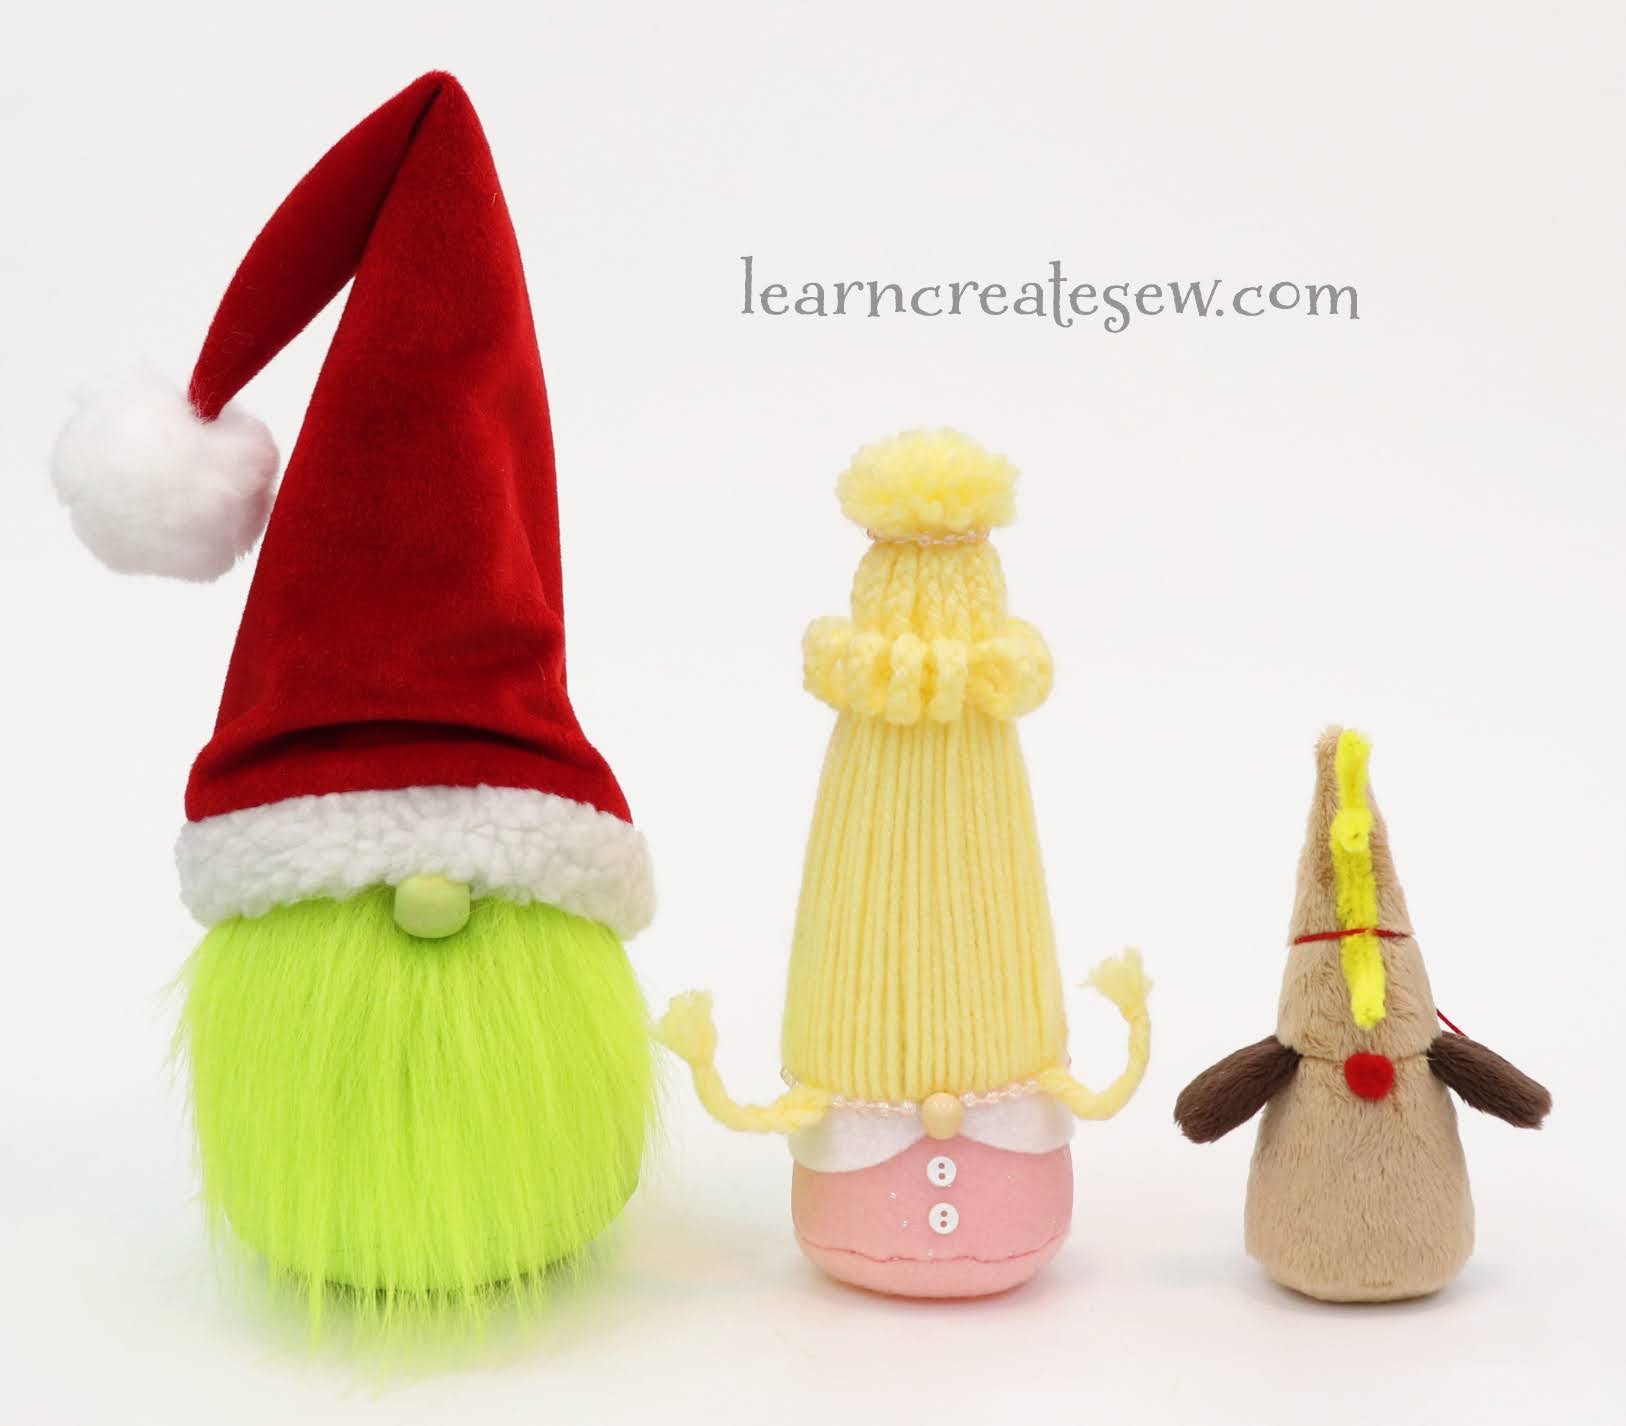
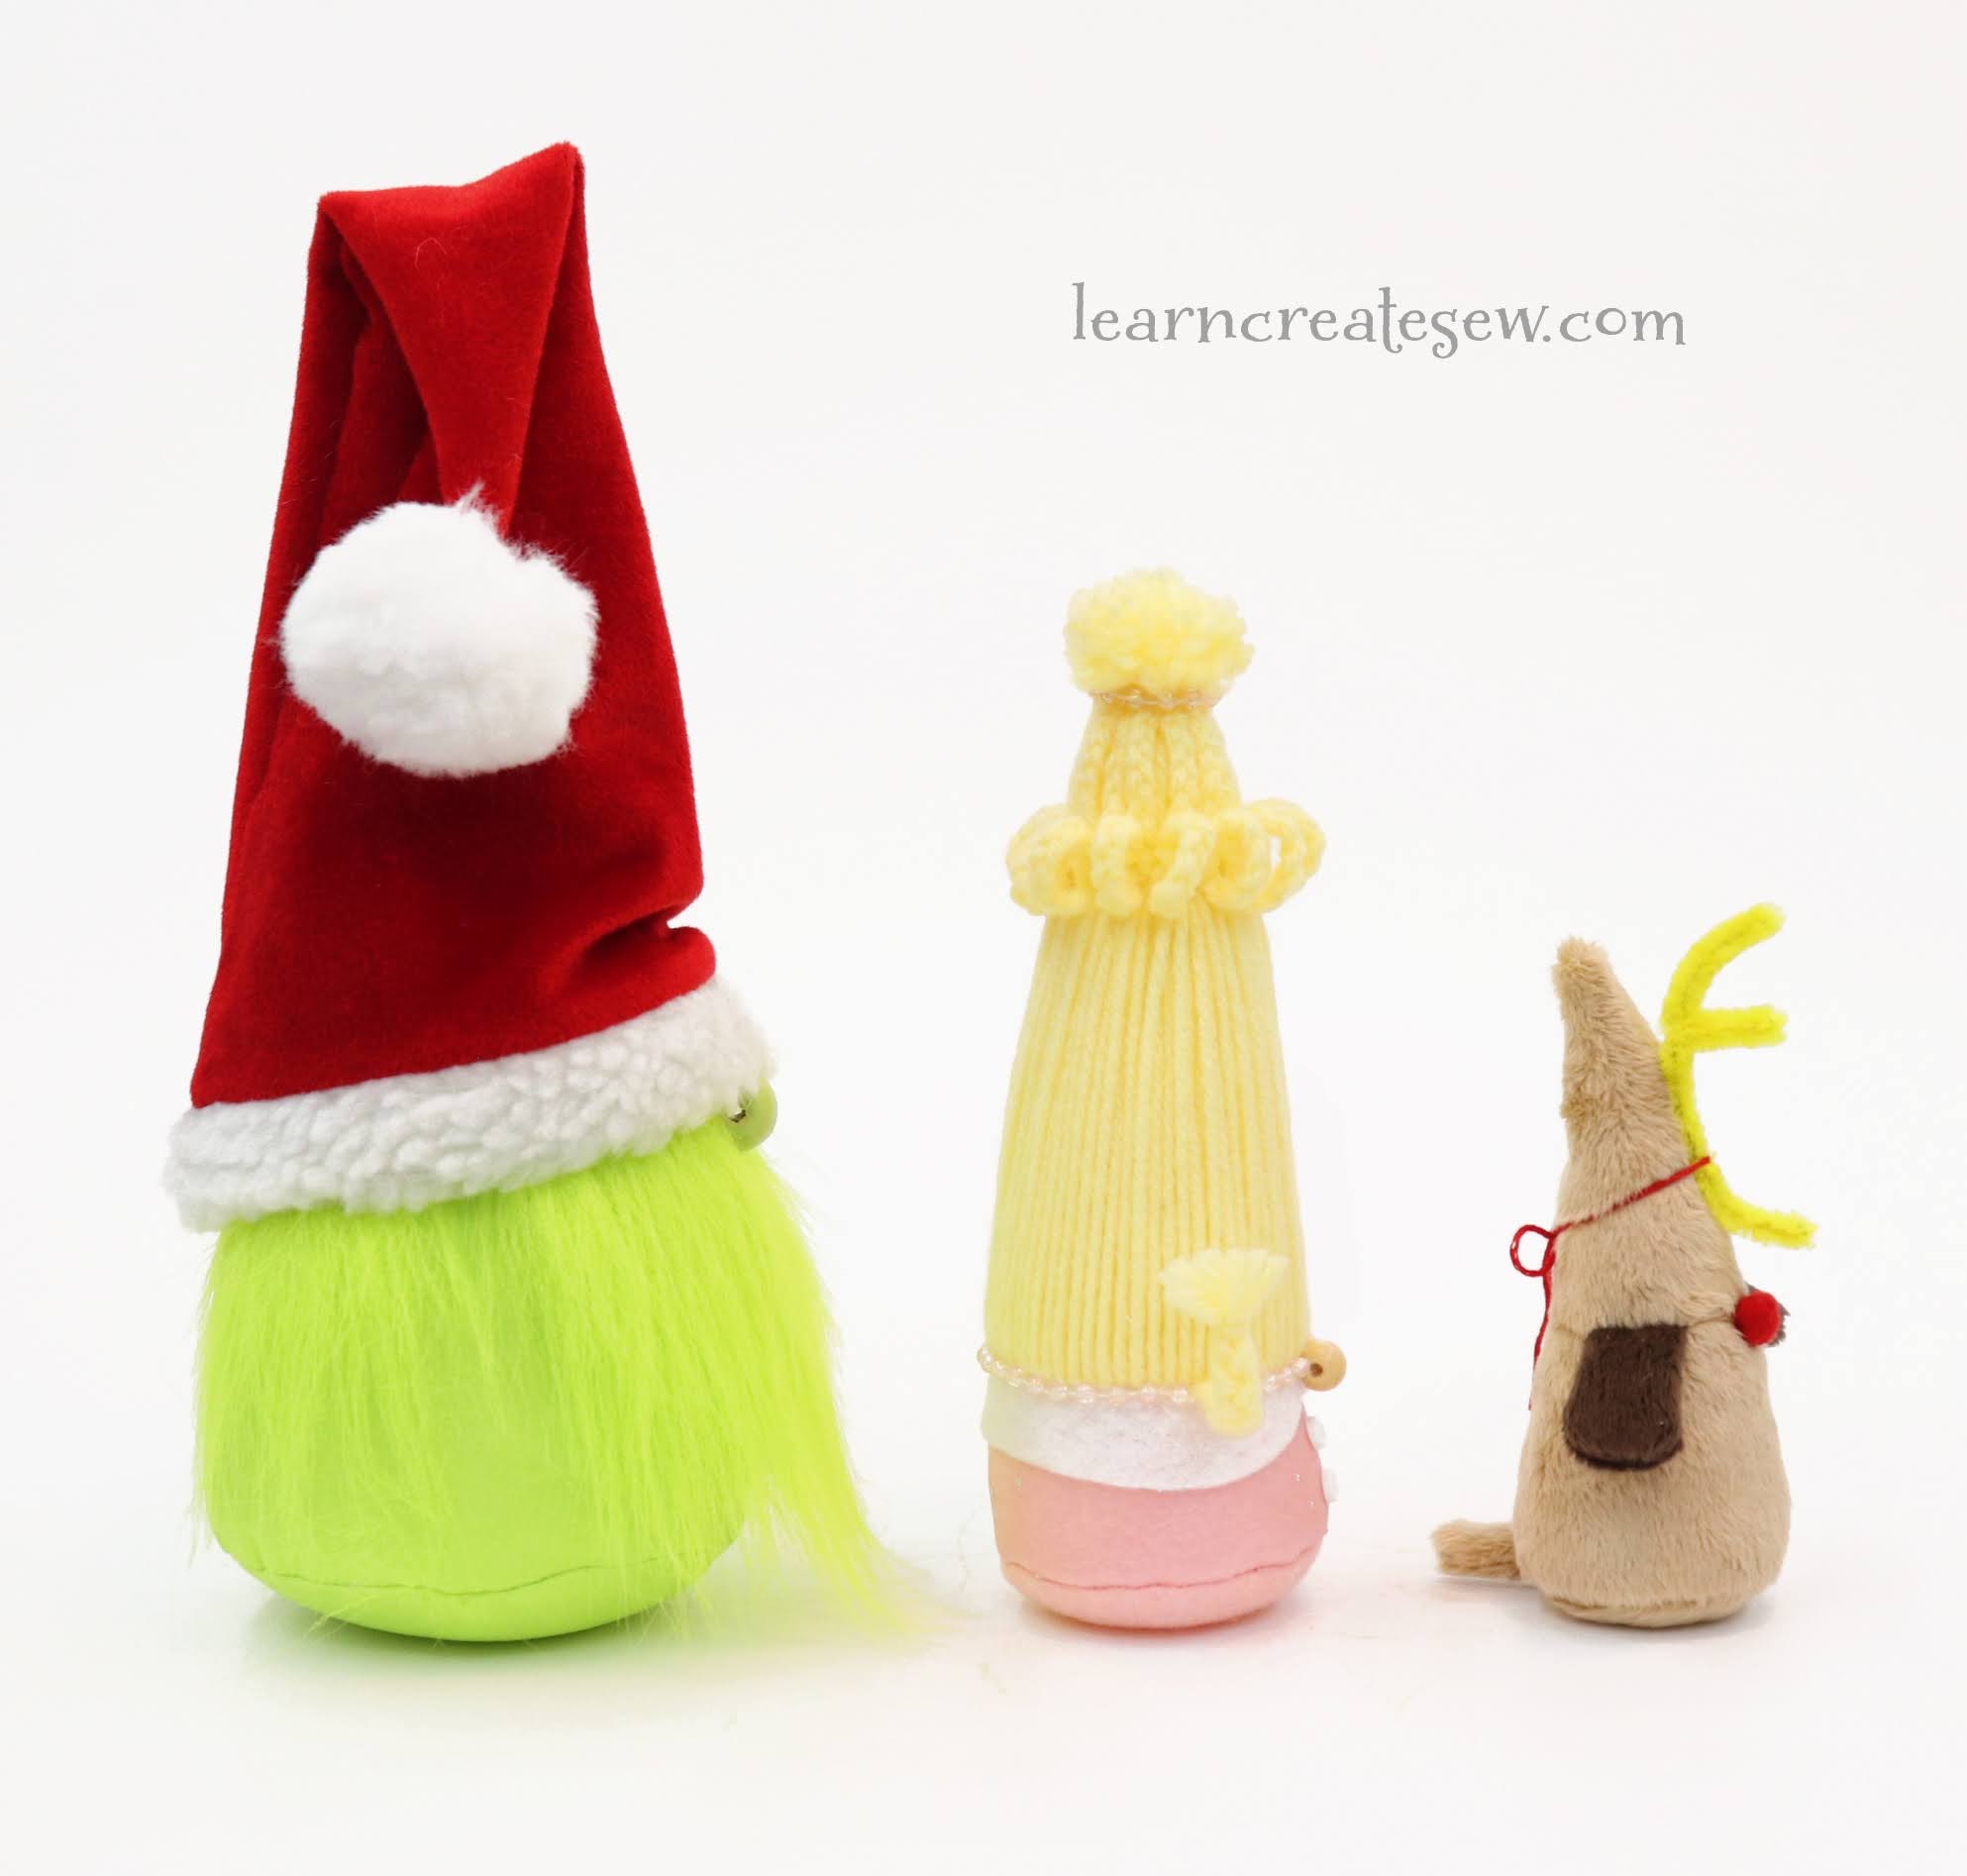
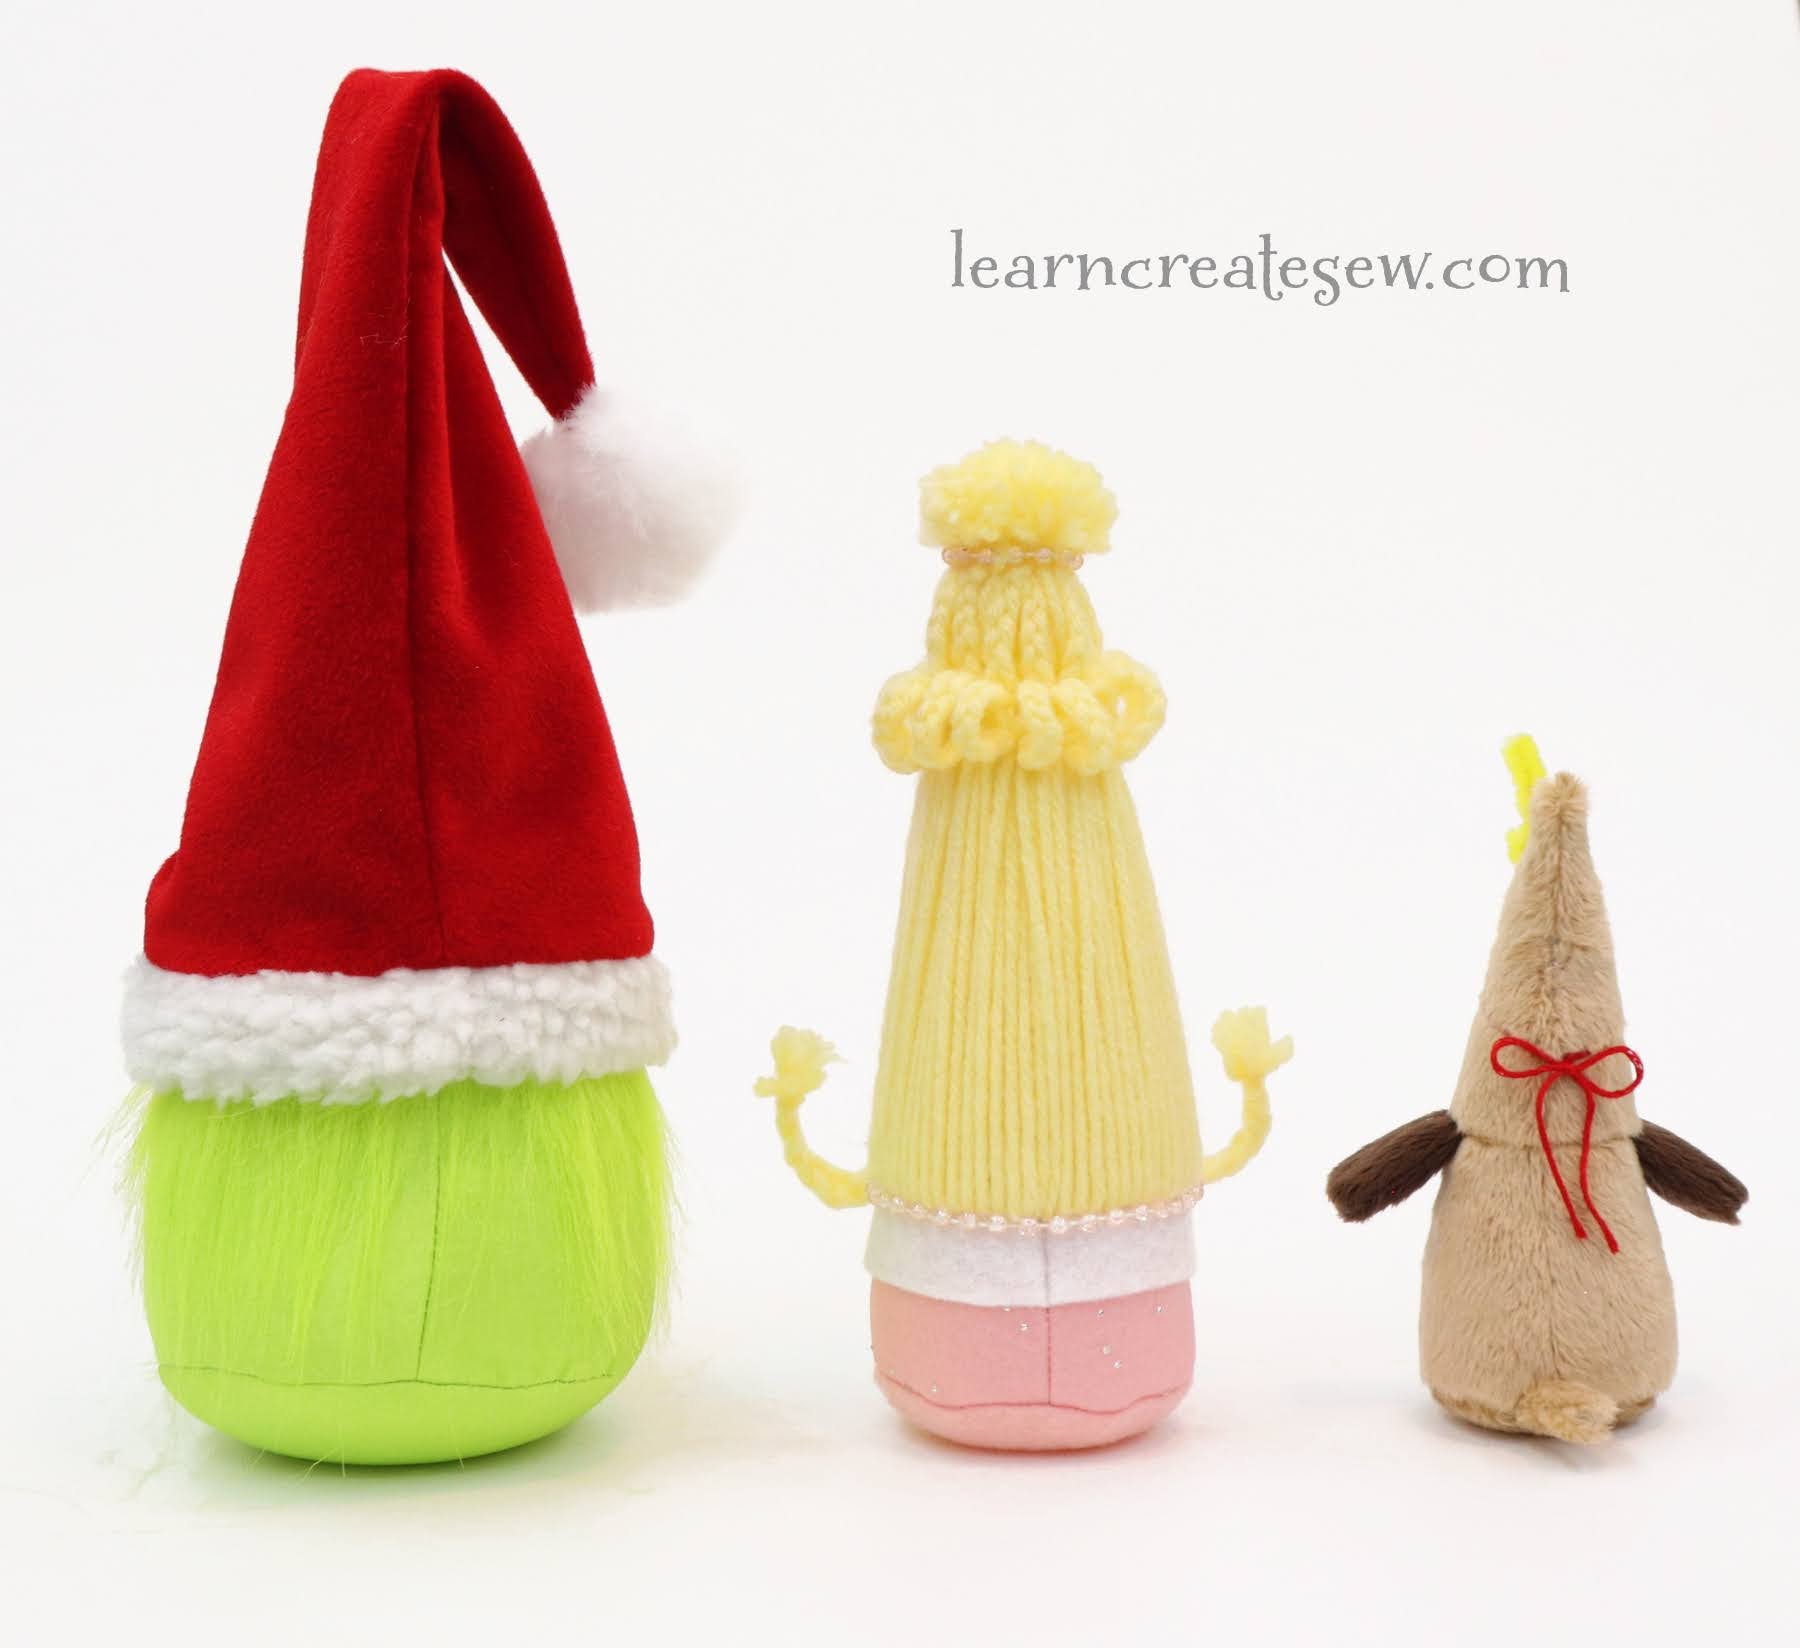
Whenever I think of Christmas, all of those iconic characters from Christmas classics come to mind!
I was crafting with my mom and we started brainstorming all of the possibilities available when making gnomes. There are just SO many cute cute gnomes out there.
I took up the challenge and decided to make some themed gnomes of my own. I hope you enjoy!
I just simply couldn’t resist making these guys!
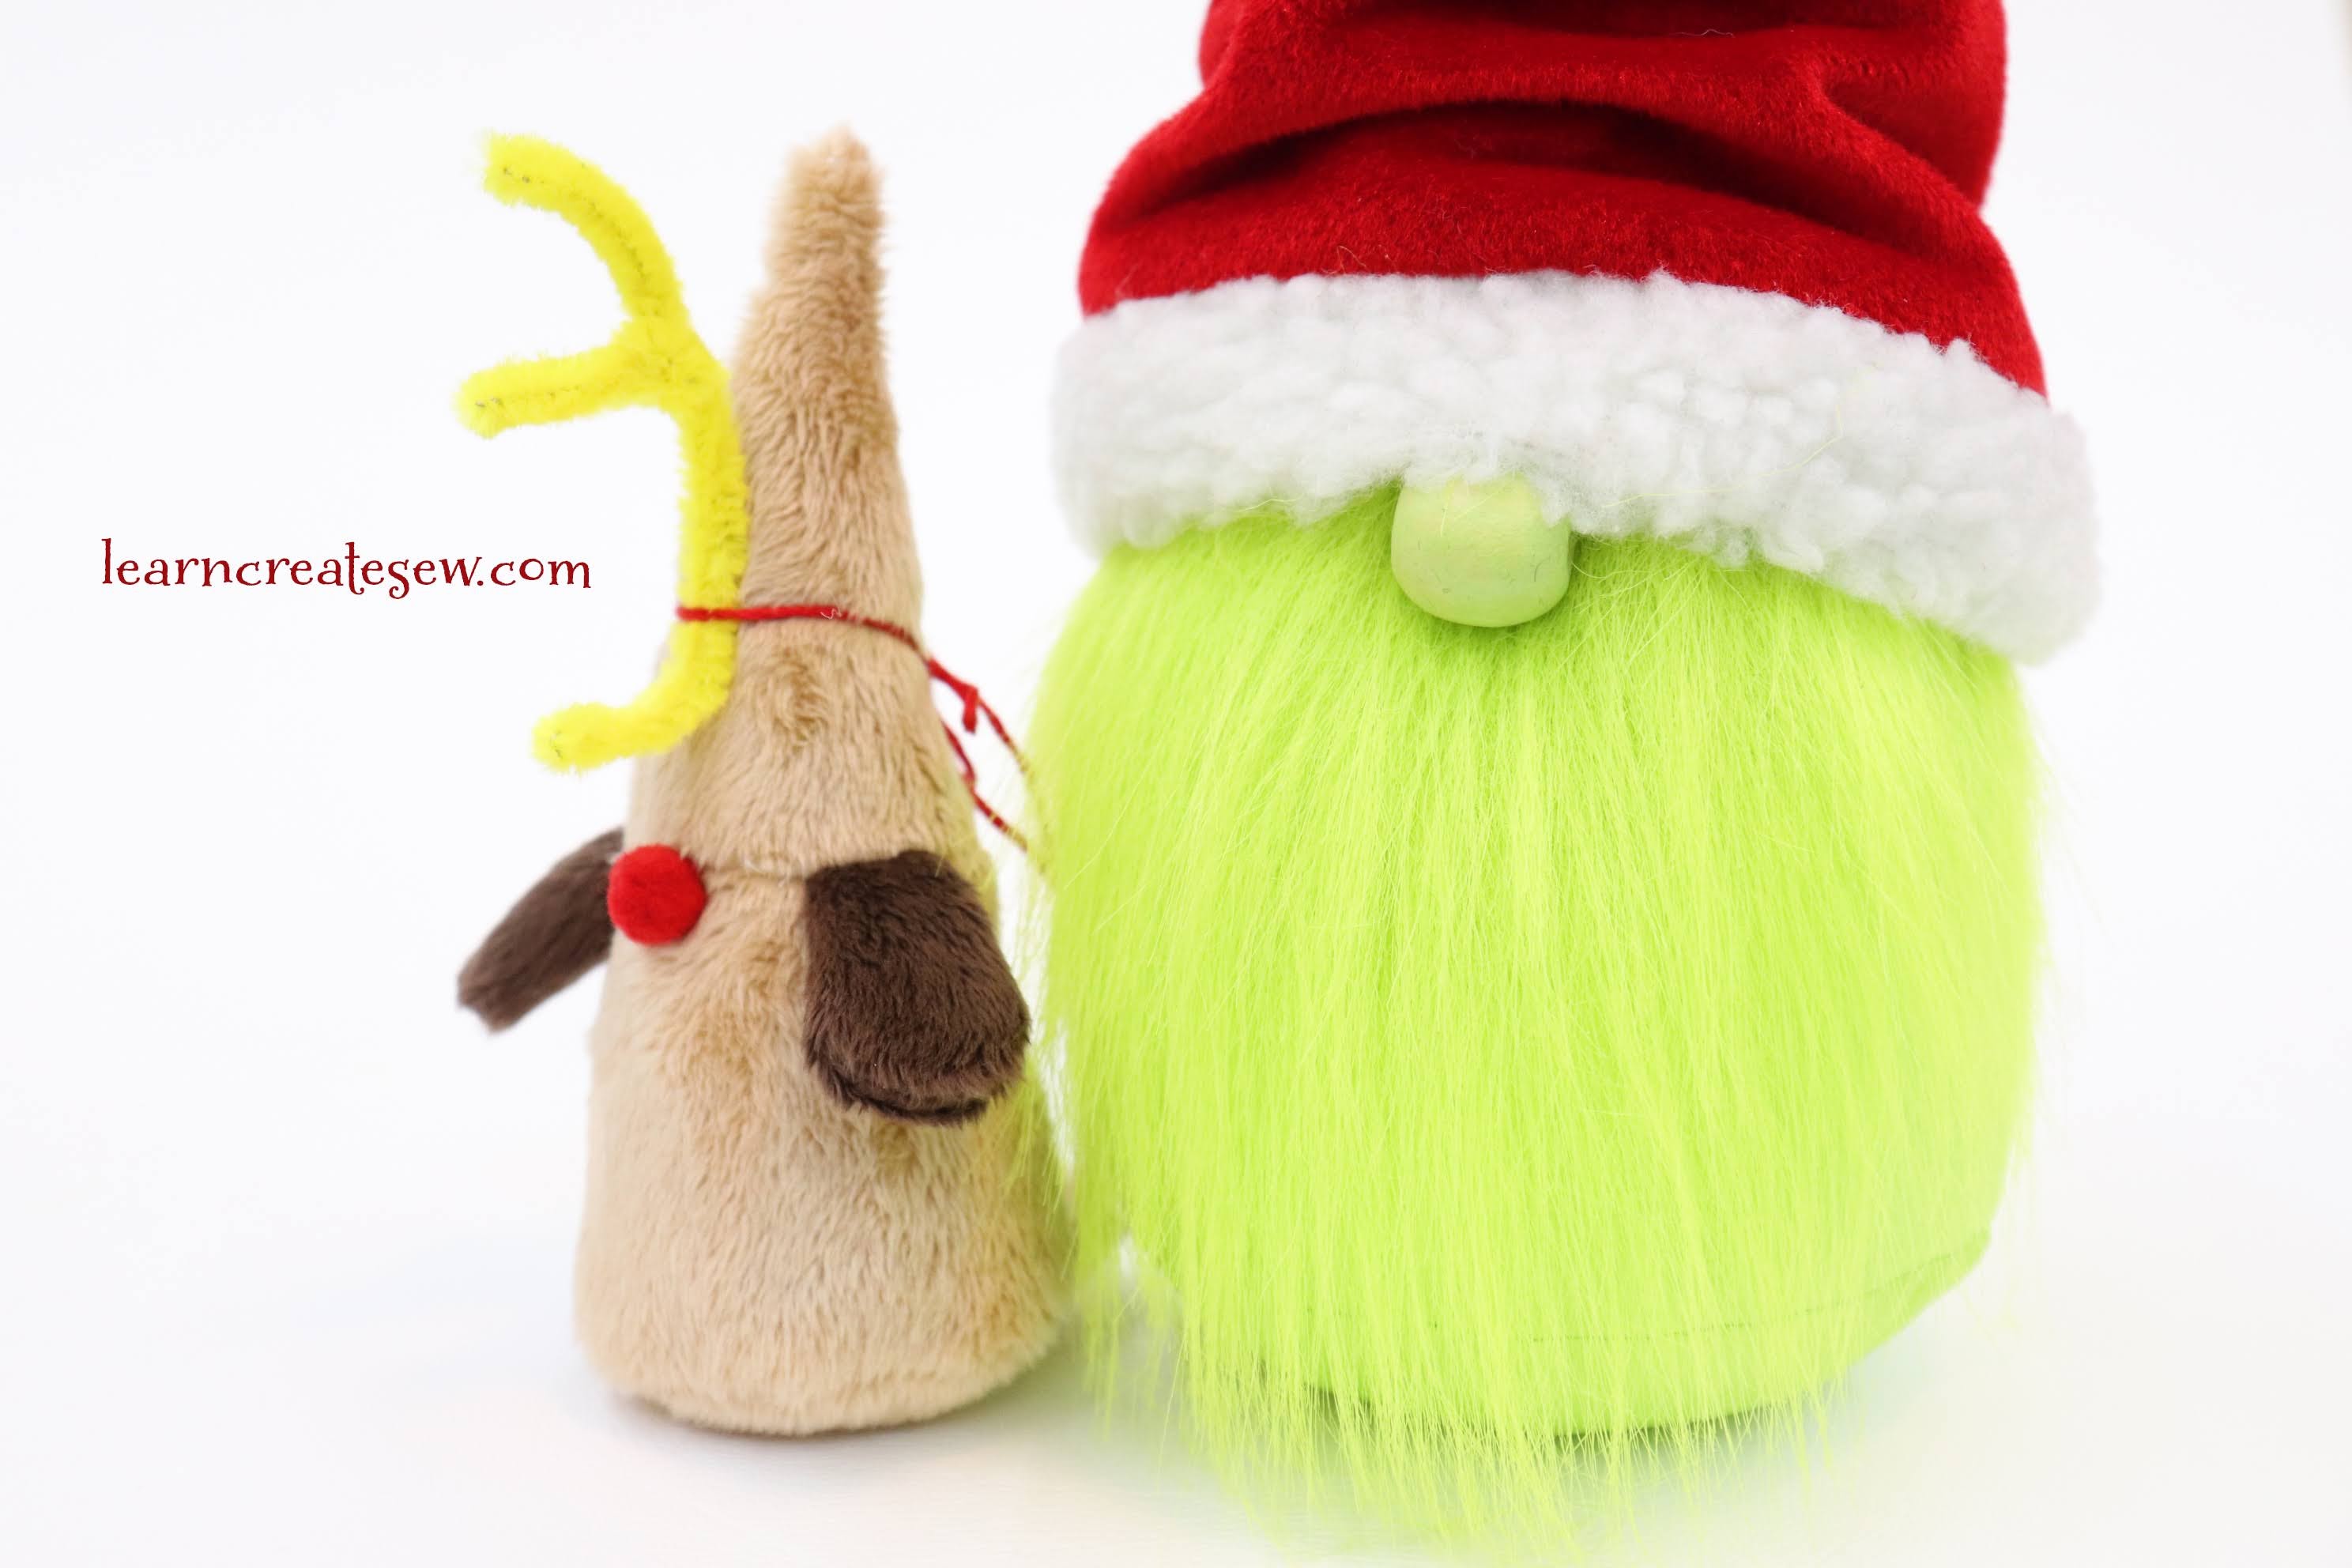
This big green guy can be made using the basic Christmas Gnome Pattern and tutorial. He is a size X-Large and stands about 10.5 inches tall without his hat. I added a sherpa binding to the edge of the hat and a bit of fur around the entire body, rather than just the beard.
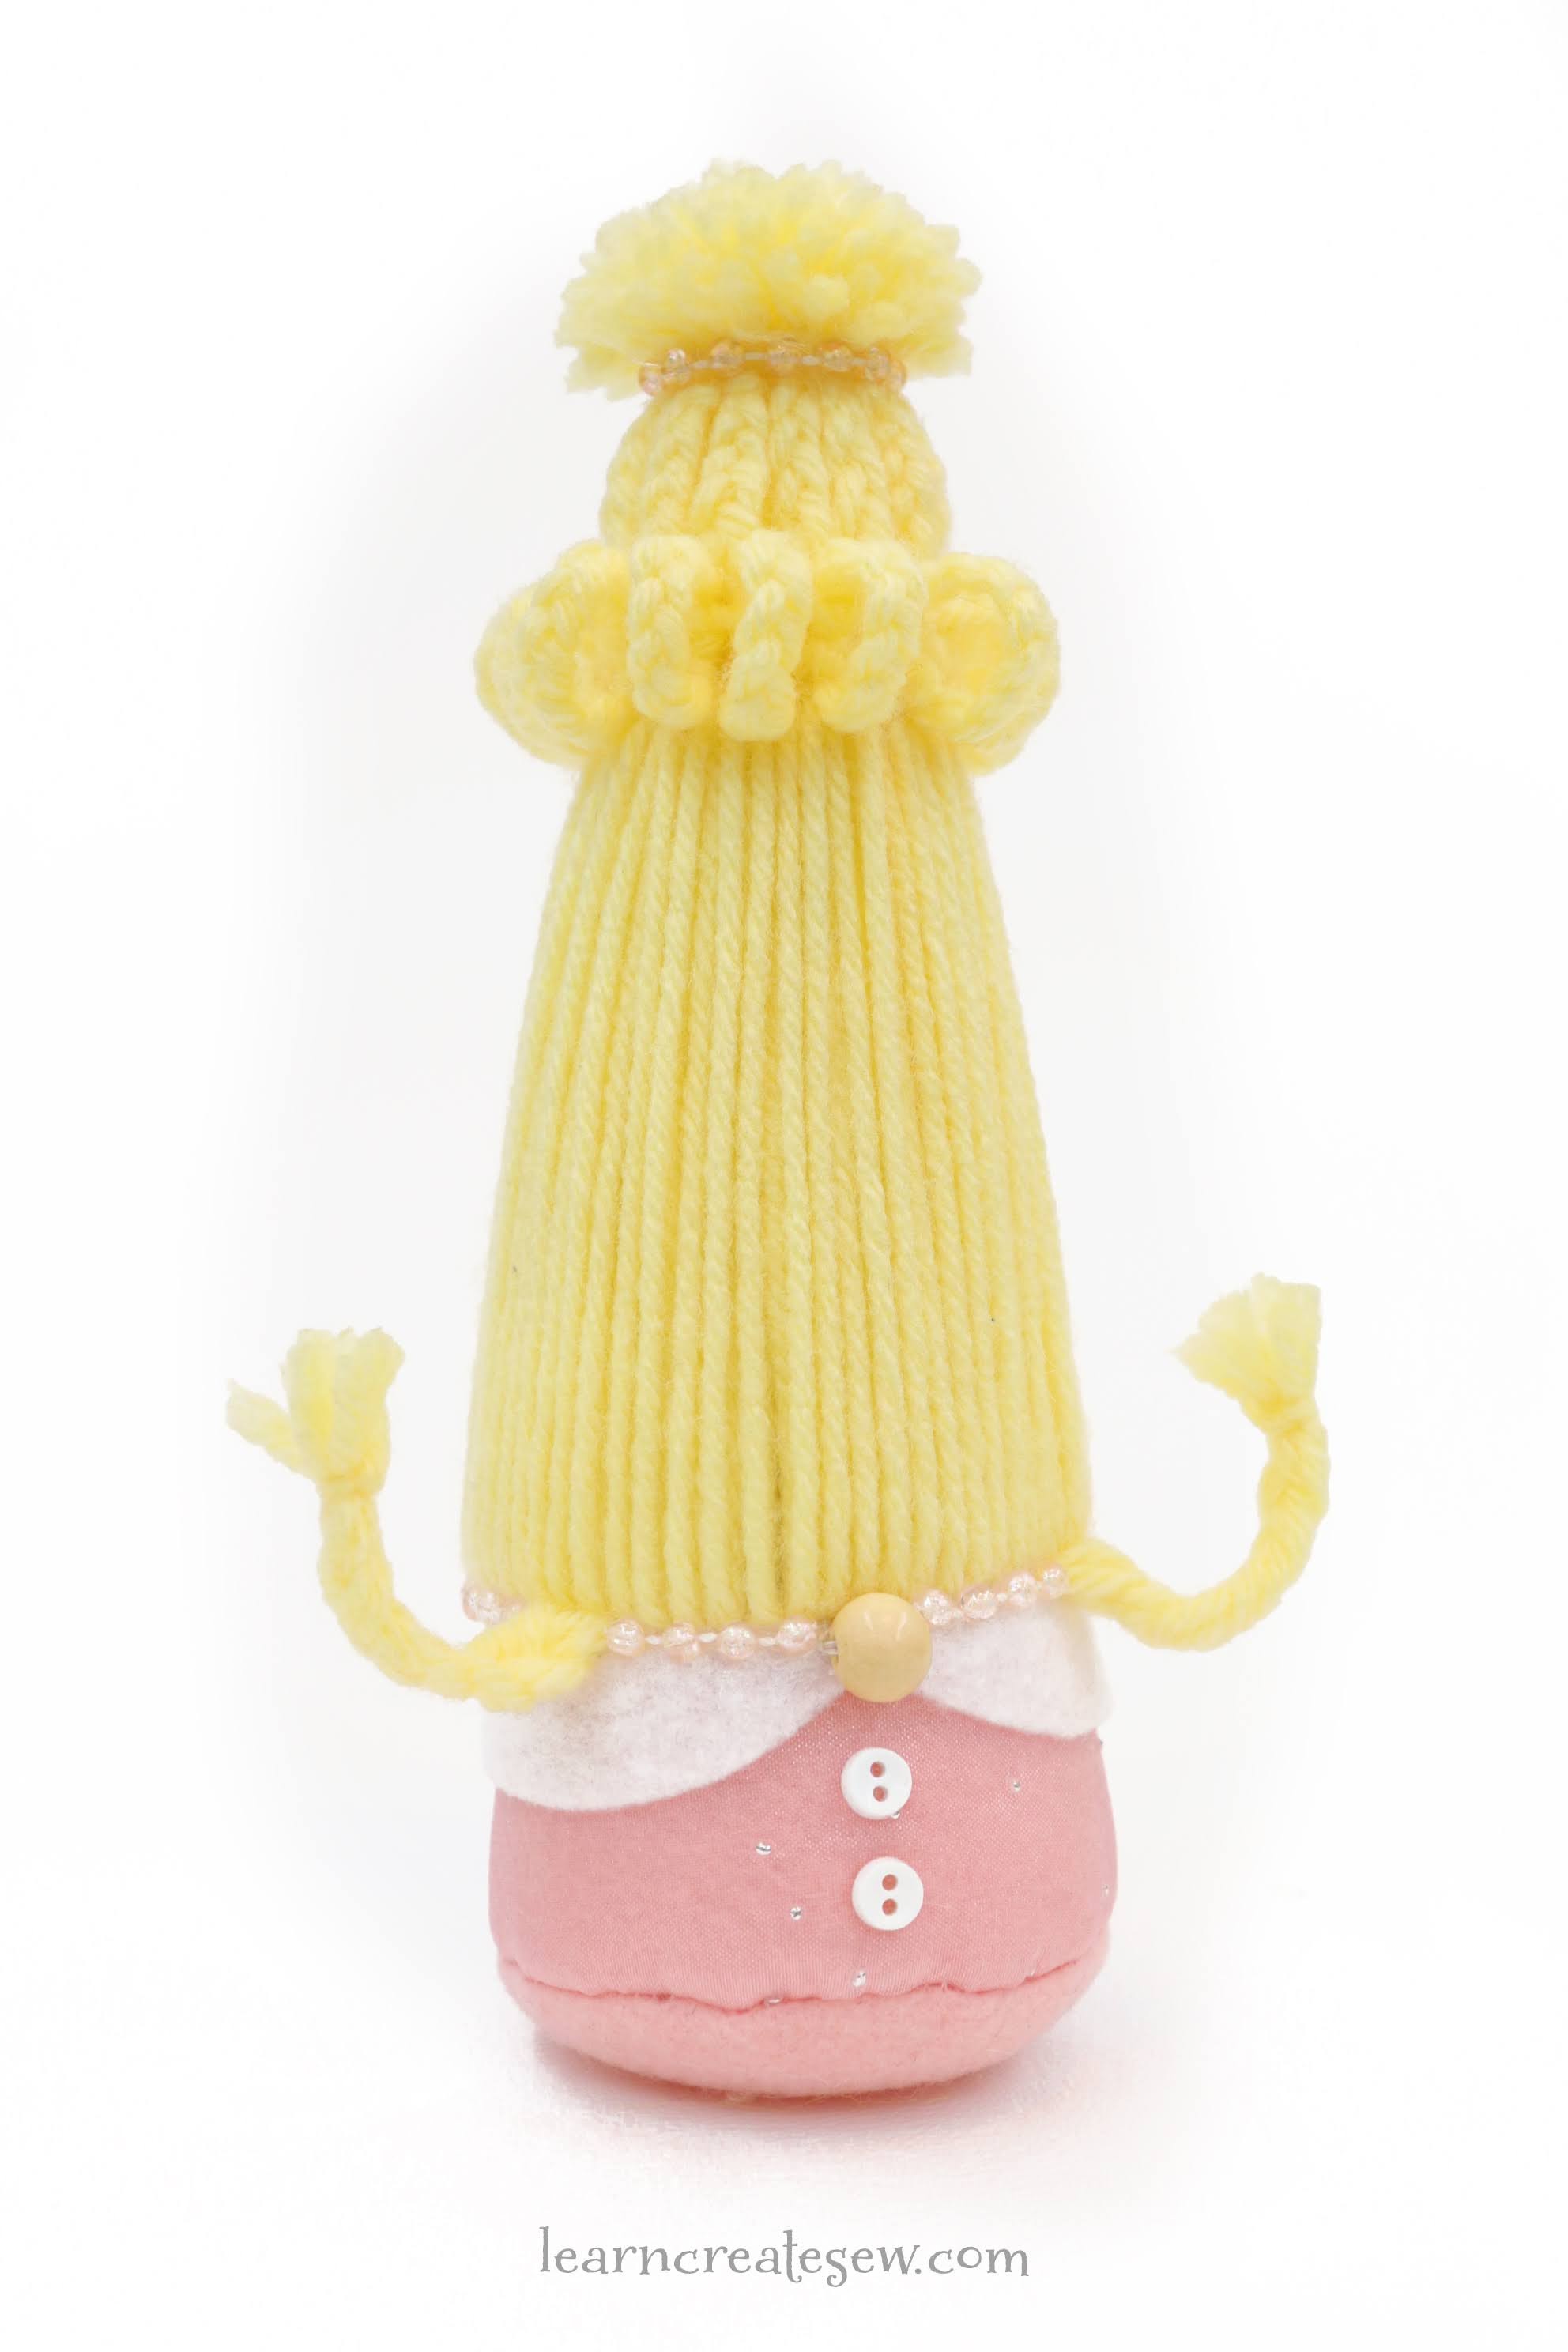
This little lady was super fun! I made the small size.
I really enjoyed decorating this one as well as making the hair. It took four tries to figure it out, but I was really happy with the results!
I really enjoyed styling the hair. All the little braids were time consuming, but I love the end result!
I also really liked adding decorations, such as buttons and pearls.
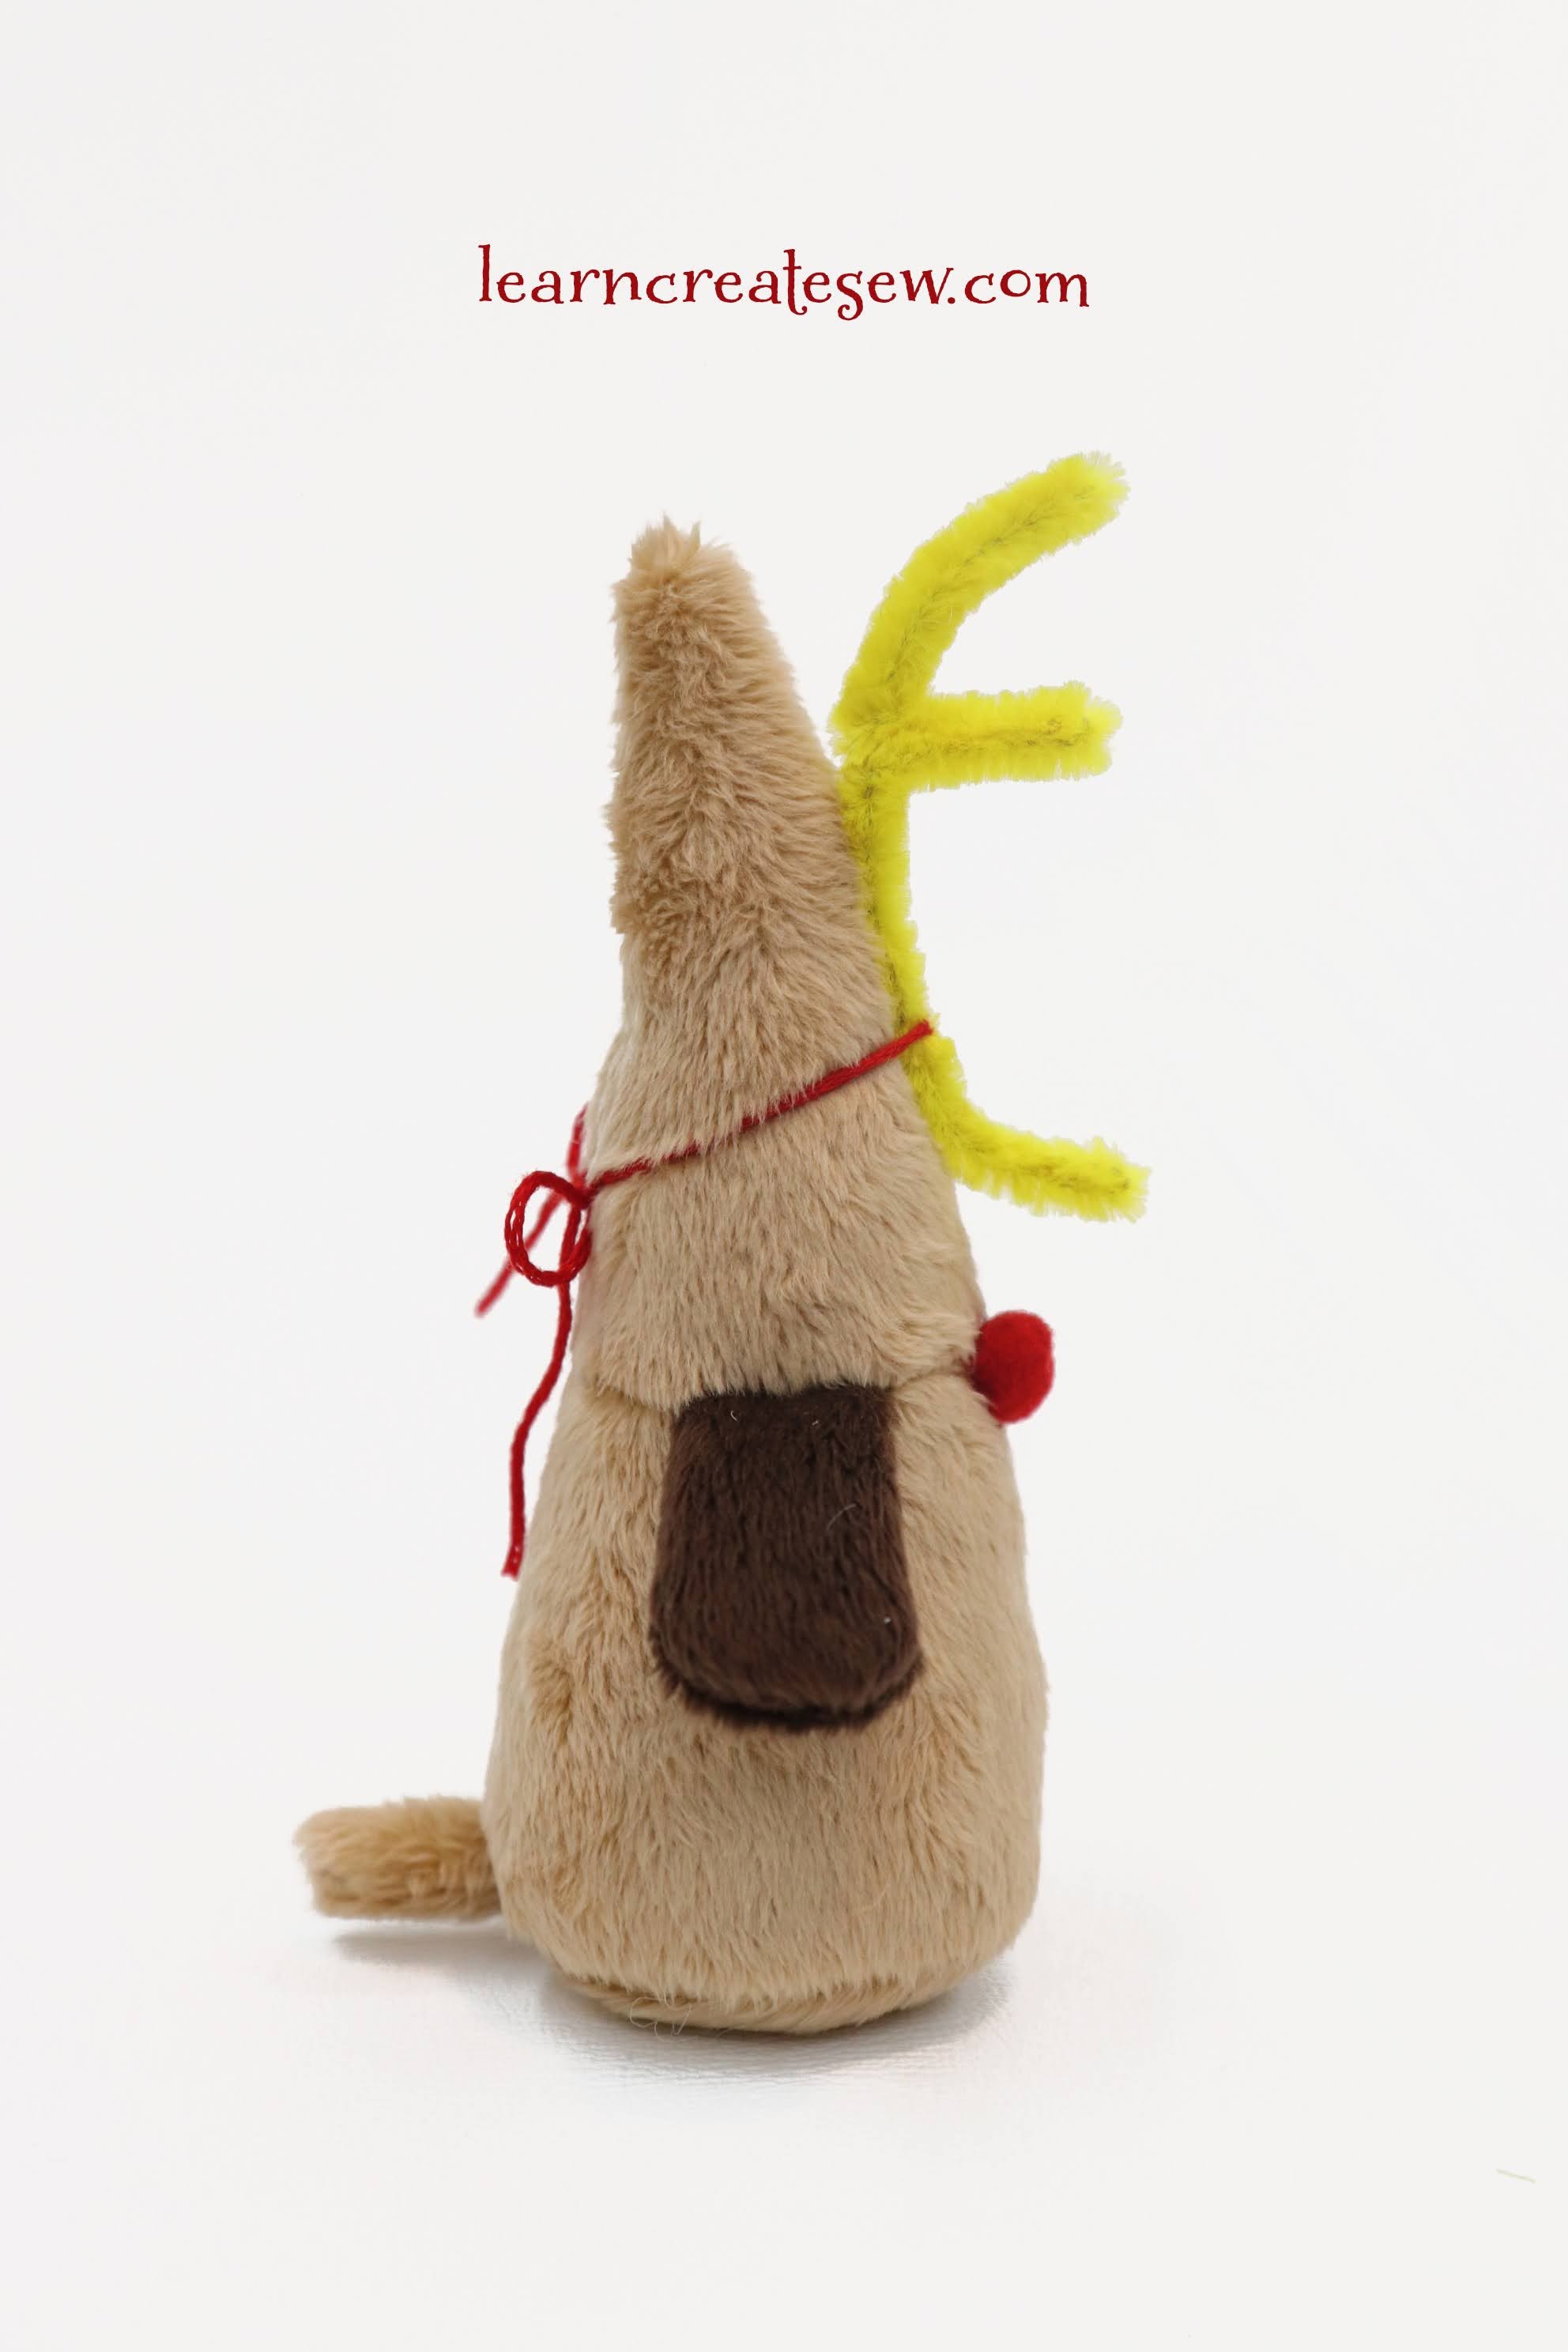
Of course, these two would not be complete without their furry friend!
This little pup was actually super quick to make and I absolutely adore how he turned out. I used minky to give him that furry look 🙂 And a pipe cleaner is the antler. A special thanks to my sister for that idea!
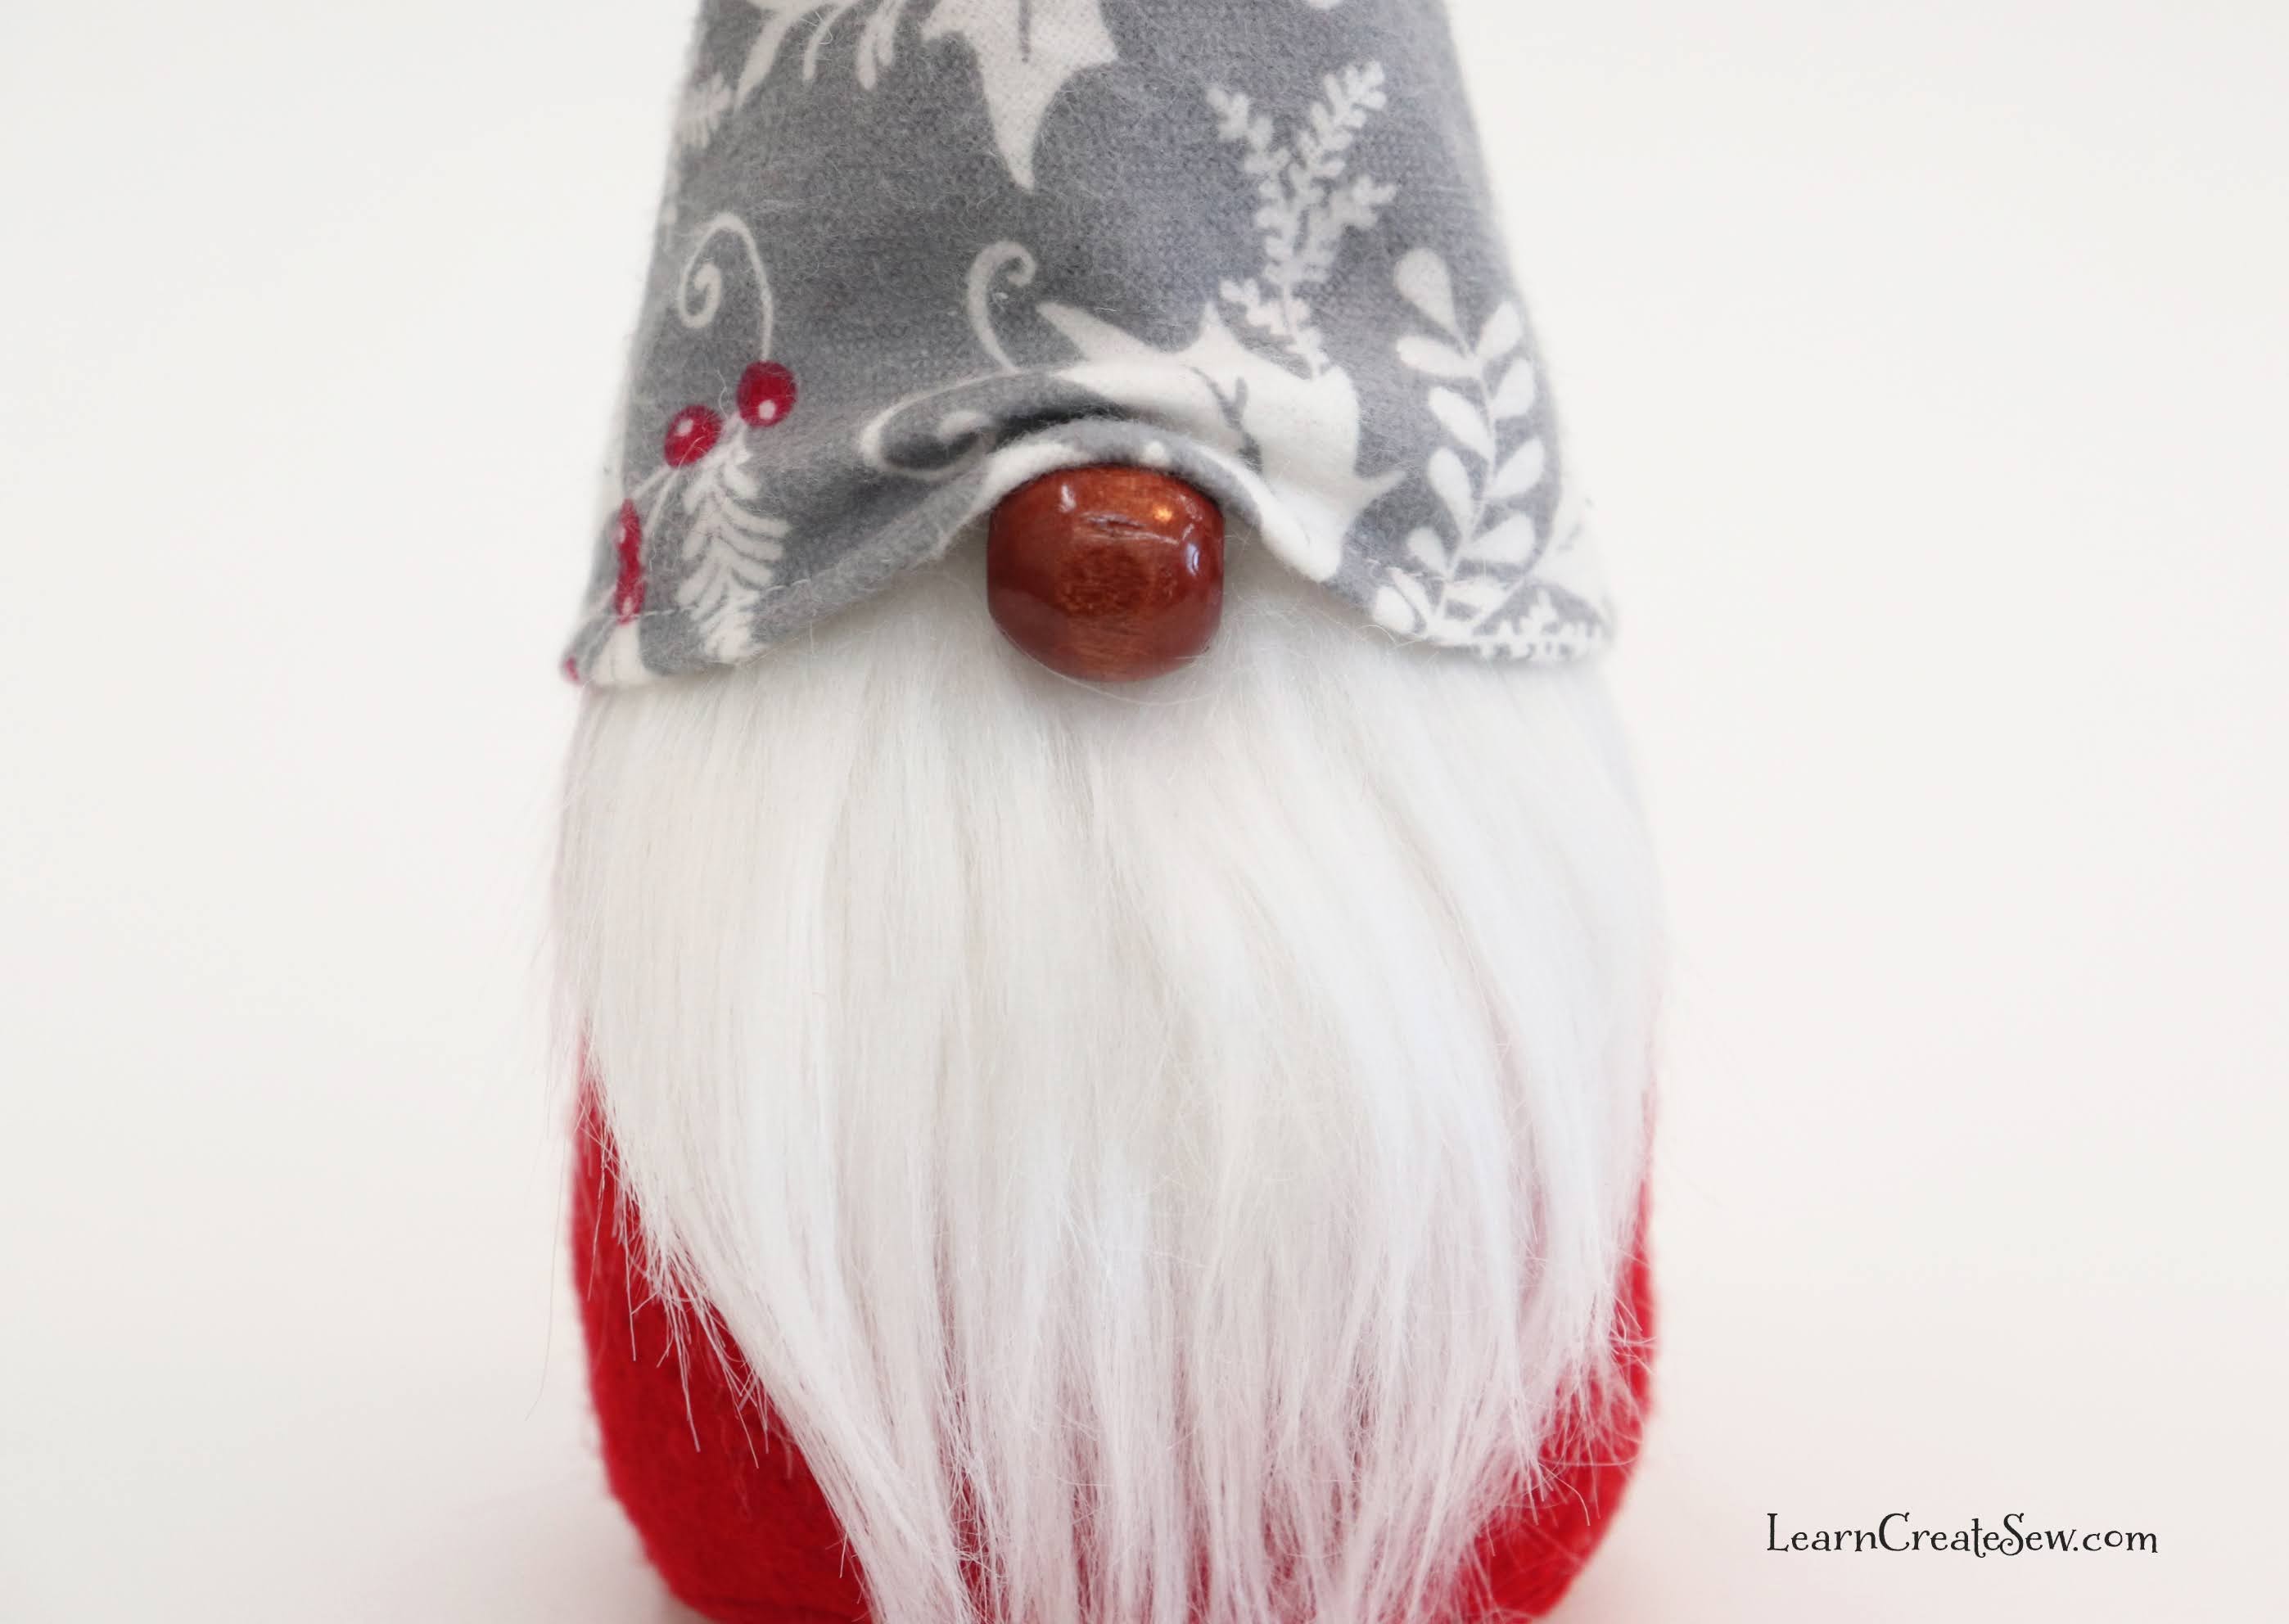
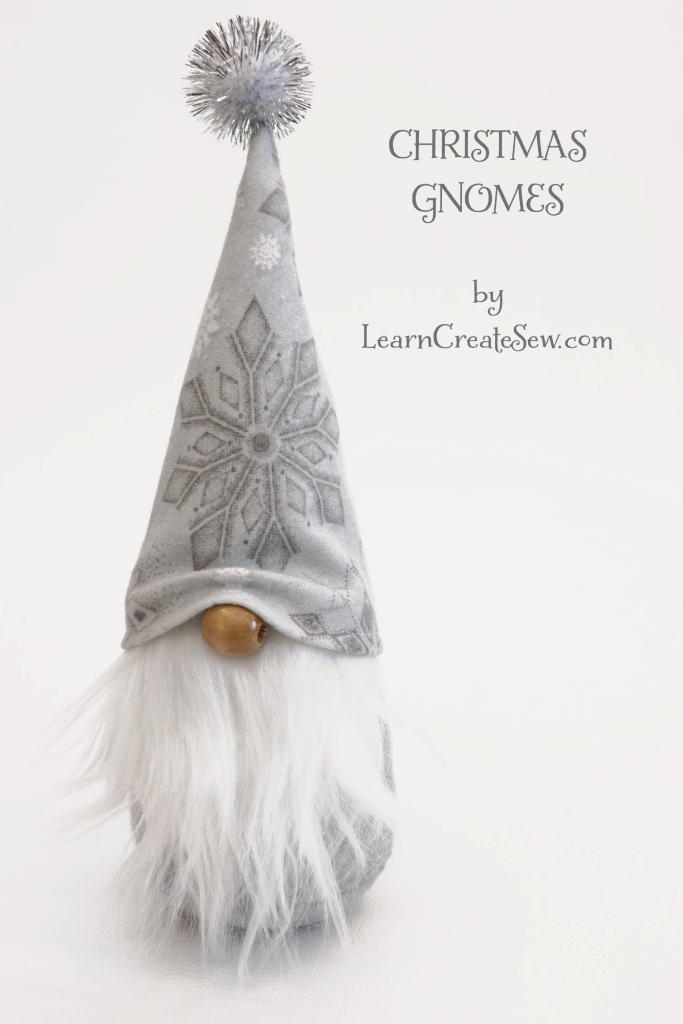
Happy Holidays! These little Christmas Gnomes are a great addition to your holiday decorations.
They are quick and easy to make and super cute!
I used flannel fabric for the hat and felt for the body. My favorite part is the sparkly pom poms I found for the tops!
The beard is faux fur and gives the little gnomes a lot of character. I also picked up a mixed set of wooden beads at Walmart that work great as noses!
Each gnome is filled with polyfil and poly pellets to weigh them down.
At this holiday season, I want to express my gratitude to all of my followers. Thank you! Thank you for supporting learncreatesew.com and subscribing to my YouTube Channel. Having the opportunity to share my love of sewing with so many is a great privilege and an opportunity I never thought I would have.
Thank you for making all of this possible and encouraging me to keep creating.
And for you, here are my next videos!
I had a lot of fun adapting the Christmas Stocking pattern for you! I don’t know about you, but I love options. But what if I did this…or this…? That is what I am always asking myself. As a result, I wasn’t satisfied with just the basic stocking. I wanted to expand upon it to provide more great options for creativity.
The first video explains how to add a contrasting cuff, if you wanted the fabric of the lining to vary from the fabric of the cuff. The stocking shown here has a sherpa cuff but a flannel lining.
The next video adds a burlap overlay to the main fabric as well as decorative embellishments.
I hope these videos inspire creativity, and I hope you have a lot of fun making your own stockings!
See the Christmas Stocking page for the free pattern.